8 Modern Renter-Friendly Kitchen Upgrade Design Ideas Under $50
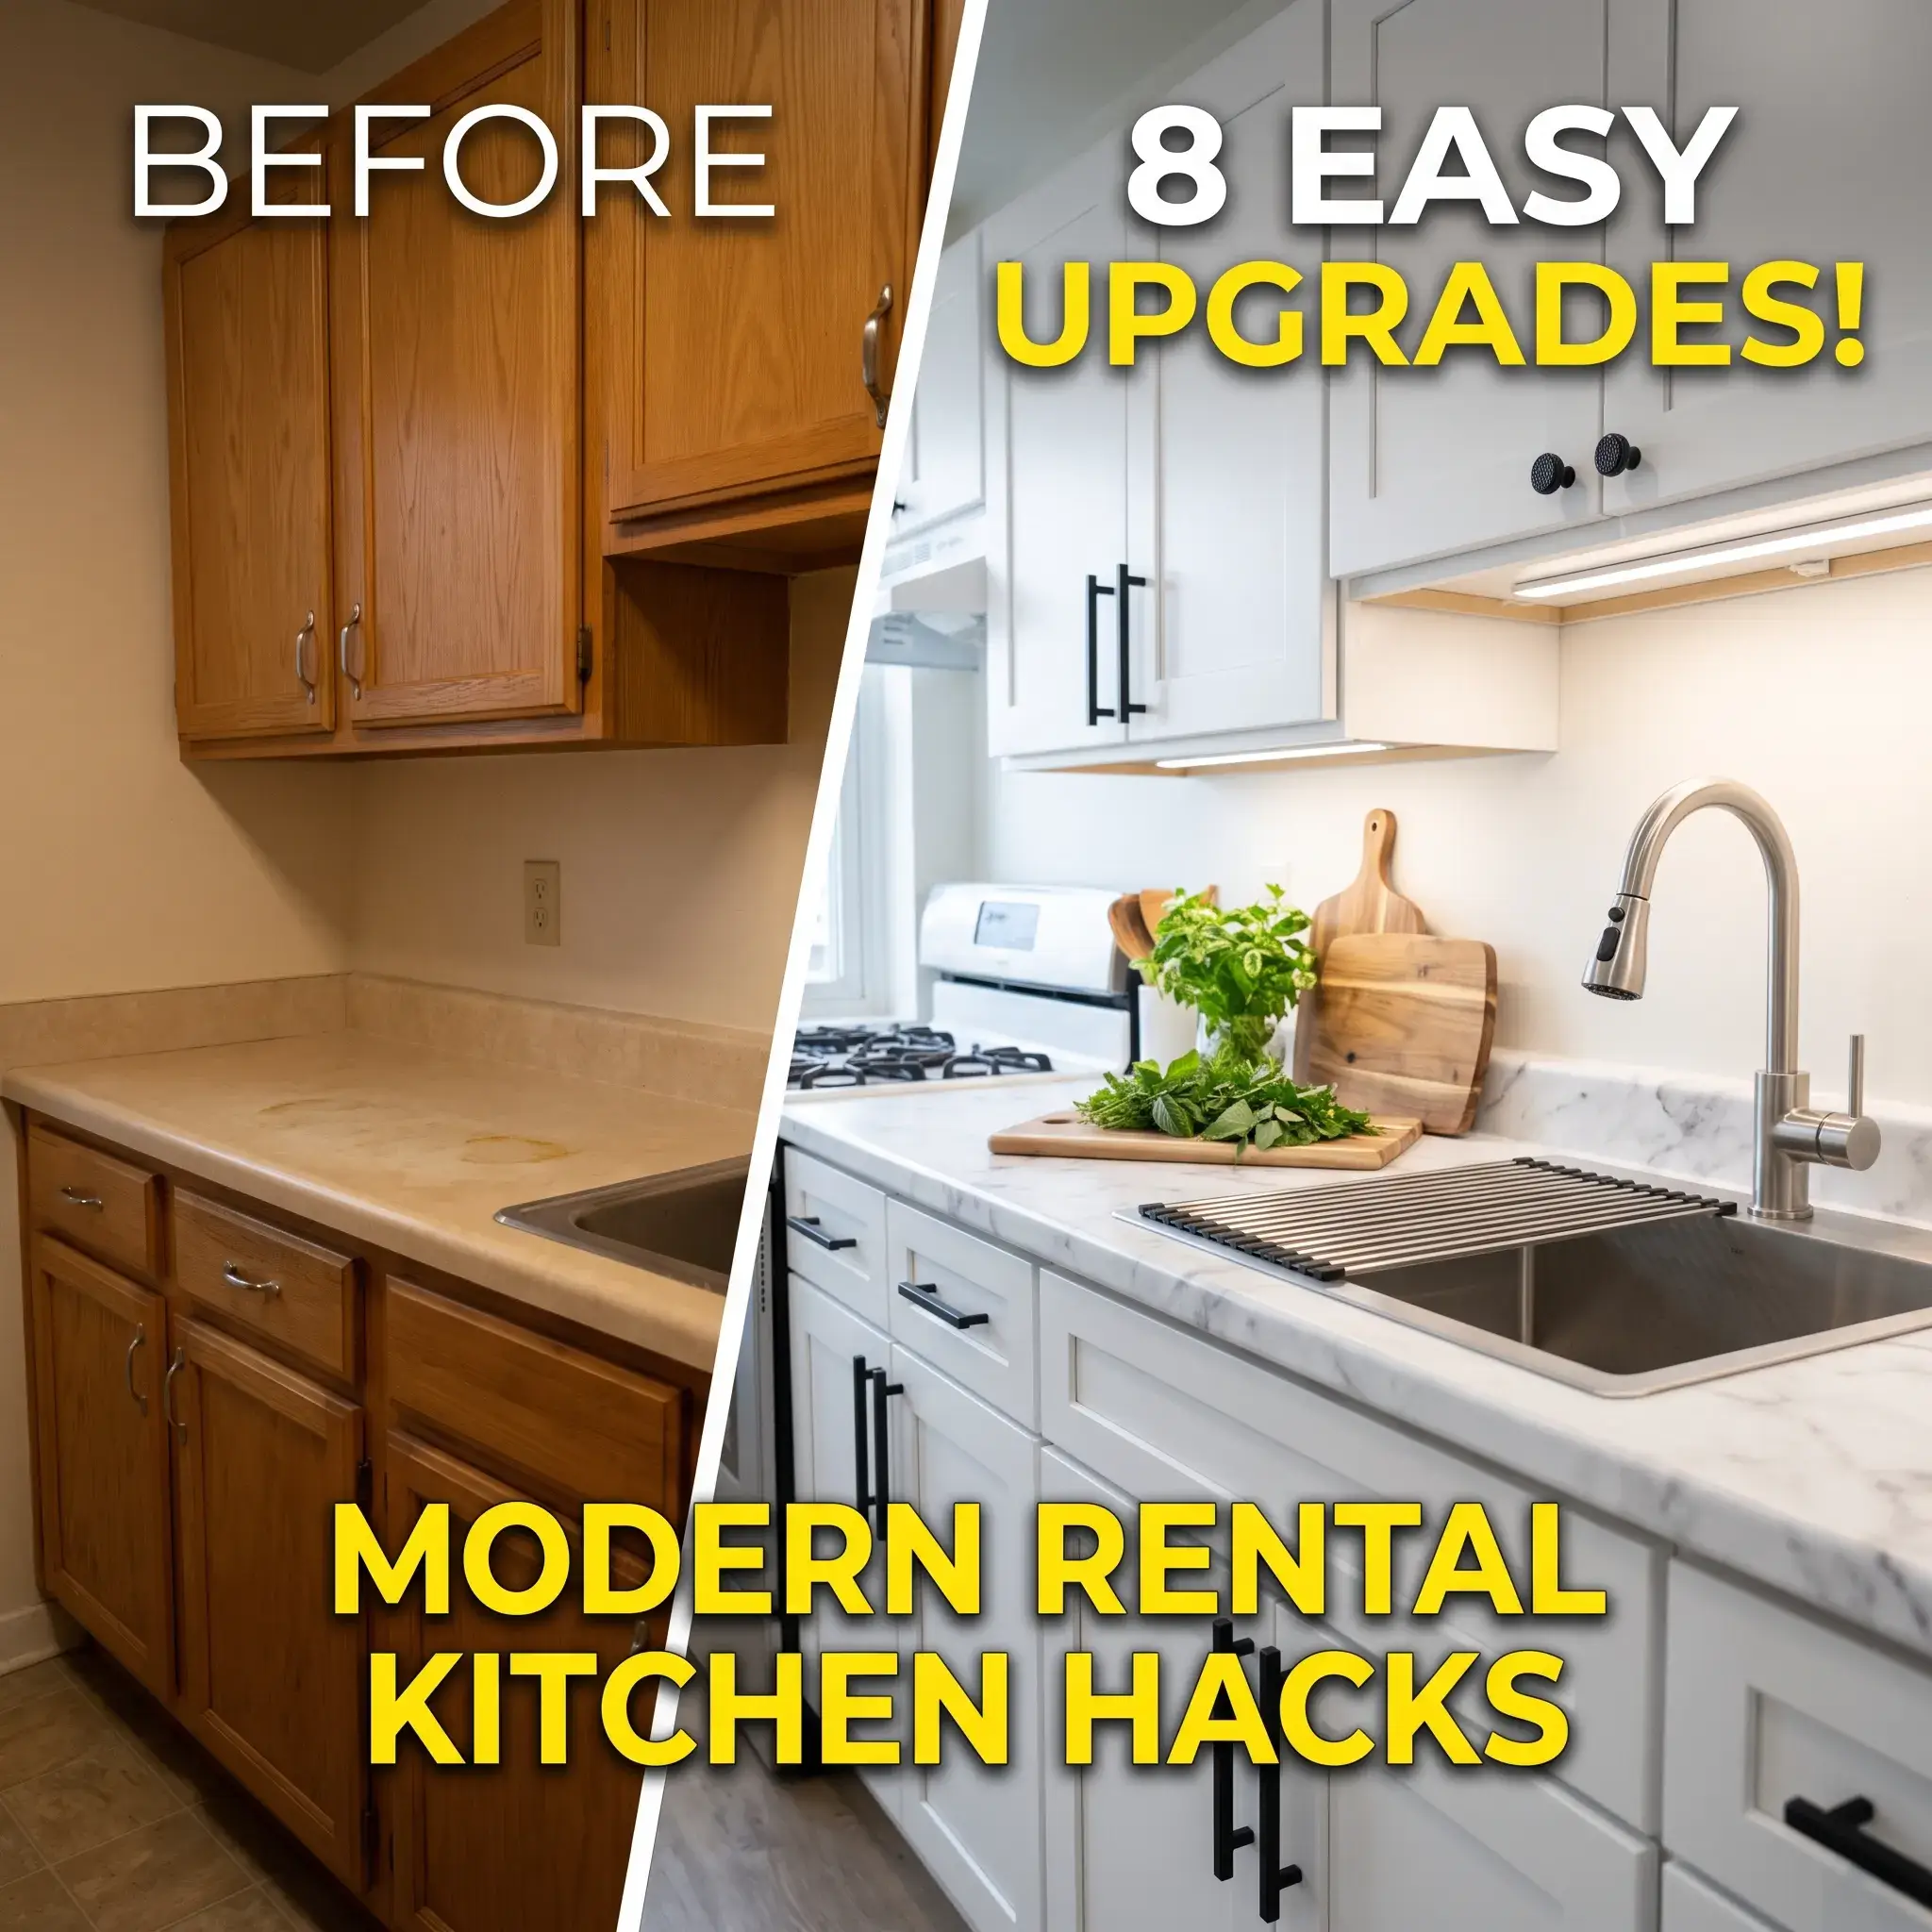
Most rental kitchens feel stuck in another decade. Honey-oak cabinets, stained laminate countertops, and dim yellow ceiling fixtures make the entire space feel small and outdated.
Renting creates a difficult design challenge. You want a clean, modern kitchen where cooking feels enjoyable, but your lease forbids permanent alterations. Driving screws into walls or painting cabinets can forfeit your security deposit on move-out day.
You do not have to live with builder-grade finishes. You also do not need permanent construction to achieve a contemporary aesthetic. By selecting the right materials and non-invasive methods, you can dramatically modernize your kitchen.
Here are eight modern, renter-friendly kitchen upgrade design ideas that look high-end, streamline your cooking routine, and reverse cleanly when your lease concludes.
1. The Honed Marble Architectural Surface Wrap
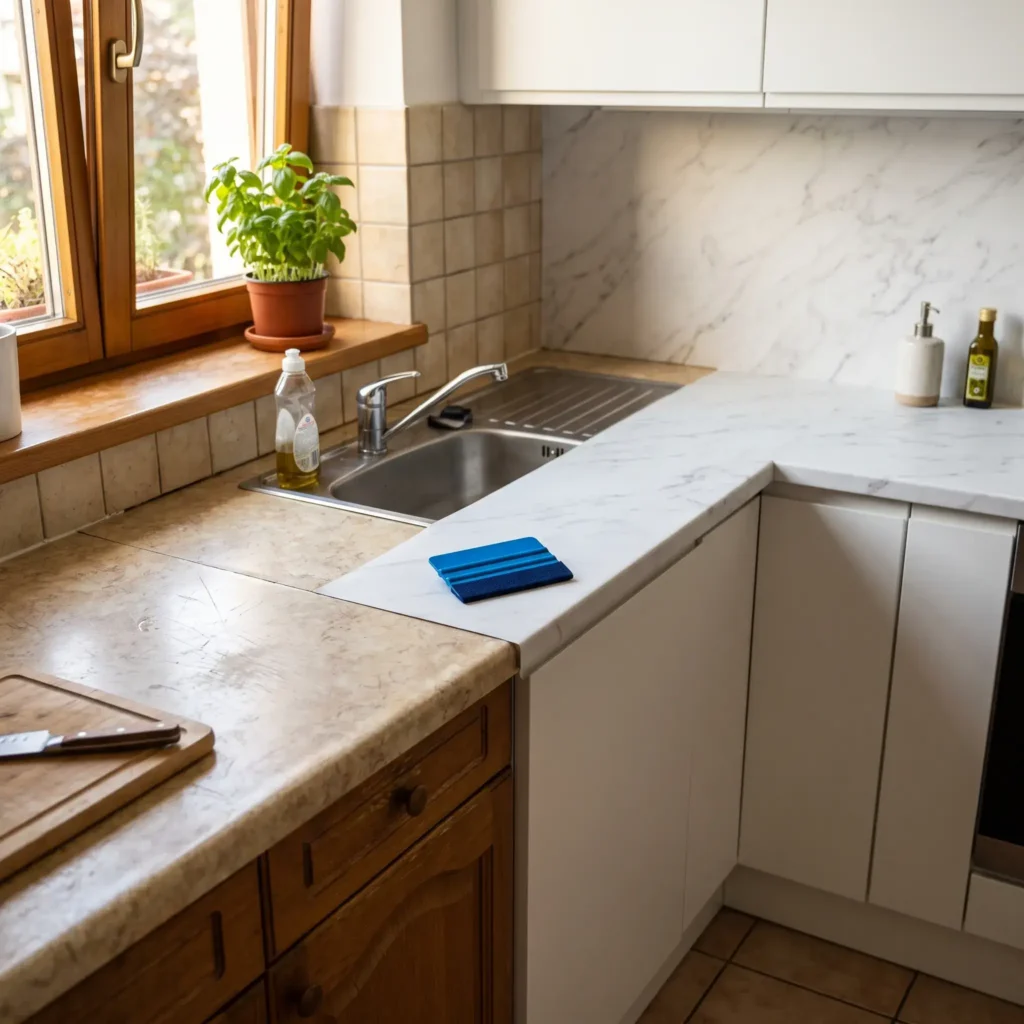
Dated laminate countertops instantly cheapen the look of a kitchen. You can give your work surfaces a clean, contemporary stone appearance with matte calendered PVC architectural film. A honed or satin finish mimics real Carrara marble or soapstone, avoiding the artificial shine of basic craft contact paper.
Begin by scrubbing the existing counters with isopropyl alcohol to strip grease. Cut your vinyl sheets with three inches of excess margin on all edges. Start at the rear corner and work forward, using a felt-edge squeegee to push air bubbles outward as you peel the backing paper.
When you reach the front rounded counter edge, warm the vinyl with a household hair dryer on medium heat. Warm air softens the material, letting you stretch it smoothly over curves without wrinkles or creases. Wrap the film at least one inch beneath the lower horizontal overhang and trim the excess with a fresh utility blade. Always use dedicated cutting boards and hot trivets, as direct knives and hot cookware will puncture the protective vinyl seal.
- Products Featured:
- Heavy-gauge matte marble calendered architectural vinyl roll (24-inch width)
- Felt-edge vinyl smoothing squeegee
- Precision hobby utility knife with fresh blades
2. The Clean Subway Tile Backsplash with a Sacrificial Barrier
A bright subway tile backsplash adds instant architectural depth and modern contrast to flat walls. However, the commercial-grade adhesive on composite peel-and-stick tiles bonds aggressively to paint. Sticking them directly onto bare apartment drywall will rip the wallboard paper during removal and create expensive repair bills.
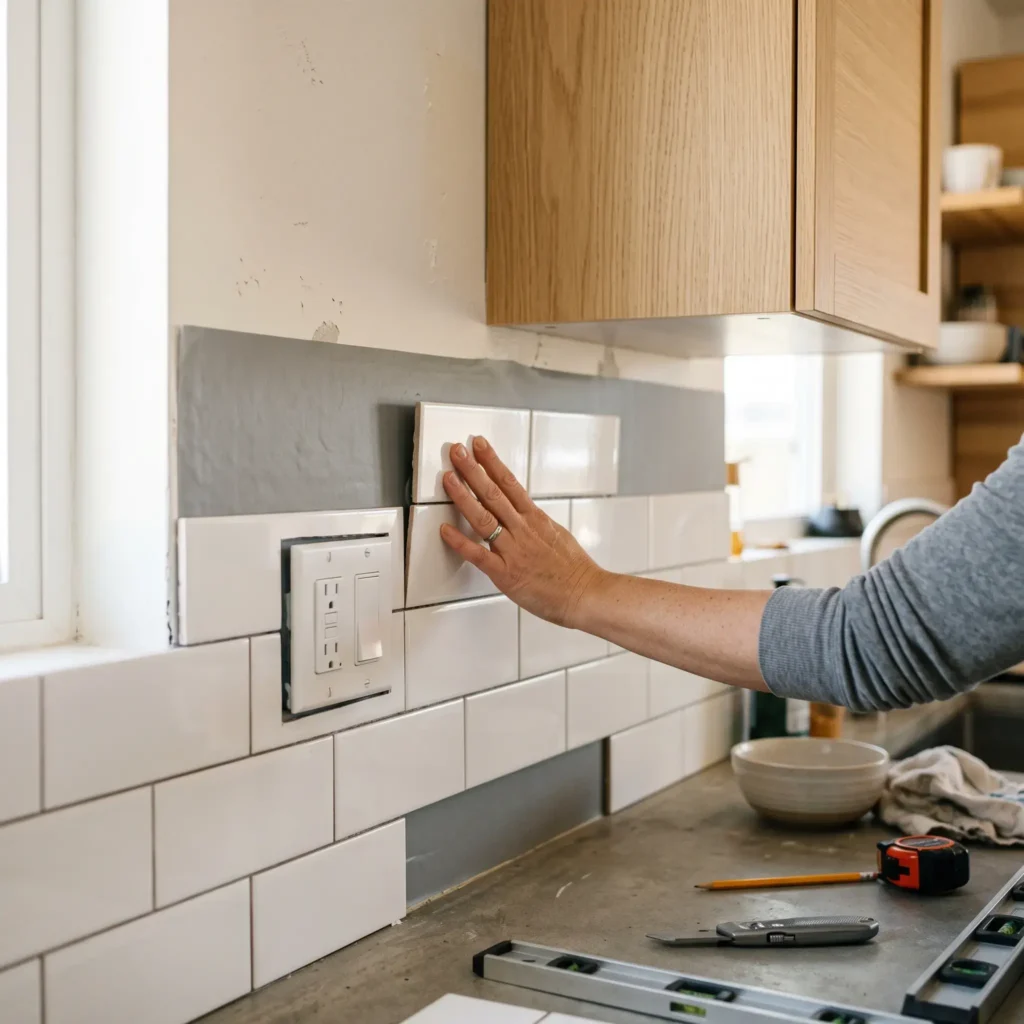
You can solve this problem with a sacrificial barrier layer. First, apply a continuous base sheet of low-tack, removable matte vinyl contact paper across the entire wall plane. Smooth out air bubbles with a flat plastic scraper. Next, press your decorative tiles directly onto that vinyl base. When moving day arrives, the tiles peel off with the vinyl sheet, leaving the original wallboard and paint completely undamaged.
Because composite tiles add about two millimeters of thickness, your wall outlets will sit recessed behind the new surface. Add plastic caterpillar shims behind the outlet mounting screws. This brings the outlet forward so your faceplates rest completely flush and secure against the tile face.
- Products Featured:
- Self-adhesive composite white subway tile sheets
- Low-tack removable matte vinyl base roll
- Plastic caterpillar outlet shims
- Heavy-duty utility knife and metal straight-edge ruler
Check out more Renter-Friendly Ideas
3. High-Contrast Matte Black Hardware Swaps
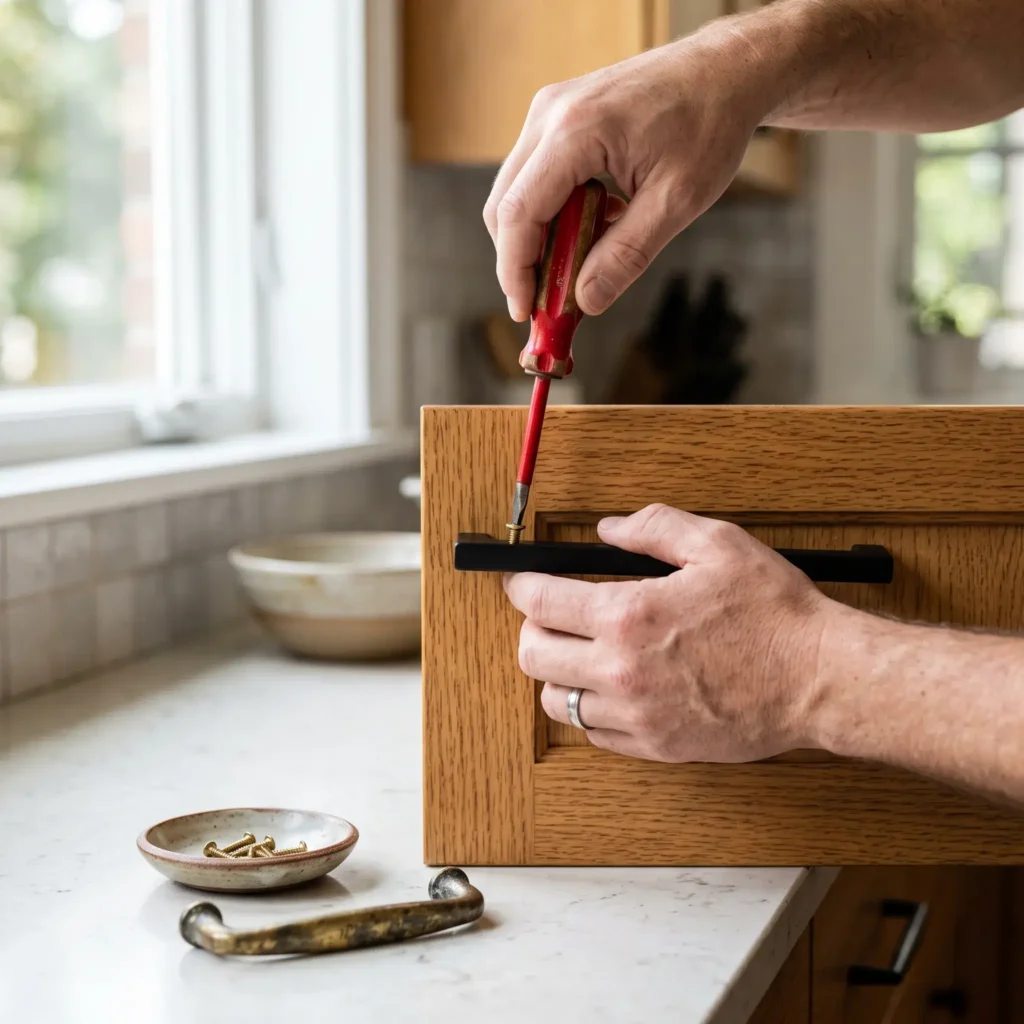
Tarnished brass handles or stained wooden knobs make solid cabinetry look decades older than it is. Replacing that hardware with sleek matte black, brushed champagne bronze, or knurled metal pulls immediately sharpens the room’s profile.
The golden rule for renters is matching the center-to-center hole spacing. Measure the exact distance between the centers of the two screw holes on your existing handles. Common American cabinet hole spacings are 3 inches, 3.75 inches, and 5 inches. Choosing replacement pulls with the exact same spacing means you will not need to drill new holes into your cabinet doors.
Remove the original handles using a manual screwdriver. Place the landlord hardware and screws into a labeled storage bag, then tape it to the interior floor of the sink base cabinet. Install your new pulls using segmented breakaway screws. Hand-tighten each screw carefully. High-torque power drills can easily strip the soft particleboard cores found in rental cabinets.
- Products Featured:
- Solid metal matte black or brushed bronze bar pulls
- Segmented breakaway cabinet mounting screws
- Multi-bit handheld manual screwdriver
4. Warm Under-Cabinet Floating Task Illumination
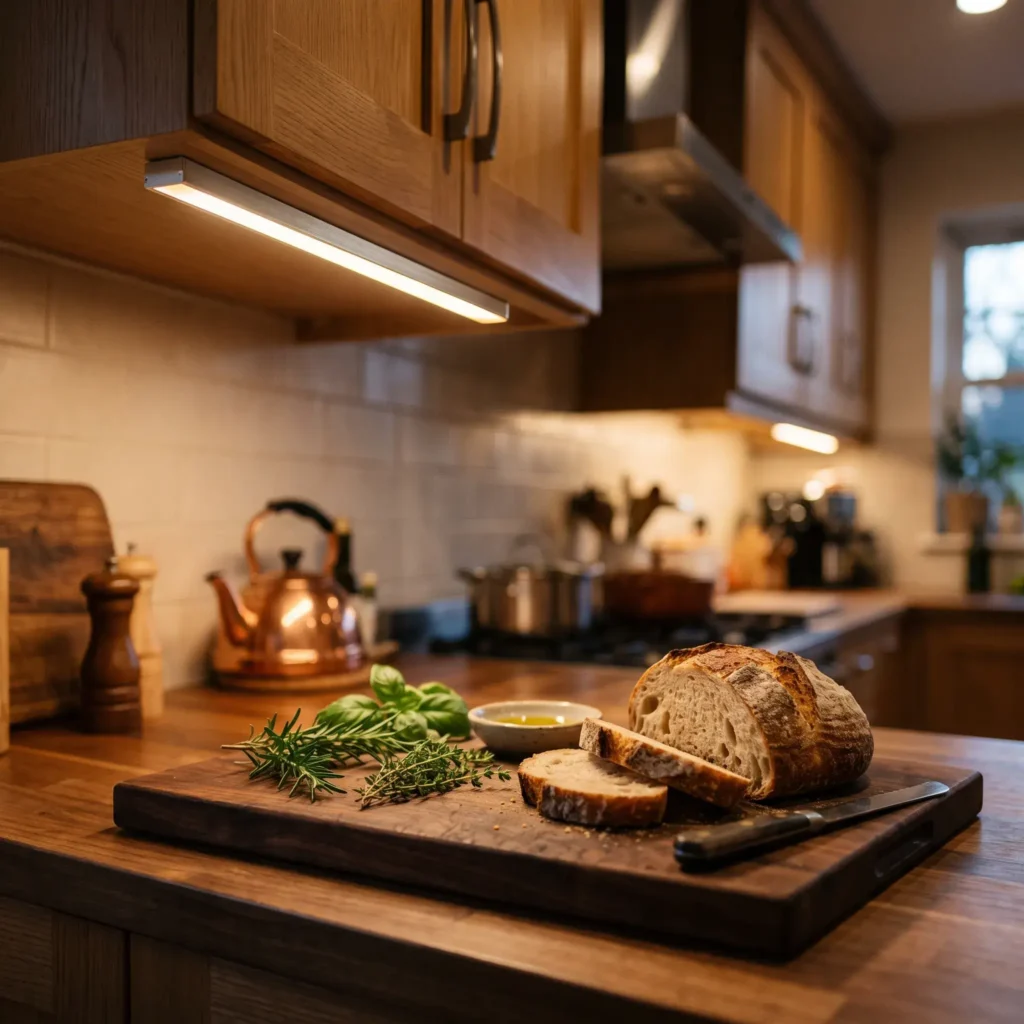
Most rental kitchens rely on a single ceiling light that casts your own shadow over the counter while you prep food. Adding under-cabinet task lighting makes the room feel larger while making meal preparation significantly safer and more comfortable.
Choose slim, rechargeable LED light bars equipped with passive infrared motion sensors and magnetic mounts. Select a warm color temperature between 2700K and 3000K. A color rendering index of 90 or higher ensures your fresh ingredients look natural and appetizing rather than dull and gray.
Mount the lights two-thirds of the way forward along the underside of the cabinet rather than flat against the back wall. This forward geometry casts direct light down onto your cutting board without creating glare on the backsplash. Mount the metal plates using damage-free stretch-release adhesive strips. When the batteries run low, simply detach the light bars from their magnets to recharge them via USB-C.
- Products Featured:
- Rechargeable USB-C magnetic LED task bars with motion sensors
- Stretch-release picture hanging adhesive strips
- Dark wood prep cutting board
5. The Commercial-Style Articulated Swivel Faucet Aerator
Standard rental sink spouts sit low and rigid. They splash water over the surrounding counter and make cleaning large pans or baking sheets difficult.
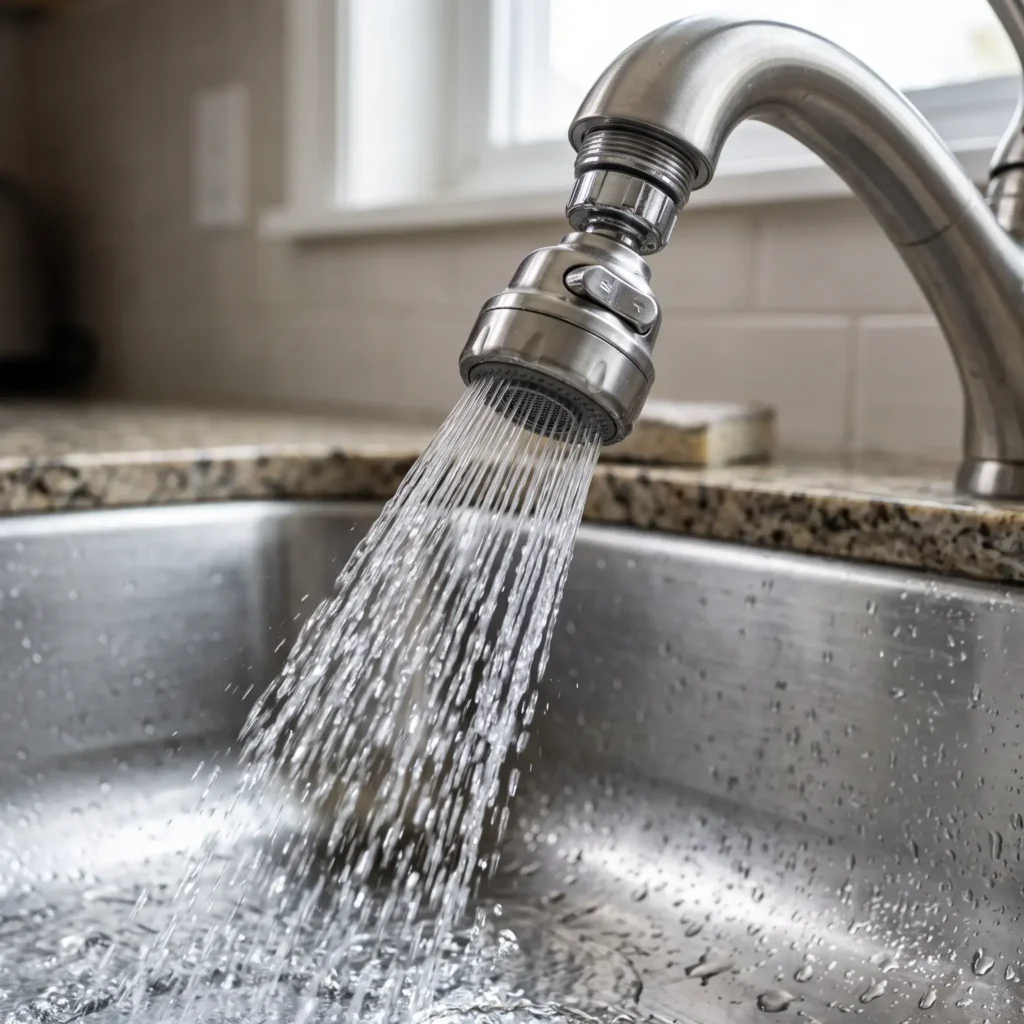
You can add commercial kitchen functionality without touching the water shutoff valves or replacing the faucet body. Unscrew the factory aerator from the tip of the spout. If the aerator sits recessed inside the spout, loosen it using an inexpensive plastic cache key. Store the original components safely in your sink cabinet storage bag.
Thread on a machined brass swivel aerator with dual-spray modes. Solid brass fittings withstand continuous water pressure and outlast cheap chrome-plated plastic units, which often crack and leak. These aerators rotate up to 720 degrees, allowing you to sweep water into every corner of the sink basin while switching easily between a soft aerated flow and a high-pressure rinse spray.
- Products Featured:
- Dual-mode machined brass articulated swivel faucet aerator
- Universal multi-size plastic faucet aerator cache keys
- Protective plumber’s tape
6. The Stainless Steel Over-the-Sink Prep Bridge
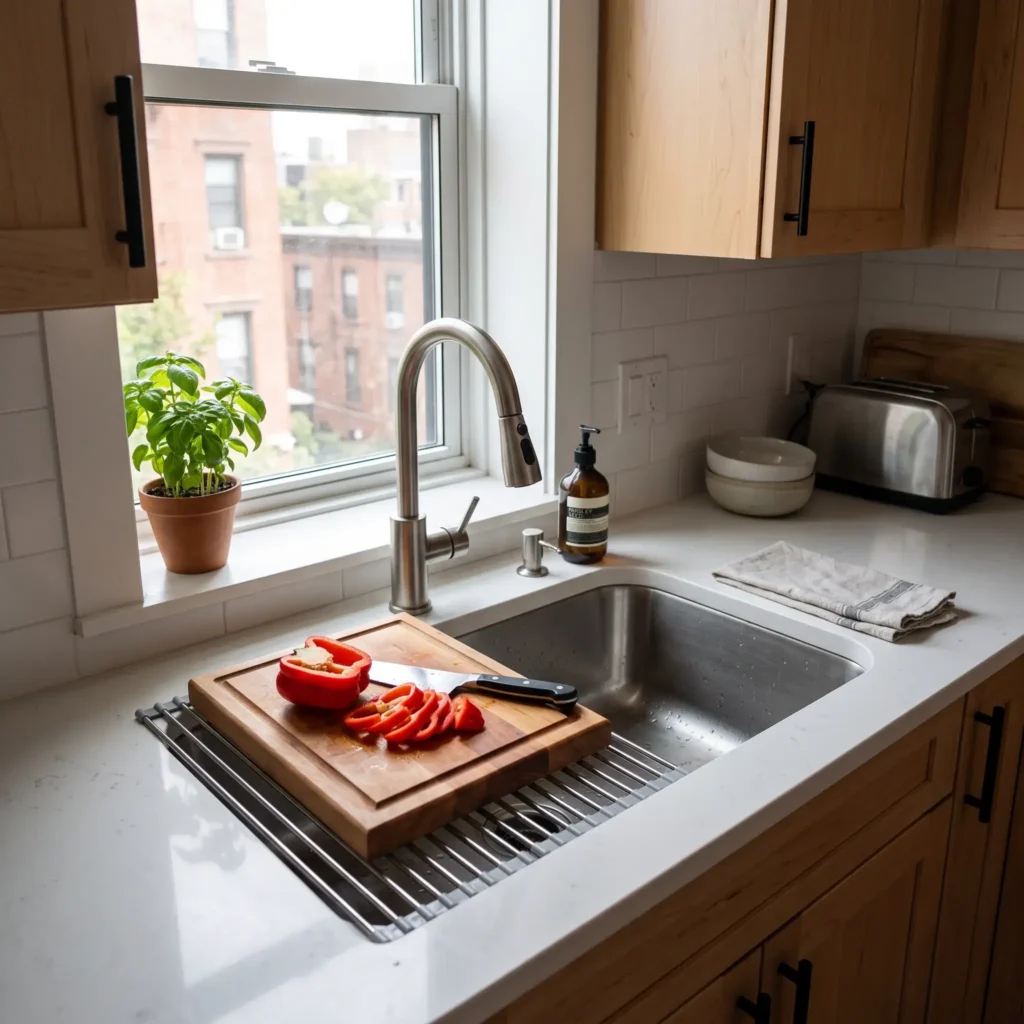
Compact apartments often provide minimal counter space between the stove and the sink. An over-the-sink roll-up rack converts the open sink basin into an instant prep surface with a clean, industrial aesthetic.
These platforms feature food-grade 304 stainless steel rods connected by heat-resistant silicone edges. Measure the width of your sink basin before purchasing. The platform must extend at least 1.5 inches beyond both edges of the counter to provide stable support.
The rack supports up to 35 pounds of static weight. Set a heavy wooden cutting board on top to prepare meals directly over the sink cavity. Vegetable trimmings and water drain straight into the basin below, keeping your prep counters clean. Because food-grade steel withstands heat up to 400 degrees Fahrenheit, the rack also works as a heavy-duty cooling trivet for hot pans. When cooking is complete, rinse the rack, roll it into a compact cylinder, and store it in a drawer.
- Products Featured:
- 304 stainless steel roll-up sink rack with food-grade silicone borders
- End-grain maple prep cutting board
- High-carbon chef’s knife
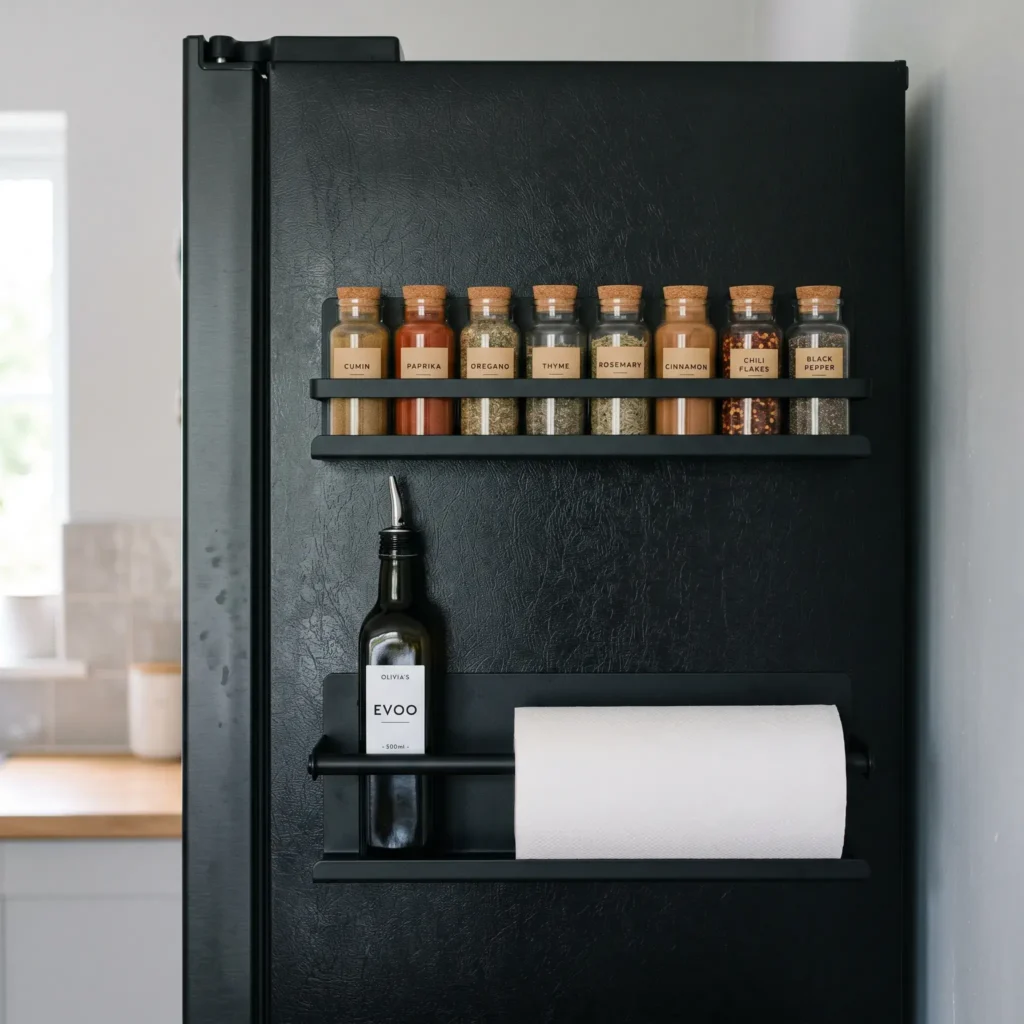
7. The Curated Magnetic Refrigerator Storage Gallery
The bare steel side of a refrigerator or upright freezer represents valuable vertical space that often sits unused. You can transform this bare exterior into an organized, attractive spice gallery that clears your main counters.
Heavy-duty powder-coated carbon steel shelves backed by thick rare-earth magnetic sheets grip directly onto appliance panels. Wipe the refrigerator side panel with rubbing alcohol before mounting. Removing kitchen grease films gives the magnets maximum friction, preventing them from sliding down when loaded.
These shelves hold up to 15 pounds of glass spice jars, olive oil bottles, and kitchen essentials without screws or adhesives. Select organizers that include a lower wooden dowel for paper towels or hanging hooks for oven mitts. When your lease concludes, simply lift the racks off by hand. The factory enamel finish on the refrigerator remains completely unmarked.
- Products Featured:
- Heavy-duty matte black magnetic spice storage shelves
- Matching clear glass spice jars with bamboo lids
- Glass olive oil dispenser bottle
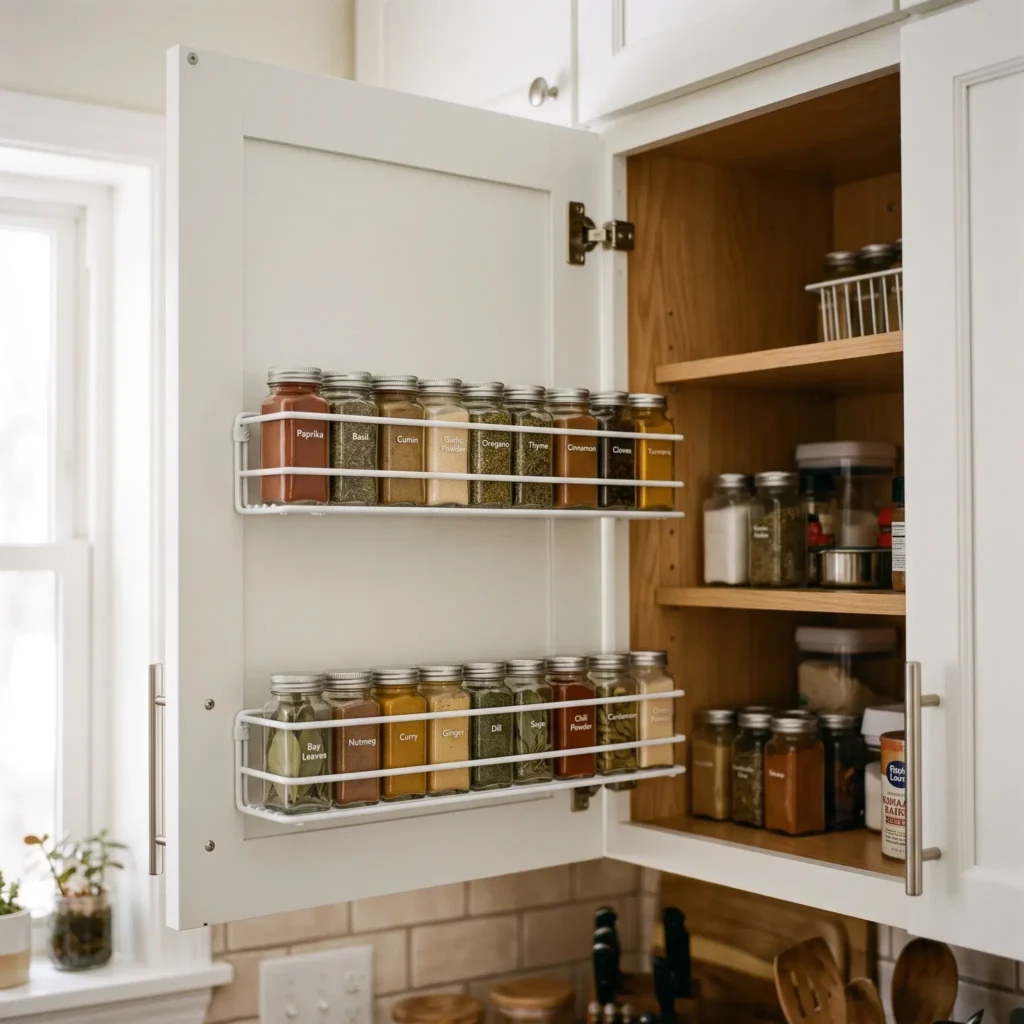
8. Concealed In-Door Organization with Structural Load Limits
Clutter on your counter makes a small kitchen feel half its size. Mounting lightweight storage baskets to the interior faces of your cabinet doors keeps everyday cooking spices and cleaning supplies neatly out of view.
Test your positioning by holding the basket against the inside of the door while closing the cabinet. Verify that the basket clears your interior shelves and front face frame. Clean the mounting area with a mixture of water and rubbing alcohol. Mount the rack using damage-free picture-hanging adhesive strips with pull-tabs. Press firmly for 30 seconds, detach the basket from its base, and let the adhesive strips cure for one full hour before adding items.
Keep the total weight under five pounds per door. Most rental cabinets use builder-grade compressed particleboard and standard European cup hinges. Limiting the weight protects the door from sagging and prevents screws from pulling out of the frame over time.
- Products Featured:
- Narrow wire cabinet door spice organizer racks
- Heavy-duty damage-free picture-hanging adhesive strips
- Compact airtight spice jars
Portable Upgrades vs. Consumable Improvements
When planning rental kitchen projects, categorize each item into one of two groups: portable assets and consumable improvements. This distinction helps you spend your budget smartly.
| Upgrade Project | Classification | Transferable to Next Home? | Move-Out Time Required |
|---|---|---|---|
| Magnetic Under-Cabinet LED Bars | Portable Asset | Yes, pack with household items | 2 minutes |
| Cabinet Pulls and Handles | Portable Asset | Yes, swap originals back in | 10 minutes |
| Machined Brass Swivel Aerator | Portable Asset | Yes, unthread and bring along | 3 minutes |
| Over-the-Sink Prep Bridge | Portable Asset | Yes, rolls up into moving boxes | Instant |
| Magnetic Refrigerator Shelves | Portable Asset | Yes, pull off appliance exterior | Instant |
| Interior Door Spice Racks | Portable Asset | Yes, stretch tabs to release | 5 minutes |
| Sacrificial Subway Tile Backsplash | Consumable Improvement | No, peel off and discard | 20 minutes |
| Calendered PVC Countertop Film | Consumable Improvement | No, peel off and discard | 15 minutes |
Portable assets are long-term personal property that will improve your next home just as effectively. Consumable improvements exist strictly to elevate your daily quality of life in your current space.
The Move-Out Playbook: Damage-Free Restoration
Taking down your upgrades cleanly requires patience and the correct technique. Rushing during move-out can damage finishes and lead to unexpected repair bills. Follow these four practical steps when packing up:
- Warm Adhesives Before Pulling: Never pull cold vinyl or adhesive strips away from walls. Warm the surface using a hair dryer on high heat for 20 to 30 seconds. The heat softens the glue, allowing it to release smoothly without pulling wall paint.
- Use a 180-Degree Peel Angle: Pull vinyl films flat against themselves at a sharp 180-degree angle. Never pull straight outward at a 90-degree angle, which places direct tension on the drywall paper.
- Clean Adhesive Residue Safely: Avoid aggressive chemicals like acetone or lacquer thinners, which strip factory clear coats from cabinets. Spray any remaining sticky residue with a citrus-based solvent or standard mineral oil. Let it sit for two minutes, then wipe it away with a damp microfiber cloth.
- Reinstall Factory Fixtures: Retrieve your labeled storage bag from the sink cabinet. Thread the landlord’s original faucet aerator back in place using your removal key. Screw the original cabinet knobs back into their factory holes using a manual screwdriver.
Frequently Asked Questions
Can landlords legally deduct your deposit for peel-and-stick tiles?
Yes. Landlords can deduct repair costs if tile removal damages drywall paper, peels paint, or leaves adhesive residue. Installing a low-tack vinyl barrier layer underneath prevents high-tack tile adhesive from contacting the wall directly.
Does architectural contact paper leave residue on laminate counters?
Quality calendered vinyl film releases cleanly from non-porous laminate when softened with a hair dryer. Sticky residue usually occurs only if the film is pulled off cold or if cheap craft vinyl was left in place for multiple years.
How do you find the right cabinet handle replacement size?
Measure the distance between the center of one screw hole to the center of the other screw hole. Do not measure the total handle length. Standard residential spacings include 3 inches, 3.75 inches, and 5 inches.
What is the best adhesive for hanging kitchen items without wall damage?
Stretch-release elastomeric adhesive strips work best. When pulled parallel to the mounting surface, the polymer chains stretch and release their grip cleanly without pulling paint, wallboard paper, or wood veneer.
How do you brighten a dark rental kitchen without rewiring?
Rechargeable magnetic LED light bars provide the best balance of output and safety. They attach with non-damaging adhesive brackets, charge via USB, and eliminate the need to alter any existing electrical wiring.
Upgrading an outdated rental kitchen does not require risking your deposit or arguing with your landlord. Prioritize portable upgrades like magnetic under-cabinet lighting, modern cabinet hardware, and articulating faucet aerators first. These simple changes install in minutes, improve your daily cooking routine, and pack directly into your moving boxes when you leave.