Stop Buying Floating Tables: 8 Custom Breakfast Nook Upgrades Without a Renovation
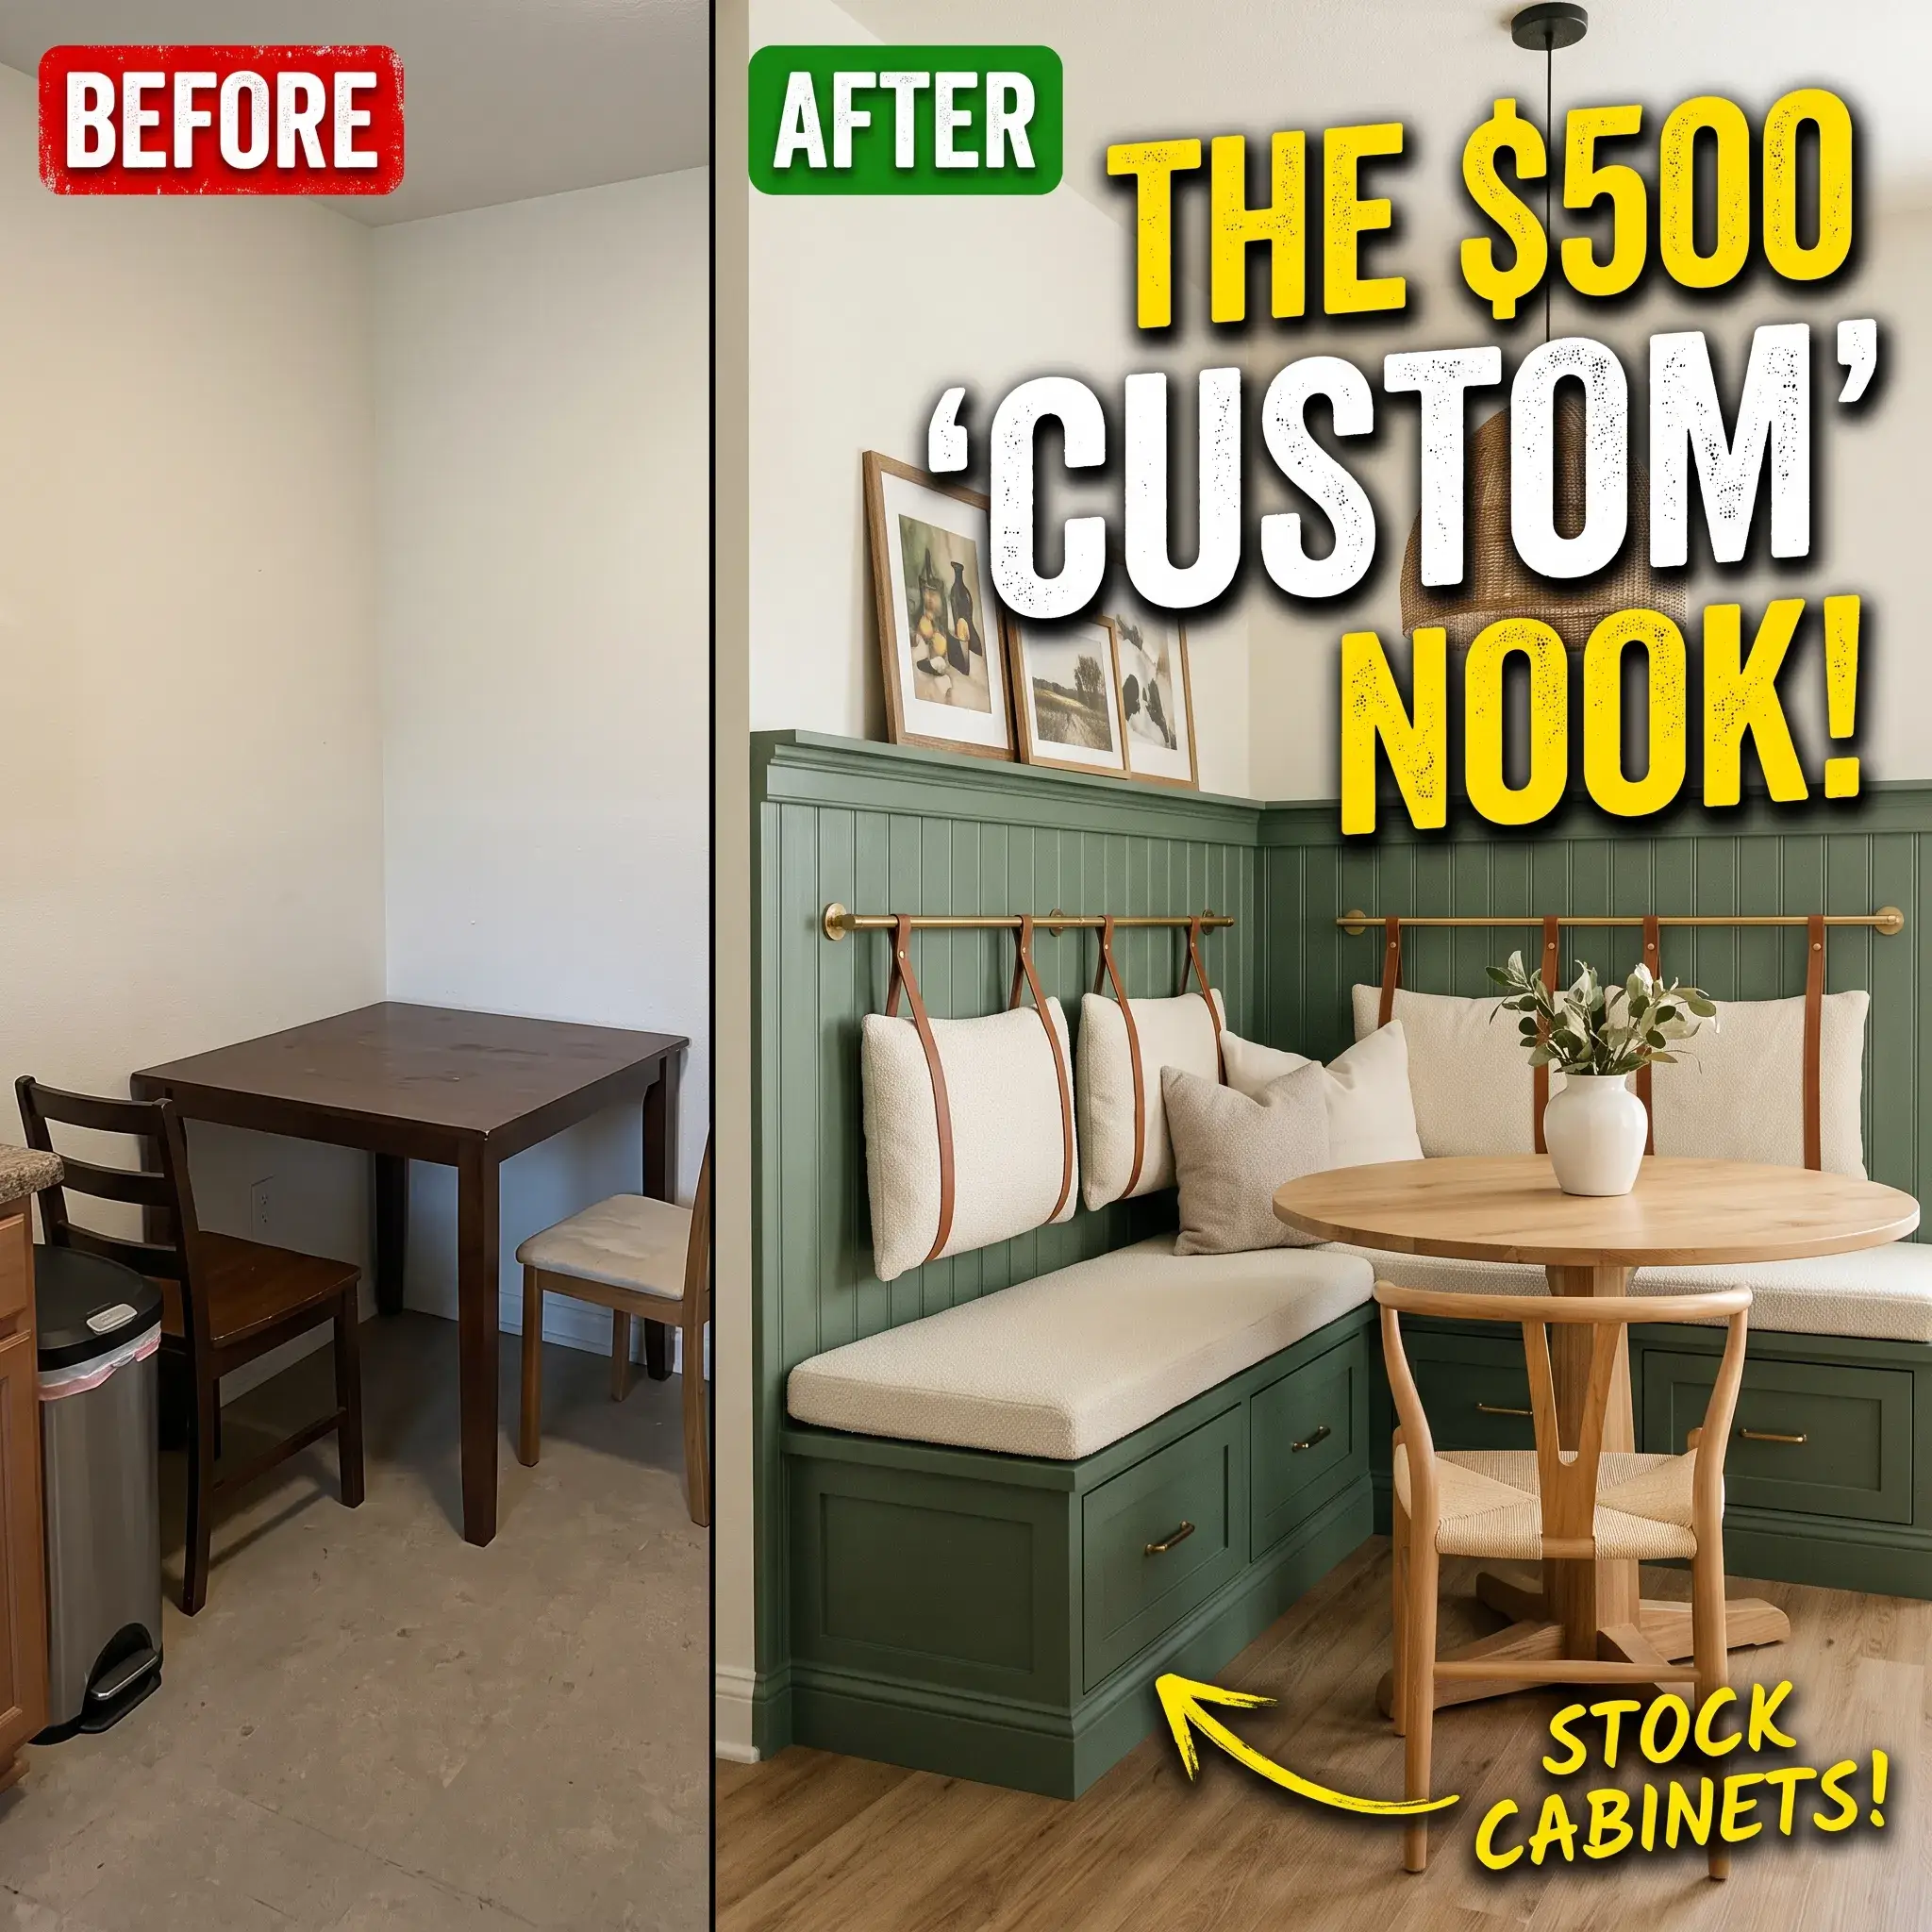
A standalone dining table pushed into a kitchen corner looks unfinished. The chairs crowd the walkway, and the entire setup feels like an afterthought.
Hiring a contractor for a custom banquette can cost between $5,000 and $12,000. You do not need to tear down walls or pay high trade fees to get a built-in look. You can create the look of custom millwork with stock cabinets, continuous trim, correct lighting, and proper measurements.
Here are 8 practical breakfast nook upgrades you can install in your home. Each design includes product sources and image prompts. After the designs, you will find exact measurements and carpentry guidelines.
8 Practical Breakfast Nook Upgrades That Look Custom
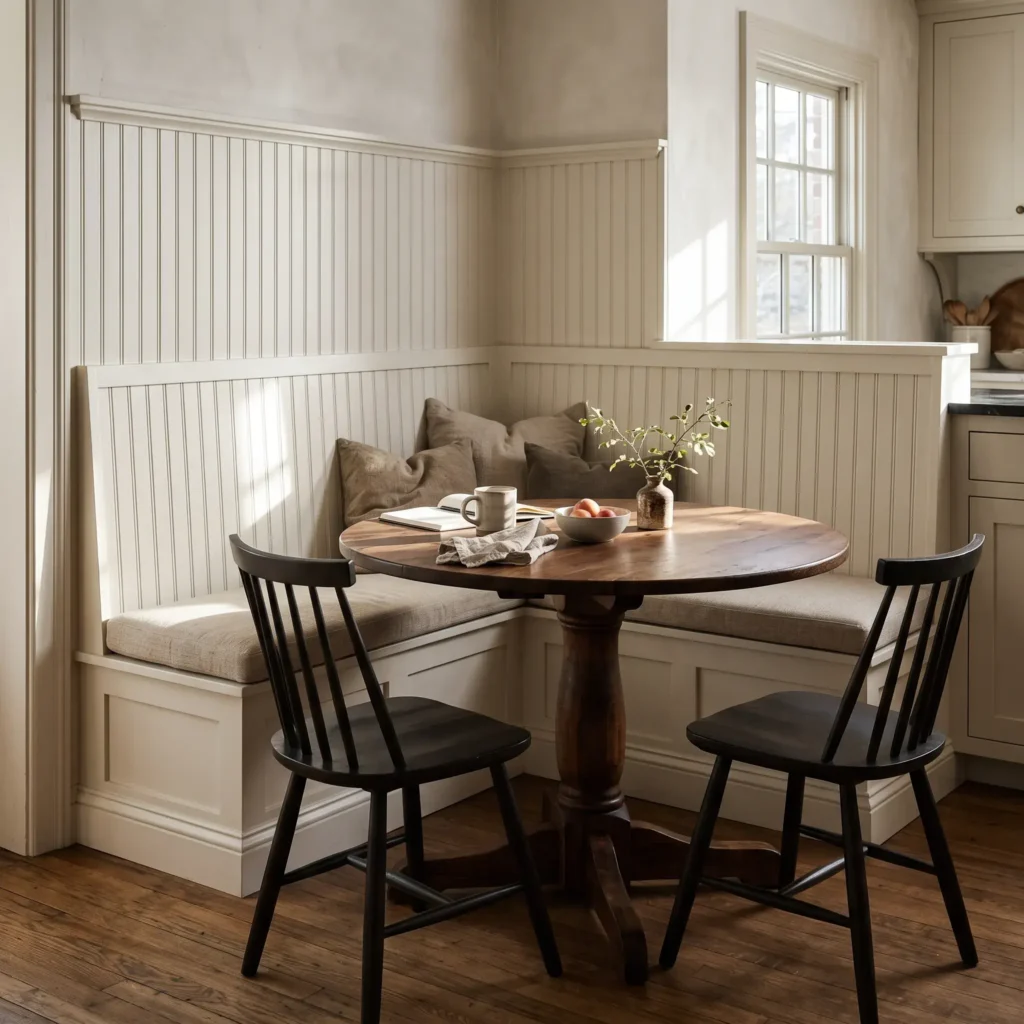
1. The Beadboard Enclosure with Continuous Baseboards
Vertical tongue-and-groove or beadboard paneling behind your bench anchors the seating directly to the kitchen walls. The key detail is running your room baseboards across the bottom face of the bench. This simple adjustment makes the seating look original to the home.
- Products Featured:
- Primed MDF tongue-and-groove beadboard wall panels (32-inch height)
- Matching 5.25-inch speed baseboard molding
- 36-inch cast-iron round pedestal dining table
- Low-back walnut spindle dining chairs
- Matte black wall-mount plug-in swing arm sconce
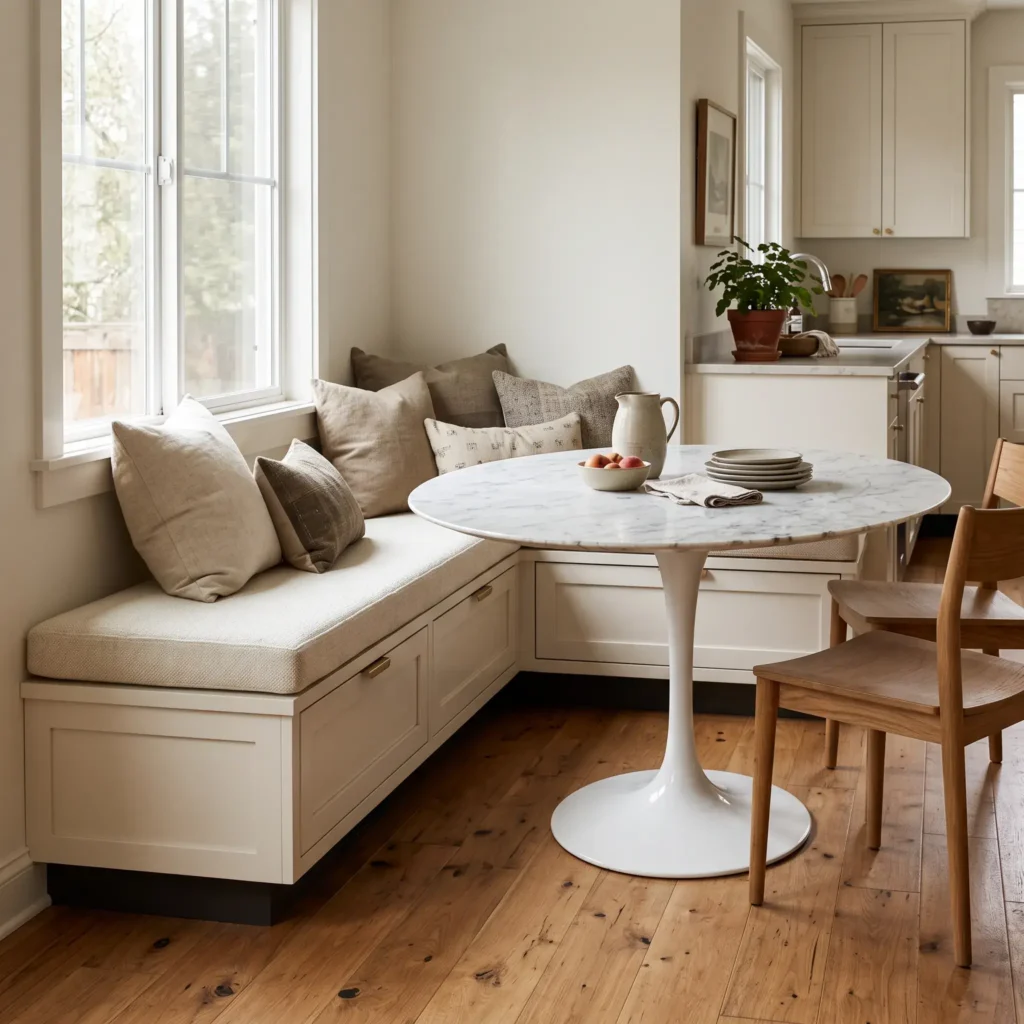
2. The Stock Cabinet Drawer Bench with a Recessed Toe-Kick
This upgrade uses 15-inch-high kitchen wall cabinets to build a deep bench with working storage drawers. Placing the cabinets on a site-built 2×4 wooden frame creates a 3.5-inch recessed toe-kick. Diners can tuck their heels back when standing up without kicking the cabinet wood.
- Products Featured:
- 15-inch horizontal cabinet frames with soft-close drawer slides
- Solid unlacquered brass edge pulls
- 4-inch tailored cushion in Crypton ivory textured performance fabric
- 48-inch oval white marble tulip dining table
- Natural white oak woven counter chairs
Check out more Renter-Friendly Ideas
3. The Monochromatic Color-Drenched Dining Nook
Painting the drywall, window casing, wall trim, and bench in the exact same color creates an intentional dining space. A unified color hides seams between different wood parts. It makes budget materials look like expensive woodwork. Use a satin finish on wood and an eggshell finish on drywall.
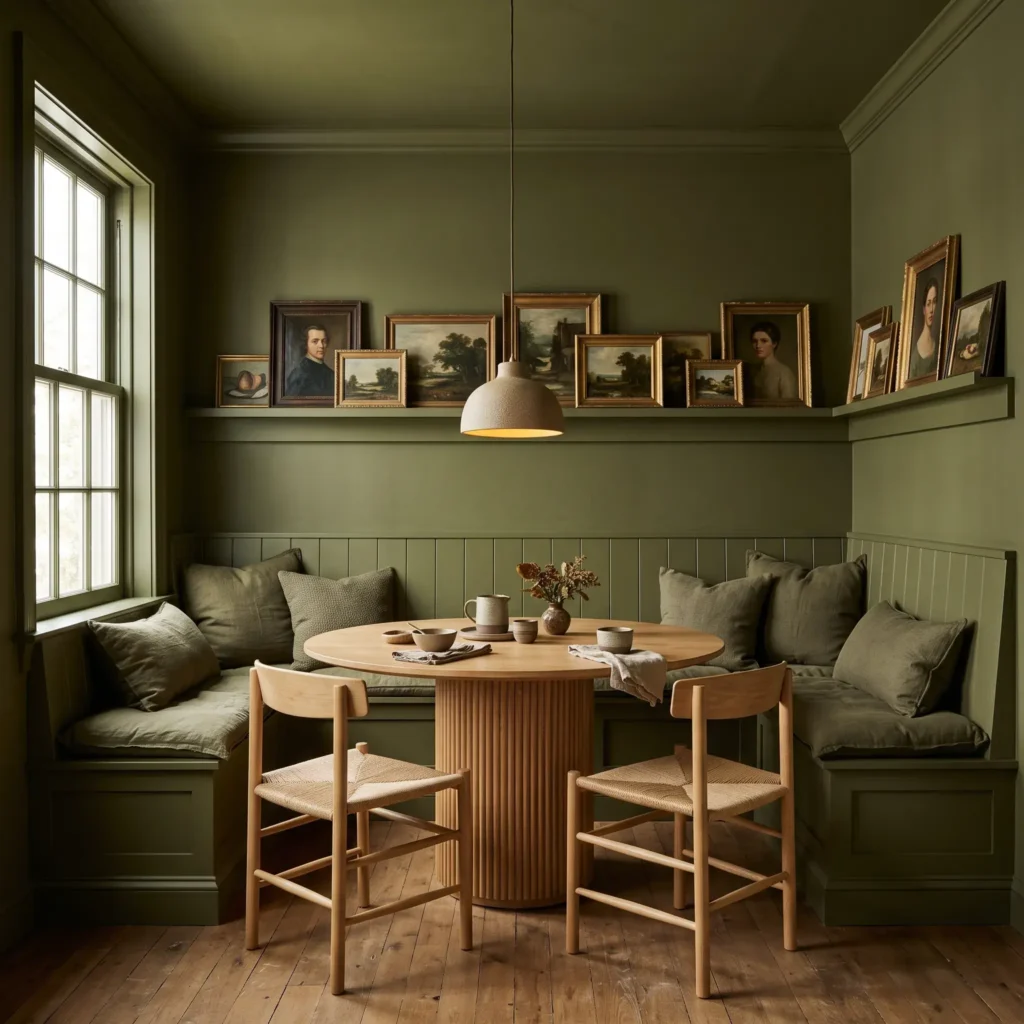
- Products Featured:
- Benjamin Moore Dark Olive paint (Satin on trim and bench, Eggshell on walls)
- 4-inch deep picture display ledge mounted 58 inches above the floor
- Fluted oak cylinder pedestal dining table
- Hans Wegner style woven cord paper wishbone chairs
- Ribbed glass cone pendant light with brass downrod
4. The Wall Cushion on Leather Straps and a Brass Rod
Hang a tailored cushion directly on the wall if you want comfortable back support without building an angled backrest. Suspending the pad from leather straps on a solid metal rod protects your drywall from scuffs. It gives the dining corner a boutique restaurant look.
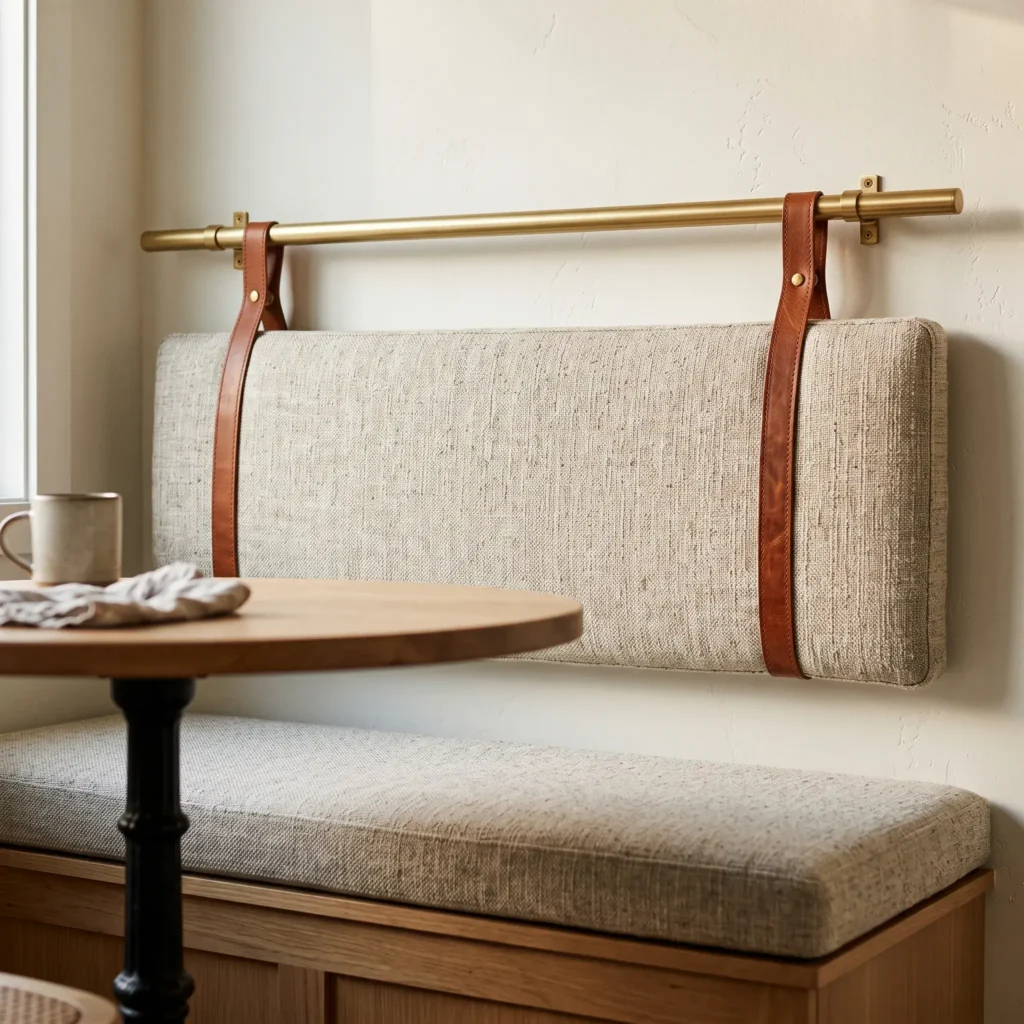
- Products Featured:
- 1-inch solid unlacquered brass curtain rod with flush end brackets
- Cognac saddle leather hanging straps with screw rivets
- Tailored rectangular back cushion in charcoal textured linen
- 30-inch round white bistro table with cast-iron base
- French bistro woven rattan cafe chairs
5. The Channel-Tufted Wall Panels with Hidden French Cleats
Mounting vertical tufted panels directly to the wall creates an upscale booth. Interlocking aluminum French cleats hide all mounting screws. The panels lift off the wall clips easily, so you can clean or reupholster them without damaging your drywall.
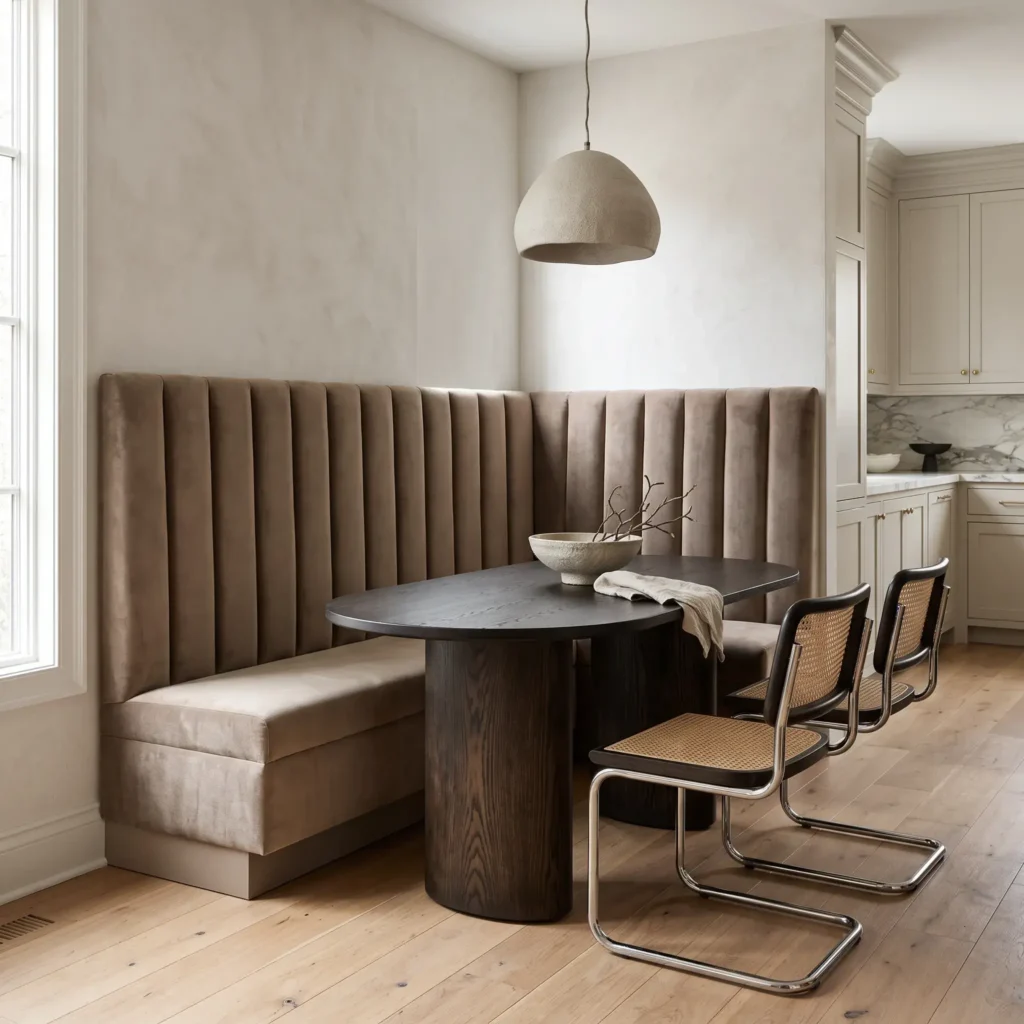
- Products Featured:
- Custom vertical channel-tufted upholstery panels (24-inch height)
- Heavy-duty interlocking aluminum Z-clips and French cleats
- Stain-resistant taupe velvet upholstery fabric
- 54-inch capsule-shaped pill pedestal dining table in smoked oak
- Tubular steel Bauhaus Cesca style dining chairs with cane backing
6. The Fluted Tambour Bay Window Banquette
Fitting a bench into an angled bay window usually requires complex carpentry angles. Wrapping the bench face in flexible wood tambour paneling smooths sharp corners into soft curves. It turns an awkward window layout into a functional focal point.
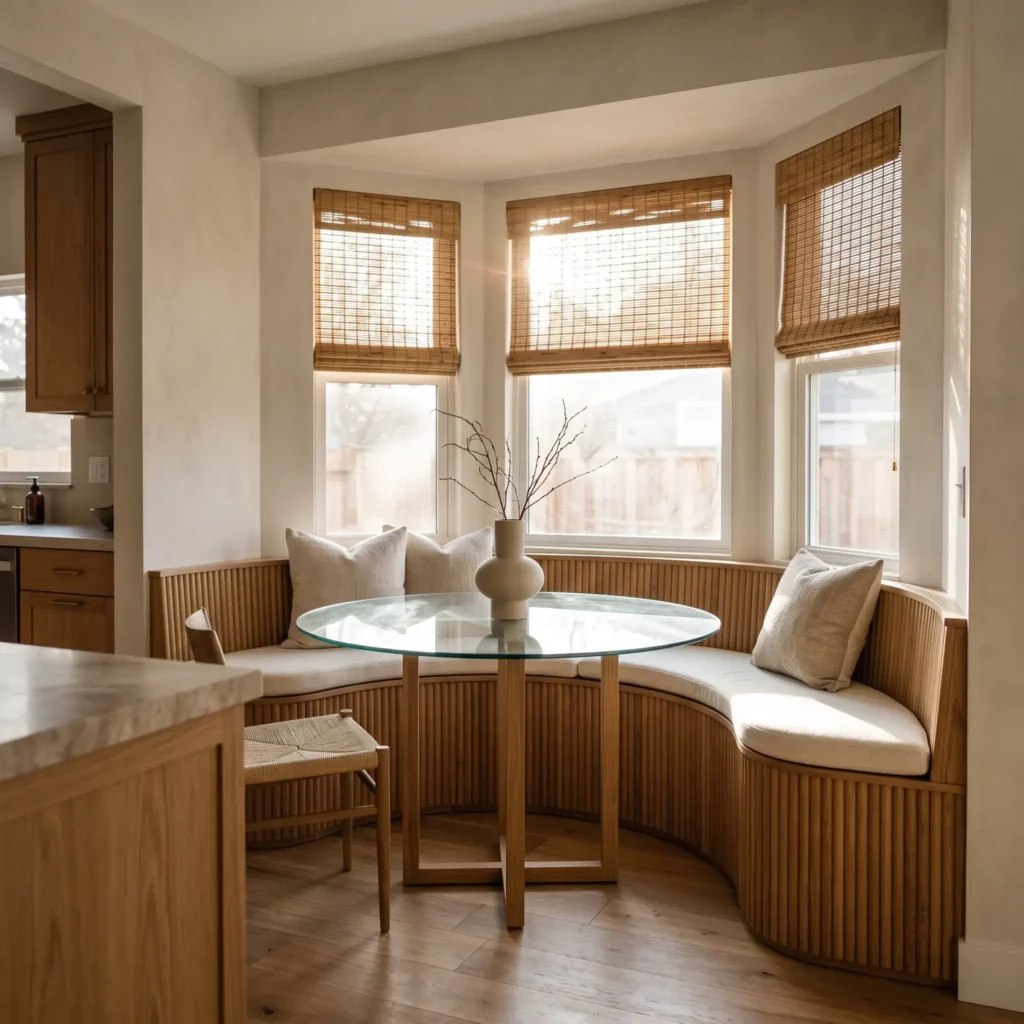
- Products Featured:
- Solid white oak flexible tambour wall panels
- Custom-cut high-density polyurethane window seat cushion
- 42-inch round glass top dining table with sculpted wood base
- Matte ceramic vase with dried branches
- Woven roman shades in natural bamboo
7. The Wall-Mounted Cantilever Floating Bench
Removing floor supports makes small kitchens feel open. Securing heavy steel brackets directly to wall studs before adding wall paneling creates a floating seat. A recessed LED strip underneath provides warm accent light along the floor.
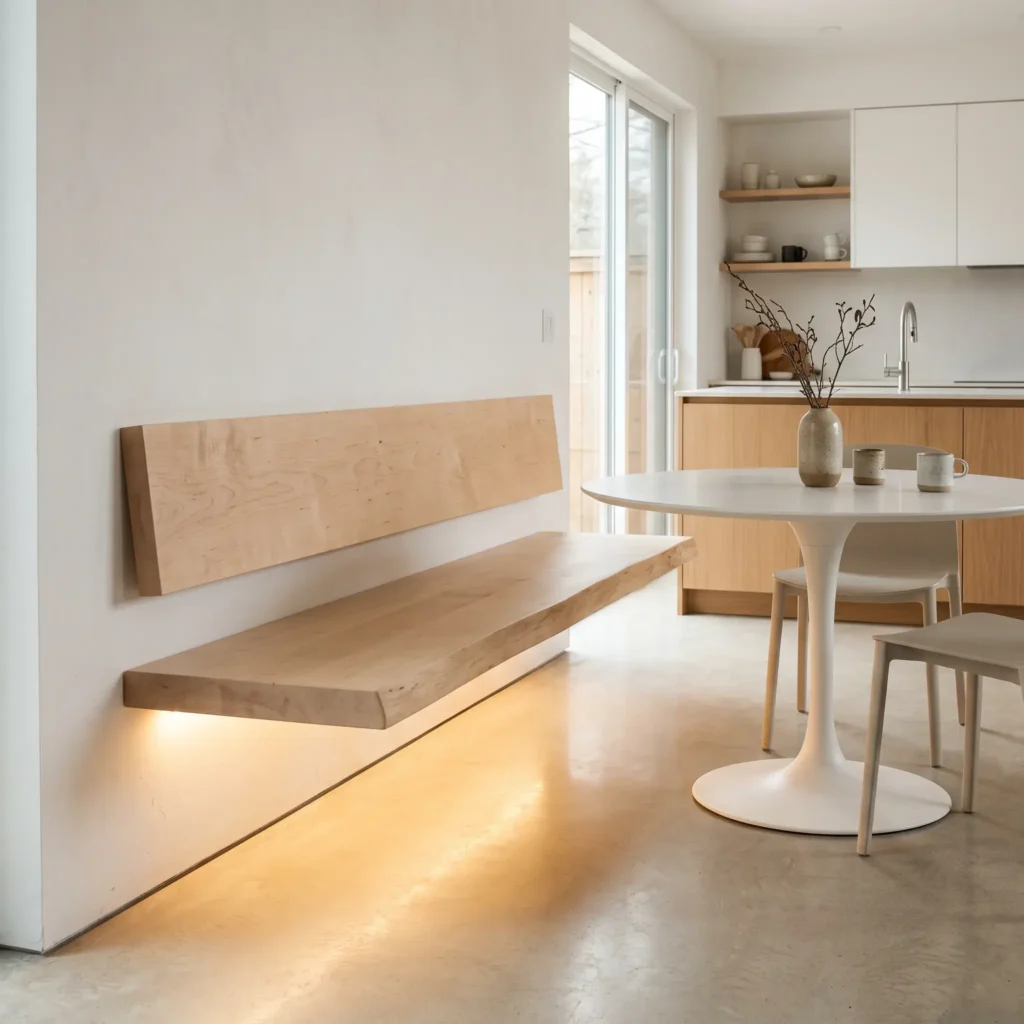
- Products Featured:
- Heavy-duty quarter-inch structural steel L-brackets
- 1.5-inch thick solid maple bench top with clear matte poly finish
- Recessed 2700K warm white aluminum channel LED strip lights
- Minimalist white tulip dining table
- Molded fiberglass side chairs with Eiffel wire legs
8. The Picture-Frame Molding Nook with Lift-Top Storage
Adding classic picture-frame molding turns flat drywall into a formal dining alcove. Inside the bench, pneumatic gas struts carry the weight of the wooden lid. This prevents slammed lids and finger injuries when accessing seasonal storage.
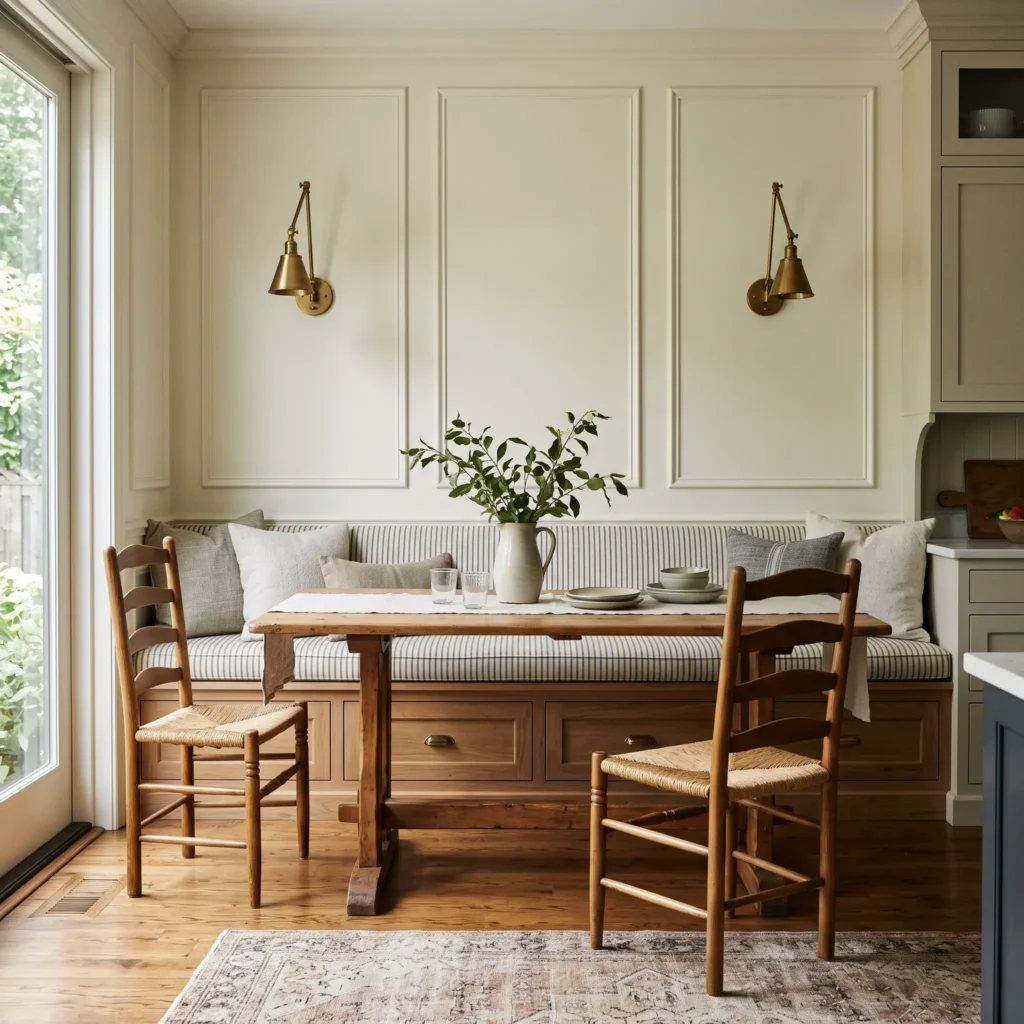
- Products Featured:
- Primed pine picture frame wall molding profiles
- 120N cabinet lid support gas struts
- Warm cream performance ticking-stripe fabric for seat cushion
- 60-inch inset trestle dining table in reclaimed pine
- Traditional French ladder-back chairs with rush seating
Structural Framing: Modifying Stock Cabinets for Seating
A dining bench needs to support active body weight. Stock kitchen upper cabinets, such as 15-inch-high over-refrigerator boxes, provide factory-squared corners and smooth drawer runners. However, manufacturers make these boxes to hang on walls, not to support people jumping onto them.
Thin factory backings will rack and split under daily use. You must reinforce stock cabinets with three carpentry steps:
| Step | Carpentry Task | Material Used | Practical Purpose |
|---|---|---|---|
| 1. Build Plinth | Build a level base frame | 2×4 framing lumber | Replaces plastic legs with a solid foundation. |
| 2. Recess Base | Inset the plinth 2 to 3 inches | Standard framing screws | Creates a 3.5-inch toe-kick for heel room. |
| 3. Wall Anchors | Replace thin 1/8-inch backing | 1/2-inch structural plywood | Locks the cabinet boxes directly into wall studs. |
| 4. Deck the Top | Cover top of all cabinets | 3/4-inch Baltic birch sheet | Distributes weight evenly across cabinet walls. |
Assembly Steps
- Build a rectangular box frame using 2×4 lumber laid on edge. Level this frame on your floor. Fasten it into floor joists and wall studs.
- Position the frame 2 to 3 inches back from the cabinet front face. This creates a recessed toe-kick.
- Remove the thin pressed-cardboard back panel from each cabinet box. Replace it with 1/2-inch plywood. Secure the plywood directly to your wall studs with heavy construction screws.
- Join the cabinet boxes together through their side walls.
- Screw a continuous sheet of 3/4-inch Baltic birch plywood across the entire top. This ties the units together and prevents individual panels from sagging.
Ergonomic Rules: Measurements That Ensure Comfort
The most frequent DIY mistake is building a wooden bench to standard chair height (18 inches) and then adding a 4-inch cushion. This places the seat at 22 inches, wedging your legs against the table apron.
Custom furniture makers determine final seat height by calculating foam compression under adult weight.
The Compressed Seat Height Formula
Aim for an 18 to 18.5-inch finished height with the cushion compressed.
High-density foam compresses about 35% under standard adult weight. A 4-inch cushion compresses by 1.4 inches, leaving 2.6 inches of firm padding.
Subtract 2.6 inches from your 18-inch goal:
- Target compressed seat height: 18.0 inches
- Compressed cushion thickness: 2.6 inches
- Required wooden base height: 15.4 inches
Your wooden structure, including the 2×4 base, the cabinet box, and the top plywood lid, must measure approximately 15.4 inches above the finished floor.
Banquette Clearance Guidelines
| Measurement Area | Minimum Standard | Custom Build Target | Functional Benefit |
|---|---|---|---|
| Table-to-Bench Overlap | 1.5 inches | 2 to 4 inches | Keeps diners from leaning forward while eating. |
| Seat-to-Apron Space | 9 inches | 10 to 12 inches | Gives thighs proper clearance beneath the table. |
| Usable Bench Depth | 18 inches | 19 to 20 inches | Provides back support without slouching. |
| Width per Seated Adult | 24 inches | 28 to 30 inches | Prevents crowded shoulders during meals. |
| Main Walkway Clearance | 32 inches | 36 to 42 inches | Keeps kitchen traffic paths clear. |
| Picture Ledge Height | 54 inches | 57 to 60 inches | Prevents heads from bumping wall displays. |
Hardware and Storage Selection
Concealed bench storage makes good use of tight kitchen spaces. Choosing the wrong hardware will cause daily annoyances.
Avoid Push-to-Open Latches
Many online tutorials recommend push-to-open latches for a smooth, handle-free look. Avoid these in dining banquettes.
Diners pull their feet back while eating. Their heels hit the cabinet door, triggering the internal spring. The drawer pops open and hits their legs during dinner.
Install soft-close undermount drawer slides instead. Pair them with low-profile metal edge pulls along the top of each drawer.
Use Gas Struts on Lift-Up Seats
If a nearby table stops you from using pull-out drawers, use a lift-up top.
Never install a lift-up bench lid with standard hinges alone. A heavy 3/4-inch plywood top can pinch fingers and slam shut unexpectedly. Install pneumatic gas struts rated between 100N and 150N. These struts support the weight of the wood, hold the lid open at 90 degrees, and close quietly.
Commercial-Grade Upholstery and Cushion Standards
Craft store foam flattens within a year of daily use. For cushions that hold their shape and support your posture, buy materials that match commercial standards.
Cushion Specifications
- Foam Density (PCF): Density determines how long foam lasts. Choose High-Resilience (HR) polyurethane foam rated at 2.8 PCF or higher. Foams rated under 2.0 PCF break down quickly, leaving you sitting on the hard plywood base.
- Firmness (ILD): Indentation Load Deflection measures firmness. For a dining cushion 3 to 4 inches thick, choose an ILD rating between 35 and 45 (Medium-Firm). Softer foam lets you sink directly onto the hard wood.
- Dacron Batting: Wrap the bare foam core in 0.75-inch bonded polyester Dacron batting. The batting rounds out the edges, fills the fabric corners, and stops the cover from wrinkling.
Performance Fabric Comparison
| Fabric Brand | Material Base | Stain and Liquid Defense | Double Rub Rating | Best Dining Room Application |
|---|---|---|---|---|
| Crypton | Cotton and Polyester | Integrated moisture-barrier backing | 50,000 to 100,000+ | High-traffic dining areas with children and pets. |
| Revolution | Solution-Dyed Olefin | Inherently stain-resistant, bleach-safe | 30,000 to 50,000 | Eco-friendly homes needing chemical-free fabric. |
| Sunbrella | Solution-Dyed Acrylic | UV pigments locked in fiber core | 30,000 to 50,000 | Sunny breakfast nooks with direct window exposure. |
| Marine Vinyl | Coated Polyester | Non-porous waterproof outer skin | 100,000+ | Casual breakfast corners needing immediate wipe-down. |
Table and Lighting Selection
Even a well-built banquette will feel awkward if you pick the wrong table or position lighting incorrectly.
The Pedestal Table Requirement
Do not use a standard four-legged table with a built-in bench.
Diners must slide sideways to get into a banquette. Corner table legs block the entryway, forcing people to bang their knees and shins against the table frame.
- Round Pedestal Tables: Best for square spaces and small L-shaped benches. The round edge sweeps away from the seat, making it easy to sit down and slide out.
- Oval or Capsule Tables: Ideal for long wall benches. Rounded ends protect hips from sharp corners.
- Inset Trestle Tables: For benches over 6 feet long, use a trestle table. Make sure the table posts sit at least 12 inches inside the outer edge for legroom.
Positioning the Overhead Light
Electricians typically put ceiling light boxes in the geometric center of the room. When you put a banquette in the corner, that junction box sits in the wrong spot, leaving the table in shadow.
Center your light fixture over the middle of your table top, not the bench or the room floor.
Hang the bottom rim of your pendant light 30 to 34 inches above the table surface. This lights the dining area clearly without blocking face-to-face sightlines. If moving the ceiling box is not an option, use a swag hook to loop the cord over the table center.
Common Mistakes That Ruin the Custom Look
- Leaving Raw Gaps Uncaulked: Real built-in millwork blends directly into the wall. Apply paintable acrylic caulk along every joint between the wood trim and drywall before painting.
- Skipping Table Overlap: Setting a table flush with the front edge of the bench forces people to lean forward to eat. Make sure your tabletop overlaps the bench seat by 2 to 4 inches.
- Using High-Back Dining Chairs: Tall, solid chairs on the open side of the table cut off the nook from the rest of the kitchen. Choose low-back spindle, wishbone, or caned chairs to keep sightlines clear.
- Mounting Shelves Too Low: Hanging display ledges at eye level means seated people hit their heads when leaning back. Hang wall ledges 57 to 60 inches above the floor.
Frequently Asked Questions
What is the ideal height for a breakfast nook bench with a cushion?
The finished height with the cushion compressed should sit between 18 and 18.5 inches above the floor. If you use a 4-inch firm foam cushion, build your wooden bench base to 15.4 inches. This leaves proper legroom under standard 30-inch tables.
How much should a dining table overlap a banquette bench?
The table should overlap the bench seat edge by 2 to 4 inches. Because banquette benches are fixed in place, this overlap allows diners to sit upright and eat without straining their lower backs.
Can you use standard kitchen base cabinets for a breakfast nook bench?
Standard kitchen base cabinets do not work for seating because they stand 34.5 inches tall without counters. Built-in dining benches require low 15-inch-high cabinets mounted on a low 2×4 base.
What is the best table shape for a corner L-shaped banquette?
A round or oval pedestal table is best for an L-shaped corner banquette. Center pedestals remove table legs that block access to the bench. The rounded edges also provide extra hip clearance when sliding in.
How deep should a breakfast nook bench be?
A wooden bench should measure 20 to 22 inches deep if you plan to use a padded backrest cushion. This leaves an ergonomic usable seat depth of 18 to 19 inches, which supports your thighs properly.
Building a custom-style breakfast nook comes down to careful carpentry and accurate clearances rather than major demolition. Building a recessed toe-kick, reinforcing stock cabinets with plywood, using 2.8+ PCF foam, and overlapping your pedestal table by 3 inches delivers the permanence of high-end millwork at a fraction of the price. Check your compressed cushion heights, run your room baseboards across the front plinth, and caulk all joints flush before applying paint.