7 Sophisticated DIY Easter Decorations That Will Elevate Your Entire Home
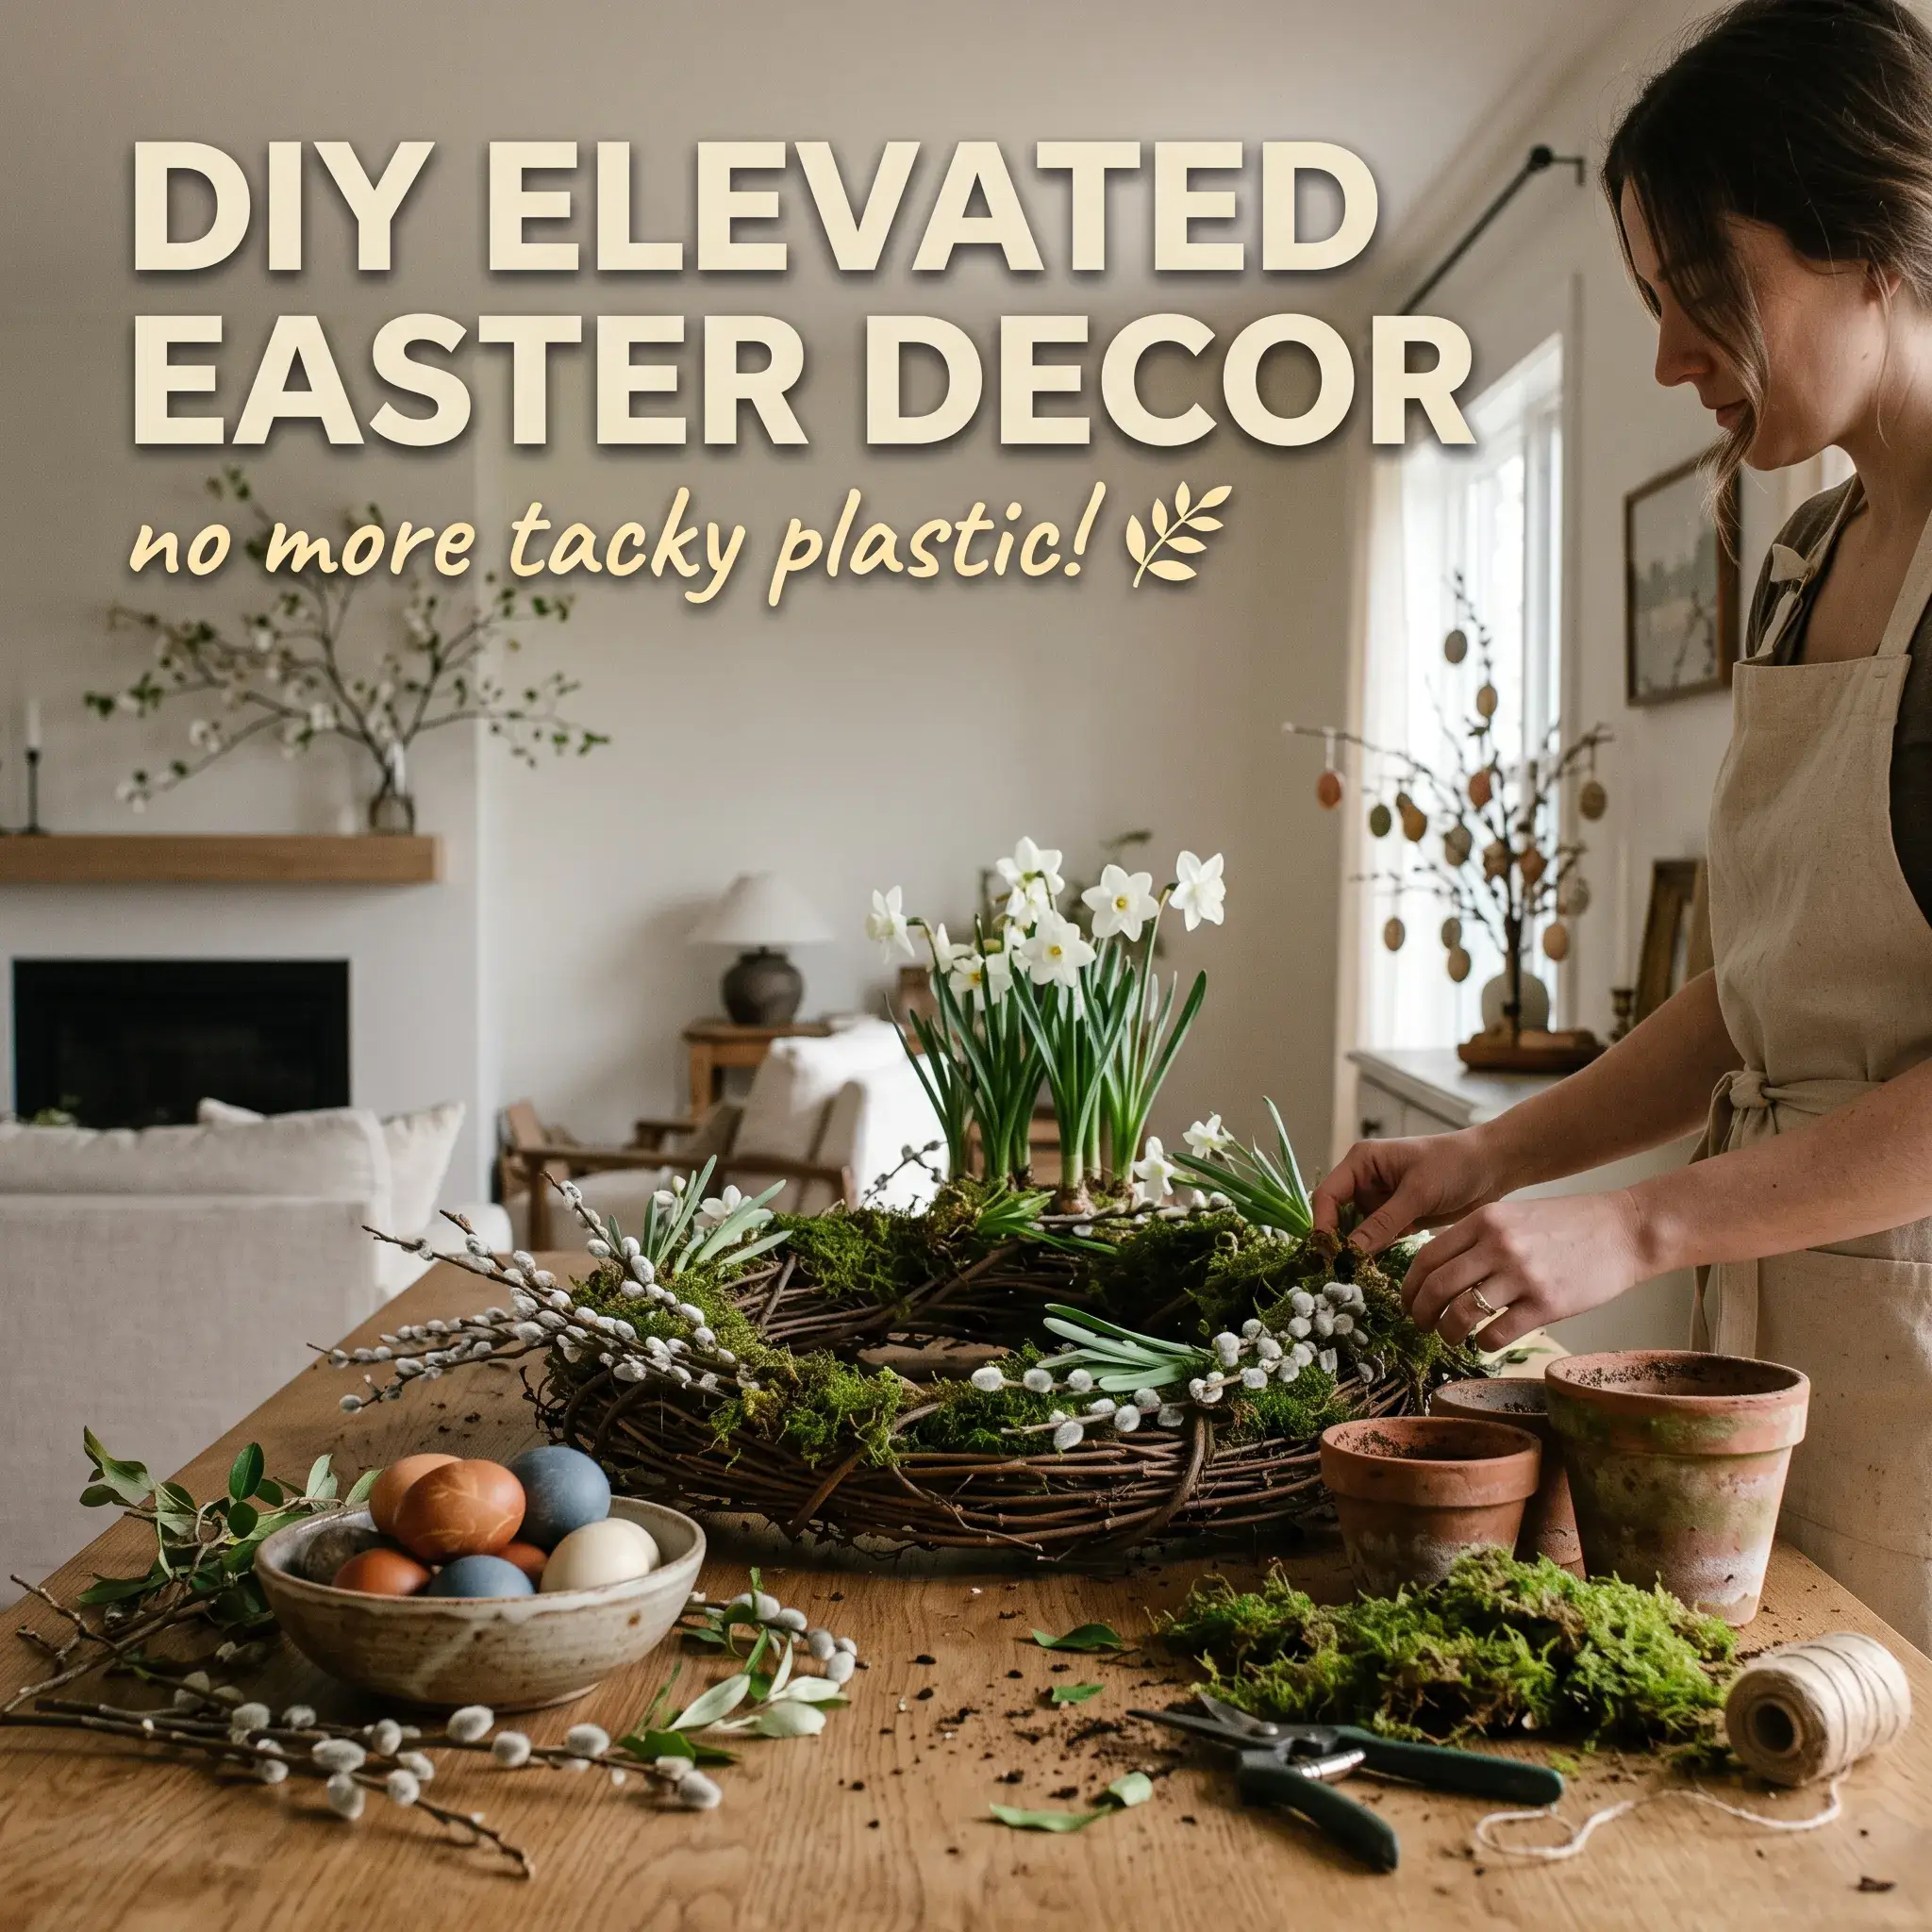
Easter decorating often goes wrong when rooms fill with neon grass, plastic eggs, and cheap pastel garlands. These synthetic accents clash with warm, carefully designed homes. You do not have to turn your living space into a kindergarten classroom to celebrate the spring season.
True seasonal design draws inspiration from European country estates and calm Nordic interiors. It relies on fresh garden clippings, living rooted bulbs, and tactile textures like raw flax linen, aged clay, and pure beeswax.
Here are seven practical, designer-level DIY projects you can make to bring quiet, organic beauty into your home this spring.
7 Elevated DIY Easter Decor Projects for a Refined Home
1. The Living Spring Bulb and Grapevine Wreath
Replace artificial door wreaths with living plants that grow throughout the season. This wreath uses live bulbs wrapped in damp moss and secured along a wild grapevine form. The bulbs root into the vines and open gradually over three weeks.
- Step 1: Submerge sheet moss in water for ten minutes. Squeeze out the excess moisture until the moss feels damp.
- Step 2: Unpot dwarf spring bulbs. Gently shake off loose soil while keeping the primary root clusters intact.
- Step 3: Wrap clusters of two or three bulbs in damp moss to create secure root pouches.
- Step 4: Fasten the moss pouches along the lower curve of an 18-inch natural grapevine wreath using floral bind wire.
- Step 5: Slide 18-inch fresh pussy willow branches into the vine twists behind the bulbs. Let them fan outward naturally.
- Maintenance Tip: Spray the moss base with fresh water every morning to keep the bulbs hydrated.
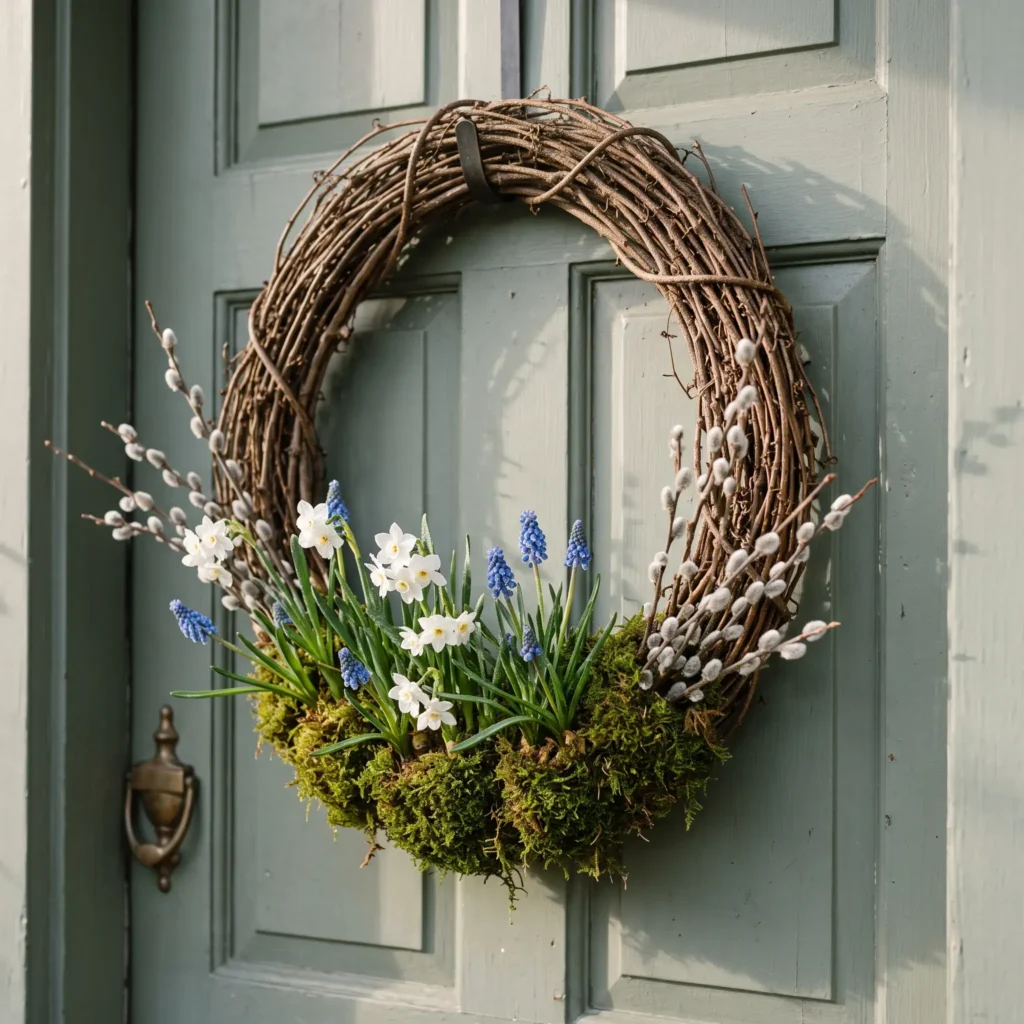
Products and Materials Used:
- 18-inch natural grapevine wreath base
- Live potted dwarf narcissus (Tete-a-Tete variety)
- Live potted grape hyacinths (Muscari armeniacum)
- Natural green sheet moss
- Fresh cut pussy willow branches
- 20-gauge paper-covered floral bind wire
- Glass fine-mist spray bottle
2. The Nordic Botanical Moss Meadow Runner
Tall floral vases block sightlines across a dining table. This low-profile living runner sits below eye level, running down the center of your table like a wild forest floor.
- Step 1: Lay a washed, unpressed oatmeal linen runner down the center of your table.
- Step 2: Place a clear silicone mat beneath the runner to protect your wood table from moisture.
- Step 3: Place shallow terracotta saucers at uneven intervals down the center. Set rooted, sprouting dwarf bulbs into the saucers.
- Step 4: Tear fresh cushion moss and preserved sheet moss into loose clumps. Pack the moss across the saucers until all container edges disappear.
- Step 5: Set solid brass candlesticks into open spaces within the moss. Insert unscented ivory beeswax tapers.
- Step 6: Place natural speckled quail eggs in small groups of two or three inside the moss hollows.
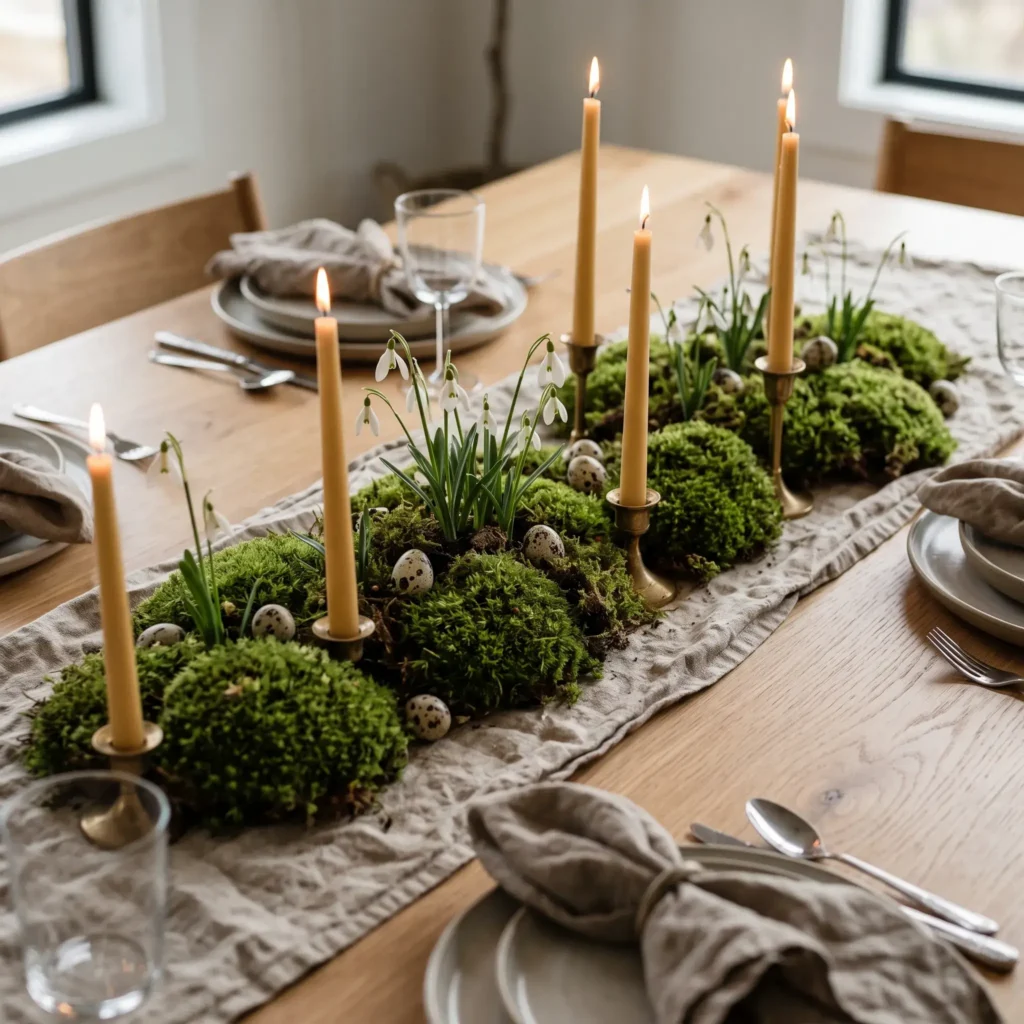
Products and Materials Used:
- Raw-edge oatmeal flax linen runner
- Clear silicone table protector mat
- Potted sprouting white snowdrops or miniature paperwhites
- Fresh living cushion moss (pillow moss)
- Preserved forest sheet moss
- Solid unlacquered brass candleholders in staggered heights
- Hand-dipped pure beeswax taper candles
- Blown natural quail eggs
Check out more Styling Ideas
3. The German Ostereierbaum (Architectural Easter Tree)
The traditional German Easter egg tree creates a striking vertical display on an entryway console or credenza. Rather than using flimsy plastic craft branches, this project uses heavy garden cuttings anchored in vintage stoneware.
- Step 1: Choose a heavy vintage stone crock, ironstone pitcher, or ceramic urn.
- Step 2: Fill the bottom half of your crock with clean pea gravel. The weight keeps the top-heavy branches from tipping over.
- Step 3: Push three to five tall architectural branches deep into the gravel. Curly willow, budding birch, or flowering dogwood work best.
- Step 4: Fasten real blown eggshells using an interior wooden toggle instead of glued exterior caps. Tie a thin velvet ribbon around a half-inch splinter of a bamboo skewer. Push the skewer through the top hole of the egg. The wood flips horizontal inside the shell, locking the ribbon in place.
- Step 5: Hang the eggs along the inner branch joints where the wood is thick enough to support them without drooping.
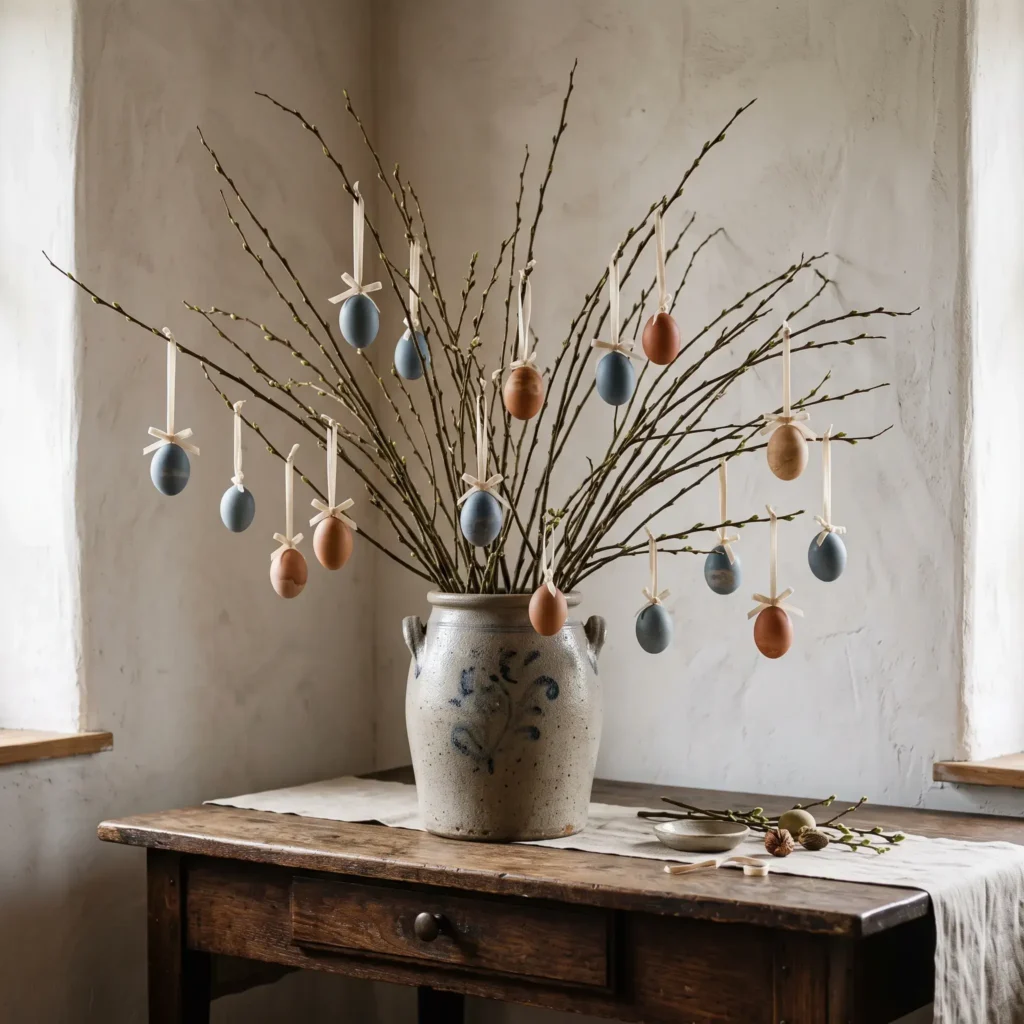
Products and Materials Used:
- Antique salt-glazed stoneware crock or heavy earthenware jug
- Washed pea gravel or river stones
- Tall fresh curly willow or blooming quince branches (3 to 4 feet tall)
- Hand-blown chicken or duck eggs dyed in botanical shades
- 1/8-inch silk velvet ribbon in warm taupe and cream
- Thin bamboo skewers cut into half-inch splinters
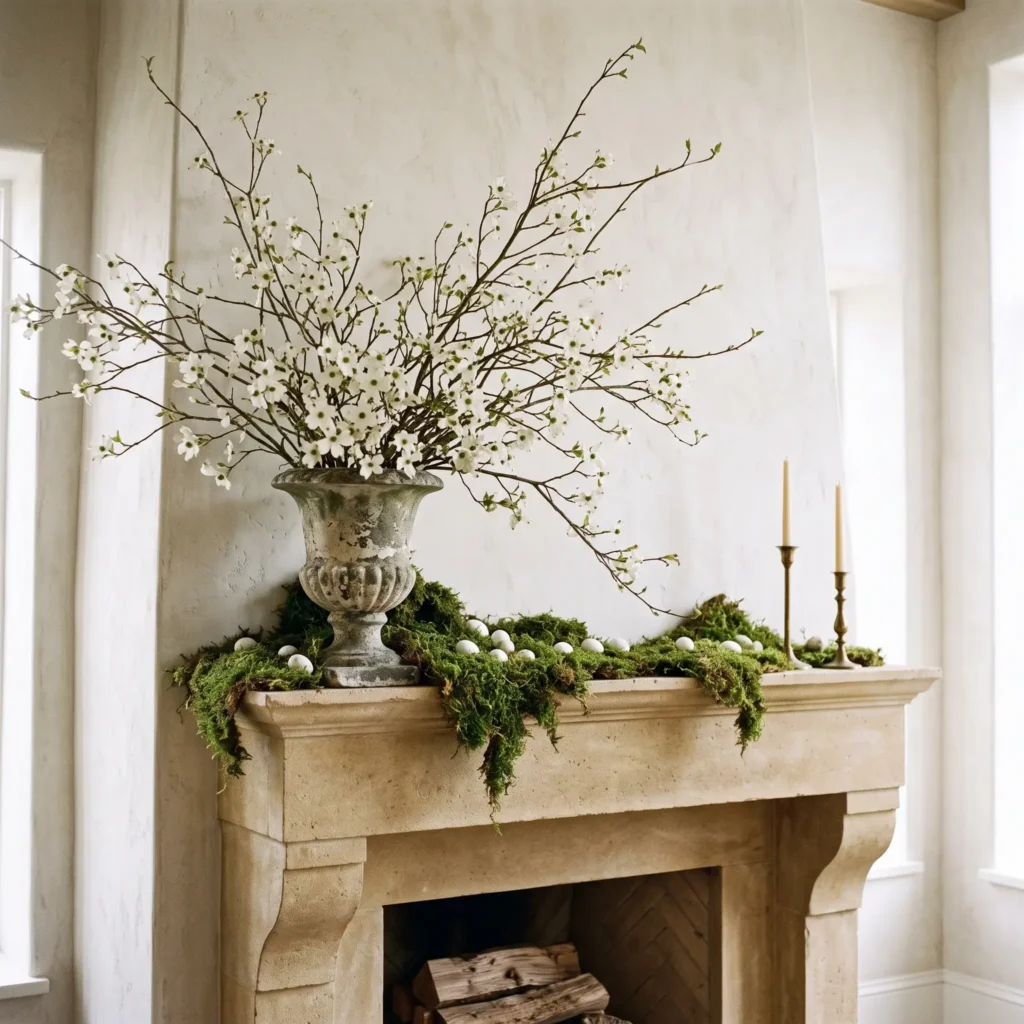
4. Asymmetrical Wild Dogwood and Stone Mantel
Symmetrical mantel displays often look rigid and formal. This wild branch installation places most visual weight on one side and tapers down the shelf, creating an organic focal point.
- Step 1: Set a heavy stone urn or ceramic confit pot on the left side of your fireplace mantel.
- Step 2: Form a piece of coated chicken wire into a loose ball. Place it inside the urn, then fill the vessel with fresh water.
- Step 3: Cut flowering dogwood or cherry blossom branches to twice the height of the urn. Cut short vertical slits into the base of each woody stem to help them draw water.
- Step 4: Push the branches through the chicken wire at dynamic angles so they sweep upward and outward across the wall.
- Step 5: Spread preserved sheet moss along the mantel shelf. Slip small cardboard wedges under the moss to create natural mounds.
- Step 6: Balance the arrangement by placing two slim brass candle tapers on the far right side of the mantel.
Products and Materials Used:
- Weathered stone urn or ceramic confit pot
- 2-inch galvanized chicken wire
- Fresh blooming dogwood, cherry blossom, or forsythia branches
- Preserved forest sheet moss
- Matte ceramic or blown goose eggs in pale ivory
- Slender unlacquered brass taper candleholders
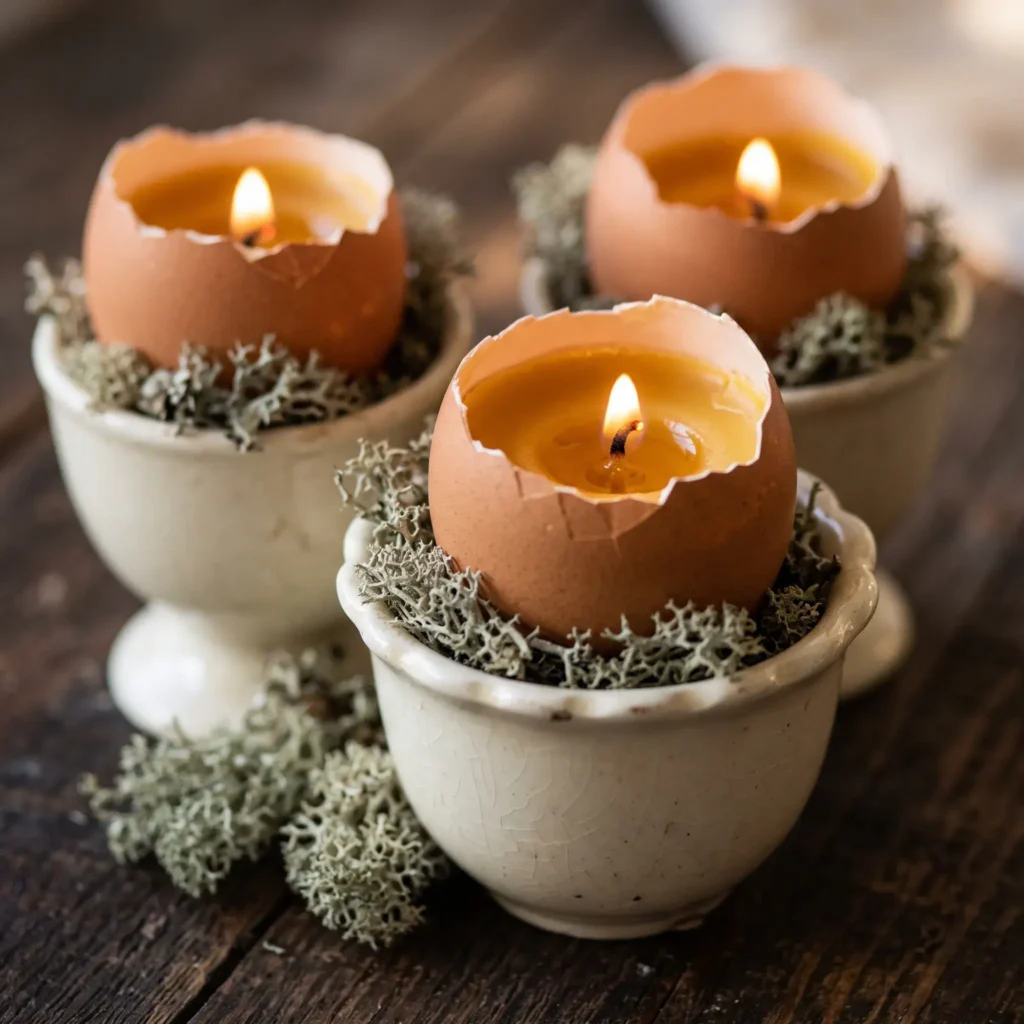
5. Hand-Poured Eggshell Beeswax Votives
These miniature candles convert cracked kitchen eggshells into warm accent lights for coffee tables, sideboards, or place settings.
- Step 1: Crack fresh brown or white farm eggs near the top third. Empty the yolks for cooking and wash the inner shells with warm soapy water.
- Step 2: Dry the hollow shells in an oven at 200°F (95°C) for twenty minutes to eliminate remaining moisture.
- Step 3: Fasten a small cotton wick to the inside bottom of each shell using a drop of melted wax.
- Step 4: Melt pure yellow beeswax pellets in a heat-safe pitcher over a double boiler.
- Step 5: Pour the melted wax into the shells, stopping one-quarter inch below the rim. Allow the wax to cool at room temperature.
- Step 6: Display the finished votives in vintage porcelain egg cups or nestle them into a shallow wooden dish lined with reindeer moss.
Products and Materials Used:
- Clean halved brown and white farm eggshells
- 100% pure yellow beeswax pellets
- Pre-waxed cotton wicks with metal base tabs (small size)
- Preserved silver reindeer moss
- Vintage porcelain egg cups or a shallow hand-carved wood tray
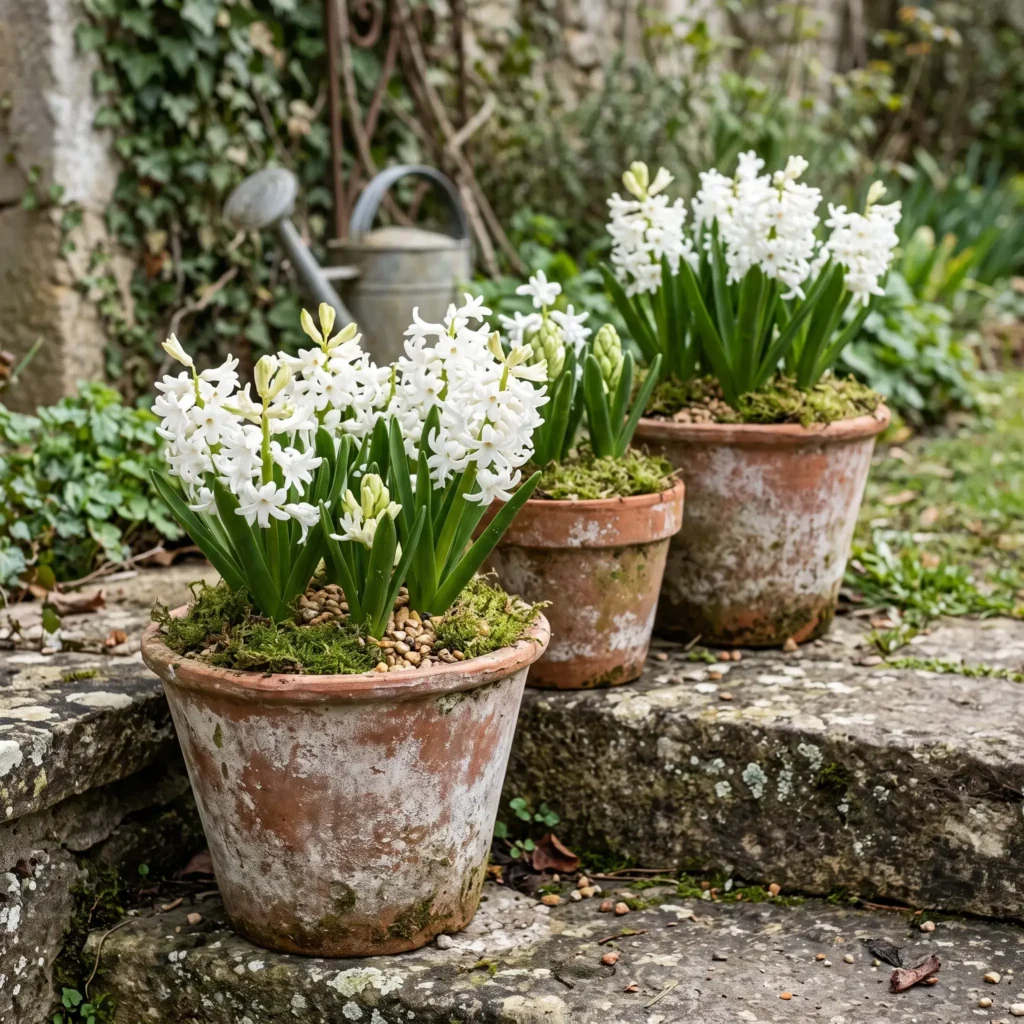
6. Aged French Terracotta Bulb Planters
New orange clay pots often look stark and unfinished. You can age plain clay pots in an afternoon, giving them the chalky, weathered surface of French garden antiques.
- Step 1: Submerge raw terracotta pots in a bucket of tap water for one hour. Saturated clay will not pull moisture out of your paint wash too fast.
- Step 2: Blend two tablespoons of garden lime or white chalk paint with three tablespoons of water to form a thin wash.
- Step 3: Paint the mixture onto the pots using a coarse bristle brush. Dab the surface with a damp cloth to build heavy mineral texture in the crevices.
- Step 4: Rub raised edges with fine-grit sandpaper to show hints of warm clay below the chalk finish.
- Step 5: Plant white pearl hyacinths into the aged pots. Cover the potting soil with washed pea gravel and fresh moss.
- Step 6: Group the pots in clusters of three along your front steps or down a sideboard.
Products and Materials Used:
- Standard 4-inch and 6-inch raw terracotta pots with matching saucers
- Agricultural garden lime or matte white chalk furniture paint
- Coarse natural bristle utility brush
- 150-grit sandpaper sheet
- Live potted white pearl hyacinths or paperwhites
- Fine river gravel and natural sheet moss
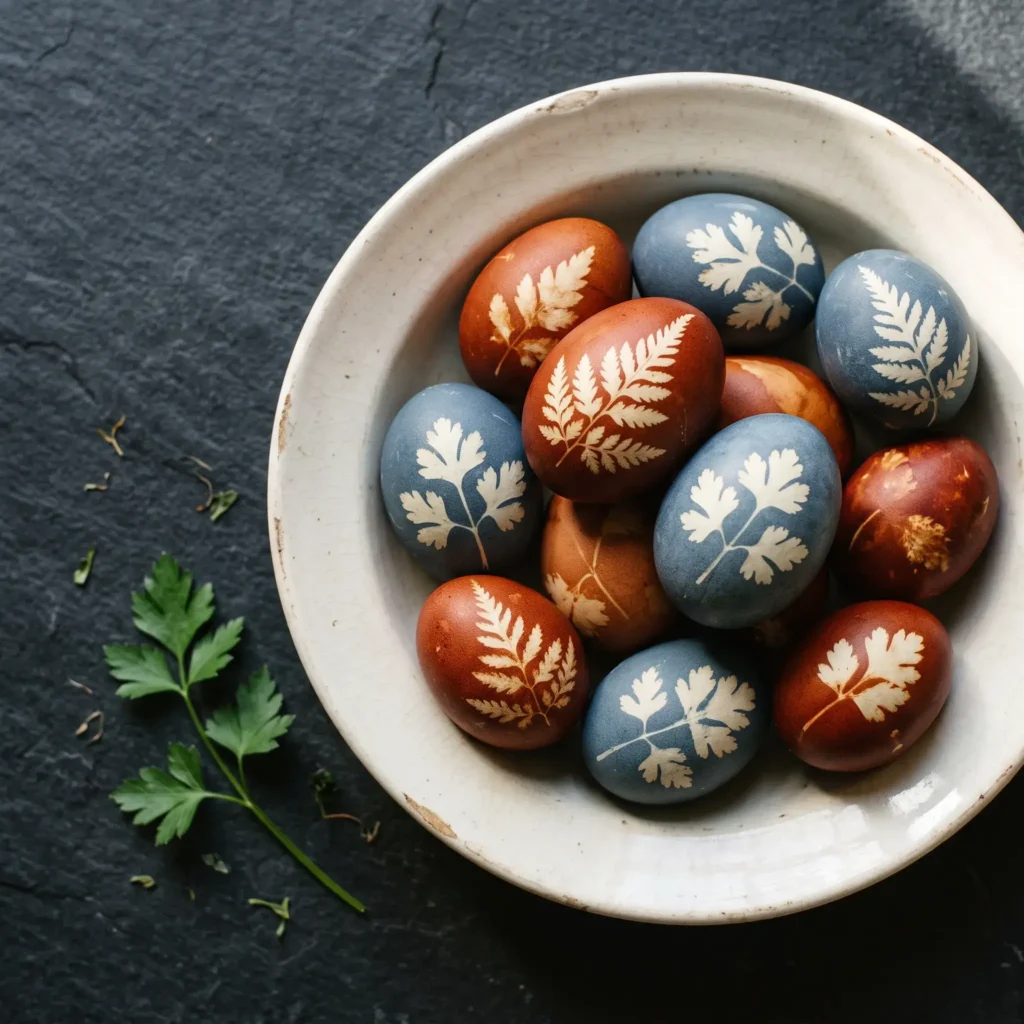
7. Botanical Leaf-Resist Naturally Dyed Eggs
This traditional European method uses fresh garden leaves to print detailed botanical silhouettes onto eggs using plant-based dyes. The finished eggs look like collected stone specimens rather than craft kits.
- Step 1: Gather small, flat leaves with sharp outlines, such as flat parsley, wild clover, or small fern fronds.
- Step 2: Wet a leaf with water and press it flat against the shell of a clean blown egg.
- Step 3: Pull a section of sheer nylon pantyhose tightly over the egg, holding the leaf flat against the surface. Tie the nylon closed with kitchen string.
- Step 4: Place the wrapped egg into a strained botanical dye bath made from boiled onion skins or red cabbage.
- Step 5: Keep the egg submerged in the dye bath for two to four hours inside your refrigerator.
- Step 6: Remove the egg, cut away the nylon, and peel off the leaf. A crisp white botanical print remains against the warm, dyed shell.
- Step 7: Rub the dried shell with a single drop of olive oil on a clean cloth to create a soft satin finish.
Products and Materials Used:
- Blown white and brown chicken eggs
- Fresh flat parsley, wild clover, or maidenhair fern cuttings
- Sheer nylon stockings cut into 4-inch sections
- Kitchen twine
- Natural yellow onion skin or cabbage dye liquid
- Pure olive oil for polishing
- Vintage creamware or stoneware display bowl
Archival Egg Preparation: How to Blow Shells That Last for Decades
Blown eggs only rot or smell bad when leftover yolk and whites dry inside the shell. Follow this clean three-step method to preserve your real eggshells for decades.
- Clean Piercing: Set a raw egg on a folded cloth. Buff the top and bottom with a nail file to remove the slick outer coating. Pierce a 1.5-millimeter hole at the narrow top with a craft awl. Pierce a 2.5-millimeter hole at the wider bottom base.
- Air Clearing: Never blow through an egg using your mouth. Push a needle through the bottom hole to puncture the inner yolk sac. Then press the tip of a blunt-tip kitchen syringe over the top hole and push air inside. The air pressure forces the yolk and whites out smoothly through the bottom hole into a clean bowl.
- Flushing and Heat Curing: Flush the empty shell twice with warm water and white vinegar to clear out inner proteins. Shake gently and let the water drain. Place the clean shells on a parchment-lined baking sheet and bake them at 200°F (95°C) for twenty minutes. The heat dries out the inner membrane, kills all bacteria, and eliminates odors permanently.
Kitchen-Crafted Botanical Dye Formulas
Artificial dye tablets produce loud, synthetic colors. Natural kitchen scraps release plant pigments that soak directly into real calcium eggshells, creating muted colors that complement your home decor.
Always simmer the plant materials in water for thirty minutes, strain out the solids, and stir in white vinegar. The mild acid opens the pores of the calcium shell, allowing the plant pigments to take hold.
| Desired Color | Plant Ingredient | Water Ratio | White Vinegar | Steep Duration | Resulting Finish |
|---|---|---|---|---|---|
| Warm Sienna and Terracotta | 4 cups yellow onion skins | 4 cups water | 2 tablespoons | 2 to 4 hours | Warm polished horn, rich stone |
| French Slate Blue | 1 head red cabbage (chopped) | 5 cups water | 2 tablespoons | 6 to 12 hours (chilled) | Chalky duck-egg blue |
| Muted Botanical Olive | 3 tbsp ground turmeric + 2 cups boiled cabbage liquid | 4 cups water | 2 tablespoons | 1 to 2 hours | Soft celadon, dried herb green |
| Dusty Rose and Plum | 3 large red beets (grated) | 4 cups water | 2 tablespoons | 2 to 3 hours | Washed terracotta pink, blush |
| Aged Parchment | 6 dark black tea bags | 3 cups water | 1 tablespoon | 1 to 3 hours | Aged bone, soft ivory |
Sustainable Floristry: Ditching Green Floral Foam
Traditional green floral foam breaks down into microplastics and toxic chemical residues that contaminate water when rinsed down household drains. Professional florists rely on clean, reusable mechanics that provide far stronger support for heavy woody branches.
- Galvanized Chicken Wire Pillows: Cut an 18-inch square of poultry chicken wire. Fold the raw edges inward and shape the wire into a loose, layered cage that fits inside your vase. The wire holds heavy branches at wide, dramatic angles without crushing delicate stems.
- Solid Brass Floral Frogs (Kenzans): These heavy metal disks hold rows of sharp vertical brass pins. Anchor one to the base of a shallow stone bowl using floral putty. Push your cut stems straight down onto the pins. They keep sparse branch arrangements standing tall in small amounts of water without bulky mechanics.
- Reusable Glass Water Tubes: When placing real flowers into dry grapevine wreaths or moss table runners, slip each stem into a small glass water tube. Hide the tube under moss clumps to keep your flowers fresh for days without spilling water onto furniture or doors.
What to Do with Living Bulbs After Easter
A well-planned seasonal project avoids landfill waste by planning for the lifecycle of your plants. Never discard live bulbs when the holiday ends.
- Keep the Foliage Green: Trim away the spent flower heads, but leave the green leaves alone. The foliage catches sunlight to generate energy, sending nutrients down into the bulb for next year.
- Slow Down Watering: Allow the soil to dry out between waterings while the leaves turn yellow and die back naturally over two to three weeks.
- Replant in Your Garden: Dig four-inch holes in your outdoor flower beds or beneath yard trees. Drop the bulbs in, cover them with garden soil, and add a thin layer of mulch. They will establish permanent roots and return to bloom in your garden every spring.
Frequently Asked Questions
How do I stop a live moss table runner from damaging wood tables?
Do not lay damp moss straight onto bare wood. Place a strip of clear silicone kitchen liner down the center of your table first. Lay your linen fabric over the liner, then place shallow terracotta saucers beneath your moss clumps. This system catches all moisture while keeping the protective barrier out of sight.
Will real blown egg decorations begin to smell over time?
Eggs only smell when yolk residue is left to rot inside the shell. Flush the inside of the shell with warm water and white vinegar to wash out leftover proteins. Bake the hollow shells in an oven at 200°F (95°C) for twenty minutes. This dries out the inner membrane completely, eliminating bacteria and odors permanently.
Can I leave this decor up after Easter Sunday?
Yes. These projects rely on natural botanical elements rather than holiday novelty items. When Easter weekend passes, pack away the hanging eggs and leave the flowering dogwood branches, aged terracotta pots, and moss runners in place. They work as fresh spring decor through late May.
How often should I water a living door wreath?
Check the moss backing once a day. Lightly spray the moss pouches with a water bottle every morning to keep the bulb roots damp. If your front door receives harsh afternoon sun, take the wreath down every five days and set the base in a shallow tray of water for ten minutes to rehydrate the roots.
Creating a welcoming spring home does not require plastic novelty items or disposable craft clutter. By working with living bulbs, garden cuttings, raw linen, and natural minerals, your seasonal decor honors the natural growth of early spring while keeping your living spaces calm, intentional, and refined.