7 Creative and Spooky DIY Halloween Costumes for Adults
Store-bought costumes are overpriced and flimsy. You spend sixty dollars on thin polyester that rips before midnight. Basic homemade alternatives often look cheap and rushed.
True scares do not rely on rubber masks. They come from distorted silhouettes, optical tricks, and believable physical textures.
Here are seven high-impact costume builds designed specifically for adults. Each project includes step-by-step assembly instructions, a full supply list, party wearability ratings, and photo references.
1. The Head-in-a-Jar Cantilever Rig
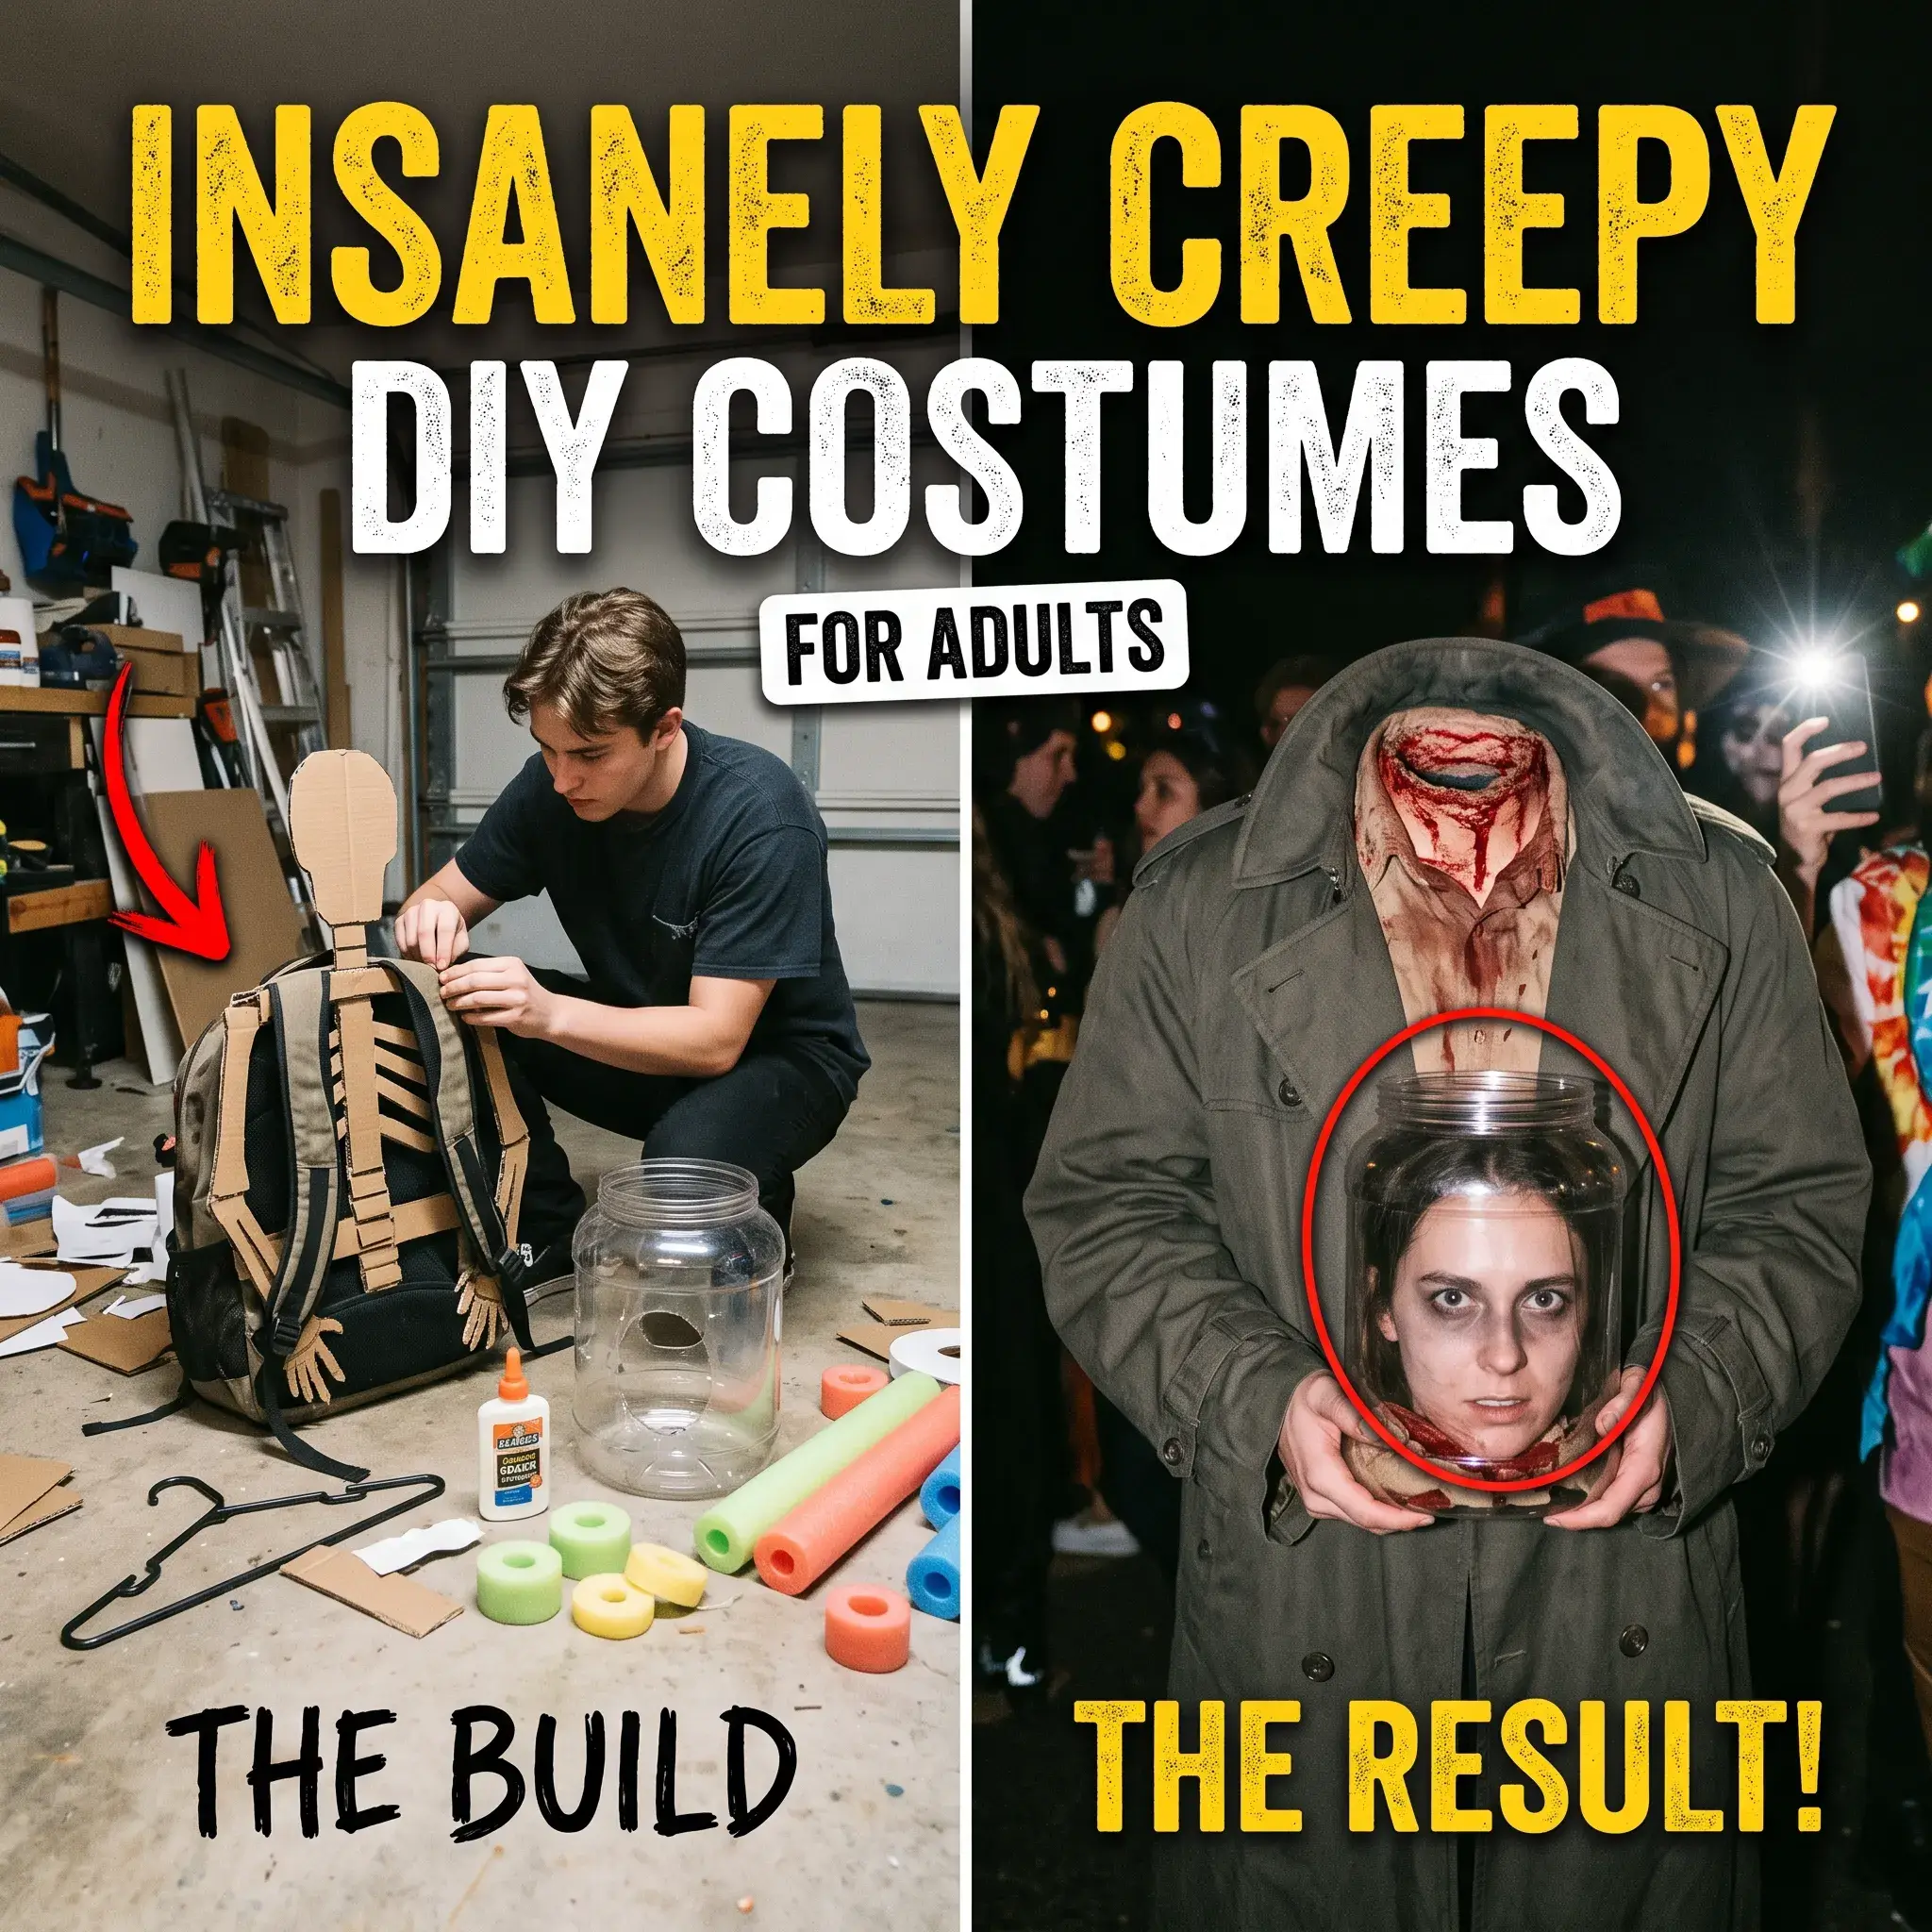
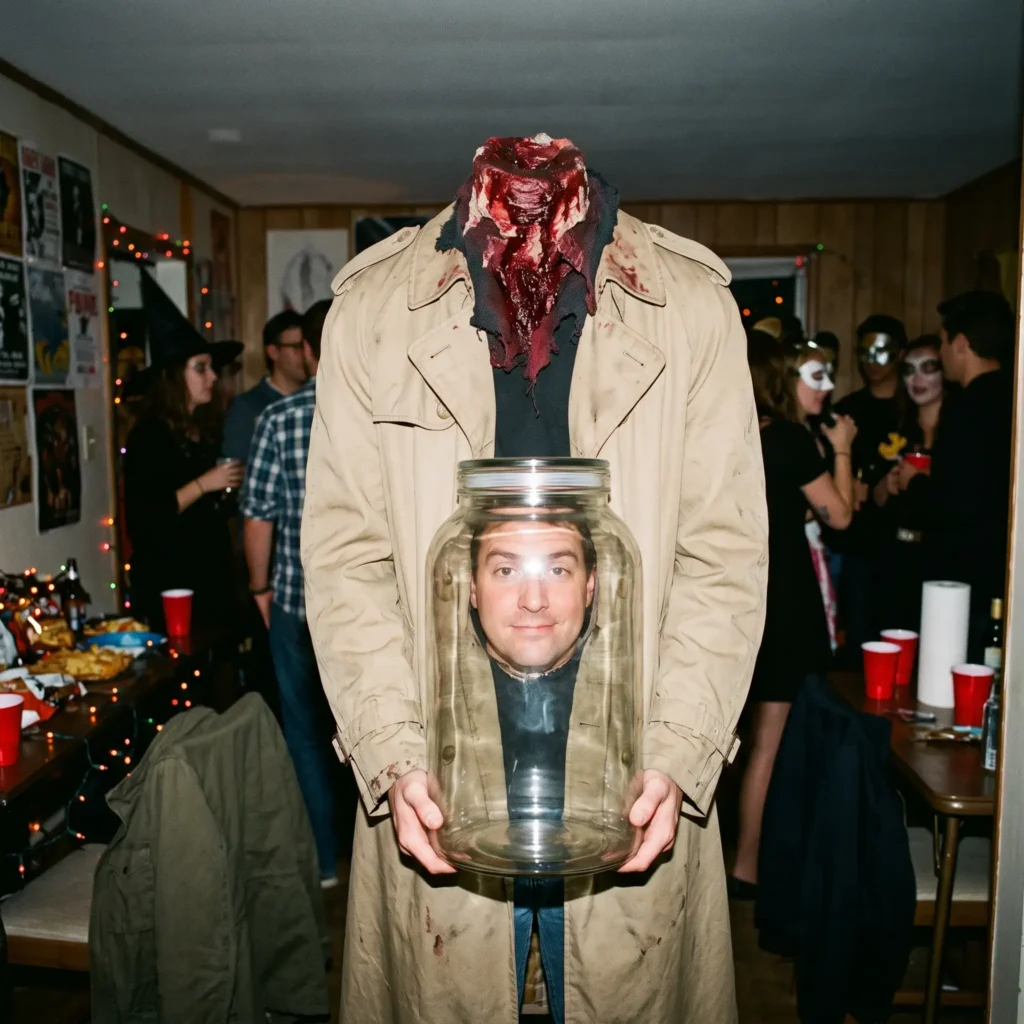
This build creates the optical illusion of a headless torso carrying your severed head in a glass jar. Most online guides tell you to stuff a backpack with newspaper. That collapses within an hour. This version uses an internal frame to keep the shoulders stable all night.
How It Works
A rigid plastic spine transfers the weight of the false shoulders down to your hips. Your real head sticks out through the open rear of a modified food container. An oversized coat hides the frame and your real shoulders.
Step-by-Step Instructions
- Bolt a sheet of corrugated plastic to the frame of an old daypack. Extend it fourteen inches above your head.
- Fasten a curved wooden coat hanger to the top of the plastic sheet with heavy zip ties.
- Glue split pool noodles over the hanger to build realistic shoulder slopes.
- Cut away the rear half of a clear plastic snack barrel with a utility knife.
- Slit clear vinyl tubing along one side. Press it over the cut plastic edges to protect your neck from cuts.
- Drill small ventilation holes in the lid of the jar.
- Put on the pack and slide your head into the jar from the back.
- Drape an oversized thrift-store trench coat over the false shoulders.
- Remove the chest buttons on the coat and install Velcro strips. This creates an emergency escape latch if you trip or get hot.
Materials List
- Small daypack with a chest strap
- Corrugated plastic board, 18 by 24 inches
- Wooden coat hanger
- Heavy-duty zip ties
- Standard foam pool noodle
- Clear plastic wide-mouth snack barrel
- Clear vinyl tubing, 3/8-inch diameter, 3 feet
- Thrifted oversized trench coat or lab coat
- Heavy-duty peel-and-stick Velcro tape
Wearability Check
- Build Time: 5 hours
- Estimated Cost: $25 to $35
- Mobility: Sitting in deep chairs is difficult.
- Drinking: Requires a flexible straw.
- Vision: Clear forward sight, but your peripheral vision is limited.
2. The Living Monochrome 1940s Noir Specter
This concept removes every trace of color from your body. You step into a room looking like an analog black-and-white film frame. It relies on value matching rather than simply painting your skin stark white.
How It Works
Pure black clothing absorbs too much light and looks like modern stage wear. Vintage wool patterns disperse light evenly across gray values. Water-activated slate paint flattens your skin without the greasy shine of cheap costume makeup.
Step-by-Step Instructions
- Wash your face with an oil-free cleanser to remove skin oils.
- Sponge water-activated matte slate gray body paint over your face, neck, and ears. Avoid oil-based grease paint because it reflects light.
- Brush dark charcoal powder under your cheekbones, down the sides of your nose, and into your eye sockets.
- Dust matte white powder along your nose bridge and brow bones to mimic vintage studio lighting.
- Dull your natural lip color with a gray cosmetic pencil.
- Spray your hair with matte black temporary color spray.
- Wear vintage wool garments with houndstooth, herringbone, or tweed patterns. These textured weaves scatter light like classic black-and-white film stock.

Materials List
- Water-activated cake makeup in slate gray
- High-density makeup sponges
- Pressed charcoal powder or matte dark gray eye shadow
- Matte white highlight powder
- Gray lip liner pencil
- Temporary black hair color spray
- Vintage gray tweed suit or patterned wool dress from a thrift store
Wearability Check
- Build Time: 2 hours for makeup application
- Estimated Cost: $20 to $40
- Mobility: Full normal movement.
- Drinking: Use a straw to protect your lip makeup.
- Vision: Unrestricted.
Check out more Halloween Decor Ideas
3. The Multi-Eyed Biblical Seraphim
Step away from traditional feathered angel wings. This cosmic horror costume uses concentric rings covered in glass eyes and geometric foam feathers. It creates a floating silhouette that unnerves viewers through unnatural geometry.
How It Works
Three wooden rings pivot on brass hardware to create a kinetic halo. Lightweight craft foam feathers resist rain and maintain crisp edges. A dark mesh veil conceals your real face while keeping your vision clear.
Step-by-Step Instructions
- Take three wooden embroidery hoops in twelve, eighteen, and twenty-four inch diameters.
- Join them at right angles using small brass pivot bolts and lock nuts so the inner rings spin freely.
- Press cabochon eye prints into small balls of foam clay and glue them along the rims of the hoops.
- Bolt the outer hoop to the brow band of an adjustable welding helmet headgear.
- Cut individual feather shapes out of 2mm EVA craft foam.
- Hot-glue the foam feathers in layered rows over three pairs of wire wing frames.
- Mount the wings to a rigid plastic backplate. Wear the plate with a four-point chest harness under a white tunic.
- Cover your real face with black scrim fabric so you can see out while appearing faceless to others.

Materials List
- Three wooden embroidery hoops in 12, 18, and 24 inch sizes
- Adjustable welding mask replacement headgear
- Small brass pivot bolts with lock nuts
- Package of glass or acrylic doll eyes, 25mm
- High-density foam clay
- Five rolls of 2mm white EVA craft foam
- Heavy aluminum armature wire, 8-gauge
- Sheet of black scrim or sheer chiffon fabric
- Plain white linen or canvas robe
Wearability Check
- Build Time: 12 to 16 hours
- Estimated Cost: $45 to $65
- Mobility: Requires wide doorways. Watch out for ceiling fans.
- Drinking: Easy, just lift the front mesh veil.
- Vision: Clear view through the black scrim cloth.
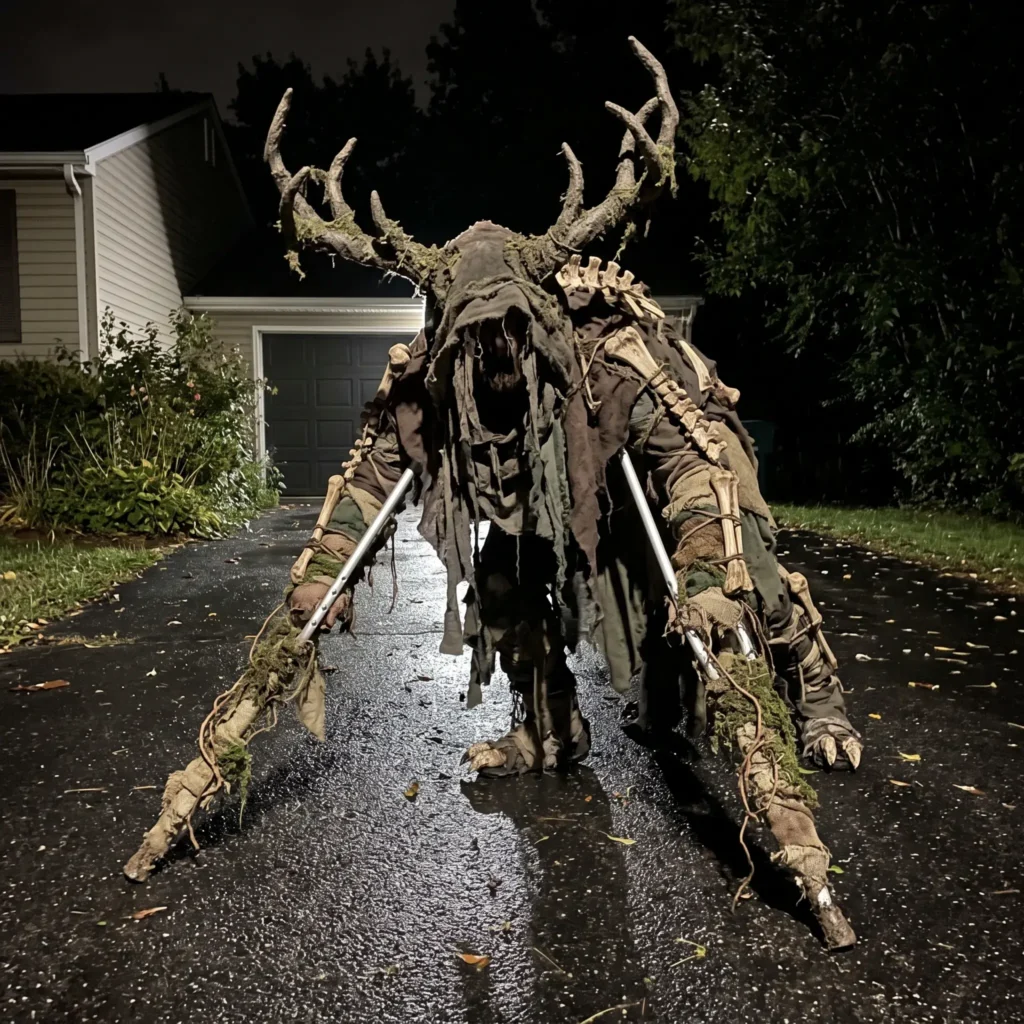
4. The Quadrupedal Bog Wendigo
This build transforms your body from two legs into a four-legged animal prowl. It uses forearm crutches and drywall stilts to disrupt the human silhouette completely.
How It Works
Drywall stilts elevate your lower body. Lengthened crutches drop your upper body into a thirty-degree forward lean. Internal wood dowels prevent the crutches from bending outward under your weight.
Step-by-Step Instructions
- Set drywall stilts to an eighteen-inch height. Adjust the calf braces directly below your knees for joint stability.
- Take a pair of medical forearm crutches and insert rigid hardwood dowels inside the aluminum tubes. This stops the metal from bowing outward under heavy load.
- Extend the bottom of the crutches with PVC pipe until your hands match your elevated hip level at a thirty-degree lean.
- Carve green upholstery foam with an electric carving knife to resemble animal tendons and leg joints.
- Glue the carved foam blocks directly around the crutches and stilt legs with contact cement.
- Shape a dorsal hump using flexible PVC pipe and attach it to an old backpack frame.
- Wrap the entire frame in strips of shredded burlap soaked in liquid latex and tea dye.
- Walk with a four-beat diagonal crawl by moving your left arm forward with your right foot, then your right arm with your left foot.
Materials List
- Commercial drywall stilts, 18 to 30 inch adjustable
- Pair of medical aluminum forearm crutches
- Hardwood dowels, 1-inch diameter
- Schedule 40 PVC pipe and couplers
- High-density upholstery foam cushions
- Contact cement
- Ten yards of rough brown burlap
- One quart of casting latex
- Wire coat hangers for antler frames
Wearability Check
- Build Time: 20 hours
- Estimated Cost: $80 to $120
- Mobility: Very demanding. Requires flat ground and a designated spotter.
- Drinking: Impossible while wearing the costume.
- Vision: Good, but you must focus directly on the floor ahead.
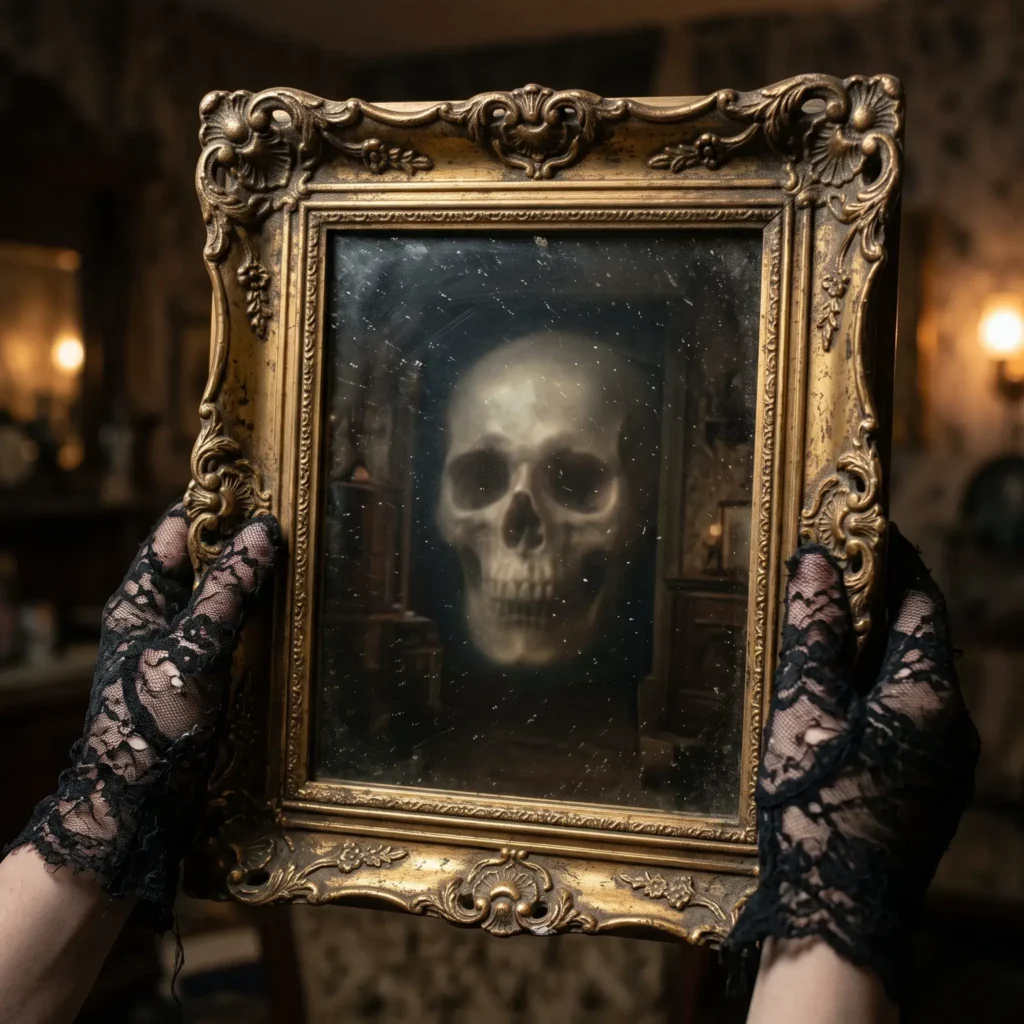
5. The Haunted Pepper’s Ghost Picture Frame
This interactive prop turns a standard thrift-store picture frame into a live optical illusion. In normal room light, it looks like an ordinary vanity mirror. When you tap a button hidden in your palm, the reflection vanishes and a glowing phantom face appears behind the glass.
How It Works
The illusion relies on balanced light levels. Unlit, the two-way mirror film reflects ambient light like ordinary glass. When interior LEDs illuminate the hidden rear portrait, the glass turns transparent.
Step-by-Step Instructions
- Remove the backing board from an eight-by-ten-inch wooden picture frame.
- Apply two-way architectural mirror film to the inside face of the frame glass using soapy water and a squeegee.
- Build a one-inch-deep spacer box out of black foam board and glue it to the back of the wood frame.
- Paint the inside of the box with ultra-matte black acrylic paint.
- Glue a high-contrast print of a decaying skull to the back panel of the box.
- Run a strip of cool-white 12-volt micro LEDs along the inside rim. Point the LEDs backward toward the print so light does not spill forward onto the glass.
- Wire the LED strip to a nine-volt battery clip and run thin speaker wire down your sleeve to a momentary push button in your palm.
- Wear Victorian mourning clothes. Offer the mirror so people check their appearance, then press the button to reveal the ghost.
Materials List
- Ornate thrift-store wooden picture frame, 8 by 10 inches
- Roll of two-way mirror window film
- Sheet of black foam board
- Ultra-matte black acrylic craft paint
- High-contrast black and white skull portrait print
- Strip of 12V cool-white micro LED ribbon
- 9-volt battery snap connector and 9V battery
- Small momentary push button switch
- Six feet of thin two-conductor wire
Wearability Check
- Build Time: 3 hours
- Estimated Cost: $20 to $30
- Mobility: Full normal mobility. You only carry a lightweight picture frame.
- Drinking: Unrestricted.
- Vision: Fully unobstructed.
6. The Decomposed Bog Banshee
This costume focuses on textile breakdown rather than heavy plastic props. It uses household acids, tea baths, and abrasive kitchen tools to make cheap fabric look like it rotted in a swamp for two centuries.
How It Works
Mechanical abrasion cuts through synthetic fabric coatings. Natural plant tannins in tea and coffee stain clean fibers unevenly. Vegetable glycerin holds moisture indefinitely to give fabric a clammy, wet appearance.
Step-by-Step Instructions
- Buy an oversized white nightgown or vintage lace dress from a thrift store.
- Rub a wire grating brush or 60-grit sandpaper along the cuffs, hem, and collar until the threads fray.
- Snip small notches along the bottom hem with scissors, then tear the cloth with your hands. Hand tearing follows the weave and leaves natural frayed margins.
- Fill a large bucket with boiling water, ten black tea bags, and four tablespoons of instant coffee.
- Bunch the dress tightly with heavy rubber bands and submerge it for forty minutes to create uneven water stains.
- Mix raw umber acrylic paint with water in a spray bottle at a one-to-five ratio. Spray the hem heavily to mimic dried road mud.
- Mix equal parts vegetable glycerin and water in a misting bottle. Spray this over the chest and shoulders. Glycerin does not evaporate, so the dress looks wet all night.

Materials List
- Thrifted white cotton nightgown or lace dress
- 60-grit sandpaper or a wire grating brush
- Box of standard black tea bags
- Jar of cheap instant coffee crystals
- Bottle of raw umber acrylic paint
- Hand misting spray bottle
- Bottle of pure vegetable glycerin, 8 ounces
- Heavy rubber bands
Wearability Check
- Build Time: 2 hours plus drying time
- Estimated Cost: $15 to $25
- Mobility: Fully comfortable and warm.
- Drinking: Unrestricted.
- Vision: Fully unobstructed.
7. The Cellulose and Latex Open Torso
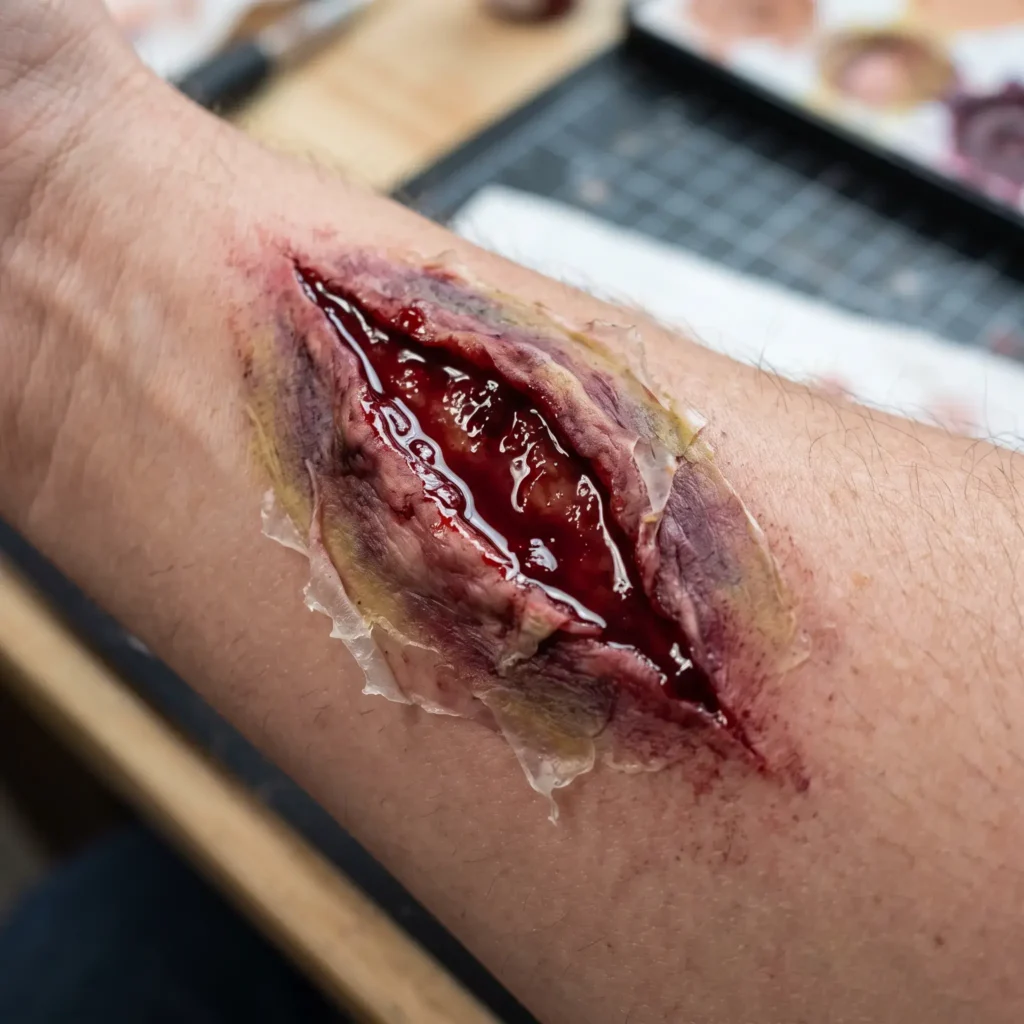
Store-bought rubber wounds look fake because they have thick borders that peel up at the edges. This practical SFX method builds open lacerations directly on your skin using single-ply paper tissue and vulcanized liquid latex.
How It Works
Single-ply paper fibers bond with vulcanizing rubber to mimic torn skin. Thin feathered margins blend the prosthetic into your real skin. Contrast paint tricks the human eye into perceiving deep hollows.
Step-by-Step Instructions
- Clean your collarbone or forearm with rubbing alcohol to clear skin oils. Shave any hair in the application area.
- Dab a thin layer of liquid latex onto your skin with a foam wedge. Feather the edges outward so they lay flat against your skin.
- Dry the latex with a hair dryer on the cool setting until it turns transparent.
- Tear single-ply toilet paper into strips and roll them between your palms into thin cords.
- Press the paper cords onto the tacky latex in an oval shape to form the raised outer lips of the wound.
- Dab another coat of liquid latex over the paper cords and onto the surrounding skin.
- Once dry, dust the area with baby powder or translucent powder to remove surface tackiness.
- Snip the center of the latex with rounded nail scissors and gently pull the edges outward.
- Paint the deep floor of the wound with matte black paint to create depth. Coat the interior walls in crimson paint, and dust the outer skin with olive and purple eyeshadow to create fresh bruising.
Materials List
- Cosmetic liquid latex, 4-ounce bottle
- Pack of disposable makeup wedges
- Single-ply toilet paper or unbleached facial tissue
- Isopropyl rubbing alcohol, 70 percent
- Translucent setting powder or baby powder
- SFX bruise wheel makeup with black, plum, olive, and mustard tones
- Small rounded nail scissors
Wearability Check
- Build Time: 45 minutes
- Estimated Cost: $12 to $18
- Mobility: High, but heavy stretching over active joints can loosen edges.
- Drinking: Unrestricted.
- Vision: Fully unobstructed.
Practical Blood Chemistry: Formulas That Will Not Ruin Clothes
A costume fails if the blood looks like translucent pink sugar or stains your wardrobe permanently. Commercial novelty blood often uses harsh dyes that bond directly with cotton fibers. You can solve this problem with basic kitchen chemistry.
The Washable Surfactant Blood Formula
Liquid dish soap contains concentrated surfactants. These molecules wrap around red dye pigments and stop them from binding into cloth threads. When you wash your clothes in warm water, the soap activates and rinses the color away cleanly.
- Two parts light corn syrup
- One part clear or blue liquid dish soap
- Red liquid food dye
- One tablespoon unsweetened cocoa powder
- One drop blue food dye
Stir the corn syrup and dish soap together in a small bowl. Add red food dye until you reach your primary crimson tone.
Whisk in the cocoa powder. Pure food dye is translucent and looks like candy syrup under party lights. Cocoa powder suspends tiny solid particles throughout the mixture, giving the fluid realistic opacity and body. Add a single drop of blue food dye to create the dark tone of venous blood.
The 10-Minute Crusty Scab Paste
- Three tablespoons clear hair gel or cooked cornstarch paste
- Two tablespoons dried, used coffee grounds
- Red food coloring
- One teaspoon chocolate syrup
Stir the ingredients in a cup until they form a gritty, thick sludge. Dab the paste along the borders of open latex wounds using a coarse stippling sponge. It dries into a crusty, jagged texture that stays in place all evening without dripping.
Adult Party Feasibility and Wearability Matrix
Before picking a build, evaluate how the costume performs in real environments. You must balance visual shock against basic human needs like using the restroom or sitting down.
| Costume Concept | Build Time | Estimated Cost | Mobility Score | Drinking Access | Restroom Access | Best Environment |
|---|---|---|---|---|---|---|
| Headless Jar Rig | 5 Hours | $25 to $35 | 5 / 10 | Straw required | Difficult (requires taking off pack) | House parties, costume contests |
| Living Monochrome | 2 Hours | $20 to $40 | 9 / 10 | Easy with straw | Normal | Dance parties, bars, indoor mixers |
| Multi-Eyed Seraphim | 14 Hours | $45 to $65 | 6 / 10 | Normal | Easy (lift robe hem) | Art events, outdoor street festivals |
| Bog Wendigo Stilts | 20 Hours | $80 to $120 | 3 / 10 | Not possible | Extreme (complete teardown) | Haunted trails, outdoor photos |
| Pepper’s Ghost Frame | 3 Hours | $20 to $30 | 10 / 10 | Normal | Normal | Any setting |
| Bog Banshee Dress | 2 Hours | $15 to $25 | 10 / 10 | Normal | Normal | Crowded bars, outdoor events |
| Cellulose Latex Wound | 1 Hour | $12 to $18 | 9 / 10 | Normal | Normal | Any setting |
Frequently Asked Questions
How can I make an adult costume scary without heavy blood and gore?
Disrupt natural human proportions, textures, and color values. Grayscale makeup tricks the eyes into seeing an analog photograph in real life. Elongated limbs, uncanny eye arrangements, and antique weathering generate genuine psychological dread without needing buckets of fake blood.
How do you stop DIY body makeup from rubbing off on your clothes?
Use water-activated cake paints instead of oil-based makeup. Once dry, mist your skin with an acrylic cosmetic barrier spray. Dust translucent setting powder over high-friction areas around your neck and jawline to prevent sweat transfer.
What is the safest way to remove liquid latex from skin?
Soak a washcloth in warm soapy water and hold it over the edges of the latex for two minutes. The moisture softens the bond. Roll the latex back slowly from your skin rather than pulling it off fast. Use baby oil or mineral oil to dissolve any residue caught in fine body hair. Always run a small patch test on your forearm 24 hours before your build to check for latex allergies.
How do I see out of a costume mask that has no visible eye holes?
Use black scrim, theatrical buckram, or sheer synthetic mesh. Fasten the dark mesh over the eye openings and keep the interior cavity dark. You can see through the loose weave easily, while people looking from the outside only see an empty dark void.
Select a project that matches both your free time and your party plans. If you have an open weekend and want to win a contest, build the Headless Jar Rig or the Seraphim Headpiece. If you need a fast build that lets you move freely through a crowded bar, choose the Living Monochrome or the Bog Banshee Dress.
Pick up your supplies early in the week, test adhesives and paints on your forearm first, and always make sure your build gives you a quick exit if you need a break during the night.