
10 DIY Valentine’s Day Gifts and Decor Ideas That Look High-End
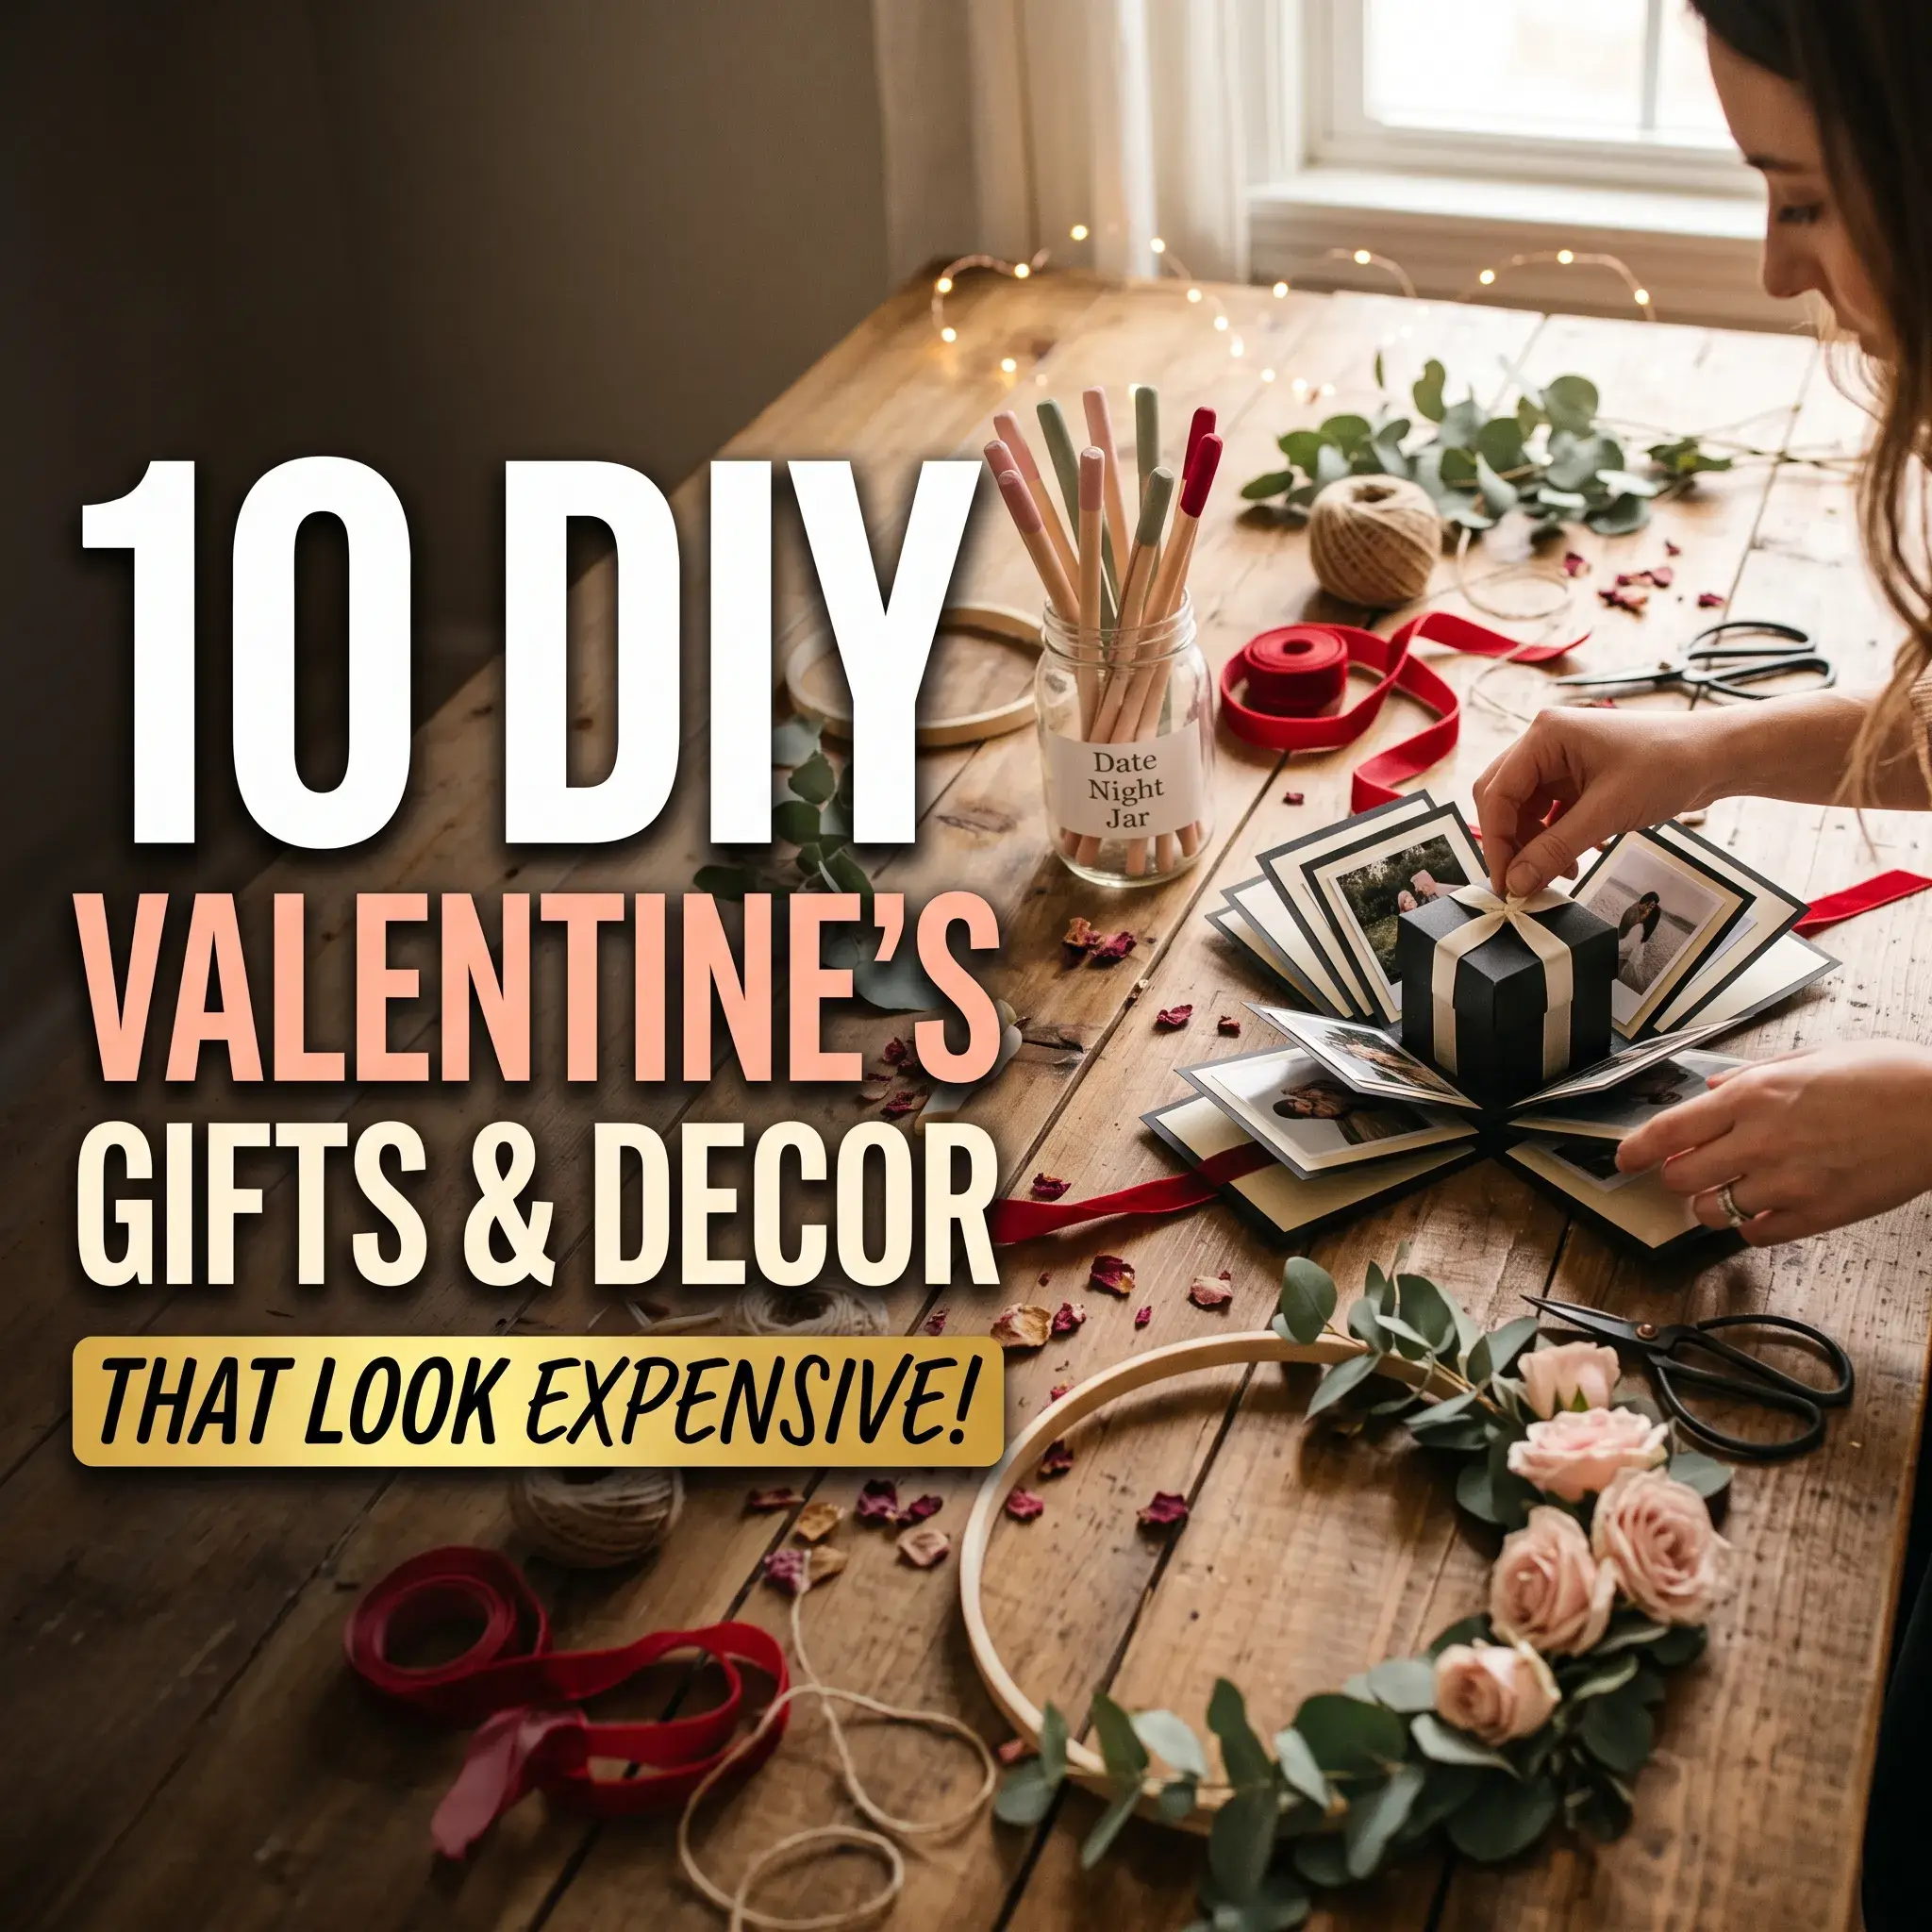
Handmade Valentine gifts and room decor often get a bad reputation. Most online tutorials rely on cheap materials that look messy, peel apart quickly, or end up in the trash by the weekend.
You do not need an expensive craft machine or years of experience to make something beautiful. High quality handmade design comes down to proper materials, exact measurements, and clean assembly.
Here are 10 practical DIY Valentine gift and decor projects you can easily make at home. Each project includes step-by-step instructions, supply checklists, cost estimates, and troubleshooting advice so your project turns out right the first time.
1. Kinetic Explosion Photo Box
This multi-layered memory box looks like an ordinary gift box from the outside. When your partner lifts the lid, the four walls fall open flat to reveal twelve custom photo panels and hidden love notes.
- Active Craft Time: 90 minutes
- Estimated Cost: $12 to $18
- Skill Level: Intermediate
- Best For: Romantic partners and long-distance couples
Step-by-Step Instructions
- Cut three square sheets of 250 GSM heavy cardstock. Do not use construction paper. Light paper lacks the spring tension needed to fall open cleanly. Cut the outer sheet to 36 by 36 centimeters. Cut the middle sheet to 33 by 33 centimeters. Cut the inner sheet to 30 by 30 centimeters.
- Score a 3-by-3 grid onto each sheet using a bone folder and a steel ruler. Your outer grid squares will measure 12 centimeters each. The middle squares will measure 11 centimeters each. The inner squares will measure 10 centimeters each.
- Cut away the four outer corner squares on each sheet to form an even cross shape. You can also crease these corners diagonally toward the inside to make folding heart pockets.
- Press firmly down every scored fold line with the bone folder. Breaking the internal paper fibers cleanly guarantees the walls fall open flat.
- Secure your printed photos and handwritten notes onto the interior wall sections using double-sided craft tape. Avoid liquid school glue because wet glue causes paper to buckle.
- Apply strong double-sided tape across the center square of the largest sheet. Press the middle sheet directly on top of it. Repeat this step to attach the smallest sheet inside the middle one.
- Cut a 20.6 by 20.6 centimeter square of cardstock for the lid. Score a line 4 centimeters inward from all four outer edges. This creates a 12.6-centimeter top that slides over the 12-centimeter base with a comfortable fit. Cut small relief slits at the corners, fold the edges downward, and glue the corner tabs inside the rim.
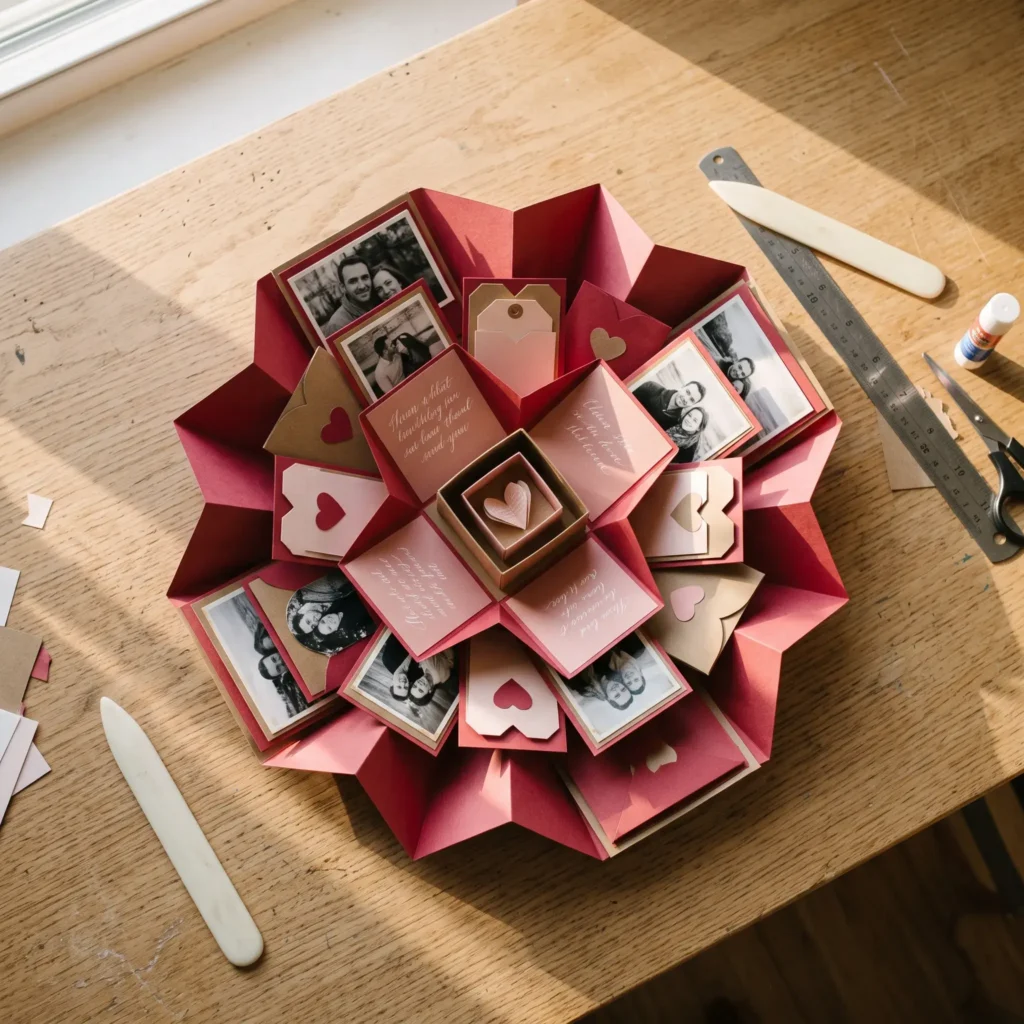
- Products Used in Design:
- 250 GSM heavy cardstock in black and cream
- Double-sided archival adhesive tape runner
- Standard bone folder tool and 12-inch metal ruler
- 2.5-inch square matte photo prints
2. Categorized Date Night Activity Jar
Planning weekly dates often causes decision fatigue. This simple project organizes future outings into a physical archive categorized by budget, travel time, and effort.
- Active Craft Time: 30 minutes
- Estimated Cost: $6 to $10
- Skill Level: Beginner
- Best For: Couples, newlyweds, and anniversaries
Step-by-Step Instructions
- Clean an apothecary glass jar with rubbing alcohol to remove grease and label residue.
- Gather 40 to 50 jumbo birch craft sticks. Dip the top inch of each stick into colored acrylic paint to build your activity key.
- Paint tips blush pink for free or low-cost home dates like homemade pizza nights, backyard stargazing, or board games.
- Paint tips sage green for mid-tier outings like local trivia, indie film screenings, bowling, or coffee tastings.
- Paint tips deep red for special outings like live concerts, weekend cabin trips, or multi-course dining.
- Write an activity on each stick using a waterproof fine-tip pigment pen.
- Let the ink dry for 10 minutes. Brush a light coat of clear matte sealant over the painted tips so hand oils do not smear the text over time.
- Tie a strip of natural jute twine around the neck of the jar. Attach a small paper tag that explains the color system.
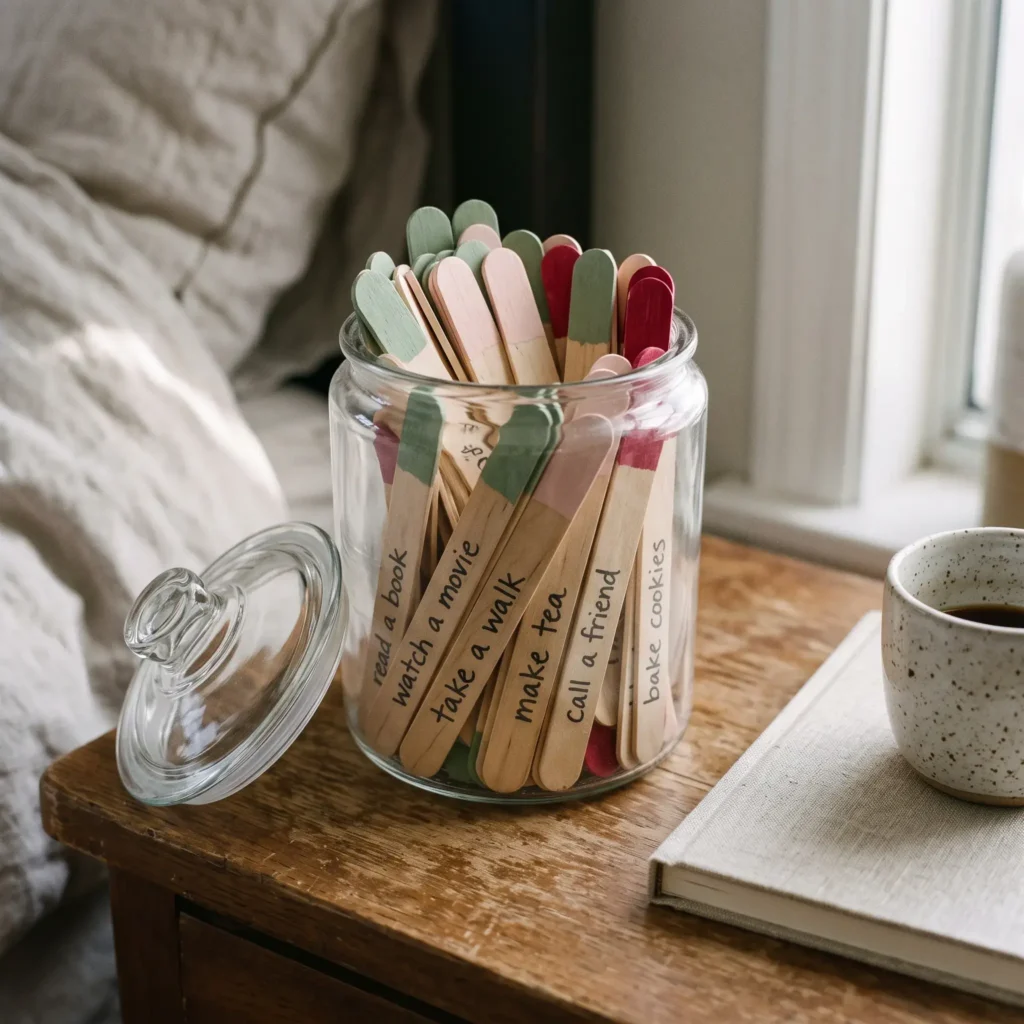
- Products Used in Design:
- 16-ounce wide-mouth glass jar
- Jumbo natural birch craft sticks
- Matte acrylic paint in blush, sage, and dark red
- Archival waterproof black pen
- Natural jute twine cord
Check out more Valentine’s day Decor Ideas
3. “52 Reasons Why I Love You” Playing Card Album
Turn an ordinary deck of playing cards into a pocket-sized booklet filled with personal memories, inside jokes, and relationship milestones.
- Active Craft Time: 45 minutes
- Estimated Cost: $5 to $8
- Skill Level: Beginner
- Best For: Sentimental partners and budget anniversaries
Step-by-Step Instructions
- Take a standard 52-card poker deck. Lightly rub the front face of every card with 400-grit sandpaper. This roughs up the slick plastic coating so glue holds without peeling.
- Punch two holes along the left border of every card using an adjustable hole punch. Space the holes 1.5 centimeters inward from the outer edge to prevent paper tears when turning pages.
- Cut 52 rectangles of cream cardstock to 5.5 by 7.5 centimeters.
- Write a specific memory or reason on each paper strip. Alternate these text cards with small cropped photos throughout the deck.
- Glue the paper slips onto the sanded card faces with an adhesive tape runner.
- Bind the cards together using two 1-inch metal split rings. Tie short strips of frayed velvet ribbon around each ring to soften the metal look.
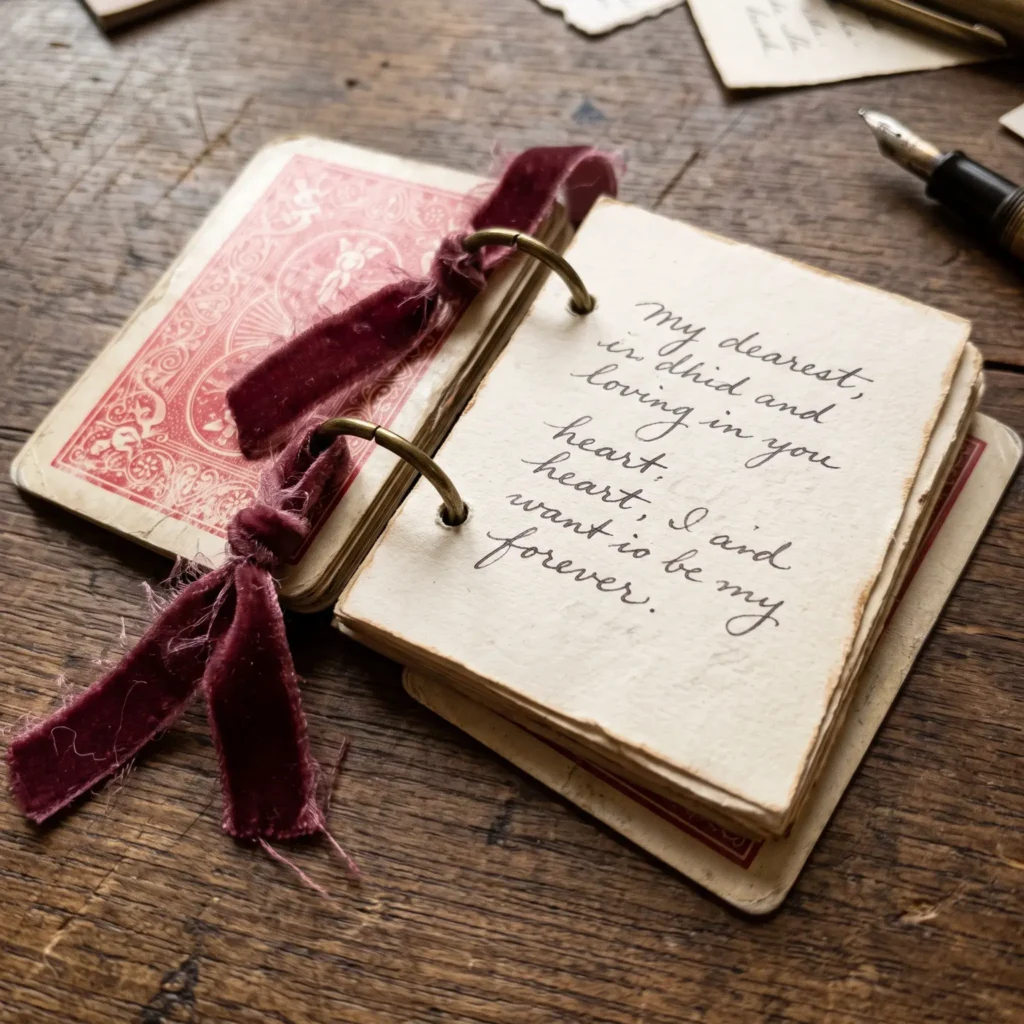
- Products Used in Design:
- Standard 52-card playing deck
- 400-grit fine sandpaper sheet
- 1-inch nickel or brass book binder rings
- Frayed-edge velvet ribbon in burgundy
- 65 lb cream cardstock cut to size
4. Botanical Rose and Pistachio Dark Chocolate Bark
Artisan chocolate bark makes an upscale edible gift. The secret to smooth, glossy chocolate with a clean snap is proper temperature control during melting.
- Active Craft Time: 20 minutes (plus 90 minutes cooling time)
- Estimated Cost: $14 to $20
- Skill Level: Intermediate
- Best For: Food lovers, Galentine hosts, and neighbor gifts
Step-by-Step Instructions
- Chop 12 ounces of dark couverture chocolate that contains at least 31% cocoa butter. Place two-thirds of the chopped chocolate in a clean glass bowl set over a small pot of simmering water. Make sure no water splashes into the bowl, or the chocolate will seize into a stiff paste.
- Heat the chocolate until it reaches 45 to 48 degrees Celsius (113 to 118 degrees Fahrenheit). Take the bowl off the pot.
- Stir in the remaining un-melted chocolate in small batches. Cool the chocolate down to 27 degrees Celsius (80 degrees Fahrenheit). Place the bowl back over the warm water for 10 seconds to bring it to a working temperature of 31 to 32 degrees Celsius (88 to 90 degrees Fahrenheit). This sets up stable cocoa butter crystals for a firm, glossy finish.
- Pour the melted chocolate onto parchment paper. Spread it out to a 5-millimeter thickness with an offset spatula.
- Scatter chopped green pistachios, crushed freeze-dried raspberries, culinary dried rose petals, and a pinch of flaky sea salt across the warm chocolate.
- Let the bark rest at room temperature for two hours until solid. Snap the slab into shards by hand.
- Wrap the pieces in food-safe glassine paper to keep cocoa oils from staining your outer gift box.
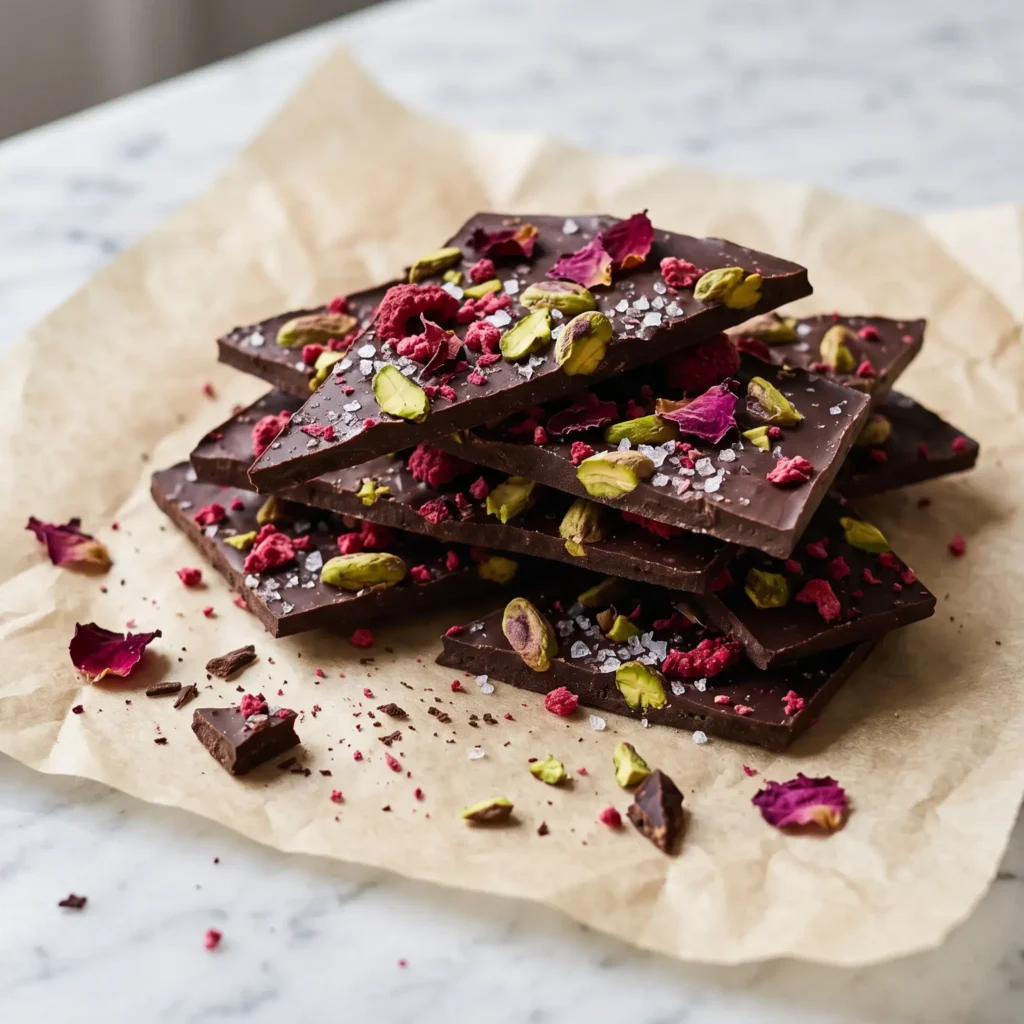
- Products Used in Design:
- 60% to 70% dark couverture chocolate
- Raw shelled unsalted pistachios
- Freeze-dried whole raspberries
- Culinary grade organic dried rose petals
- Translucent food-safe glassine paper
5. Hot Cocoa Meltdown Spheres
These hollow chocolate globes melt under hot milk to release cocoa powder and marshmallows. They create an interactive dessert display for cozy winter evenings.
- Active Craft Time: 45 minutes
- Estimated Cost: $12 to $16
- Skill Level: Intermediate
- Best For: Family treats, kids, and party favors
Step-by-Step Instructions
- Melt white or milk chocolate slowly over low heat. If adding color, use oil-based liquid dye or oil-soluble powder. Never use regular water-based food coloring, which ruins melted chocolate instantly.
- Brush an even layer of melted chocolate inside each half of a 6.5-centimeter silicone sphere mold. Build extra thickness around the top rim so the edges do not crack during assembly.
- Place the mold in the refrigerator for 15 minutes to harden.
- Carefully pop the chilled chocolate domes out of the silicone mold using gloved hands to prevent fingerprints.
- Fill half of the chocolate domes with two tablespoons of Dutch-process cocoa powder and a dozen mini marshmallows.
- Warm an empty ceramic plate over hot water and wipe it dry. Press the rim of an empty hemisphere flat against the warm plate for two seconds to melt the edge evenly.
- Place the melted rim directly onto a filled base hemisphere. Run a clean finger along the warm seam to seal the sphere shut. Drizzle melted chocolate across the top and dust with edible shimmer dust.
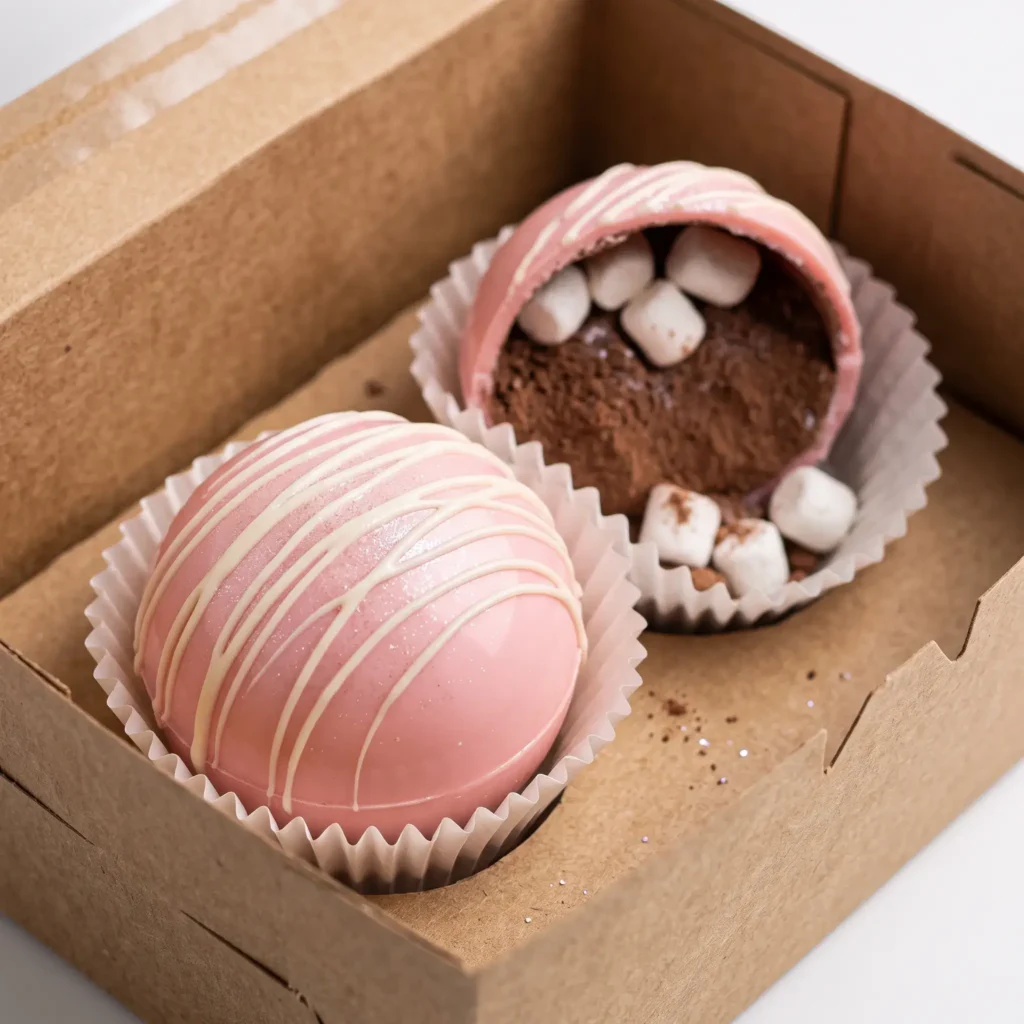
- Products Used in Design:
- Food-grade 6.5 cm silicone hemisphere molds
- White melting chocolate wafers
- Oil-based pink candy coloring
- Dutch-processed cocoa powder and micro marshmallows
- Kraft paper bakery box with clear window
6. Minimalist Beechwood Floral Hoop Wreath
Traditional wreaths can feel heavy and cluttered. This modern hoop wreath uses negative space, bare wood grain, and muted greenery for an understated accent on walls or doors.
- Active Craft Time: 30 minutes
- Estimated Cost: $15 to $22
- Skill Level: Beginner
- Best For: Front doors, bedroom walls, and apartment decor
Step-by-Step Instructions
- Separate a round 10-inch natural beechwood embroidery hoop. Use the smooth inner wooden ring as your frame.
- Leave the top 60% of the hoop completely bare. The contrast between raw wood and soft flowers creates a clean look.
- Place two stems of preserved silver dollar eucalyptus along the bottom curve. Fasten the stems tightly to the wood frame using wraps of 22-gauge green floral wire.
- Cut the stems of three preserved blush garden roses down to half an inch. Put hot glue onto the base of each flower and press them firmly over the wire wraps in the center.
- Tuck dried bunny tails and bleached ruscus between the roses to hide any visible glue.
- Tie a 15-inch length of raw-edge silk velvet ribbon around the top of the hoop for hanging.
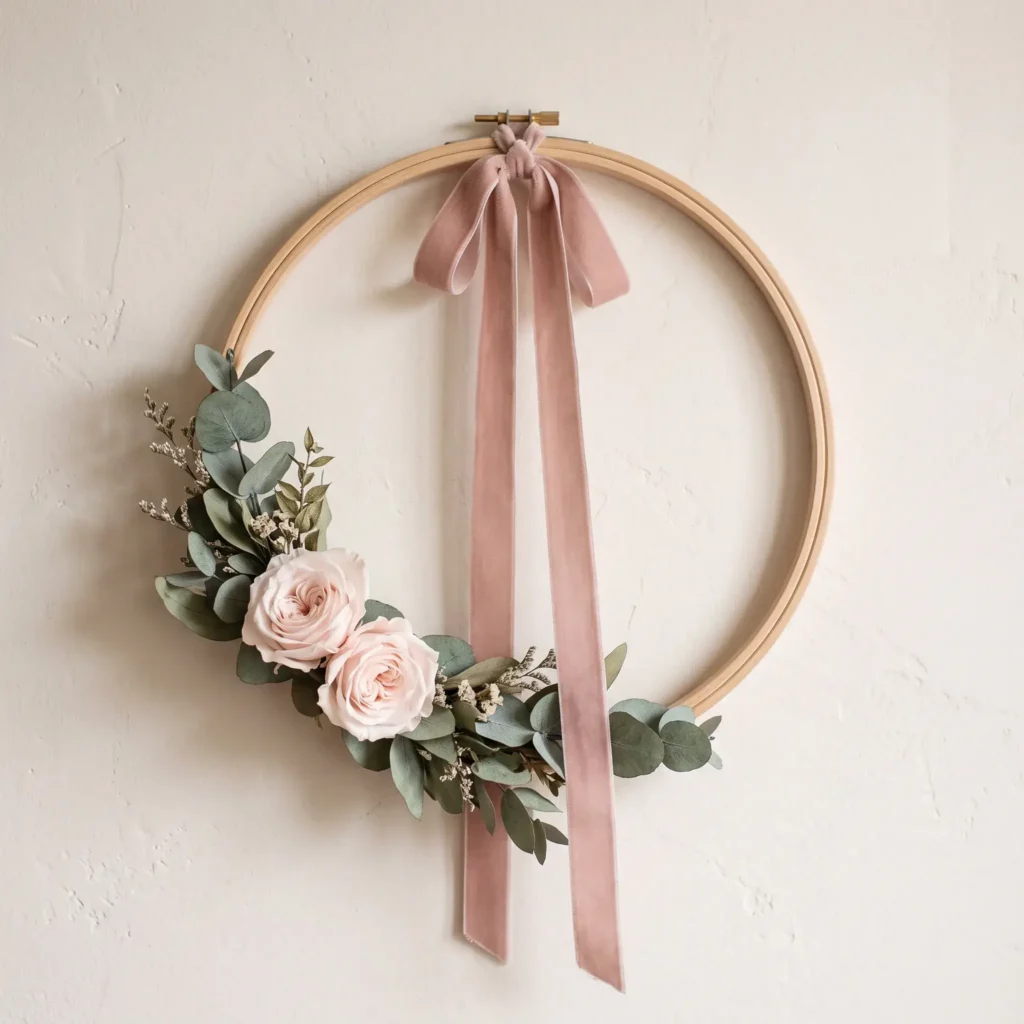
- Products Used in Design:
- 10-inch natural beechwood embroidery hoop
- 22-gauge paddle floral wire in green
- Preserved silver dollar eucalyptus stems
- Real preserved blush pink garden roses
- Frayed-edge dusty rose silk ribbon
7. Submerged Floral Cylinder Centerpiece
This tablescape project uses water refraction to highlight flower petals, creating a glowing centerpiece when paired with floating disc candles.
- Active Craft Time: 15 minutes
- Estimated Cost: $18 to $28
- Skill Level: Beginner
- Best For: Romantic dinner tablescapes and Galentine brunches
Step-by-Step Instructions
- Gather three clear glass cylinder vases of equal diameter but varied heights, such as 6, 9, and 12 inches. Clean the glass with a microfiber cloth.
- Place a small floral weight or a two-inch layer of clear glass gems at the base of each vase.
- Trim fresh orchids or calla lilies to fit inside each cylinder. Wire the bottom of each stem to your anchor so the flowers do not float to the top.
- Fill each vase with distilled water, pouring slowly along the inside glass wall. Use distilled water instead of regular tap water. Tap water contains dissolved gases that cover your flower petals in thousands of cloudy micro-bubbles within two hours.
- Leave a one-inch space below the top rim of the vase. Float a 3-inch white wax candle gently onto the water surface. Keep the candle wick dry so it lights easily.
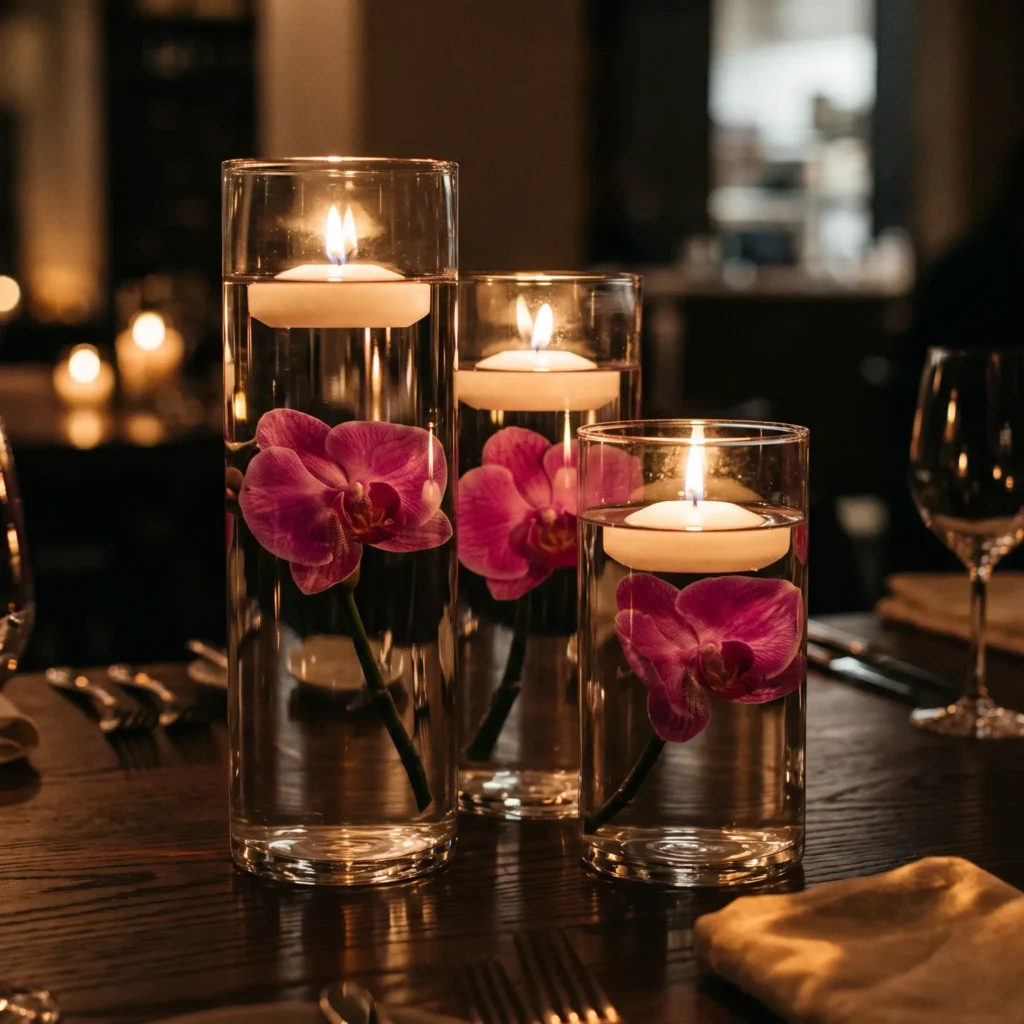
- Products Used in Design:
- Set of 3 glass cylinder vases (6, 9, and 12 inches tall)
- Fresh cut long-lasting orchid stems
- Clear acrylic floral weights or glass gems
- Pure distilled water
- 3-inch white unscented floating disc candles
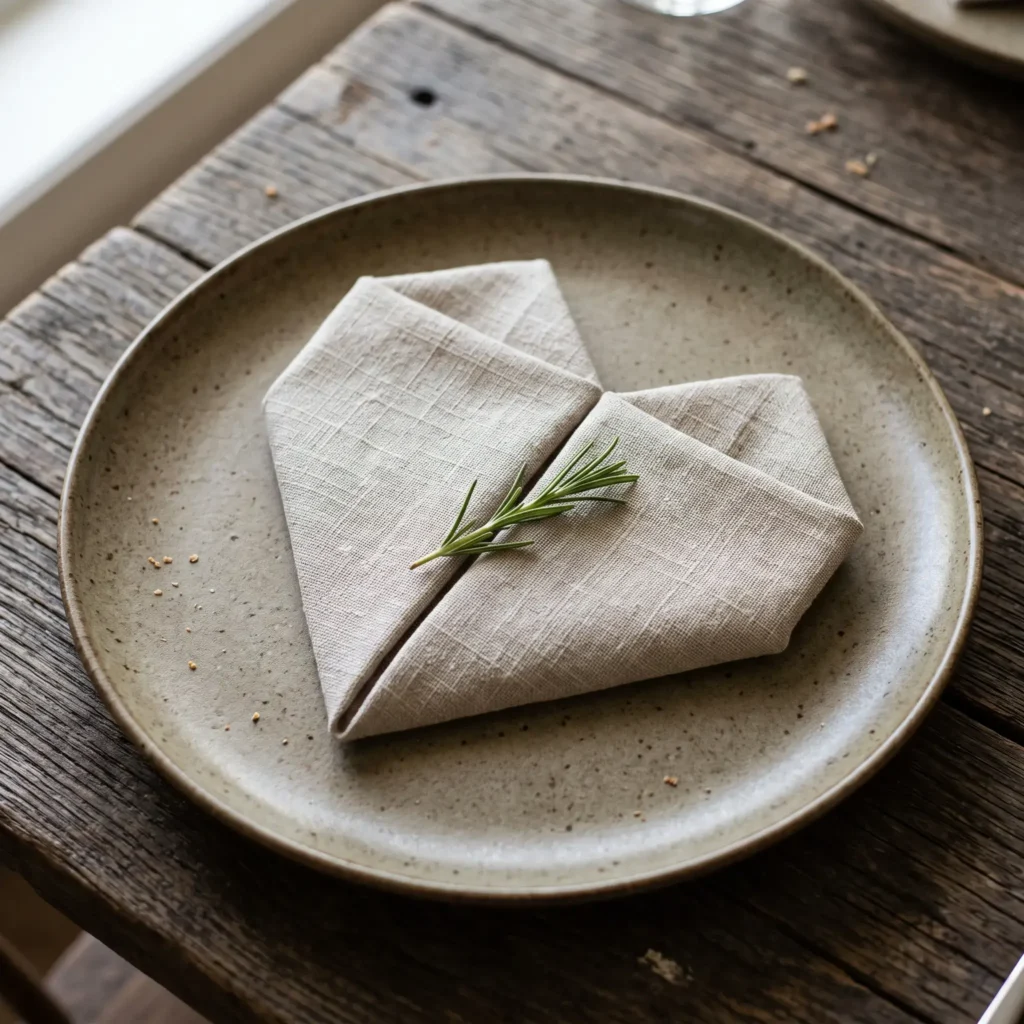
8. Sculptural Linen Heart Napkin Fold
You can set an elegant dinner table without purchasing single-use paper decorations. This origami folding method turns standard cloth napkins into crisp heart shapes that sit directly on your plates.
- Active Craft Time: 5 minutes per place setting
- Estimated Cost: $0 (Uses linens you already own)
- Skill Level: Beginner
- Best For: Dinner tables, romantic breakfast trays, and dinner parties
Step-by-Step Instructions
- Pick an 18-inch or 20-inch square cloth napkin made from woven cotton or washed linen. Slippery polyester and synthetic satin will not hold the sharp creases needed for this fold.
- Press the napkin flat with a hot steam iron and a light mist of fabric starch.
- Lay the napkin flat with the back side facing up. Fold the bottom edge up to meet the top edge, creating a wide horizontal rectangle.
- Fold the bottom edge up once more to create a long, narrow four-layer strip.
- Place an index finger on the exact center of the strip. Fold the right end straight up at a 90-degree angle. Fold the left end straight up the same way, bringing both vertical edges flush along the center seam to form a sharp downward point.
- Flip the entire napkin over to the smooth back side.
- Fold the four top corners downward by one inch to round off the sharp points and shape the upper curves of the heart.
- Flip the napkin back to the front and center it on your charger plate. Tuck a handwritten name card or a sprig of fresh rosemary between the folds.
- Products Used in Design:
- 18-inch square 100% washed linen or cotton napkins
- Household steam iron and light fabric starch spray
- Fresh sprigs of culinary rosemary or dried lavender
- Handmade paper place cards
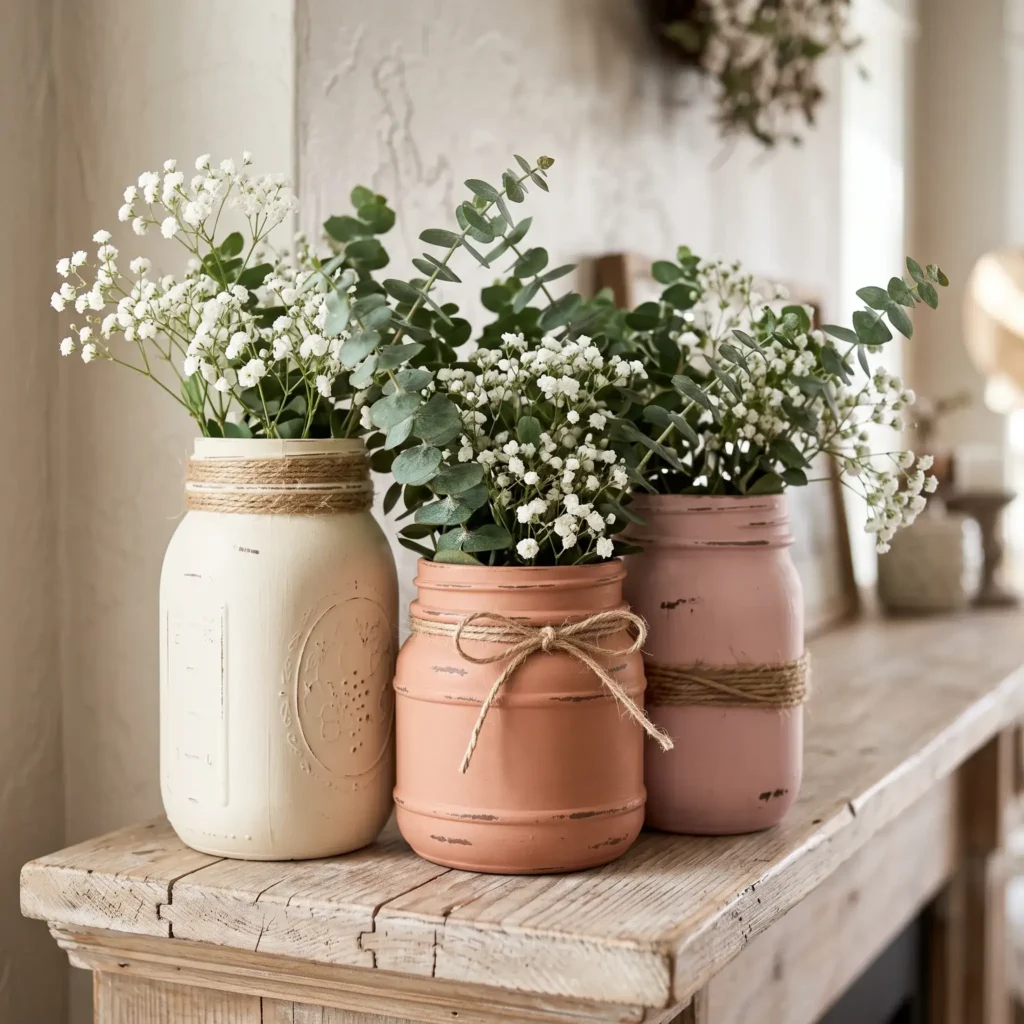
9. Distressed Chalk-Painted Mason Jar Vases
Give salvaged glass pasta and pickle jars a second life as rustic floral vases. Using chalk-finish paint creates a smooth, ultra-matte texture that distresses cleanly along raised glass lettering.
- Active Craft Time: 20 minutes (plus 60 minutes drying time)
- Estimated Cost: $3 to $6
- Skill Level: Beginner
- Best For: Mantel displays, bedside flower vases, and rustic home accents
Step-by-Step Instructions
- Wash salvaged glass jars with soap and hot water to remove labels and food oils. Wipe down the outer glass surface with rubbing alcohol so paint sticks properly.
- Apply a thin coat of ultra-matte chalk paint in white, soft blush, or sage using a flat synthetic brush. Let the first coat dry for 40 minutes, then apply a second light coat. Standard gloss paint peels off glass in rubbery strips, while chalk paint bonds securely.
- Let the paint dry completely. Gently rub 220-grit sandpaper over the raised glass threads, embossed brand logos, and base rim to reveal hints of the clear glass underneath.
- Apply a thin layer of clear finishing wax or matte protective spray to seal the paint against moisture.
- Wrap the threaded neck of the jar three times with natural jute twine, tying it off in a small knot. Fill the jar with baby’s breath, dried lavender, or battery-operated micro fairy lights.
- Products Used in Design:
- Upcycled glass jars (16 oz or 32 oz)
- Ultra-matte acrylic chalk paint in blush and white
- 220-grit fine sandpaper sponge
- Natural brown jute twine
- Fresh baby’s breath or dried eucalyptus stems
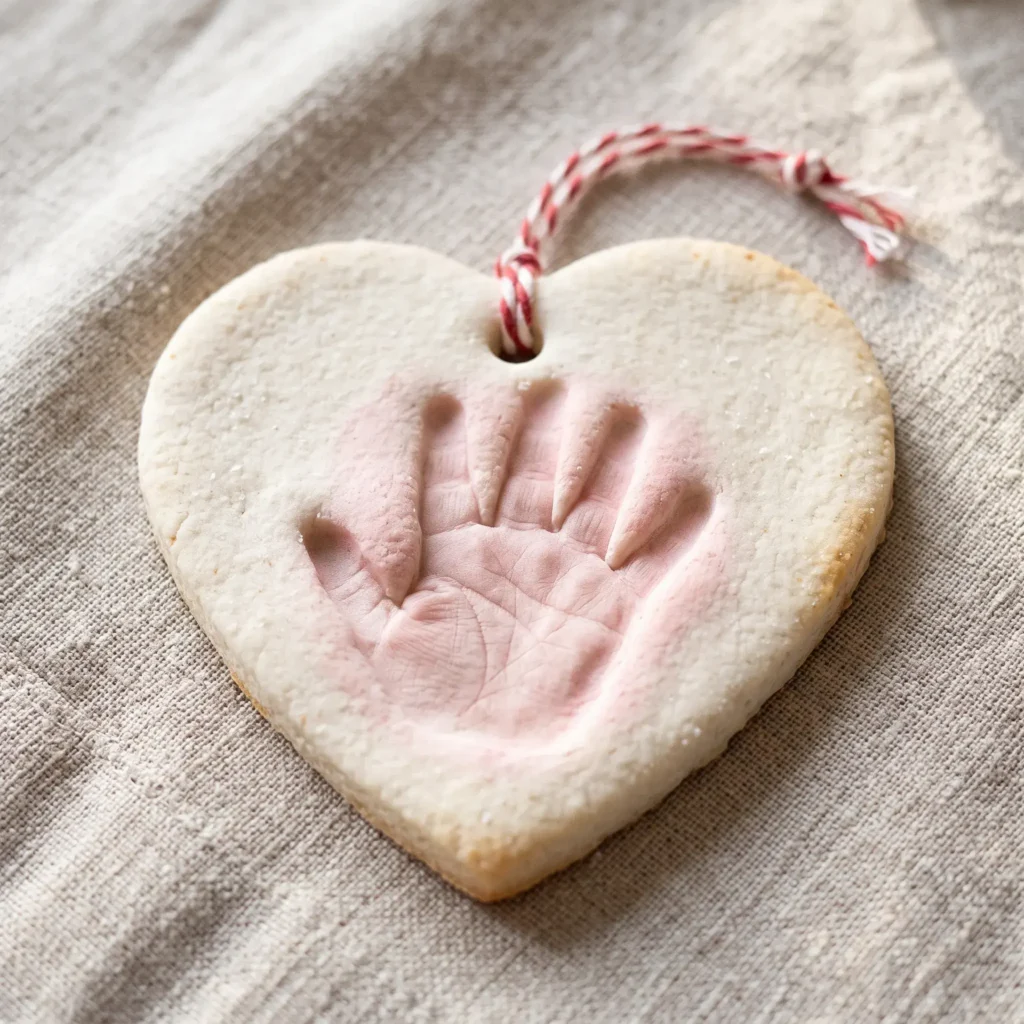
10. Dehydrated Salt Dough Milestone Keepsakes
Capture an infant handprint, a pet paw impression, or make hanging heart tags using three pantry staples. Dehydrating the dough slowly at low heat stops puffing and surface cracking.
- Active Craft Time: 30 minutes (plus 2 to 3 hours drying time)
- Estimated Cost: Under $4
- Skill Level: Beginner
- Best For: Parents, baby keepsakes, pet owners, and personalized gift tags
Step-by-Step Instructions
- Whisk two cups of all-purpose flour and one cup of fine non-iodized table salt together in a large bowl. Avoid coarse sea salt or kosher salt, as large crystals leave pits on the surface and weaken delicate edges.
- Pour in one cup of lukewarm water gradually, stirring with a wooden spoon until a shaggy dough forms.
- Turn the dough onto a clean counter and knead by hand for eight to ten minutes. The dough should feel smooth, soft, and pliable, similar to commercial playdough. If the mixture feels sticky, dust on a tablespoon of flour. If it crumbles, work in a teaspoon of water.
- Roll the dough out onto parchment paper to an even thickness of 6 to 8 millimeters. Rolling the dough thinner than 6 millimeters causes edges to warp, while rolling it thicker than 10 millimeters traps moisture inside.
- Press a baby’s hand, a pet’s paw, or a metal heart cookie cutter firmly into the dough. Punch a small hole at the top using a drinking straw to hold a hanging ribbon later.
- Transfer the parchment paper to a baking sheet. Place it in an oven set to 100 to 120 degrees Celsius (200 to 250 degrees Fahrenheit) for two to three hours. Flip the shapes over halfway through baking so moisture evaporates evenly from both sides.
- Allow the pieces to cool completely. Detail any impressions with acrylic paint and seal all sides with two coats of clear Mod Podge to protect against humidity.
- Products Used in Design:
- All-purpose unbleached flour
- Fine non-iodized table salt
- 3-inch metal heart cookie cutter
- Clear matte Mod Podge or acrylic sealer
- Red and white baker’s twine
Project Comparison and Selection Guide
Use this reference table to match a project to your available time, budget, and recipient:
| Project | Primary Category | Total Time Required | Cost Estimate | Skill Barrier | Best For |
|---|---|---|---|---|---|
| Explosion Photo Box | Sentimental Keepsake | 2 hours | $12 to $18 | Intermediate | Long-term partners |
| Date Night Stick Jar | Relationship System | 45 minutes | $6 to $10 | Beginner | Couples fighting decision fatigue |
| 52 Reasons Card Album | Pocket Memory Book | 45 minutes | $5 to $8 | Beginner | Sentimental anniversaries |
| Botanical Chocolate Bark | Gourmet Edible | 1.5 hours | $14 to $20 | Intermediate | Food lovers and party hosts |
| Hot Cocoa Spheres | Edible Favor | 1 hour | $12 to $16 | Intermediate | Winter treats and kids |
| Beechwood Floral Hoop | Wall and Door Decor | 30 minutes | $15 to $22 | Beginner | Modern room styling |
| Submerged Centerpiece | Dinner Tablescape | 15 minutes | $18 to $28 | Beginner | Romantic dinners at home |
| Linen Heart Napkin Fold | Place Setting | 5 minutes | $0 (Linens on hand) | Beginner | Breakfast trays and dinner tables |
| Chalk Painted Jars | Rustic Upcycled Decor | 1 hour | $3 to $6 | Beginner | Farmhouse accents and mantels |
| Salt Dough Keepsake | Familial Milestone | 3 hours (Baking time) | $3 to $5 | Beginner | Parents and pet owners |
3 Critical Crafting Rules to Prevent Failed DIYs
Most failed DIY projects happen because of minor material mismatches rather than a lack of talent. Keep these three rules in mind before buying supplies:
1. Water Ruins Melted Chocolate
When making chocolate bark or cocoa spheres, keep your tools completely dry. Introducing even a drop of water into warm melted chocolate breaks the fat emulsion, instantly turning it into a stiff, dull paste. Use dry metal spoons, avoid steam from double boilers, and always choose oil-based liquid dyes instead of grocery store liquid food coloring.
2. Paper Weight Dictates Structural Strength
Standard printer paper weighs 75 to 90 GSM, while scrapbooking paper ranges from 120 to 180 GSM. For moving paper crafts like the explosion box, always use 250 GSM cardstock. Light paper bends out of shape, while heavy cardstock maintains structural snap every time the lid is removed.
3. Tap Water Clouds Submerged Centerpieces
Tap water contains dissolved gasses and minerals. When poured into a vase, these gasses release and cover your submerged flower petals in thousands of cloudy micro-bubbles within two hours. Always use pure distilled water to keep your floral arrangements crystal-clear.
Frequently Asked Questions
What are the cheapest DIY Valentine gifts to make with zero crafting experience?
The categorized date night jar and the 52 reasons playing card album are the most affordable and beginner-friendly options. Both projects cost under $10, use simple household materials, and rely on personal memories rather than complex technical assembly.
How do I stop homemade salt dough keepsakes from puffing up in the oven?
Bake the dough at low temperatures between 100 and 120 degrees Celsius (200 to 250 degrees Fahrenheit). High heat boils the water inside the dough, creating trapped steam pockets that crack and puff the surface. Low temperatures dehydrate the dough slowly to keep it flat and durable.
Can I make the botanical chocolate bark a week in advance?
Yes. Tempered dark chocolate bark stored in an airtight container in a cool, dark cupboard stays fresh and crisp for up to three weeks. Avoid storing the bark in the refrigerator, as humidity causes sugar bloom, leaving a cloudy white residue on the chocolate surface.
What glue works best for handmade paper photo boxes?
Use double-sided acid-free tape runners or double-sided craft film. Liquid glues like Mod Podge or school glue saturate paper fibers, causing printed photos and cardstock panels to curl and wrinkle as they dry.
Handmade Valentine’s Day gifts and decor work best when you focus on durable materials, clean assembly, and personal touches rather than complicated store kits. Pick one project from this guide, gather your supplies ahead of time, and build something meaningful that your recipient will want to keep long after the holiday is over.
