No Drill, No Lost Deposit: 9 Headboard Ideas (7 Need Zero Tools)
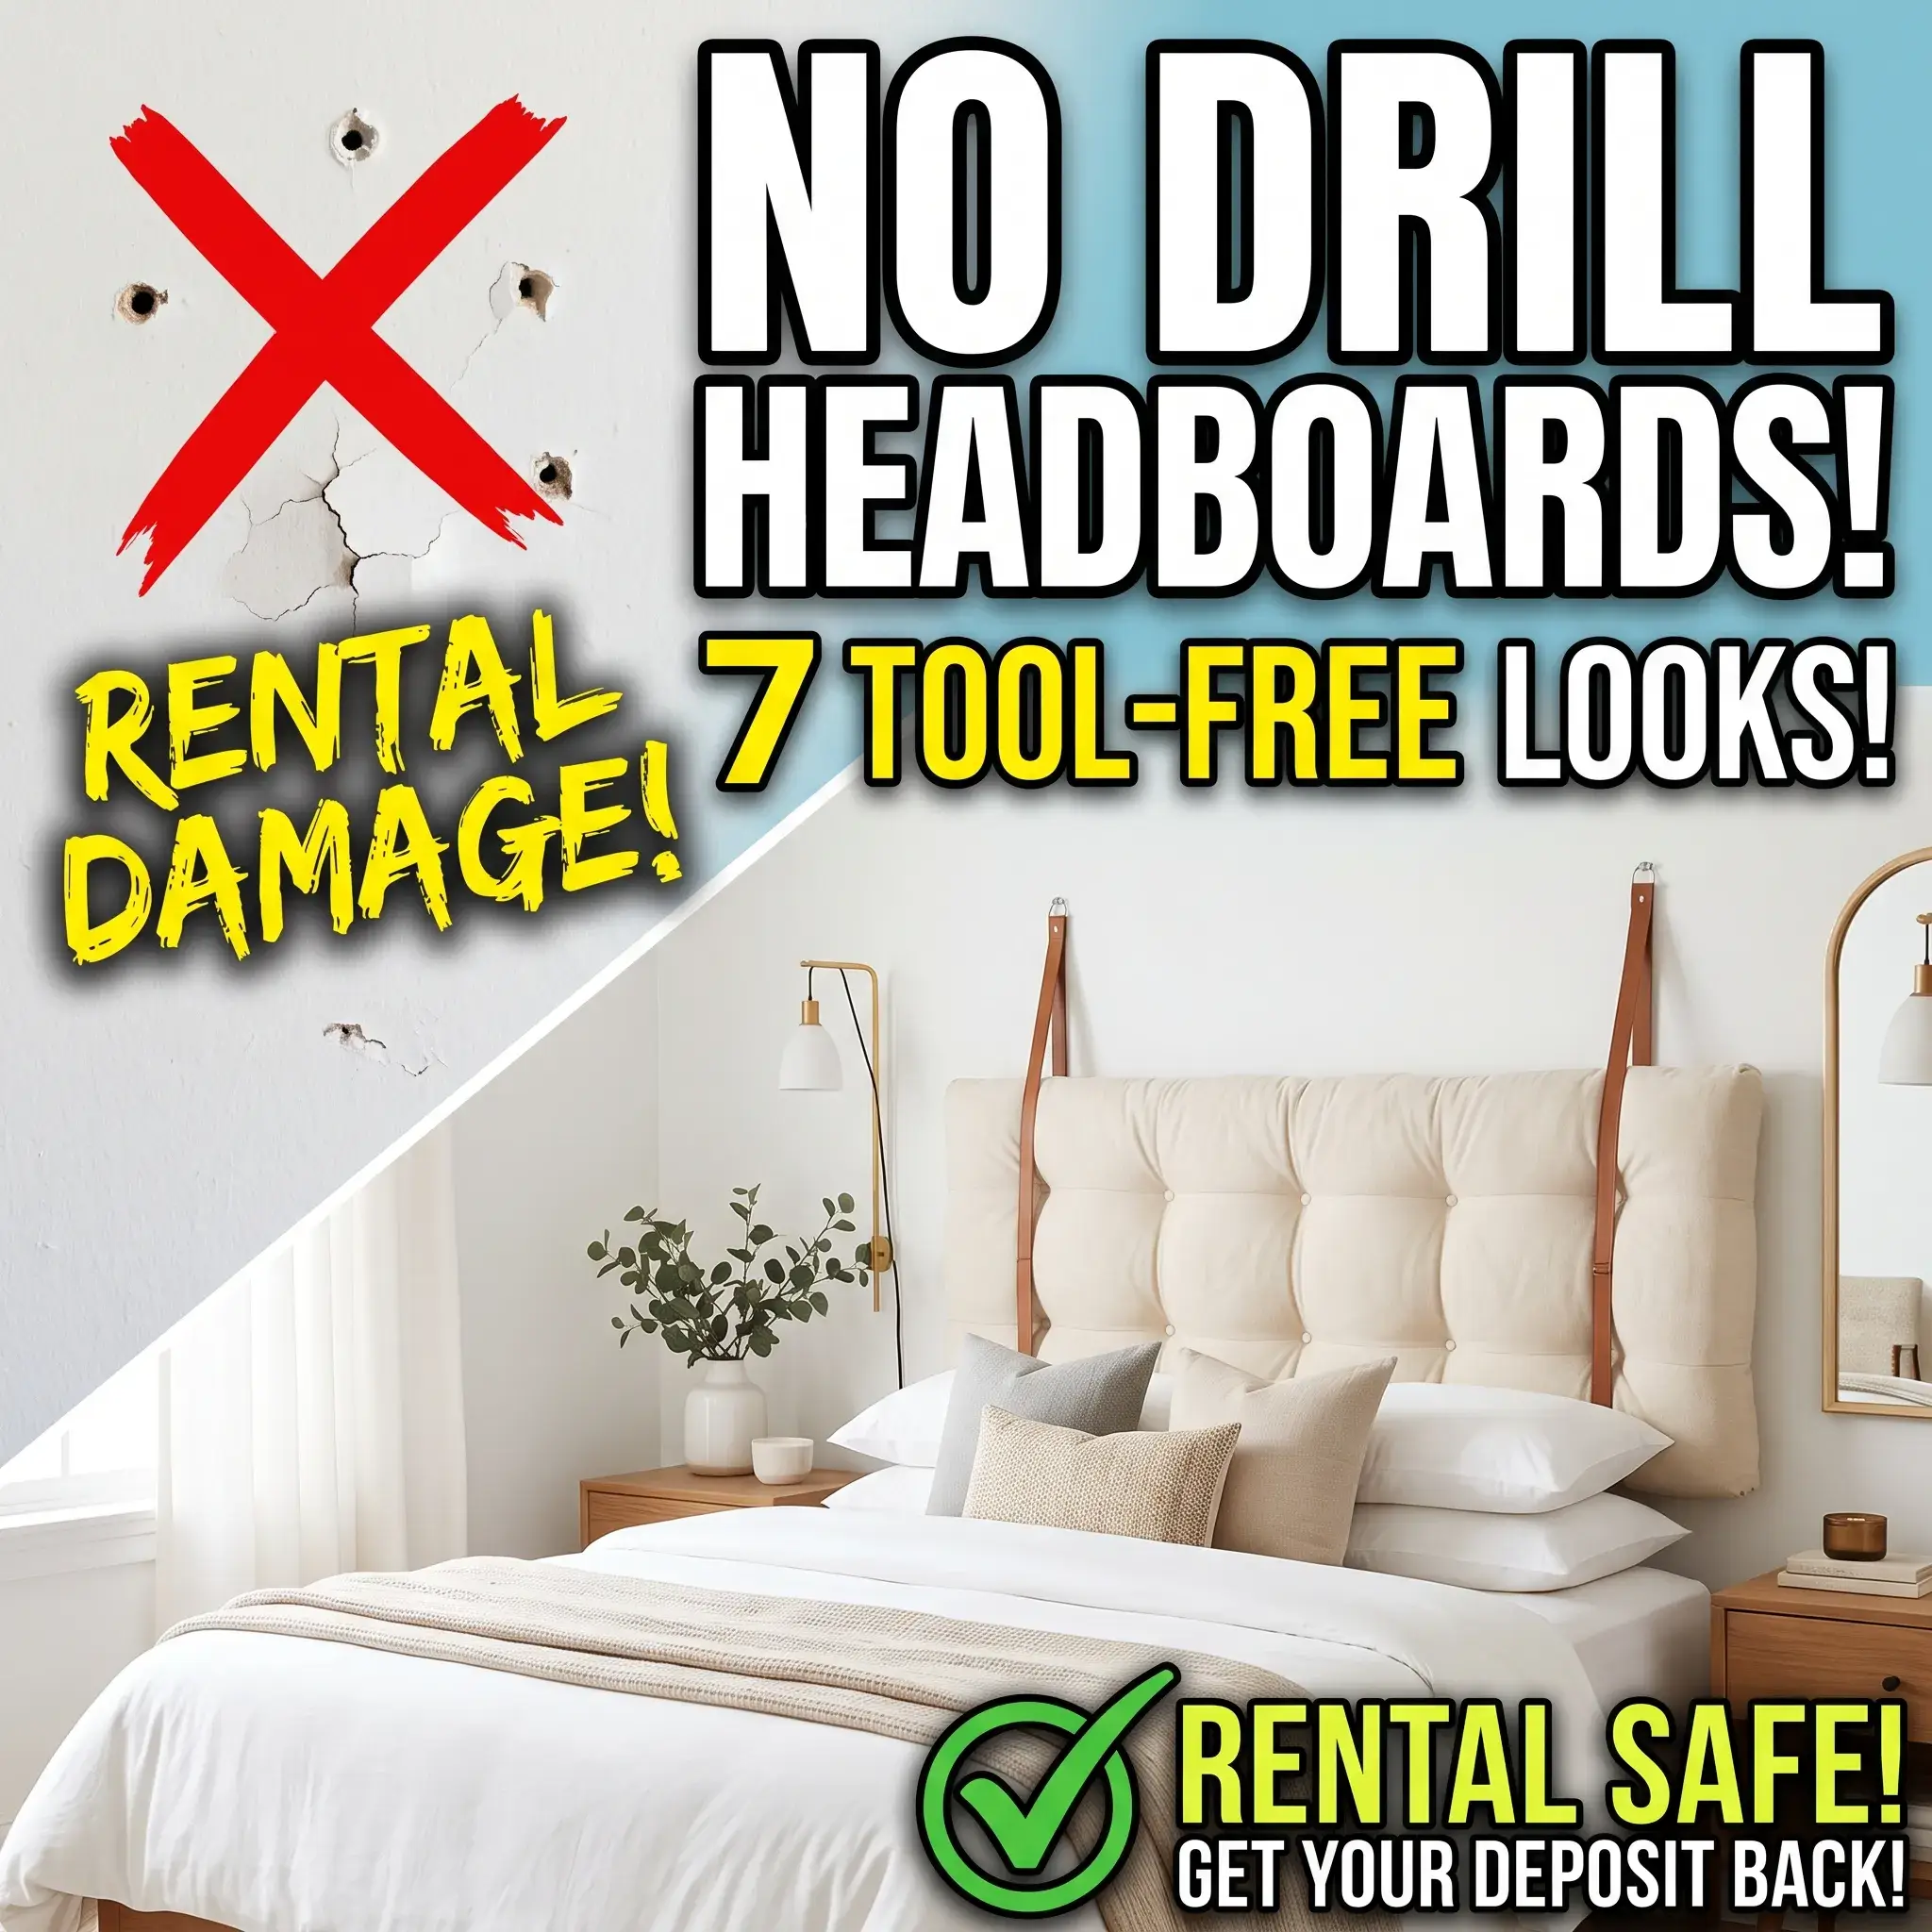
Drilling into drywall is a quick way to lose your security deposit. Traditional headboards require heavy timber, metal wall brackets, or anchor screws that leave large holes behind. If you live in an apartment, manage a strict lease, or lack power tools, you do not have to settle for a bare mattress against a blank wall.
A no-build headboard anchors your bed, protects your wall paint, and gives your room a finished look without carpentry. Seven of the designs below require zero tools, screws, or drills. They rely entirely on gravity, mattress friction, or renter-safe adhesives. Two additional options need only basic accessories like painter tape or tension rods.
Here are nine no-build headboard looks you can set up today.
1. The Friction-Locked Woven Folding Screen
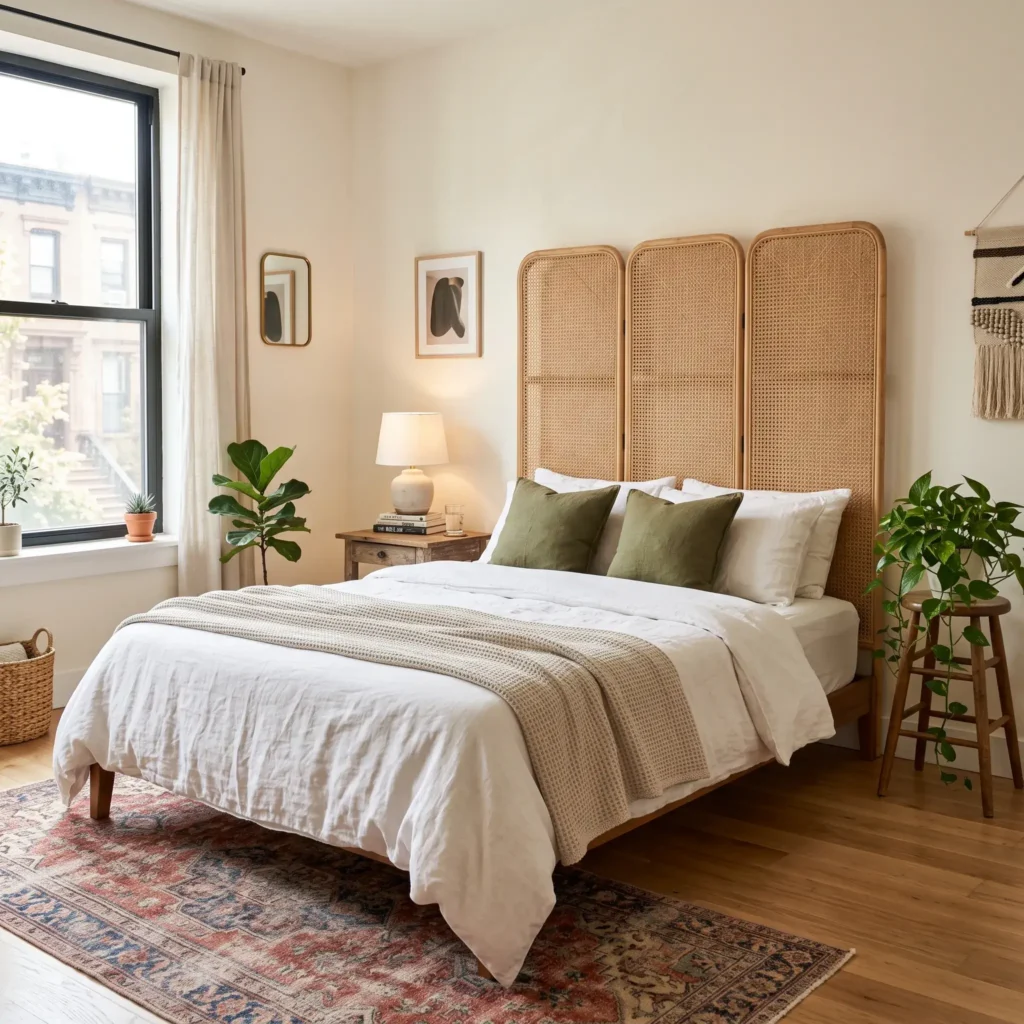
A three-panel or four-panel folding room divider makes an instant, freestanding headboard. You do not attach it to the wall. Instead, you expand the screen in a slight zig-zag pattern behind your bed and push your mattress and frame firmly against it. The physical weight of your mattress clamps the screen flat against the baseboard, locking it upright.
- Ideal Bedroom Style: Japandi, Organic Modern, or Bohemian.
- Why It Works: Gravity and mattress pressure do all the heavy lifting. The panels never penetrate your drywall.
- Setup Time: 3 minutes.
How to Set It Up
- Stick self-adhesive felt floor pads onto the bottom feet of the folding screen to protect your flooring.
- Stick clear silicone bumper pads on the top back corners of the screen where the wood touches the wall. This stops paint scuffs.
- Unfold the screen so it measures slightly wider than your mattress. A standard Queen bed needs at least 60 inches of width.
- Slide the screen behind your bed frame. Push the mattress firmly against the bottom third of the panels.
- Products Used in This Design:
- 3-panel natural woven rattan room divider (68 inches tall)
- Heavy-duty self-adhesive felt furniture pads
- Clear silicone surface bumper guards (half-inch round)
2. The Bed-Width Wedge Pillowboard
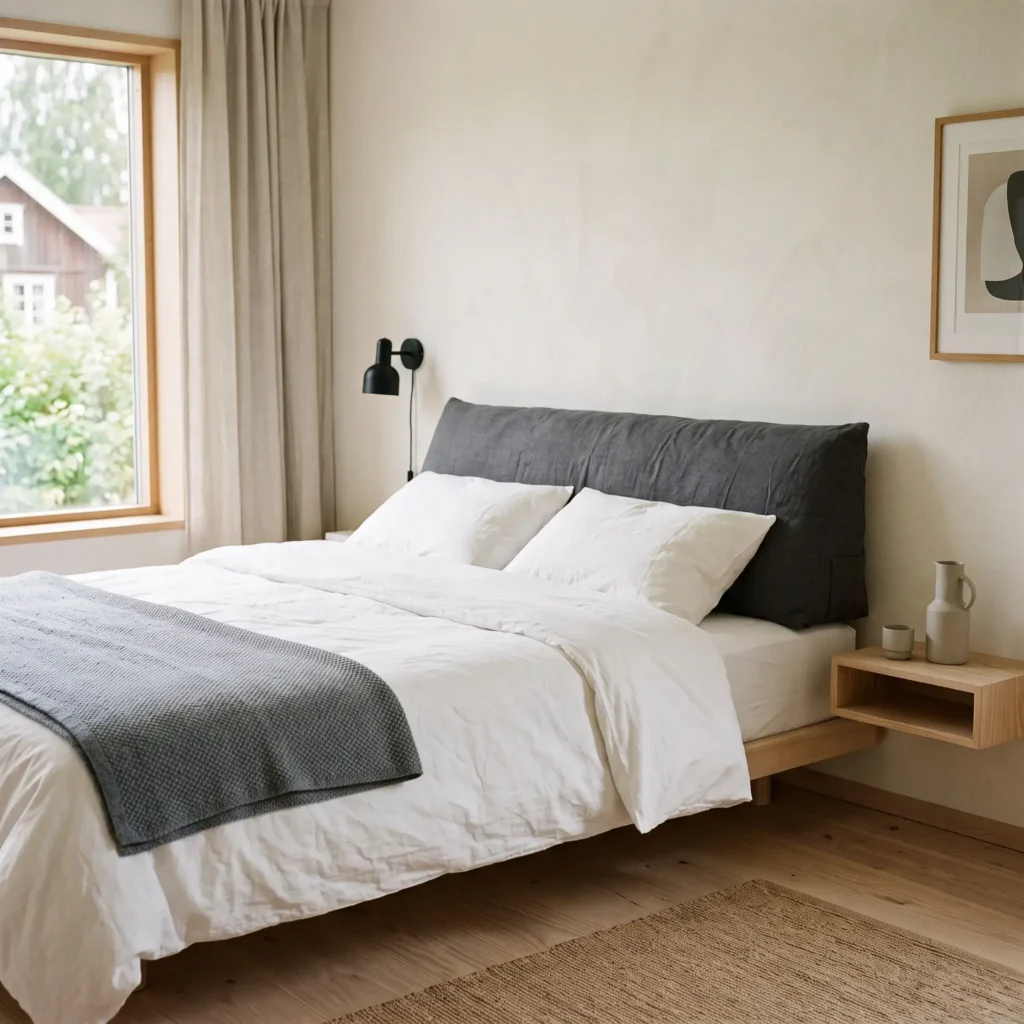
A wedge pillowboard is an oversized, high-density foam bolster shaped like a right triangle. It rests directly on top of your mattress, flush against the wall. The flat back sits against the drywall, while the sloped front provides a comfortable angle for reading or watching TV in bed.
- Ideal Bedroom Style: Casual Tailored, Minimalist, or Hotel Scandinavian.
- Why It Works: It acts as bedding rather than furniture. It never touches your wall with hardware or adhesives, which completely eliminates damage risks.
- Setup Time: 1 minute.
How to Set It Up
- Buy a bolster that matches your exact bed width: 39 inches for Twin, 60 inches for Queen, or 76 inches for King.
- Slide the wide, flat bottom of the wedge onto your mattress deck.
- Push the vertical back edge flush against your bedroom wall.
- Layer your sleeping pillows directly in front of the slope.
- Products Used in This Design:
- 60-inch Queen high-density triangular bed rest wedge pillow
- Washable textured linen pillow slipcover with side storage pockets
- Standard 20×30 inch down-alternative sleeping pillows
Check out more Shopping Guides
3. Peel-and-Stick Architectural Decal Arch
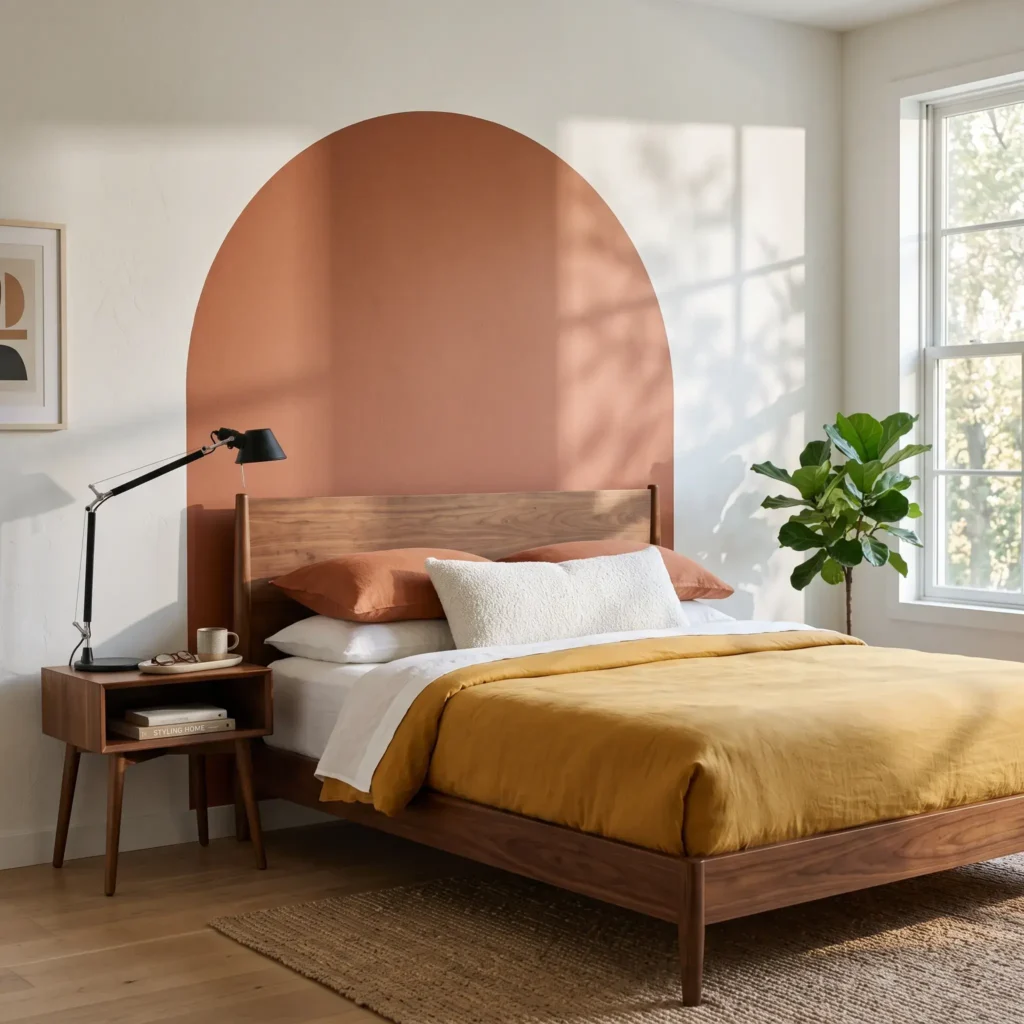
If your bedroom is narrow, physical furniture takes up valuable walking space. A peel-and-stick wall decal creates the illusion of an architectural alcove without taking up an inch of floor space. These decals use matte vinyl backed with low-tack adhesive that peels away cleanly when your lease ends.
- Ideal Bedroom Style: Postmodern, Contemporary Minimalist, or Mid-Century Modern.
- Why It Works: The vinyl sits flat against the paint. It adds color and visual height without any mechanical fasteners.
- Setup Time: 15 minutes.
How to Set It Up
- Clean your wall with a 70 percent isopropyl alcohol and water mix. Let it dry for 10 minutes to remove wall oils.
- Center the decal with your bed frame. Use a pencil to mark light reference dots at the top curve.
- Peel down the top four inches of the backing paper. Stick the top center to the wall.
- Pull the backing paper downward slowly with one hand. Smooth the decal down with a felt squeegee or soft washcloth to push out air bubbles.
- Products Used in This Design:
- 62-inch wide matte terracotta peel-and-stick headboard vinyl arch decal
- Felt-edged vinyl application squeegee
- 70 percent isopropyl alcohol surface cleaning spray
4. Modular Acoustic Felt Wall Tiles
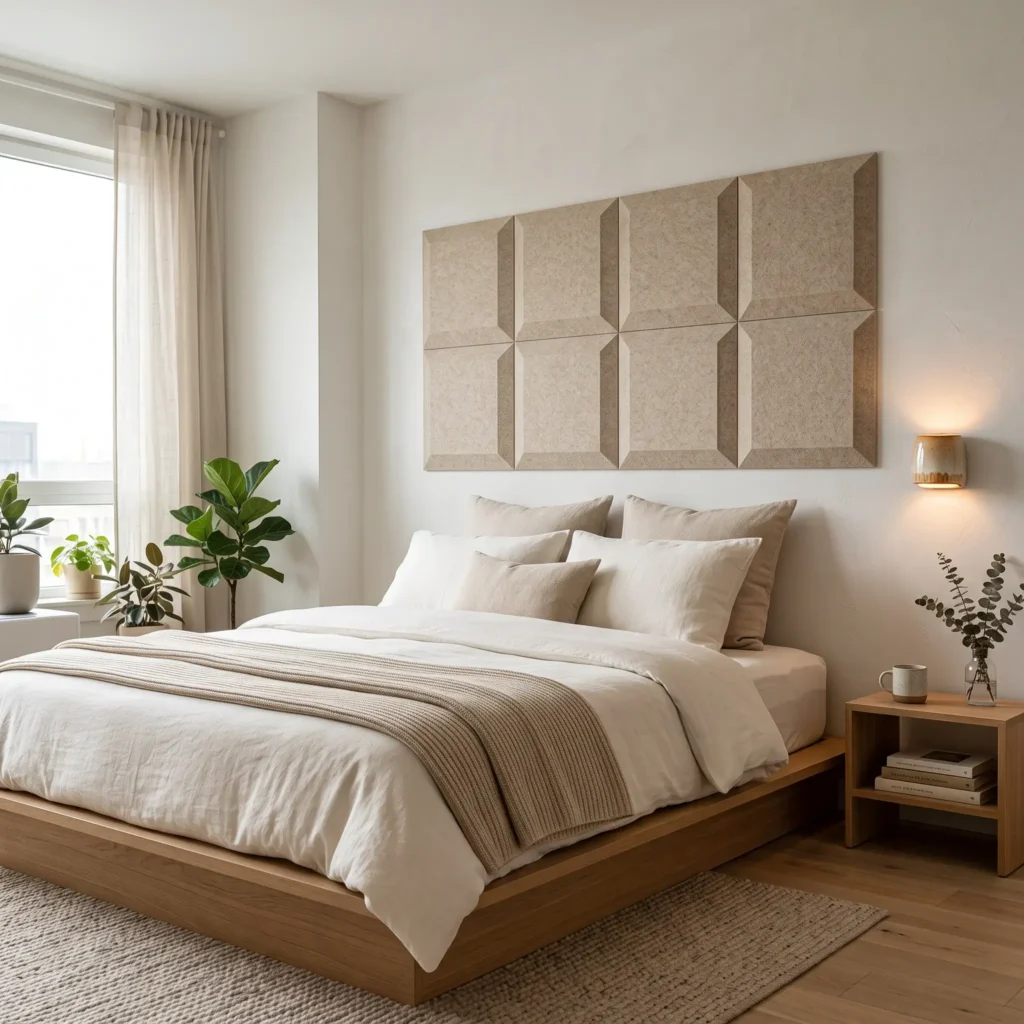
Modular acoustic panels made from recycled polyester (PET) felt offer plush texture and sound dampening. If you share a bedroom wall with a noisy neighbor or an echoing hallway, these panels absorb ambient sound. They mount using gentle stretch-release adhesive tabs that leave no sticky residue behind.
- Ideal Bedroom Style: High-Performance Modern, Urban Loft, or Nordic.
- Why It Works: PET felt is featherlight. Standard picture-hanging adhesive tabs easily support the panels without damaging drywall paper.
- Setup Time: 20 minutes.
How to Set It Up
- Wipe the wall area clean with rubbing alcohol.
- Lay out your panel grid on the floor first. A grid of eight 12×24 inch tiles creates a 48×48 inch Queen headboard backboard.
- Apply two stretch-release adhesive strips to the top corners of each tile reverse face.
- Press each tile firmly against the wall for 30 seconds to lock the pressure-sensitive bond.
- Products Used in This Design:
- 8-pack beveled acoustic PET felt wall tiles (12×24 inches each, warm beige)
- Damage-free foam picture hanging mounting tabs
- 12-inch acrylic ruler for tile alignment
5. Suspended Bench Cushion on Adhesive Utility Hooks
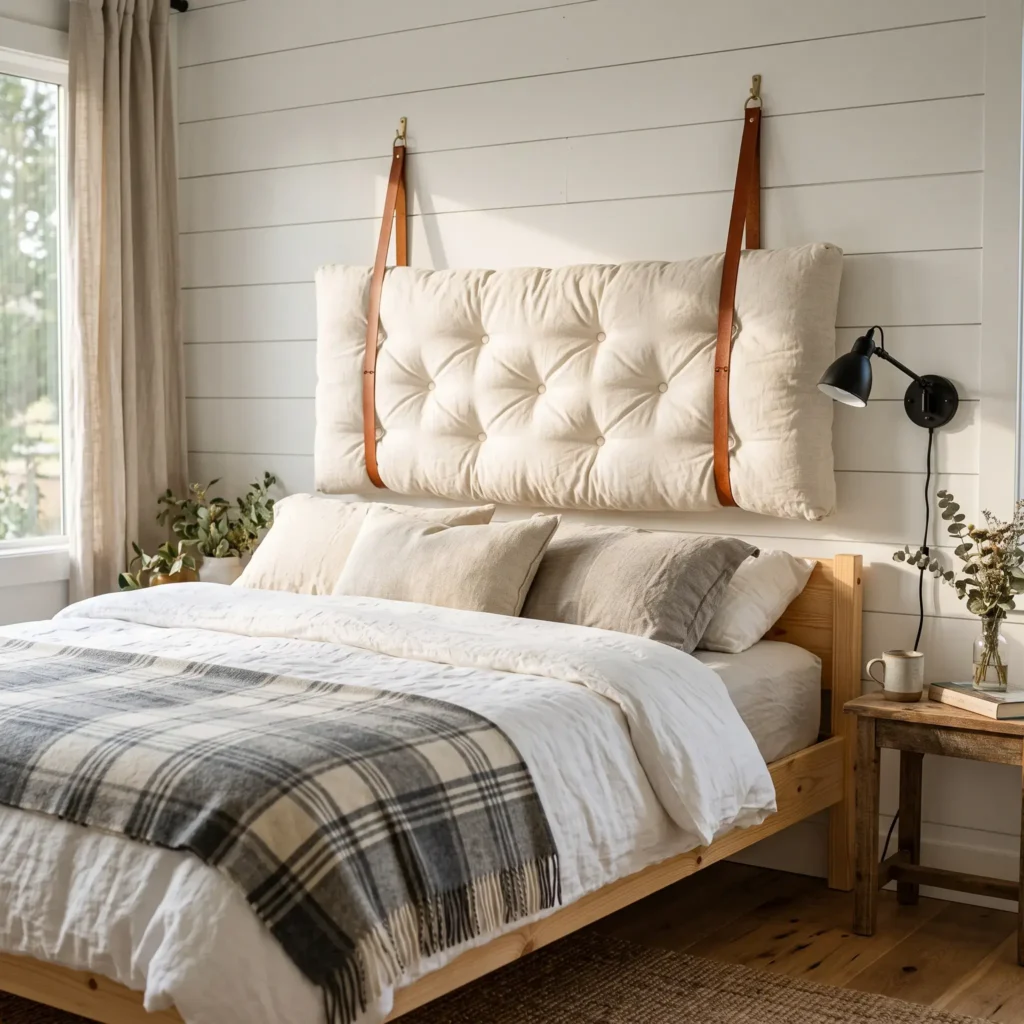
A tufted bench cushion suspended by leather or canvas straps gives you the comfort of a custom upholstered headboard. You do not need to drill curtain rod brackets into your wall. Instead, hang the strap loops directly over heavy-duty adhesive utility hooks rated for five pounds each.
- Ideal Bedroom Style: Modern Farmhouse, Warm Industrial, or Casual Nordic.
- Why It Works: A lightweight cushion spreads its downward weight across multiple hooks. The hooks use stretch-release strips that pull off cleanly.
- Setup Time: 10 minutes.
How to Set It Up
- Select a tufted cushion weighing six pounds or less with sturdy hanging loops.
- Clean the wall zones with isopropyl alcohol and let them dry completely.
- Mount three large adhesive utility hooks along a level horizontal line behind your bed.
- Wait 60 minutes for the adhesive bond to cure before hanging any weight.
- Slip the cushion straps over the hooks and push your bed frame into position.
- Products Used in This Design:
- Tufted indoor bench cushion with leather hanging loops (54×18 inches)
- 3M Command Large Utility Brass Hooks (5 lb capacity each)
- Bubble torpedo level to check hook alignment
6. The Slim Behind-Bed Console Buffer
A freestanding sofa table or ultra-narrow console table placed behind your bed creates a functional headboard shelf. Measuring between six and ten inches deep, it creates a backboard barrier, keeps your pillows from sliding into the wall gap, and provides a ledge for lighting and phone charging.
- Ideal Bedroom Style: Urban Industrial, Micro-Apartment, or Modern Craft.
- Why It Works: It is a 100 percent freestanding furniture piece. The mattress pushes the table base against the wall, keeping it upright without wall screws.
- Setup Time: 5 minutes.
How to Set It Up
- Choose an assembled console table that matches your bed width and sits roughly 30 to 34 inches tall.
- Stick soft silicone bumper pads on the back corners of the tabletop to prevent wall marks.
- Place the console table flush against your bedroom wall.
- Push your bed frame directly against the front legs of the table to sandwich it in place.
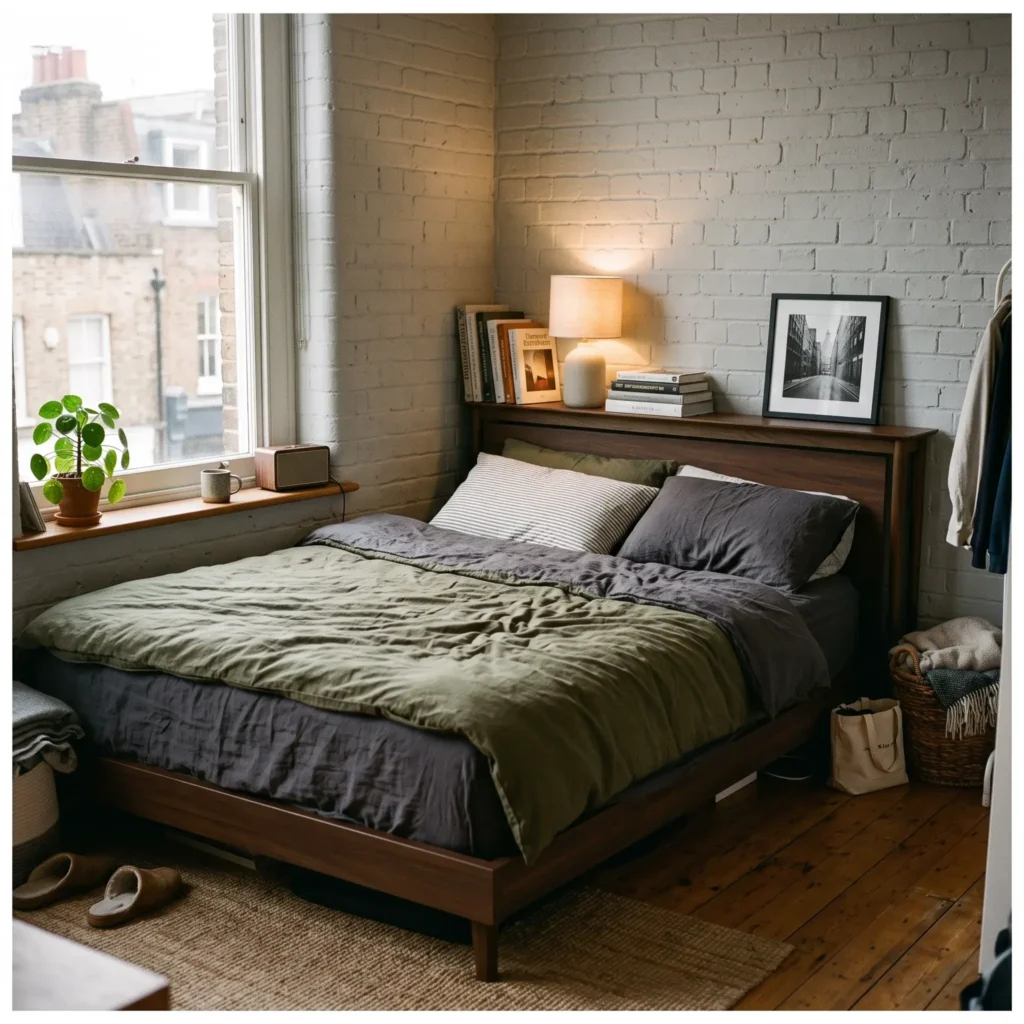
- Products Used in This Design:
- 60-inch extra-slim sofa console table (8 inches deep, dark oak finish)
- Heavy-duty silicone wall protection bumper pads
- Low-profile ceramic bedside accent lamp
7. Woven Textile Hanging with Adhesive Cleats
Hanging a vintage flatweave runner rug, Turkish kilim, or thick woven blanket behind your bed creates rich tactile warmth. Instead of hammering nail brackets or curtain rods into the wall, you can mount the textile using heavy-duty interlocking adhesive strips sewn to a protective backing tape.
- Ideal Bedroom Style: Global Eclectic, Vintage Modern, or Warm Bohemian.
- Why It Works: Hook-and-loop fasteners spread the fabric weight along the entire top hem. This eliminates single-point stress on your drywall.
- Setup Time: 15 minutes.
How to Set It Up
- Iron a two-inch-wide strip of cotton muslin fabric along the top back edge of your textile using fusible bonding tape.
- Stitch or adhere the loop side of an industrial hook-and-loop strip to that muslin tape.
- Attach the matching hook strips to your wall using heavy-duty stretch-release adhesive strips.
- Let the wall adhesive set for one hour, then press the textile firmly against the wall strips.
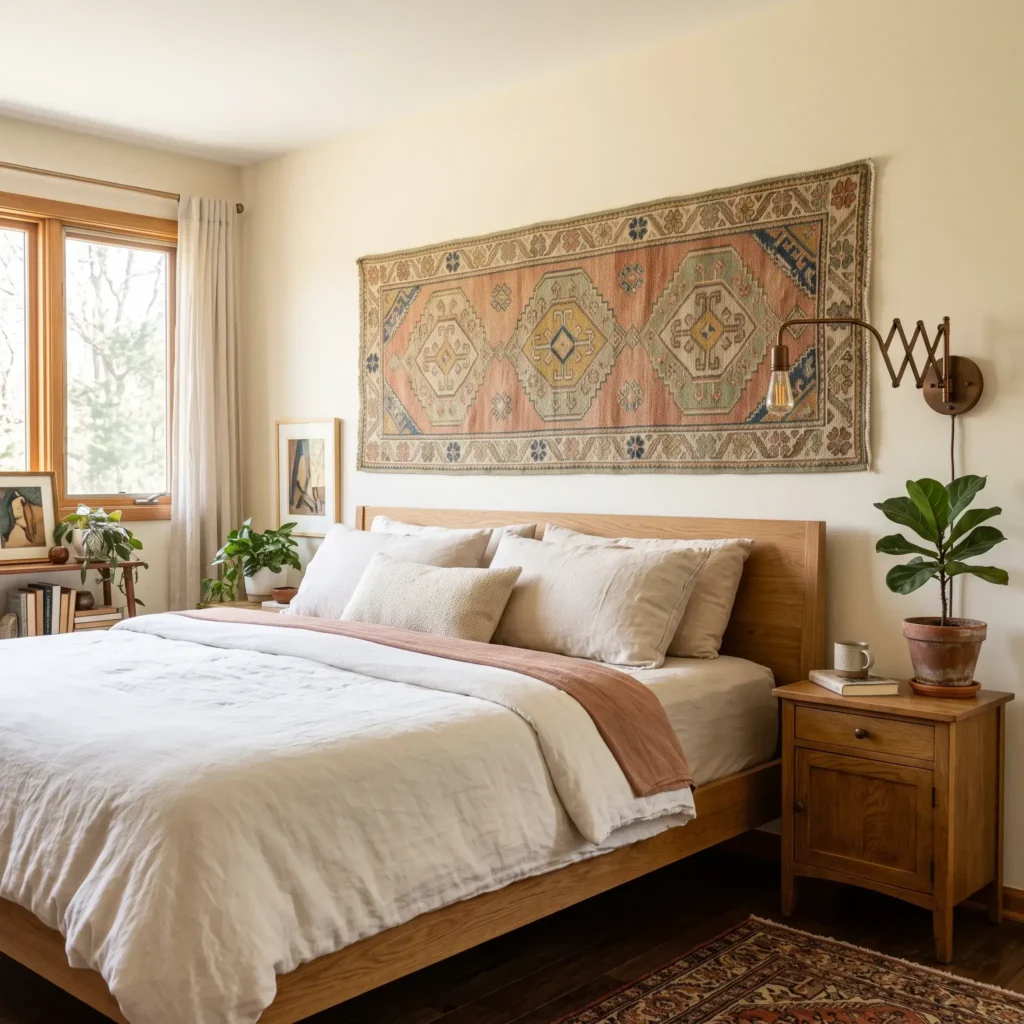
- Products Used in This Design:
- 2.5×6 foot cotton-wool flatweave kilim runner rug (geometric pattern)
- 2-inch heavy-duty interlocking picture hanging adhesive strips
- 2-inch unbleached cotton twill webbing tape
8. The Spring-Loaded Alcove Tension Drape (Low-Intervention)
If your bed sits inside an alcove, a nook, or between two partition walls, you can hang floor-to-ceiling drapery without a drill. A heavy-duty, spring-loaded tension rod wedges securely between the opposing walls, holding thick velvet or heavy linen curtains directly behind your bed frame.
- Ideal Bedroom Style: Hotel Luxury, Soft Classical, or Parisian Modern.
- Why It Works: Outward spring pressure holds the rod in place. Non-marking rubber end caps protect your side walls from marks.
- Setup Time: 10 minutes.
- Tools Needed: None. Twist-to-tighten tension rod only.
How to Set It Up
- Thread your chosen drapery panels onto the tension rod.
- Lift the rod into the alcove roughly 12 to 18 inches above your mattress height, or mount it near the ceiling for extra drama.
- Twist the rod outward until it fits snugly against both side walls.
- Let the fabric drape straight down to the floor, then push your bed frame against it.
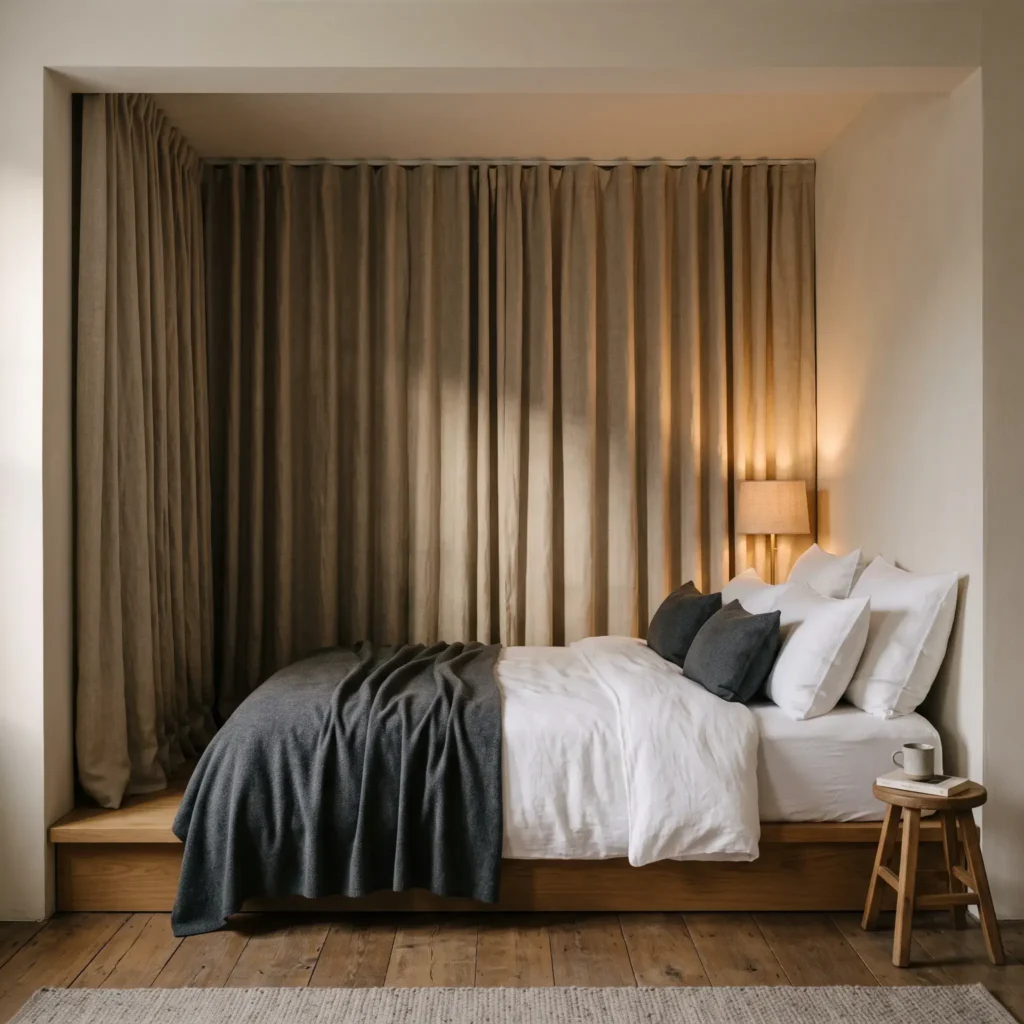
- Products Used in This Design:
- Heavy-duty spring-loaded shower or window tension rod (adjustable 48 to 84 inches)
- Pair of washed Belgian flax linen curtain panels (96 inches long, oatmeal)
- Non-slip rubber tension rod replacement end grips
9. The Painted Color-Block Arch (Low-Intervention)
If your landlord allows you to paint as long as you repaint the wall white before moving out, a painted color-block arch is an affordable way to frame your bed. It requires zero mechanical hardware, zero floor space, and zero carpentry tools.
- Ideal Bedroom Style: Modern Minimalist, Mediterranean, or Southwestern.
- Why It Works: Paint adds visual structure and anchors your furniture without touching your floor or structural drywall.
- Setup Time: 2 hours.
- Tools Needed: Paint roller, delicate painter tape, pencil, string compass.
How to Set It Up
- Measure your mattress width and add two inches on each side. Mark this outline on your wall.
- Tie a pencil to a piece of string cut to half your bed width. Pin the string center point with a thumb tack and draw a smooth top arch.
- Mask your outer lines with delicate-surface painter tape.
- Roll two thin coats of matte latex paint inside the tape lines. Remove the tape while the second coat is still slightly damp.
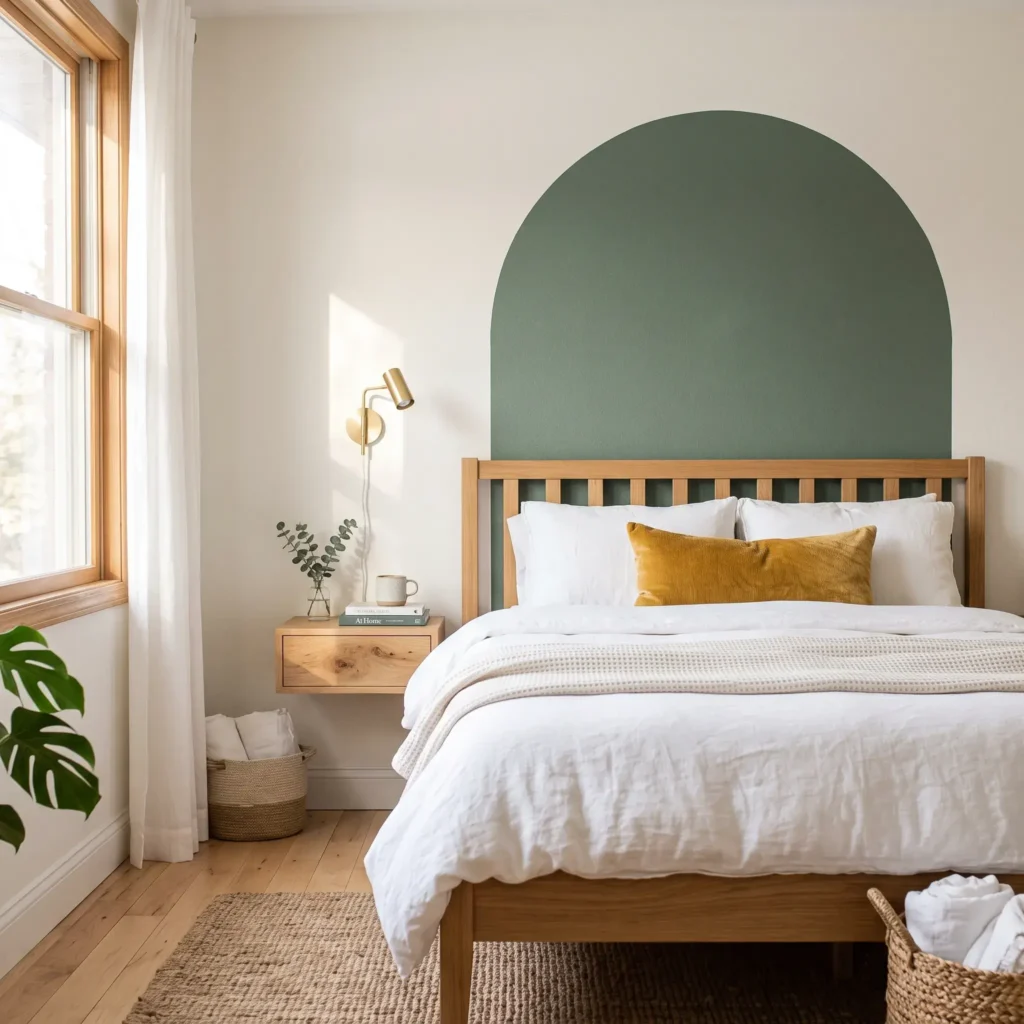
- Products Used in This Design:
- 1 quart interior matte latex paint (Muted Olive or Sage)
- 1.5-inch delicate-surface painter tape
- 4-inch mini foam paint roller with paint tray kit
Comparison Matrix: No-Build Headboard Looks
| Headboard Style | Tool Requirement | Wall Damage Risk (1 to 10) | Average Cost (USD) | Setup Time | Lumbar Back Support |
| 1. Woven Folding Screen | Zero Tools | 0 / 10 (Zero wall contact) | $70 to $180 | 3 minutes | Moderate (rigid; pair with pillows) |
| 2. Wedge Pillowboard | Zero Tools | 0 / 10 (Zero wall contact) | $40 to $90 | 1 minute | Superior (high-density foam core) |
| 3. Peel-and-Stick Decal | Zero Tools | 1.5 / 10 (Safe for cured paint) | $25 to $50 | 15 minutes | None (flush visual accent) |
| 4. Acoustic Felt Tiles | Zero Tools | 1.5 / 10 (Stretch-release tabs) | $45 to $110 | 20 minutes | Moderate (soft, pliable surface) |
| 5. Hanging Cushion | Zero Tools | 2 / 10 (Command hook adhesive) | $35 to $75 | 10 minutes | High (plush and padded) |
| 6. Behind-Bed Console | Zero Tools | 0 / 10 (Freestanding structure) | $60 to $130 | 5 minutes | Firm (wooden or metal ledge) |
| 7. Woven Textile Runner | Zero Tools | 1.5 / 10 (Adhesive strip tabs) | $30 to $80 | 15 minutes | Low (soft fabric layer) |
| 8. Tension Rod Drape | None (Twist rod only) | 0.5 / 10 (Rubber end caps) | $40 to $90 | 10 minutes | Moderate (gathered drapery) |
| 9. Painted Wall Arch | Painter tape and roller | 4 / 10 (Must repaint upon move-out) | $20 to $40 | 120 minutes | None (flush visual accent) |
Wall Surface Safety: How to Avoid Paint Disasters
Adhesive products save your security deposit only when you use them correctly. Drywall paper is delicate, and cheap builder-grade paint peels easily under improper adhesive tension.
Choose Stretch-Release Acrylic Foam Over Nano-Tape
Never use clear polyurethane “nano-tape” on painted rental walls. Nano-tape creates aggressive surface adhesion. When you peel it off, its grip strength often exceeds the bond between the drywall paper and its primer coat. It will pull chunks of paint straight off your wall.
Instead, stick strictly to stretch-release acrylic foam strips, like 3M Command picture hanging strips. When you pull the bottom tab straight downward parallel to your wall, the foam stretches out. This stretching narrows the strip and brings the peel angle close to zero degrees, releasing the bond cleanly without pulling the paint outward.
The 30-Day Paint Cure Rule
If your landlord painted your apartment right before you moved in, wait at least 30 days before applying any decals or adhesive strips. While latex paint dries to the touch in a few hours, it takes three to four weeks to fully cure and release trapped solvents. Applying adhesives over uncured paint traps moisture, weakens the bond, and ruins the finish when removed.
Drywall Texture Limits
Peel-and-stick decals and adhesive tiles require flat, smooth drywall. If your apartment has heavy orange peel, knockdown, or textured plaster walls, adhesive surfaces cannot make full contact with the wall. Air pockets form behind the strip, causing the installation to fall within days.
If you have heavily textured walls, skip the adhesives completely. Choose a friction-locked folding screen, a wedge bolster, or a behind-bed console table instead.
Essential Overhead Safety Rules
Falling objects cause serious injuries. When styling a bed without a built-in frame, follow these practical safety guidelines:
- No Glass Picture Frames Above Your Head: Never use removable adhesive strips or hooks to hang heavy glass-glazed picture frames directly over your pillows. Vibrations from walking or slamming doors can cause adhesive bonds to fail unexpectedly.
- Use Acrylic Glazing Instead of Glass: If you want framed art above your bed, buy lightweight poster frames with thin acrylic sheets instead of heavy glass panes.
- Check Weight Ratings: Always divide the weight of hanging cushions across multiple adhesive hooks. If a cushion weighs six pounds, use three hooks rated for five pounds each rather than relying on a single hook.
Frequently Asked Questions
Can you have a headboard without attaching it to the wall?
Yes. You can use freestanding furniture like a folding room divider, a narrow sofa table, or a triangular wedge pillowboard. These options rest on your floor or mattress deck, using mattress weight and gravity to stay upright without touching the wall with screws.
How do you keep a freestanding folding screen from falling over?
Push your mattress and bed platform firmly against the lower third of the screen leaves. The weight of your bed creates continuous horizontal pressure that clamps the screen against your wall baseboard. Placing rubber gripper pads under the screen feet also keeps the base from sliding outward on slick floors.
Will peel-and-stick headboards damage rental apartment paint?
Peel-and-stick decals made with low-tack polyacrylate adhesives are safe for fully cured, smooth latex paint. To remove the decal cleanly when moving out, warm the vinyl surface with a household hair dryer on low heat. The gentle warmth softens the adhesive so you can peel it away slowly without tearing the wall paper.
What is the most comfortable zero-tool headboard for sitting up in bed?
The full-width wedge pillowboard offers the best back support. Built from high-density upholstery foam, it supports your lumbar and upper back at a comfortable reading angle, outperforming hard wooden boards and flat wall decals.
Finding the Right Fit
Upgrading your bedroom should not cost you your security deposit or require a garage full of power tools.
If you want immediate back support, choose the wedge pillowboard. If you want rich architectural texture without touching the wall, set up a freestanding woven screen. If you live in a tight studio where every inch of floor space counts, install a peel-and-stick decal arch or acoustic felt tiles.
Match your choice to your room layout, check your wall texture before buying adhesives, and enjoy a finished bedroom look without putting a single hole in your wall.