8 Insanely Creative No-Carve Pumpkin Decorating Ideas for Fall
Carving pumpkins is a messy, frustrating chore. You spend an hour scooping out cold, slimy seeds with an ice cream spade. Within five days, bacteria and fruit flies turn your jack-o-lantern into a sunken puddle of gray mold.
No-carve decorating fixes this problem completely. Keeping the outer skin intact prevents moisture loss and bacterial decay. Your display stays firm and fresh from early October straight through Thanksgiving dinner.
Here are eight high-impact, failure-proof design concepts you can create at home this weekend.
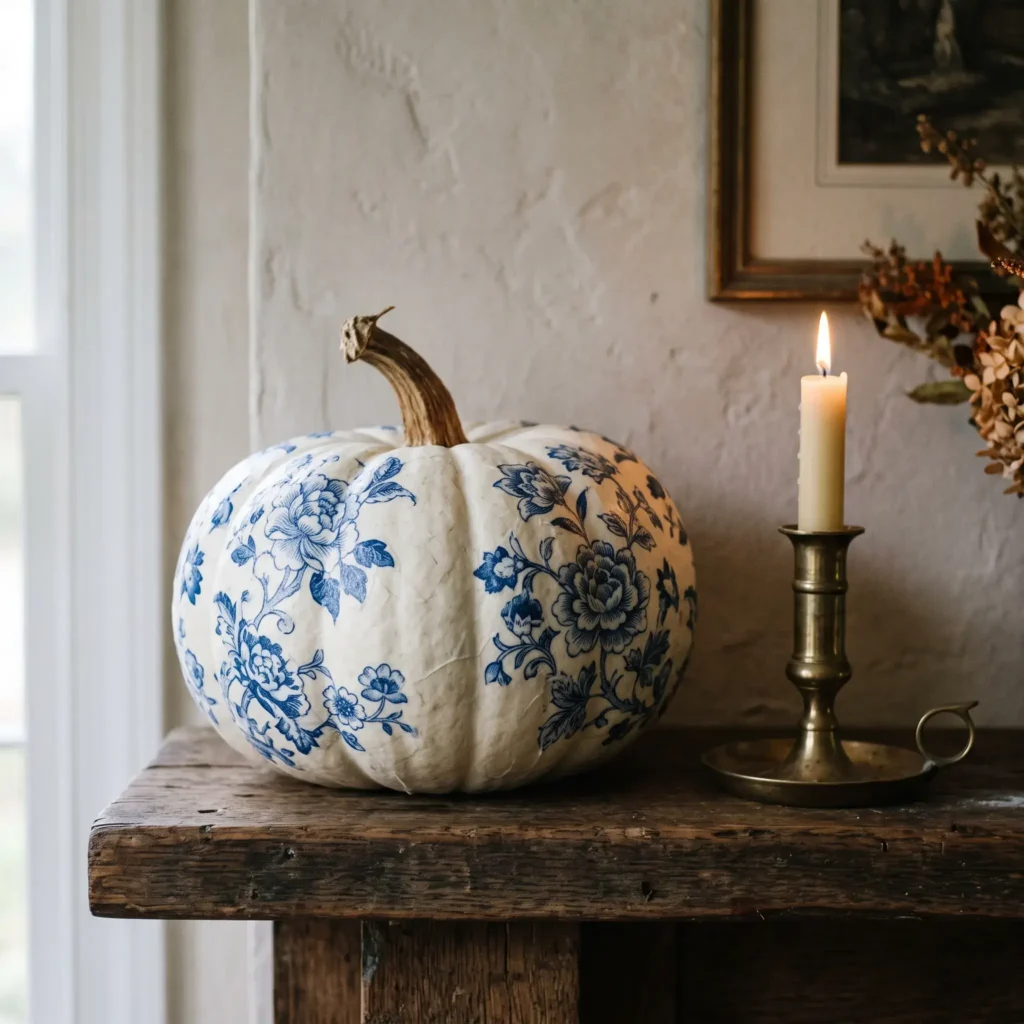
1. Chinoiserie Delft Blue Paper Decoupage
This design replicates the look of antique blue-and-white porcelain ginger jars. It pairs cobalt floral patterns against a clean white pumpkin rind.
Step-by-Step Instructions
- Separate a decorative blue-and-white paper napkin down to its single, translucent top layer. Discard the white backing sheets.
- Tear the floral patterns into small clusters using your fingers. Torn paper edges blend into the curved rind far better than sharp scissor cuts.
- Brush a thin layer of Matte Mod Podge directly onto a white Casper pumpkin.
- Place the napkin cutout onto the wet medium.
- Smooth the paper outward from the center with a soft synthetic fan brush. This pushes out air bubbles without tearing the wet napkin.
- Let the surface dry for two hours. Spray the finished surface with clear matte acrylic to protect it from porch humidity.
Supplies Needed
- White Casper or Lumina pumpkin (real gourd or craft foam blank)
- Blue-and-white Chinoiserie floral paper napkins
- Matte Mod Podge
- Soft synthetic fan brush
- Clear matte acrylic spray sealer
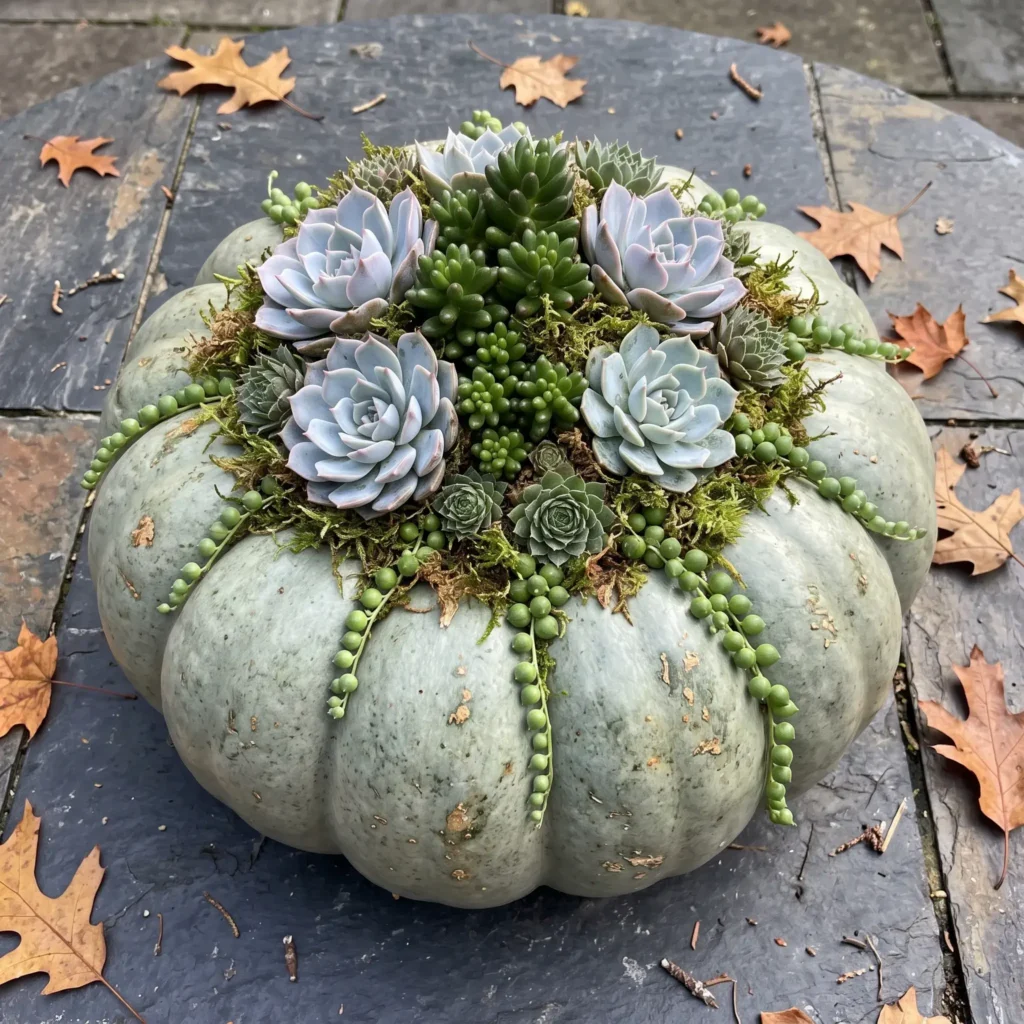
2. Living Epiphytic Succulent Crown
This living arrangement sits on top of the pumpkin without cutting into its flesh. Once autumn ends, you can lift the entire succulent cluster off the rind and plant it in your garden.
Step-by-Step Instructions
- Select an heirloom pumpkin with a wide, sunken top, such as a Cinderella or Jarrahdale variety.
- Cut a circular pad of preserved sphagnum moss roughly one inch thick.
- Apply a ring of low-temperature hot glue around the stem basin. Press the moss pad firmly into the glue.
- Gather succulent cuttings with dry, calloused stems. Echeveria, Sedum, and Sempervivum work best.
- Dab low-temperature glue onto the base of each cutting and nestle it into the moss. The glue cools within seconds and will not damage plant tissue.
- Mist the moss pad lightly with water once per week using a precision spray bottle. Avoid letting water pool in the stem cavity.
Supplies Needed
- Cinderella (Rouge Vif d’Etampes) or Jarrahdale heirloom pumpkin
- Preserved sphagnum moss
- Fresh succulent cuttings (Echeveria, Sedum, string of pearls)
- Low-temperature craft glue gun and glue sticks
- Precision water spray bottle
Check out more Fall Decor Ideas
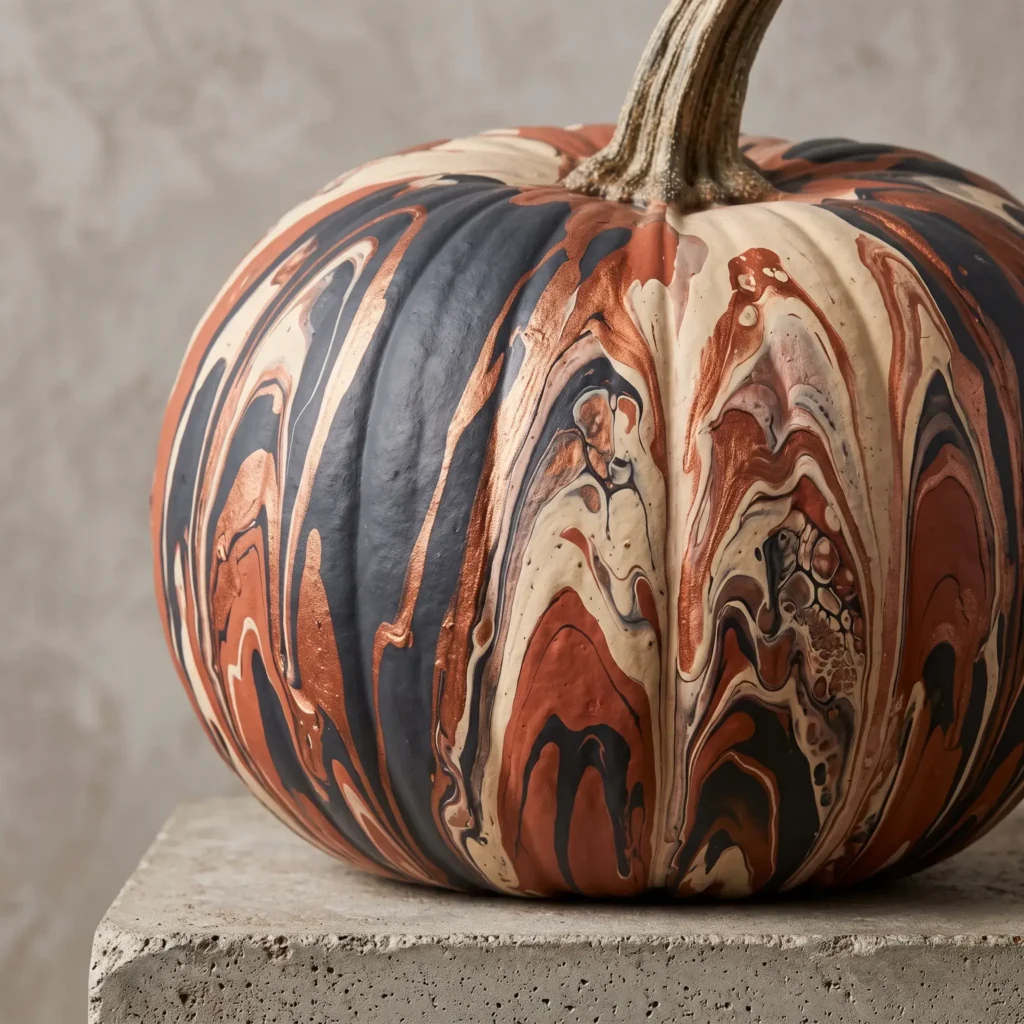
3. Fluid Acrylic Gravity Pour
Fluid pouring turns a standard gourd into a marbled stone centerpiece. The key lies in paint viscosity. Regular craft paint runs too thin, while heavy acrylic paint pools at the base and cracks.
Step-by-Step Instructions
- Mix your acrylic paints with an acrylic pouring medium in an equal 1:1 ratio. Prepare three or four complementary colors like ivory, charcoal, terracotta, and metallic bronze.
- Place an upside-down plastic cup inside a wide aluminum baking pan. Rest your sanitized white pumpkin on top of the cup so the base stays elevated.
- Layer your mixed colors into a single cup without stirring them together.
- Pour the paint slowly over the stem apex in a continuous stream.
- Let gravity pull the ribbons of pigment down each natural rib.
- Direct cool air from a hairdryer on low speed across the surface to spread the paint over bare patches.
- Let the paint cure undisturbed for 48 hours before moving it.
Supplies Needed
- White medium pumpkin
- Acrylic craft paint in three or four colors
- Polymer pouring medium
- Plastic cups and wooden stir sticks
- Disposable aluminum pan for catching paint
- Hairdryer with cool-air setting
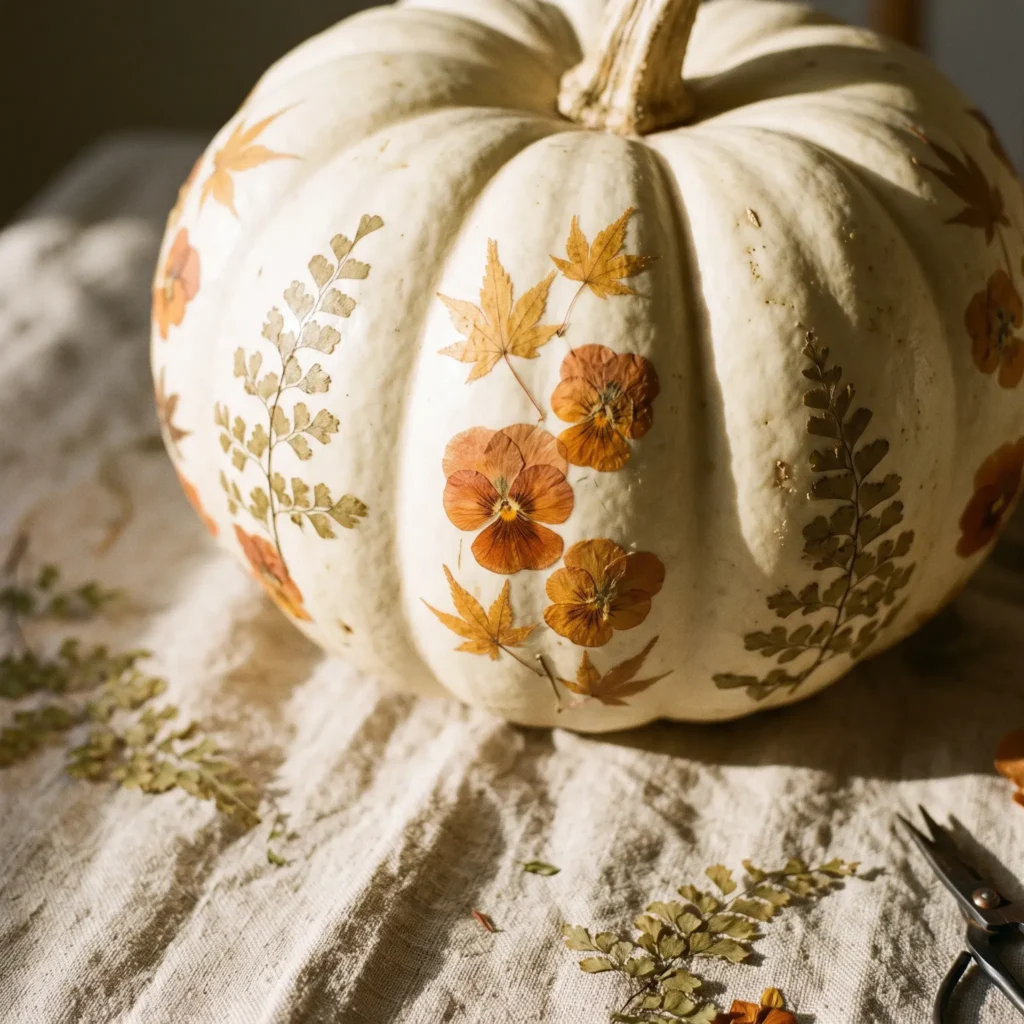
4. Pressed Autumn Herbarium Botanicals
This technique treats the pumpkin rind like vintage parchment paper. It works best with pressed garden flora that lay completely flat against the skin.
Step-by-Step Instructions
- Gather fall leaves, pansies, violas, and fern fronds. Press them between heavy books until completely dry and paper-thin.
- Clean a pale Lumina pumpkin with rubbing alcohol to remove natural rind oils.
- Brush a smooth layer of Matte Mod Podge over a small section of the pumpkin.
- Use craft tweezers to position a dried flower or leaf onto the wet glue.
- Brush outward from the center of the botanical using a soft flat brush to eliminate wrinkles.
- Seal the entire pumpkin with UV-resistant clear acrylic spray to prevent sunlight from fading the natural flower colors.
Supplies Needed
- White Lumina or Casper pumpkin
- Flat-pressed dried flowers, leaves, and fern fronds
- Matte Mod Podge
- Precision craft tweezers
- 1-inch synthetic flat brush
- UV-protective clear matte acrylic spray
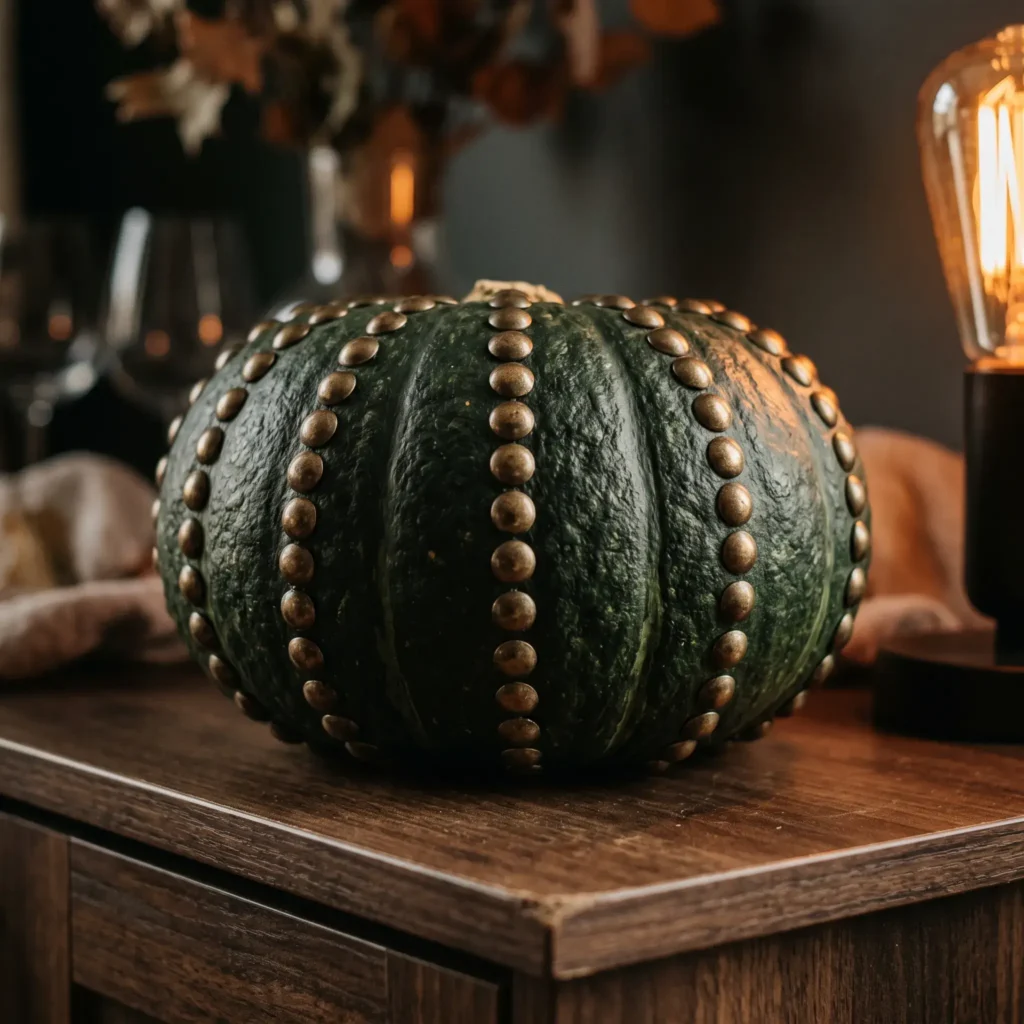
5. Antique Brass Upholstery Stud Matrix
This mechanical design creates clean geometric patterns with zero paint, zero glue, and zero cleanup time.
Step-by-Step Instructions
- Pick a dark green Kabocha squash or an heirloom pumpkin with a firm rind.
- Run strips of blue painter’s tape down the vertical ribs to create straight spacing guidelines.
- Push solid brass upholstery tacks directly into the rind using your thumb.
- Space the tacks half an inch apart down each line.
- Peel away the painter’s tape once all studs are seated.
- Optional: String thin copper wire between the tack heads to create geometric web shapes.
Supplies Needed
- Firm dark green Kabocha pumpkin
- 100 to 150 decorative brass upholstery tacks or domed nailheads
- Low-tack blue painter’s tape
- Small rubber mallet (optional, for hard rinds)
- 26-gauge bare copper craft wire (optional)
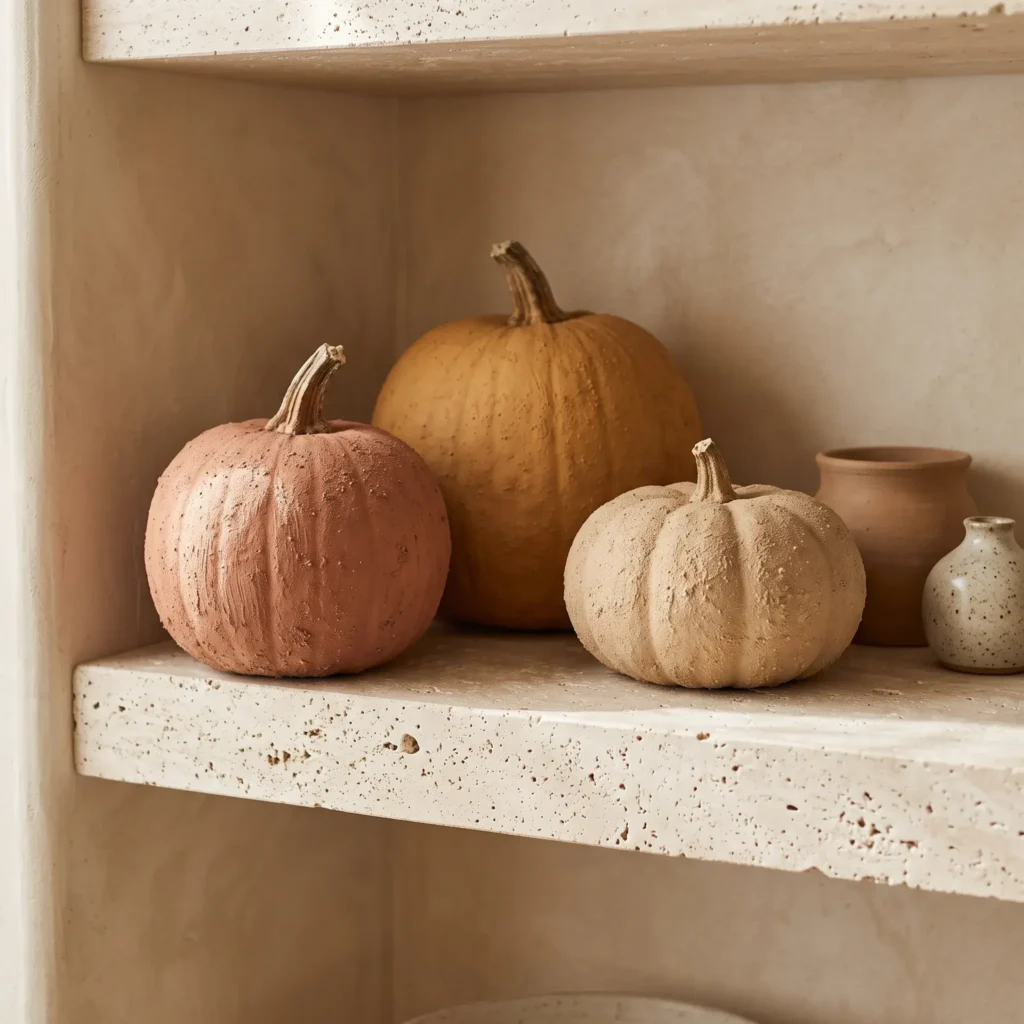
6. Textured Terracotta Baking Soda Wash
This method turns cheap plastic craft pumpkins or bright orange squash into realistic pieces of unglazed Spanish pottery. Baking soda creates real mineral texture on slick plastic.
Step-by-Step Instructions
- Mix two ounces of matte acrylic paint in terracotta, clay, or warm sand with two tablespoons of baking soda and one tablespoon of water.
- Stir until the mixture looks like thick, gritty batter.
- Use a coarse chip brush to spread the mixture across the pumpkin in short cross-hatch strokes.
- Let the first coat dry for one hour.
- Apply a second coat, tapping the brush bristles directly against the surface to create sandy ridges.
- Let the pumpkin cure for 24 hours until the paint hardens into a matte, stone-like surface.
Supplies Needed
- Craft foam pumpkin or real smooth gourd
- Matte acrylic craft paint in terracotta, clay, or beige
- Baking soda (sodium bicarbonate)
- 2-inch coarse bristle chip brush
- Disposable mixing container
7. Studio 54 Glass Mirror Mosaic
This disco-inspired design catches porch lights and candle flickers, making it an ideal focal point for evening gatherings.

Step-by-Step Instructions
- Use a dense craft foam pumpkin instead of a real gourd. Glass mirror tiles add substantial weight that can bruise real squash tissue.
- Get rolls of self-adhesive 5x5mm mini glass mirror tiles.
- Peel away the backing paper and wrap the tile sheets around the pumpkin equator first.
- Cut strips apart with scissors to fit narrower rows as you work toward the top and bottom.
- Press each row down with a soft cloth to secure the adhesive backing.
- Place a small dab of clear silicone adhesive under corner tiles near the stem for extra hold.
Supplies Needed
- 9-inch dense carvable craft foam pumpkin
- Self-adhesive glass mini mirror tile sheets (5mm x 5mm square size)
- Heavy-duty craft scissors
- Clear silicone adhesive or tacky glue
- Soft microfiber cloth
8. Moody Victorian Drip Wax Drape
This gothic design uses cascades of colored candle wax to build rich, three-dimensional ridges over dark squash.
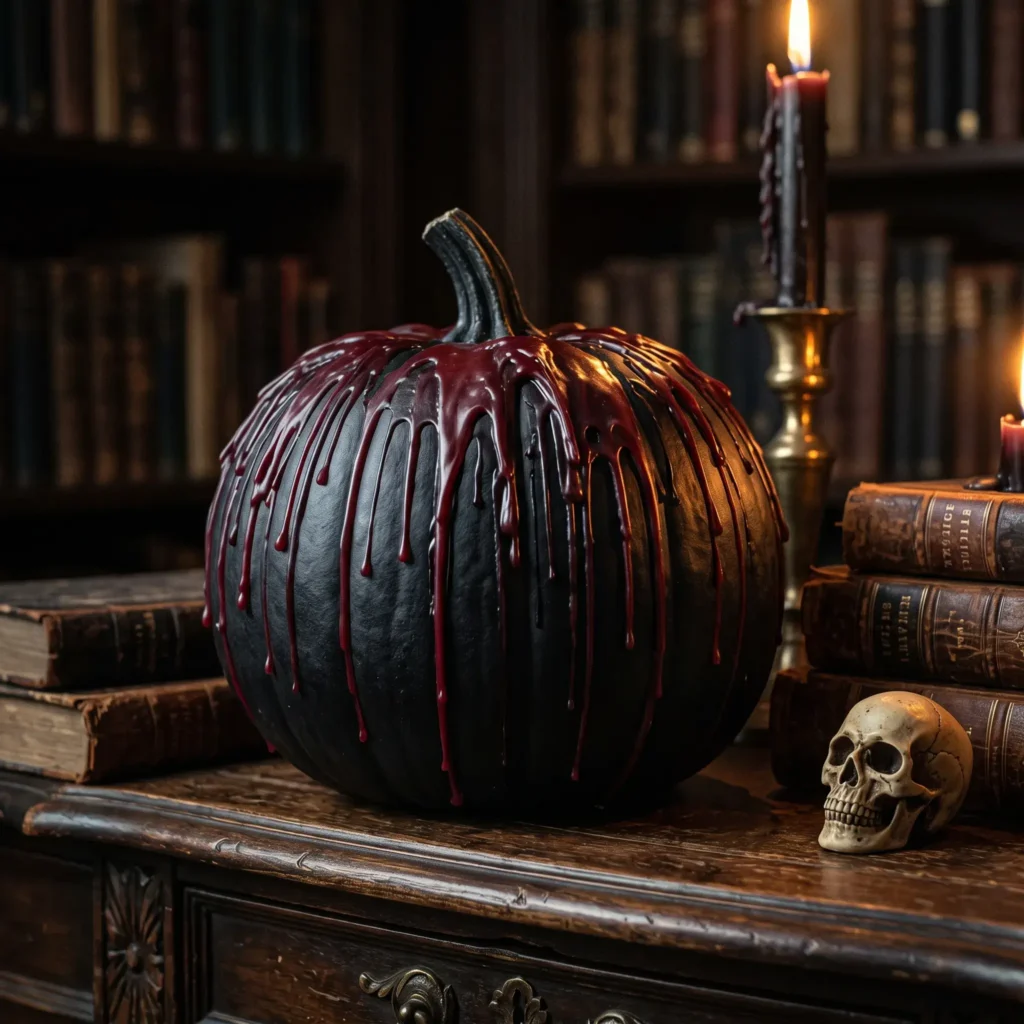
Step-by-Step Instructions
- Coat a medium pumpkin with two layers of ultra-matte black spray paint or chalk paint.
- Put down heavy parchment paper or foil across your workspace to catch hot wax runoff.
- Light a burgundy, oxblood, or black taper candle. Allow a pool of liquid wax to build around the flame.
- Tilt the candle over the pumpkin shoulders, letting drops run naturally down the vertical grooves.
- Apply five or six runs, wait two minutes for the wax to harden, then add another layer to create thick drips.
- Seal the stem base with black sealing wax to complete the vintage look.
Supplies Needed
- Real or faux medium pumpkin
- Flat black or charcoal matte spray paint
- High-drip colored taper candles (oxblood, burgundy, or ivory)
- Candle lighter or long wooden matches
- Parchment paper or aluminum foil drop sheet
The Porch-Life Protocol: How to Make Real Pumpkins Last for Months
Before applying paint, glue, or paper, you must prepare the pumpkin properly. Farm gourds arrive with soil bacteria and wild mold spores on their skin. Without sanitization, indoor heat and moisture will rot the fruit from the outside in.
Follow this two-step prep routine before you start decorating.
Step 1: The Bleach Sanitization Bath
Wash the pumpkin in a 10:1 water-to-bleach solution. Mix one tablespoon of unscented household bleach into one gallon of cool water in a clean utility sink.
Submerge the pumpkin for 15 minutes, rolling it occasionally. Bleach oxidizes fungal spores hiding in microscopic cracks without weakening the rind cuticle. Rinse with clean water and let the pumpkin dry completely in a well-ventilated space.
For an all-natural option, mix one part white vinegar with three parts water. Vinegar kills surface mold, though it provides a shorter window of protection than bleach.
Step 2: Strip Natural Rind Waxes with Rubbing Alcohol
Pumpkin rinds naturally create a waxy oil to retain hydration. This wax also repels craft paint, decoupage glue, and tape adhesives.
Wipe the entire rind with 70% isopropyl rubbing alcohol on a microfiber towel. This clears away slick oils. Once dry, mist the gourd with a light coat of clear matte acrylic spray. This creates a receptive surface that keeps paint from flaking off later.
Step 3: Handle Stems Carefully and Isolate from Ripening Fruit
- Protect the stem: Never carry a pumpkin by its stem. Snapping the wood breaks internal vascular fibers at the top, allowing soft-rot bacteria directly into the flesh.
- Isolate from apples and bananas: Keep decorated pumpkins away from kitchen fruit bowls. Ripening apples, bananas, and pears produce ethylene gas. Ethylene causes squashes to soften and yellow prematurely.
Real Gourds vs. Craft Foam Pumpkins: Material Comparison
Choosing between real farm gourds and carvable foam blanks depends on where you display the piece and how heavy the decorations are.
| Feature | Real Farm Pumpkin (Casper, Lumina, Cinderella) | Dense Craft Foam Blank (Funkin style) |
|---|---|---|
| Best Techniques | Decoupage, pressed flora, succulent crowns, drip wax | Heavy mirror mosaics, hot glue crafts, tack patterns |
| Indoor Lifespan | 8 to 12 weeks with sanitization prep | Indefinite (lasts for many years) |
| Outdoor Durability | Vulnerable to heavy rain, freezing frost, and rodents | Waterproof, but needs interior weight to resist wind |
| Surface Finish | Natural weight, organic curves, distinct rib patterns | Uniform symmetry, lightweight, smooth plastic-foam shell |
| Typical Cost | $5 to $15 each seasonally | $12 to $35 each depending on size |
Frequently Asked Questions
What kind of paint stays on pumpkins without peeling?
Acrylic craft paint and oil-based paint markers work best on pumpkin rinds. Smooth rinds shed paint easily, so clean the surface with rubbing alcohol before you begin. Finish your design with a light coat of clear matte spray sealant to lock the pigment in place.
How long do no-carve pumpkins last compared to carved ones?
A carved jack-o-lantern typically breaks down within three to seven days. A sanitized, uncarved pumpkin kept on a sheltered porch will stay firm for eight to twelve weeks.
Will hot glue ruin a fresh pumpkin?
Standard high-temperature hot glue can scorch the outer rind, creating soft spots that lead to rot. Use a low-temperature glue gun or tacky craft glue instead. These hold securely without damaging the plant skin.
Can painted pumpkins stay outside in rain and cold weather?
Rainwater can cause water-based craft paint to soften and peel. Keep painted pumpkins on a covered porch, and apply two coats of clear exterior spray sealant over the artwork. Move real pumpkins indoors whenever temperatures drop below freezing.
Skipping the carving knife keeps your hands clean and your autumn decor looking sharp well past Halloween. Pick your favorite design, prep your gourd with an alcohol wipe, and build a lasting fall centerpiece this weekend.