8 Small Bathroom Tile Ideas: How to Make Tight Spaces Look Twice as Big

A small five-by-eight-foot bathroom can easily feel cramped and dark. When you step into a tight room with broken lines, your eyes stop at every corner. The walls feel like they are closing in, and the ceiling feels uncomfortably low.
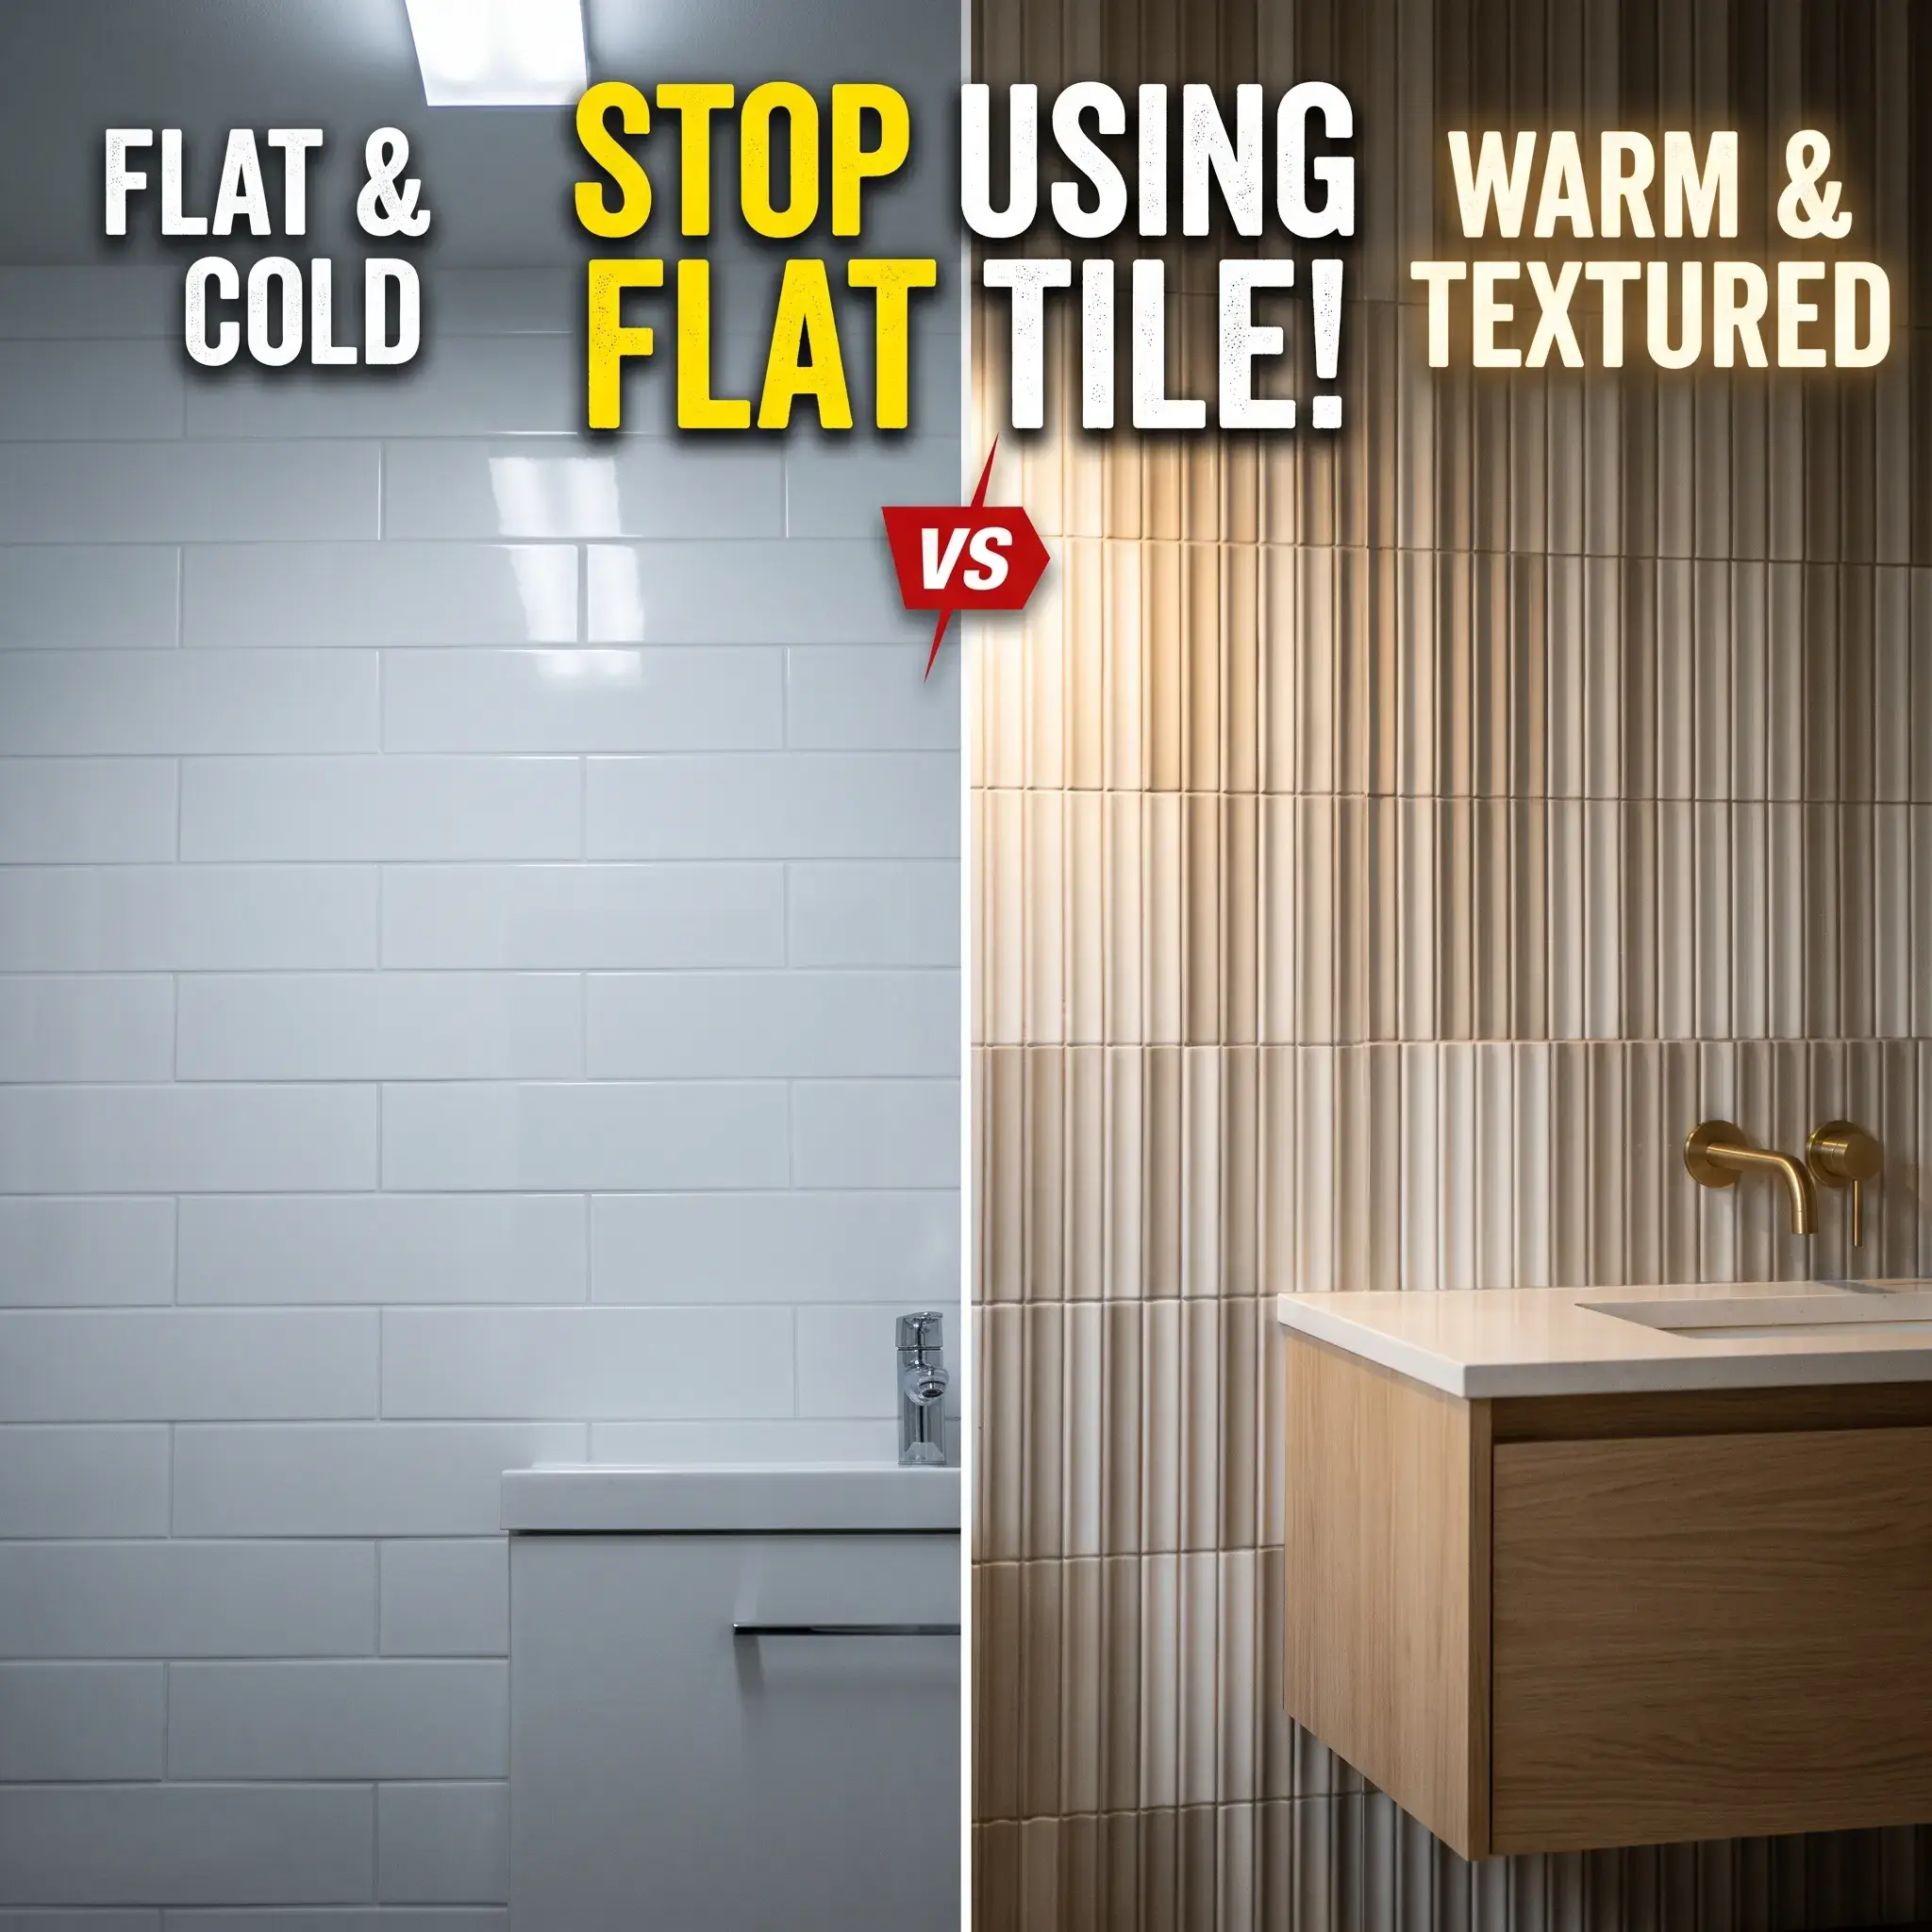
Old interior design advice often claims that small rooms require tiny tiles. That advice is completely wrong. Small tiles cover your floor and walls in dozens of grout lines. That visual grid cuts your room into tiny boxes and makes the entire space feel crowded.
You do not need to knock down walls to create an open room. You only need to manage sightlines, surface reflections, and visual flow. Choosing the right tile scale, orienting patterns intentionally, and matching your grout tones removes unnecessary visual barriers.
Here are eight practical tile ideas designed to make compact bathrooms feel significantly larger, followed by the exact structural rules needed to install them correctly.
8 Practical Tile Ideas That Expand Compact Bathrooms
1. The Monolithic 24×24 Floor and Wall Plane
Carrying the exact same large-format porcelain tile across your floor and up your walls erases the boundary between surfaces. When your eye cannot pinpoint where the floor ends and the wall begins, your brain reads the room as one open plane.
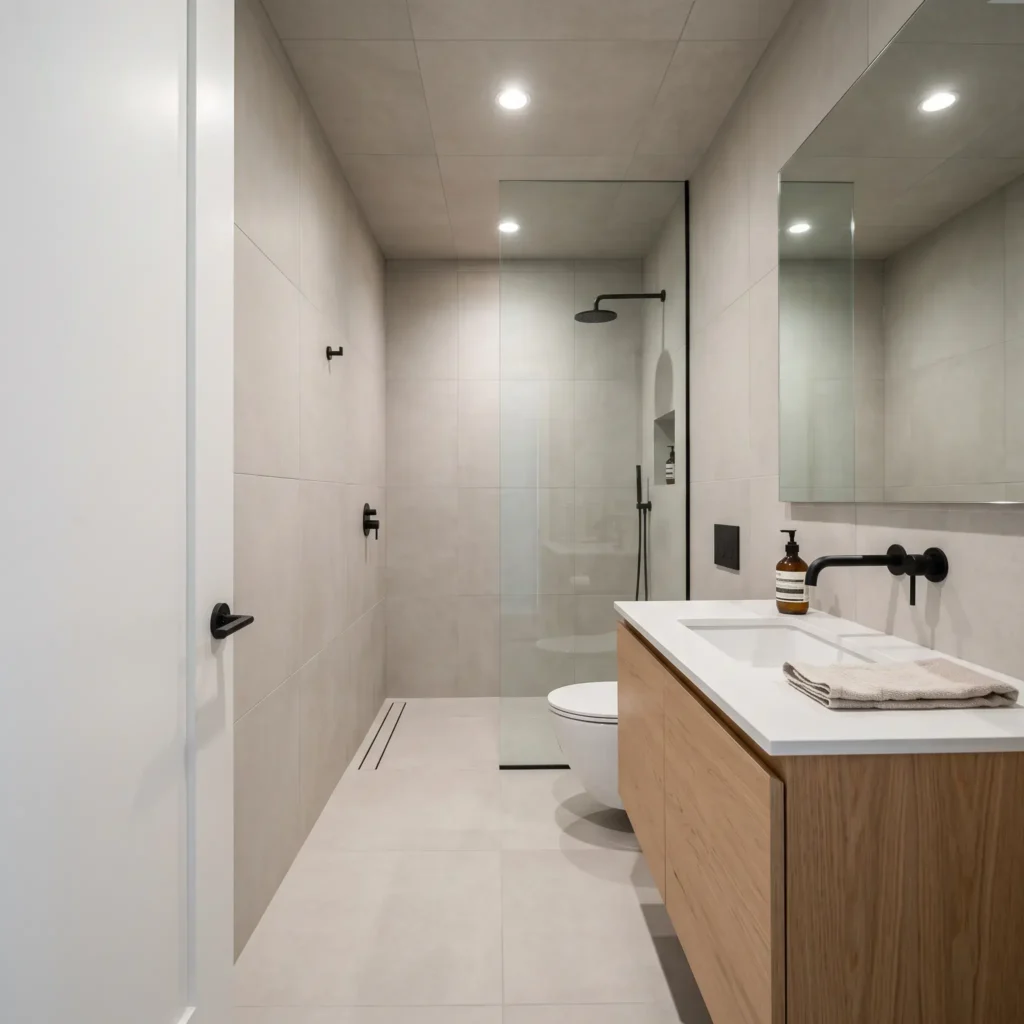
Products Used:
- 24×24 inch rectified porcelain tile in matte greige (honed surface)
- Matching warm gray high-performance epoxy grout
- 30-inch floating white oak vanity with concealed hardware
- Wall-mounted single-handle faucet in matte black
- 3/8-inch clear tempered frameless glass shower screen
2. Vertical Soldier Stack Subway Tiles
Standard horizontal subway tiles widen walls, but they do nothing for low eight-foot ceilings. Installing slim 2×8 inch or 2.5×10 inch tiles in an aligned vertical stack creates straight vertical lines that lead your eye upward. This simple shift makes the ceiling feel noticeably taller.
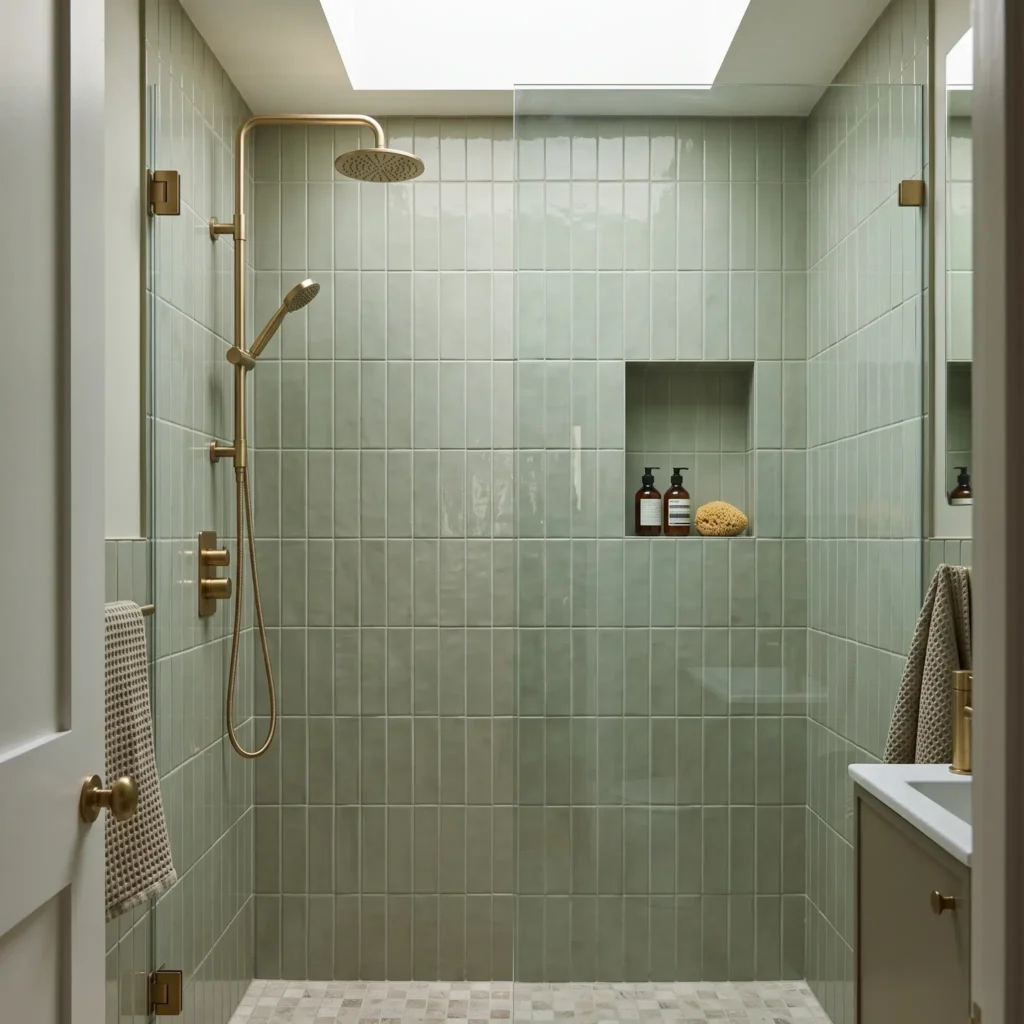
Products Used:
- 2.5×10 inch ceramic wall tiles in satin sage green
- Color-matched pale sage polymer-modified grout
- Concealed thermostatic shower valve and hand shower in brushed brass
- Brushed brass metal edge profiles for the recessed niche
Check out more Bathroom Ideas
3. Curbless Wet Room with a Single-Plane Linear Drain
A standard four-inch shower curb acts as an optical speed bump that cuts your floor in half. Removing that curb and running your floor tile directly into the shower keeps your sightline completely open. Installing a linear drain allows the entire floor to slope in one flat direction toward the back wall.
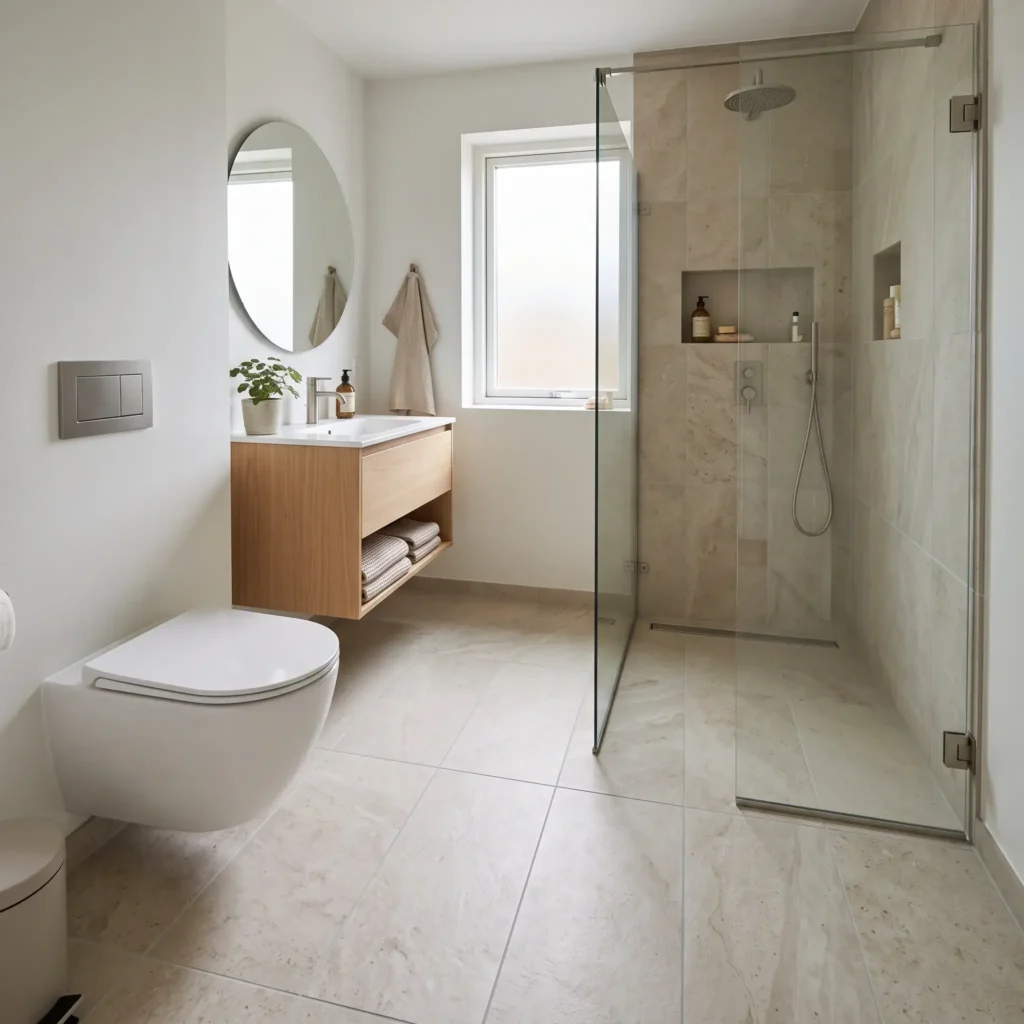
Products Used:
- 12×24 inch light limestone-look matte porcelain floor tiles with wet slip resistance
- Flush wall-to-wall stainless steel linear shower drain channel
- Curbless shower pan waterproofing system
- Wall-hung toilet with in-wall tank carrier and dual-flush actuator plate
4. Undulating Artisanal Zellige Accent Wall with Sconce Lighting
Small, windowless powder rooms often feel flat and boxy. Installing handcrafted Zellige tiles on the vanity wall introduces varied surface angles. When paired with directional wall lighting, every tile catches light at a slightly different angle, adding rich visual depth without dark paint.
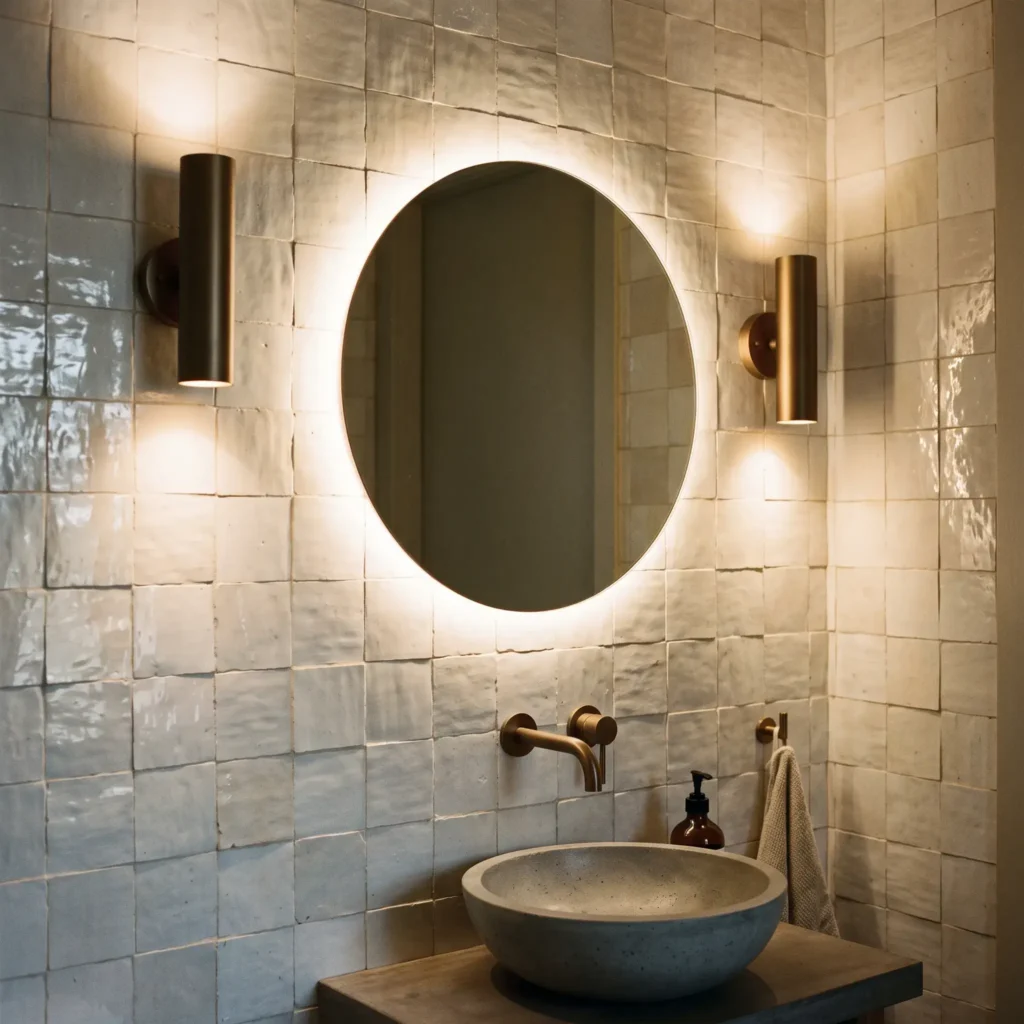
Products Used:
- 4×4 inch authentic Moroccan Zellige terracotta tiles in snow white
- Ultra-fine non-sanded grout in bone white
- 24-inch round LED backlit vanity mirror
- Wall-mounted cast concrete basin in soft gray
- Cylindrical wall sconces in aged bronze
5. Horizontal Planks Set at a 33% Offset
If your bathroom is narrow and feels like a hallway, horizontal tile placement provides an immediate correction. Wide rectangular tiles guide the eye across the perimeter walls to make the room feel wider. Staggering them with a one-third offset avoids the uneven edges common with large planks.
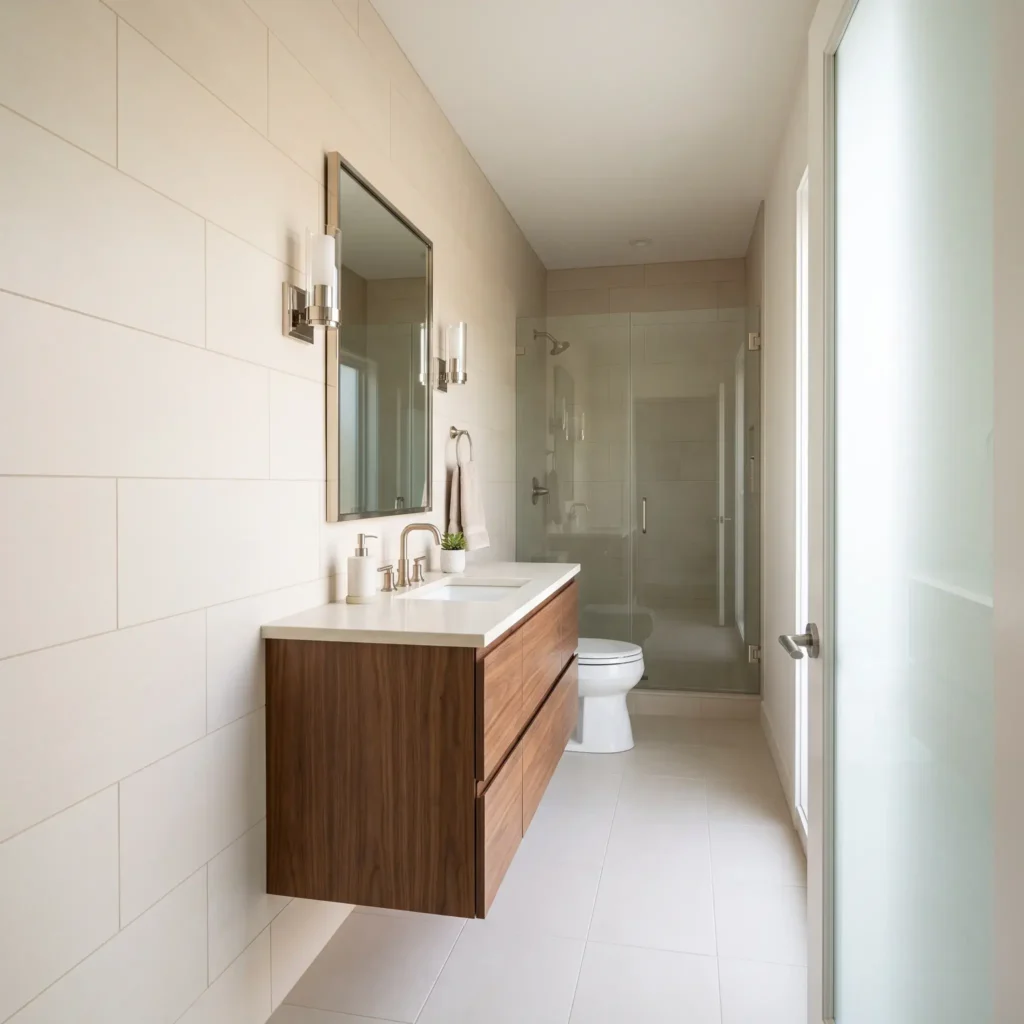
Products Used:
- 8×24 inch rectified ceramic wall tiles in warm cream
- Color-matched warm ivory grout
- 36-inch floating walnut wood vanity
- Polished nickel widespread sink faucet
- Low-profile LED flush-mount ceiling light
6. Vertical Kit-Kat Mosaics on Vanity Backsplashes and Niches
Slender kit-kat finger tiles add fine texture without the heavy visual weight of standard square mosaics. Their narrow columns draw your gaze upward. They work exceptionally well around vanity mirrors, inside shower niches, and along curved accent surfaces.
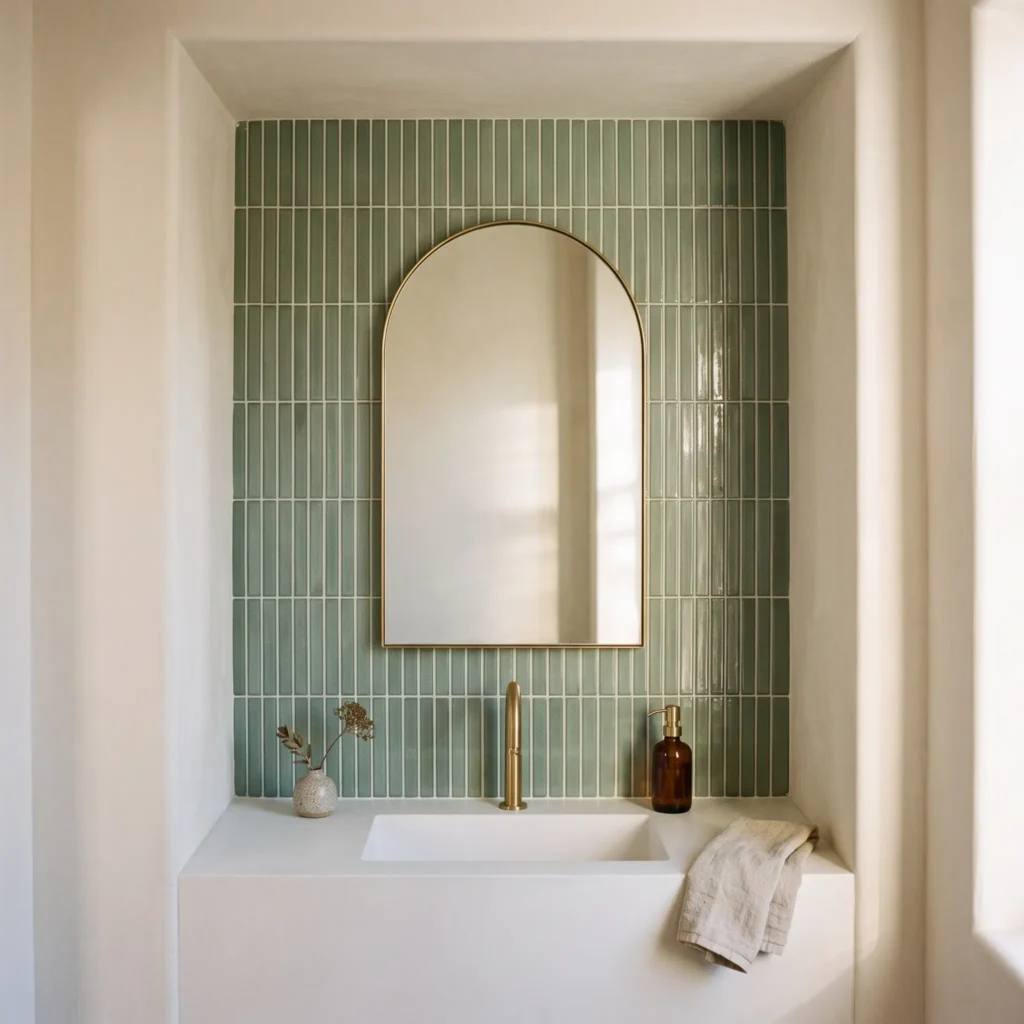
Products Used:
- Mesh-mounted ceramic kit-kat finger tiles (0.75×6 inch strips) in glossy eucalyptus green
- Stain-resistant bright white epoxy grout
- Arched brass-framed wall mirror
- Integrated solid-surface vanity top with curved backsplash transition
7. 45-Degree Diagonal Floor Layout
Square tiles laid parallel to the walls highlight crooked framing in older homes. Rotating those same tiles onto a 45-degree diagonal grid directs your sightline along the room’s widest angle. This angle also eliminates awkward thin sliver cuts along your baseboards.
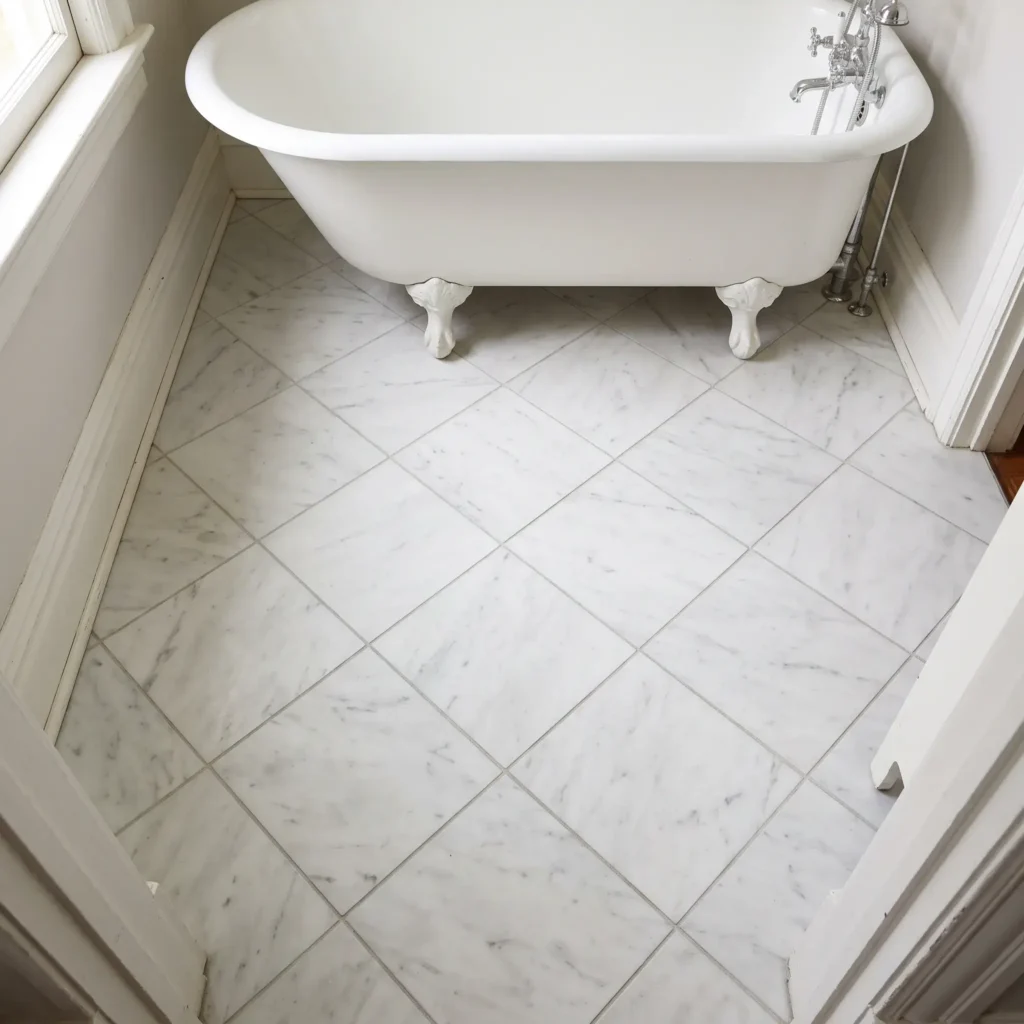
Products Used:
- 12×12 inch honed Carrara marble floor tiles
- Light silver-gray flexible grout
- Four-inch painted moisture-resistant wood baseboards
- Compact 54-inch acrylic clawfoot tub with polished chrome fixtures
8. Floor-to-Ceiling Calacatta Gauged Porcelain Slabs
Grout lines break up small shower stalls. Gauged porcelain panels measure up to five by ten feet, letting you cover an entire shower wall with just one or two sheets. With almost zero grout lines, the shower interior appears expansive and calm.
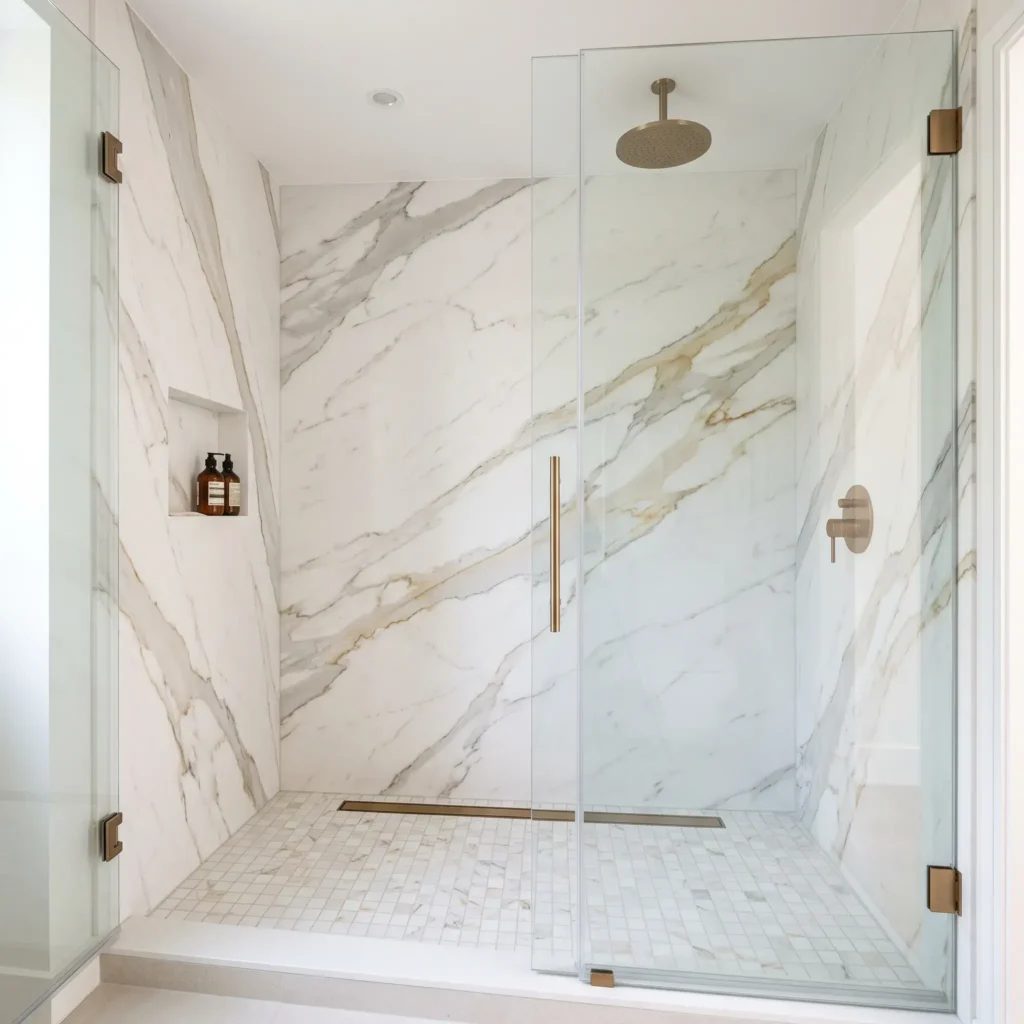
Products Used:
- Gauged porcelain slabs (approx. 48×96 inches) in bookmatched Calacatta Gold
- Color-matched micro-joint silicone sealant for internal corners
- Ceiling-mounted rainfall shower head in brushed bronze
- Matching 2×2 inch honed porcelain shower pan mosaics
Spatial Geometry and Tile Math
Tile selection is an optical calculation. When you walk into a bathroom, your brain measures the room based on physical surface breaks. Every visible grout line acts as an interruption.
Consider the math on a standard 35-square-foot floor (a common five by seven foot layout):
- A standard 12×12 inch tile installation creates roughly 100 grout line intersections. Your brain registers 100 individual squares, making the floor look busy and divided.
- A 24×24 inch large-format tile installation reduces those intersections to approximately 20. That is an 80% reduction in visual grid lines.
Fewer intersections make the surface look calm. The entire floor reads as one solid plane rather than a patchwork of small pieces.
How Layout Directions Change Perceived Space
The direction of your tile joint creates an axis for your eyes to follow across the room:
| Layout Pattern | Directional Vector | Perceived Spatial Effect | Scrap Factor | Substrate Demands |
|---|---|---|---|---|
| Vertical Stack (Soldier) | Vertical (y-axis) | Lifts perceived ceiling height; adds clean modern lines | 5% to 8% | Demands perfectly plumb wall framing. |
| Horizontal Running Bond | Horizontal (x-axis) | Widens narrow corridor walls; creates balanced spans | 8% to 10% | Forgiving over minor wall variations. |
| 45-Degree Diagonal | Diagonal (xy-plane) | Pushes floor edges out; conceals crooked framing | 10% to 15% | Requires squaring layout from centerlines. |
| Herringbone | Dynamic chevron | Adds visual depth; disguises irregular room shapes | 15% to 20%+ | High scrap rate; requires skilled labor. |
Installation Engineering and Industry Standards
Great design ideas fail when installations ignore structural rules. Large tiles and curbless floors introduce strict engineering requirements that must be handled before tile touches mortar.
Subfloor Flatness and ANSI A108.02
Large tiles cannot bend across low spots in a floor. The American National Standards Institute (ANSI) defines any tile with at least one edge measuring 15 inches or longer as a Large and Heavy Tile (LHT).
Standard small tiles tolerate subfloor variations up to 1/4 inch over 10 feet. Large-format tiles require much stricter prep work:
- Maximum allowable subfloor variation: 1/8 inch over 10 feet
- Local variation limit: no more than 1/16 inch over 2 feet
If your installer skips pouring self-leveling underlayment over an uneven subfloor, adjacent tile edges will sit at different heights. This defect is called lippage. It creates sharp tile edges, harsh shadow lines, and serious trip hazards.
The 33% Maximum Offset Rule
Kiln-fired porcelain and ceramic tiles naturally curve slightly upward in the center during manufacturing. This high point is called crowning.
If you lay tiles 15 inches or longer in a standard 50% brick pattern, you place the highest crown of one tile directly next to the lowest corner of the next tile. This creates noticeable lippage.
Under ANSI A108.02 Section 4.3.8.2, running bond layouts for tiles with any edge 15 inches or longer must never exceed a 33% offset. This spacing aligns the tile crown beside a higher point on the neighboring tile, keeping the floor flat and smooth.
Curbless Showers: Drain Physics and Tile Selection
A curbless shower makes a small bathroom feel much larger by removing visual barriers. However, the type of drain you choose determines what tile sizes you can place on the floor.
Center Point Drains vs. Perimeter Linear Drains
A traditional center point drain requires a four-way radial slope. Water must drain toward the center from all directions at a slope of 1/4 inch per foot.
You cannot install wide, flat tiles over a four-way bowl slope without cutting them into awkward diagonal slices. Because of this, center point drains force you to switch to small two-inch mosaics at the shower entrance, breaking up your floor design.
A perimeter linear drain eliminates this issue entirely:
- It mounts flat against the rear shower wall.
- It uses a single-plane slope where the floor drops in one uniform direction.
- Because the floor remains completely flat, you can run your main 12×24 or 24×24 inch bathroom floor tiles straight into the shower without relief cuts.
Wet Foot Traction and ANSI A326.3
Removing the shower curb means your open bathroom floor doubles as a wet surface. You must balance clean lines with slip prevention.
Slip resistance is tested under ANSI A326.3, which measures the Dynamic Coefficient of Friction (DCOF):
- Standard interior dry floors require a minimum rating of DCOF 0.42.
- Curbless showers and barefoot wet areas require an Interior Wet Plus (IW+) rating, which demands a wet DCOF of 0.50 or higher.
You do not need small mosaics with hundreds of grout lines to get good grip. Select large-format porcelain with an authentic matte, micro-grip finish meeting the IW+ standard. This keeps your bathroom safe while maintaining clean, unbroken lines.
Grout Chemistry and Edge Detailing
Grout and edge trims represent small budget items that make a huge difference in how clean a small room looks over time.
Two-Part Epoxy vs. Standard Cement Grout
Small bathrooms suffer from high humidity and restricted ventilation. Standard cement-based grouts are porous and absorb water, body oils, and soap residue. Within two years, light cement grout discolors, creating messy lines that visually clutter the room.
Two-part reactive epoxy grout, specified under ANSI A118.3, cures into an impermeable resin barrier:
- Moisture absorption: Under 0.5%, compared to over 10% for cement grouts.
- Stain resistance: Completely inert against soaps, oils, and household cleaners.
- Mold prevention: The non-porous finish denies mold and mildew a foothold.
- Maintenance: Never requires recurring sealers or chemical stripping.
Tonal Matching Eliminates Visual Clutter
Never use high-contrast grout in a small bathroom unless you deliberately want a busy accent wall. Dark charcoal grout against white subway tile draws a heavy grid across your room.
Match your grout within one shade of your primary tile color. When the grout matches the tile body, joints soften. Your eyes travel across the surface without stopping, making the room feel open and relaxed.
Corner Detailing: Mitered Joints vs. Metal Trims
Finishing outside corners around niches, window returns, and half-walls requires careful planning:
- 45-Degree Mitered Edges: Tile edges are cut at 45 degrees with a wet diamond saw and joined with color-matched epoxy resin. This produces a clean corner where the tile wraps naturally around the edge. However, mitered edges are delicate, can chip from impact, and increase tile installation costs by up to 40%.
- Engineered Metal Profiles (Schluter Jolly): Anodized aluminum or brass trims sit behind the tile to cap the exposed edge. They provide strong impact protection against dropped bottles and cleaning tools. Matching the metal trim finish to your faucets and shower fixtures (such as matte black or brushed brass) ties your hardware together cleanly.
Tile Waste and Material Estimation
Small bathrooms produce high scrap rates relative to their square footage. Door frames, toilets, vanity plumbing, and recessed niches require numerous cuts that consume material quickly.
Always calculate your tile order using these layout-specific waste allowances:
| Tile Pattern | Base Scrap Allowance | Cuts and Niches Buffer | Total Recommended Overage |
|---|---|---|---|
| Straight Stack (Grid) | 5% to 8% | +3% | 10% |
| Horizontal Running Bond (33%) | 8% to 10% | +3% | 12% to 15% |
| Diagonal (45° Grid) | 10% to 15% | +3% | 15% to 18% |
| Herringbone | 15% to 20% | +5% | 20% to 25% |
Always purchase one extra full box (roughly 10 to 15 square feet) beyond your installation scrap as long-term attic stock. Tile manufacturers retire production runs often. Finding an exact dye-lot match years later for plumbing repairs is almost impossible.
4 Common Mistakes That Make Small Bathrooms Look Cramped
- Contrasting Grout on Small Mosaics:Dark grout around white penny tiles turns your floor into a high-contrast checkerboard. Keep mosaic grout closely matched to the tile color to soften the surface.
- Stopping Wall Tile Below the Ceiling:Tiling your shower walls up to seven feet and leaving a foot of drywall above cuts your wall in half. Run your wall tile straight to the ceiling to draw sightlines upward.
- Ignoring Light Reflectance Value (LRV):Dark, matte charcoal tiles absorb artificial light. In a windowless bathroom, choose tiles with an LRV of 70 or higher (creams, warm whites, pale grays) to bounce ambient light into every corner.
- Mixing Too Many Tile Styles:Using penny rounds on the floor, subway tile on the walls, and a multi-colored mosaic in the niche creates visual clutter. Limit a small bathroom to two tile styles: one primary field tile and one subtle accent surface.
Frequently Asked Questions
What tile size makes a small bathroom look biggest?
Rectified 12×24 inch or 24×24 inch large-format porcelain tiles make small bathrooms look biggest. They reduce visible grout joints by up to 80% compared to traditional 12×12 inch tiles, creating a continuous, open floor plane.
Should wall and floor tiles match in a small bathroom?
Yes. Using the same tile or closely matched shades across both the floor and walls removes perimeter dividing lines. When your eye cannot easily tell where the floor ends and the wall begins, the room feels wider.
Is vertical or horizontal tile better for low ceilings?
Vertical tile layout is better for low ceilings. Installing rectangular tiles vertically in an aligned soldier stack creates uninterrupted lines that draw your sightline up toward the ceiling line.
Does dark tile make a small bathroom look smaller?
Dark tile shrinks a small room when paired with high-contrast white fixtures and light grout. However, applying dark tile uniformly across all surfaces alongside warm, layered accent lighting creates an intimate space with soft, receding corners.
What is the ideal grout joint size for a compact bathroom?
A 1/16-inch micro grout joint works best in compact bathrooms. You must choose rectified tiles with mechanically ground edges to safely achieve this tight spacing.
Practical Next Steps for Your Renovation
Making a small bathroom feel open does not require moving plumbing stacks or altering structural framing. It comes down to respecting the visual geometry of the space.
Start by verifying your subfloor level. If you plan to install 12×24 or 24×24 inch porcelain, budget for self-leveling underlayment to meet the ANSI 1/8-inch flatness rule. Pick two complementary tile surfaces, match your grout within one shade of the tile body, and run your shower tile all the way to the ceiling. These disciplined choices will turn a tight, cluttered bathroom into a calm, functional retreat.