8 Whimsical Halloween Decor Ideas That Look Cozy, Not Tacky

You do not need fake blood, plastic skeletons, or garish orange lights to celebrate Halloween. Most retail aisles push loud, aggressive items that clash with everyday home style.
Whimsical Halloween decor takes a different path. It focuses on storybook charm, warm textures, and subtle magic. You can create a festive atmosphere that welcomes children, delights guests, and blends naturally into your living space.
Here are 8 practical, design-forward ideas you can build in your home this season.
1. Floating Witch Hat Porch Canopy
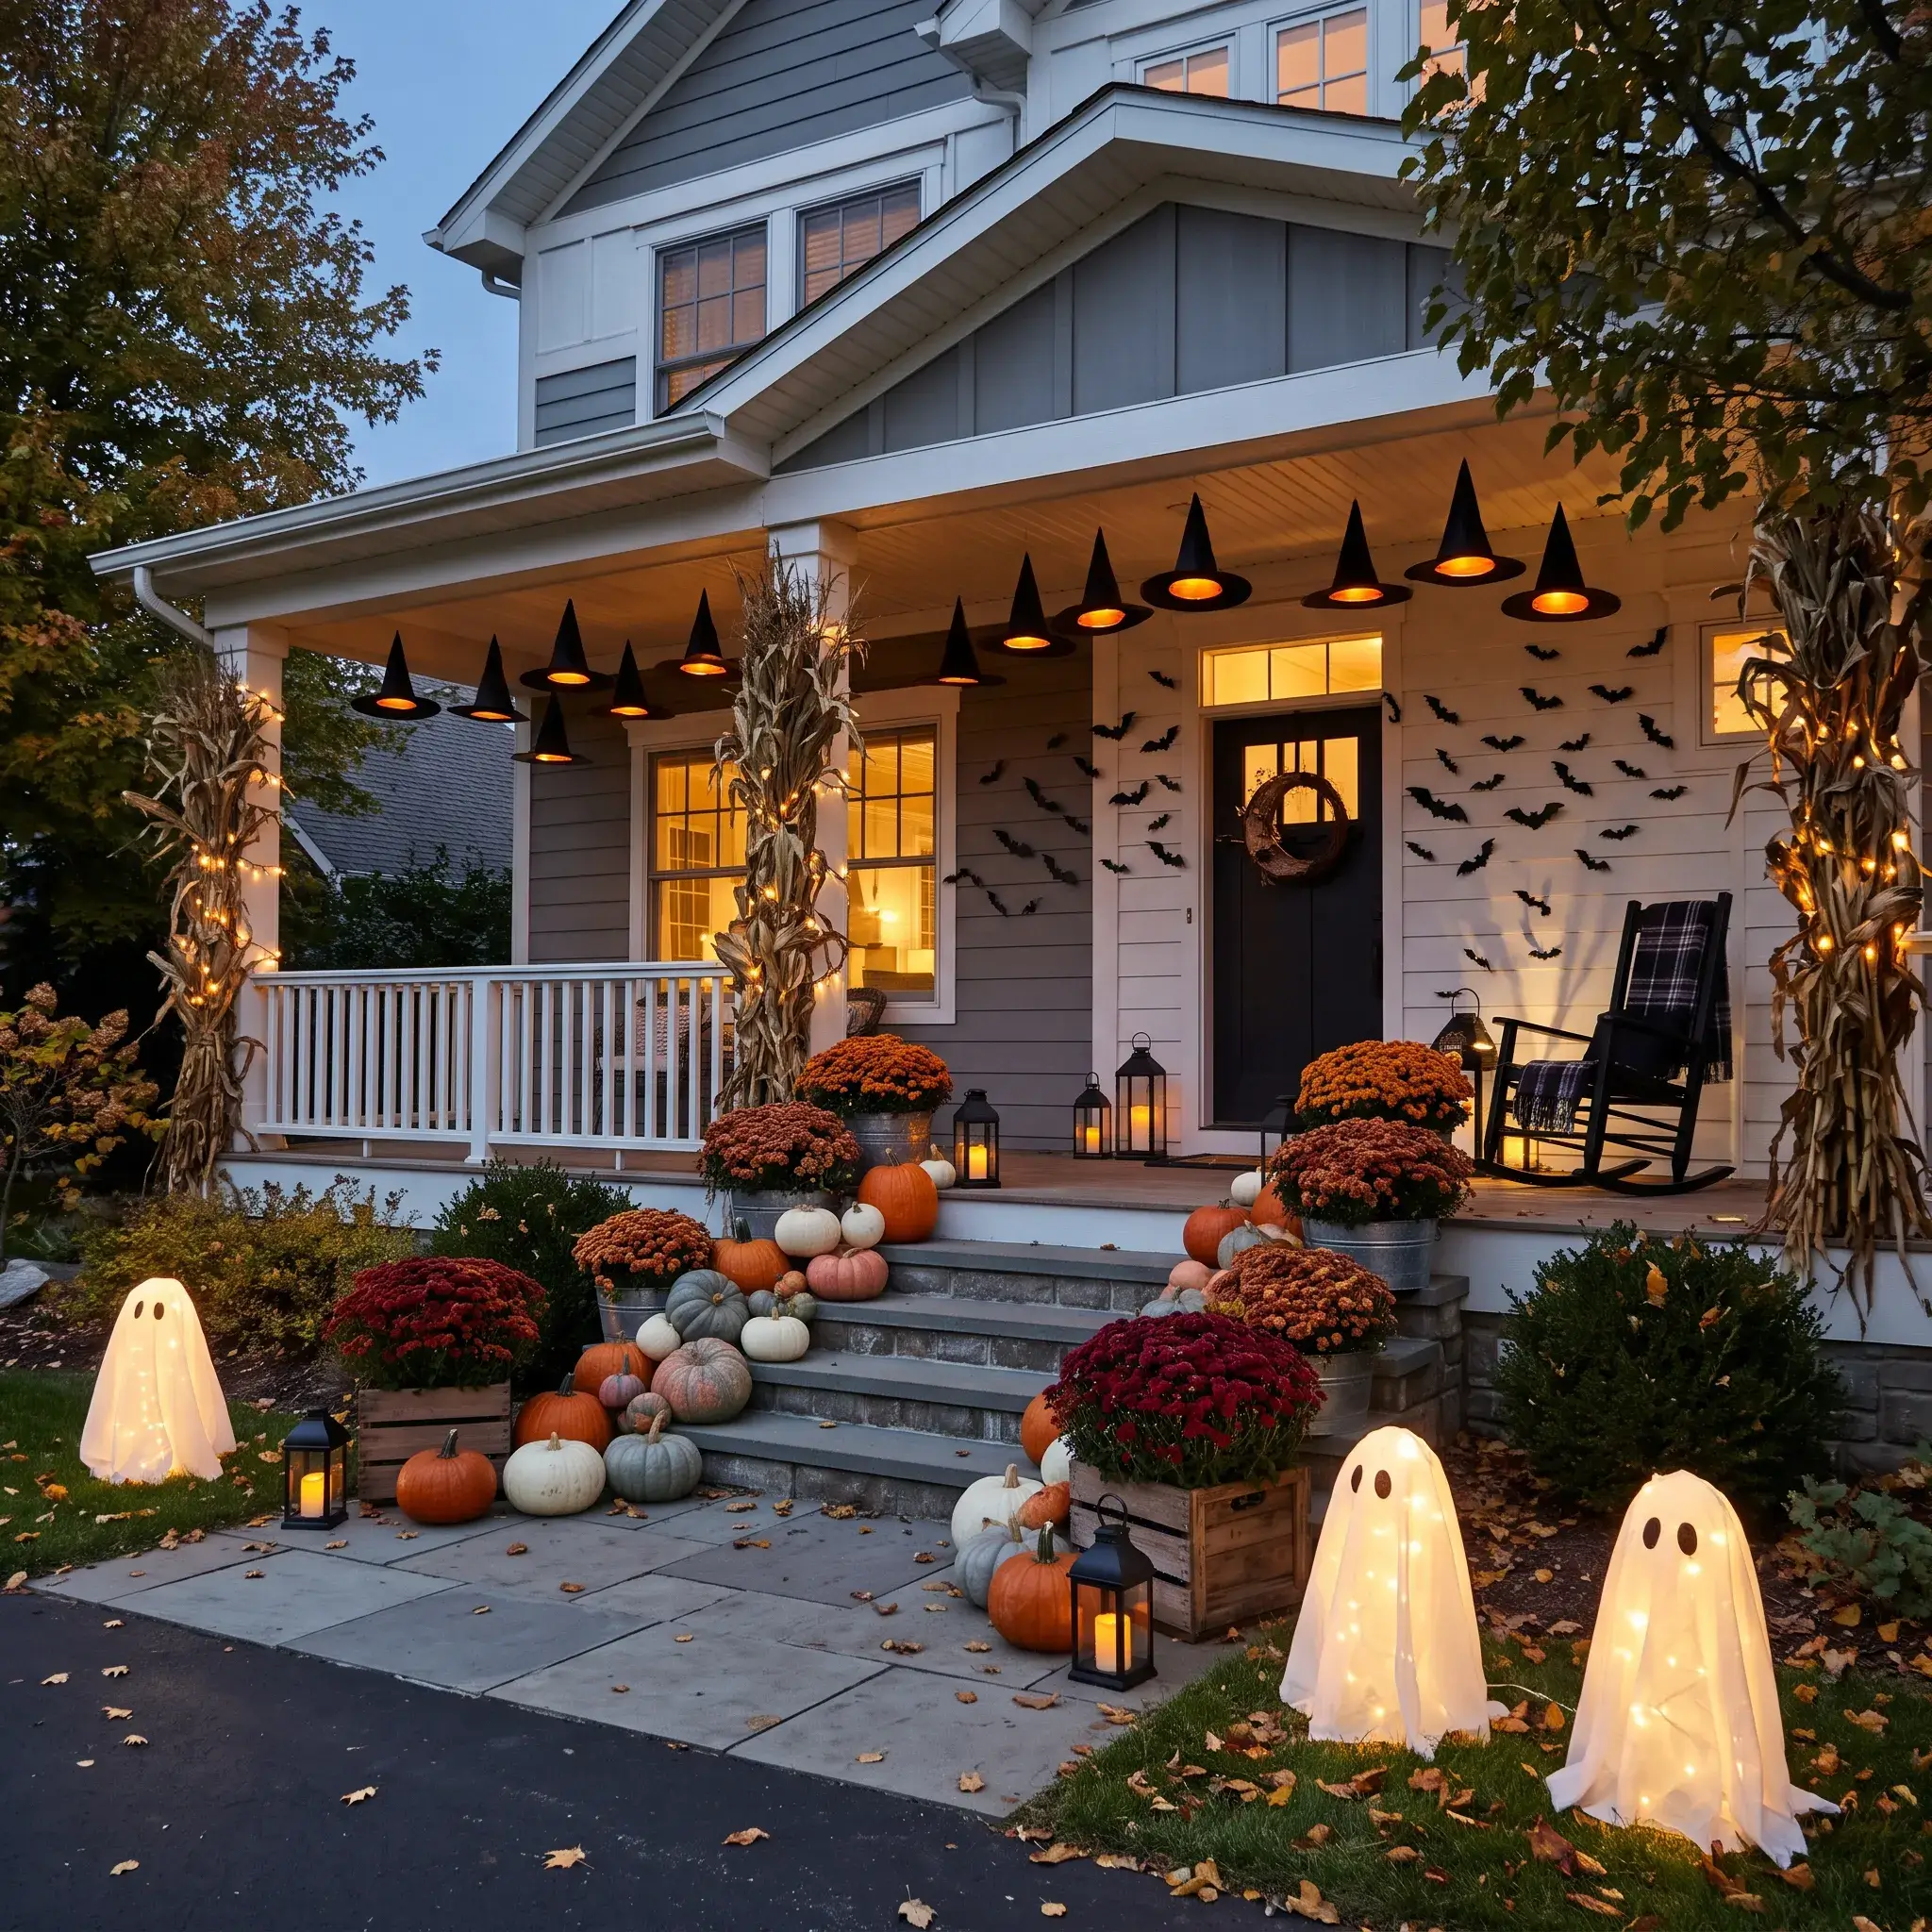
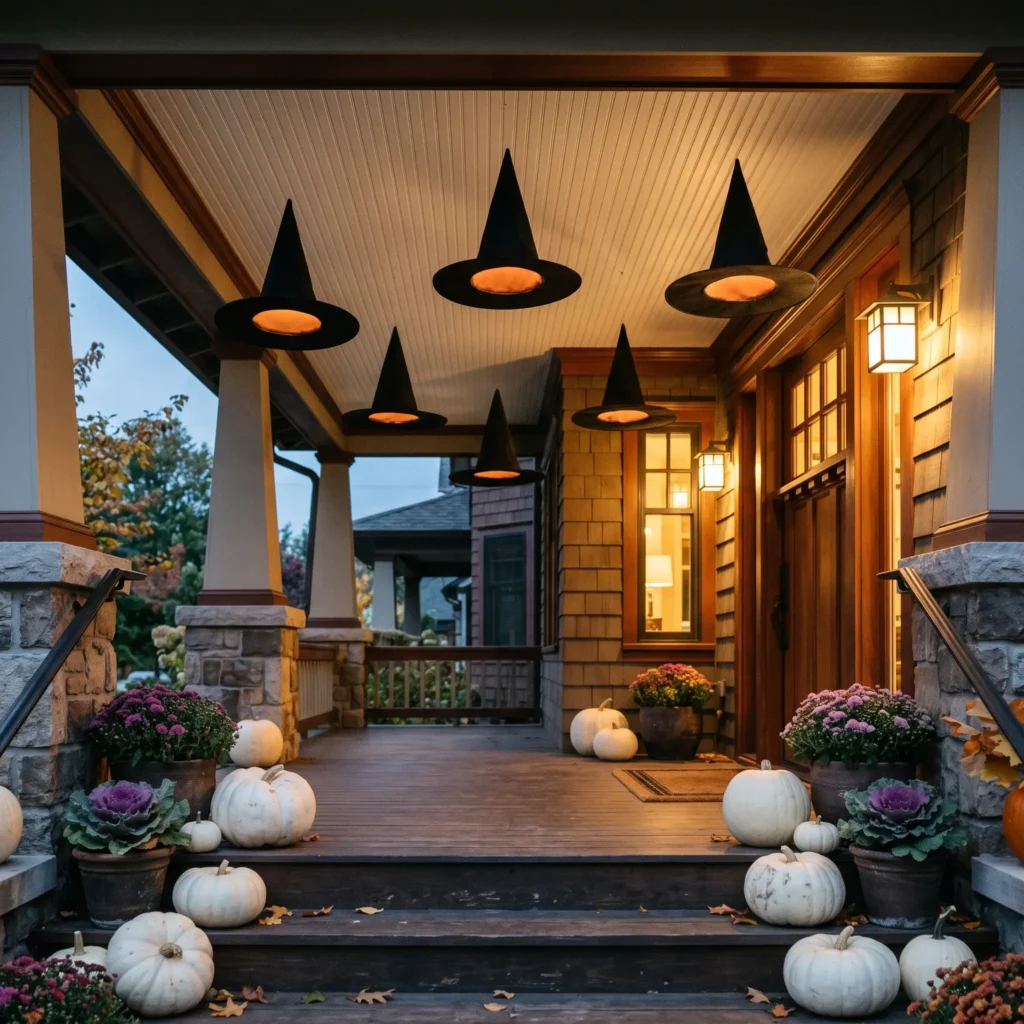
Turn your covered front porch into a gathering of floating witch hats. As evening breeze catches the fabric, the hats turn gently in midair. Warm light glows softly from inside each cone.
How to Style It
- Clean smooth spots on your porch ceiling with rubbing alcohol. Press clear outdoor adhesive hooks firmly against the surface.
- Cut clear nylon fishing line in staggered lengths between two feet and four feet.
- Thread the line through the pointed tip of an inexpensive black witch hat using an upholstery needle.
- Tie a small wooden craft bead inside the tip. This bead stops the line from pulling through the fabric. It also keeps your light fixture suspended inside the hat body rather than bunched into the point.
- Tie a battery-operated LED puck light with an automatic timer to the line just below the bead. Set the timer at dusk so the hats light up automatically every night.
Products Used
- Black fabric witch hats in a lightweight poly-nylon pack
- 10-pound clear nylon monofilament fishing line
- Clear outdoor Command adhesive hooks
- Remote-controlled LED puck lights with built-in timers
- Round wooden craft beads, half-inch diameter
- Large eye upholstery needle
2. The Grounded Pastel Ghost Mantel
Pastel Halloween displays often run the risk of looking like a nursery or baby shower. You can prevent this issue by anchoring soft blush tones with dark accents.
How to Style It
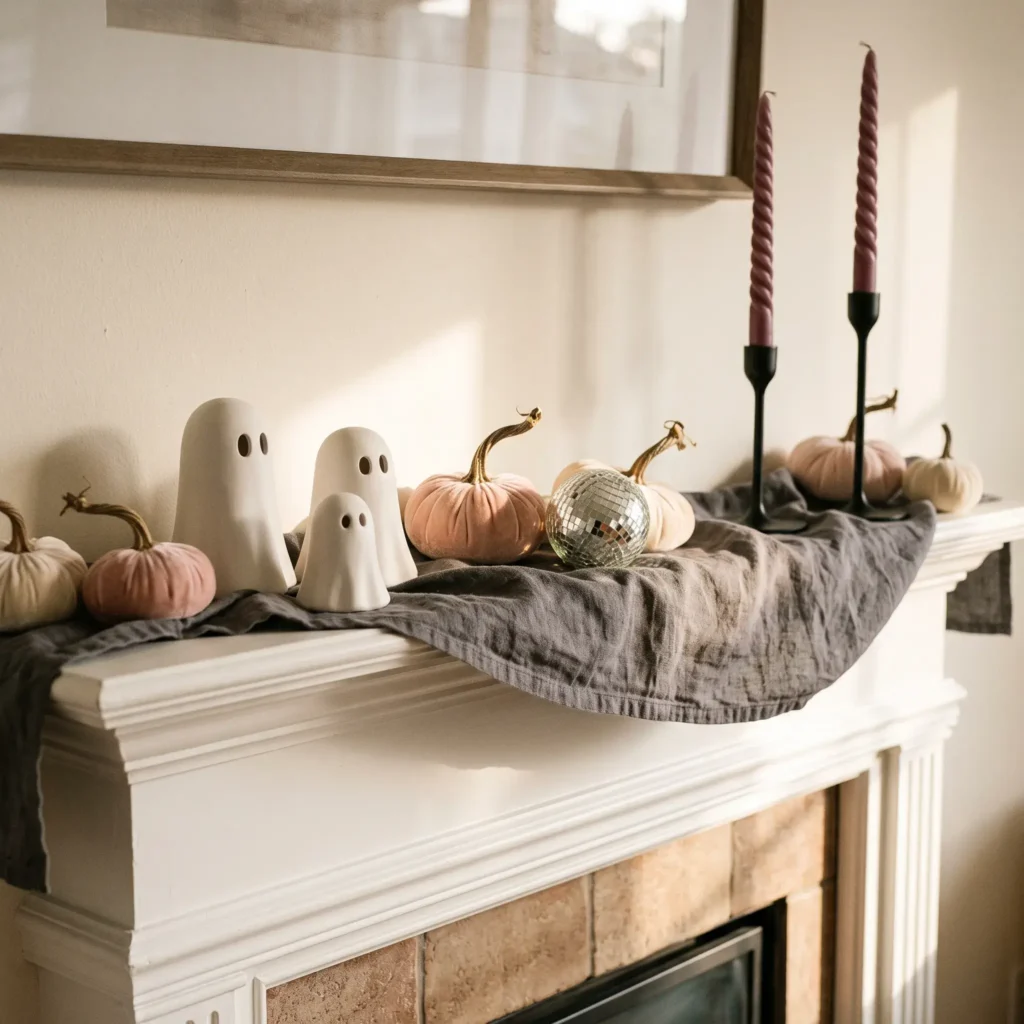
- Drape a dark charcoal linen runner across your fireplace mantel. The dark fabric creates a clear visual boundary.
- Arrange three ceramic ghost figurines on one side of the mantel shelf. Mix matte finishes with pearl glazes to keep the eye moving.
- Balance the opposite side with a pair of matte black iron candlesticks holding twisted plum or mauve tapers.
- Tuck small velvet heirloom pumpkins in dusty rose and alabaster along the base.
- Place a small mirrored disco ball among the gourds to bounce warm candlelight across the room.
Products Used
- Washed charcoal linen table runner
- Matte ceramic ghost figurines in varying heights from 4 to 8 inches
- Matte black wrought iron taper holders
- Plum and dusty rose twisted beeswax taper candles
- Velvet heirloom pumpkins with realistic resin stems
- 4-inch mirrored glass disco sphere
Check out more Halloween Decor Ideas
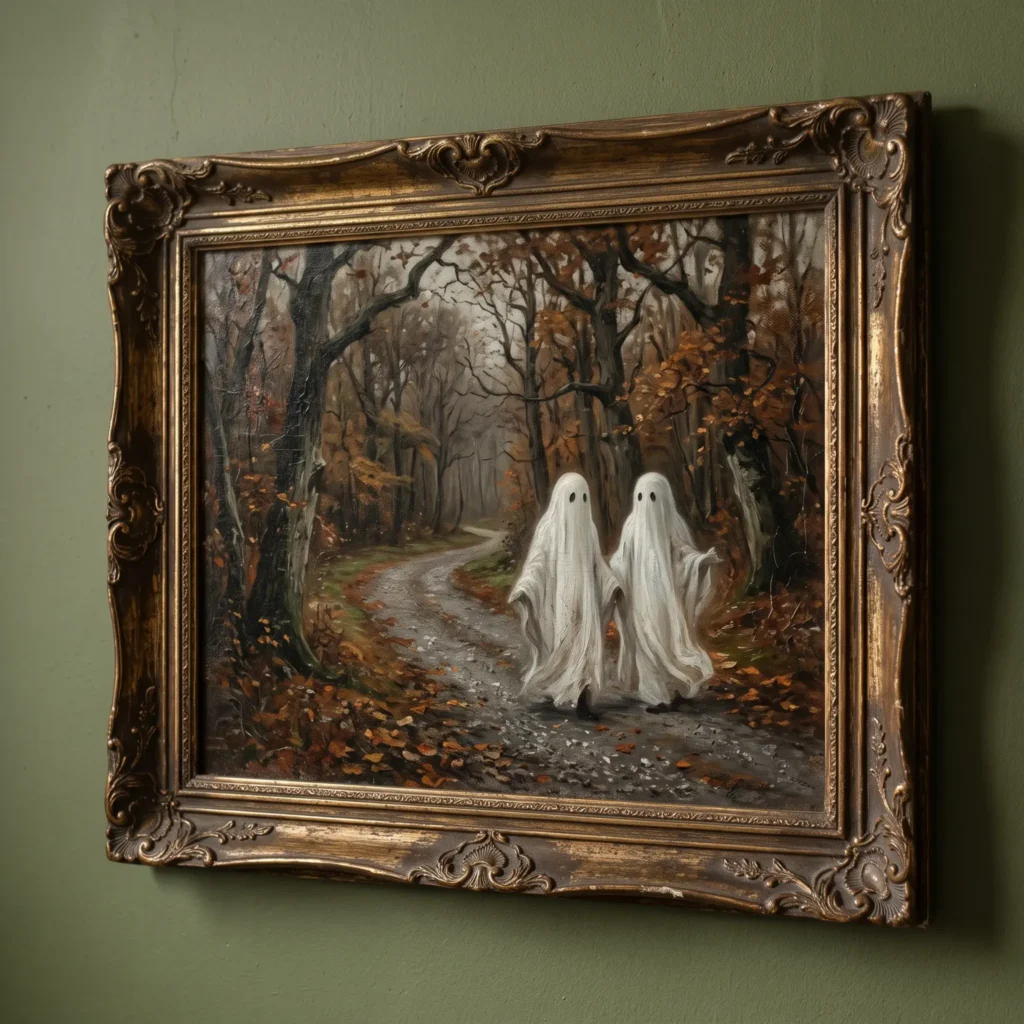
3. Thrifted Painting Ghost Makeover
Bring seasonal life to an old framed landscape print from a thrift store. Adding friendly phantom figures turns forgotten artwork into custom seasonal wall decor.
How to Style It
- Pick a framed print featuring rolling countryside, autumn woods, or a quiet cottage. Check the back first to ensure the piece has no collector value.
- Use dry white artist chalk to sketch your ghost shapes. Chalk lets you adjust proportions and position figures behind fences or along dirt paths.
- Paint the body with titanium white acrylic paint. Add a small splash of water to outer edges for a sheer drape that lets background trees show through.
- Mix a speck of black paint into raw umber to paint soft shadows along fabric folds while the white paint remains wet.
- Dot two simple black oval eyes with an acrylic paint pen.
- Paint the vintage wooden frame with matte black chalk paint or buff it with antique gold wax paste.
Products Used
- Framed thrift store landscape print or canvas
- Titanium white heavy-body acrylic paint
- Raw umber acrylic paint for shadow folds
- Fine-point black acrylic paint pen
- White chalk pencil for sketching
- Antique gold buffing wax paste for frame edges
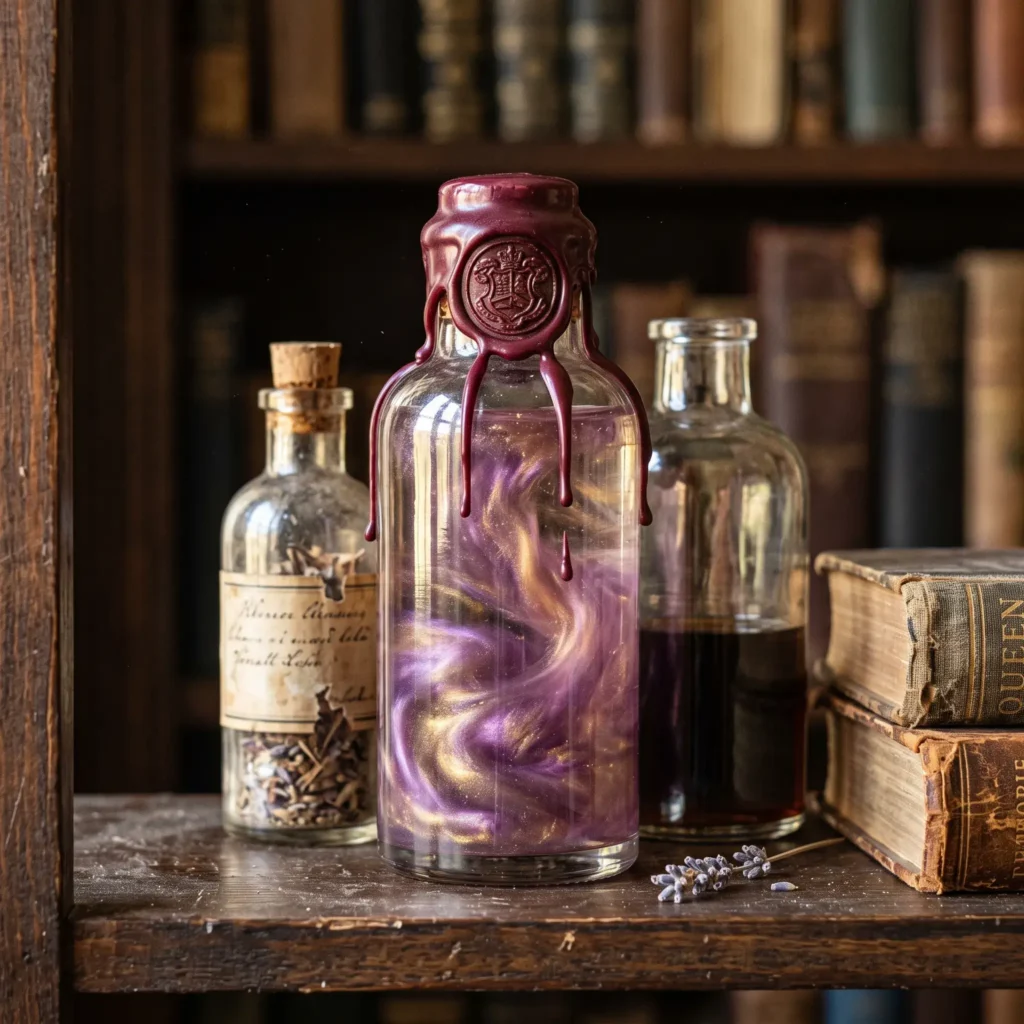
4. Swirling Apothecary Potion Bottles
Decorative bottles filled with plain tap water and glitter settle quickly. Standing tap water also grows mold within days. You can build bottles with long-lasting swirling currents using a balanced liquid formula.
The Suspension Formula
- 70% Distilled water: Provides a crystal clear carrier liquid.
- 20% Vegetable glycerin: Thickens the liquid so pigments swirl for several minutes after shaking.
- 10% Isopropyl alcohol at 70% strength: Prevents bacterial growth and lowers surface tension.
- 1 to 2 teaspoons Cosmetic-grade mica powder: Creates shimmering ribbons through the bottle.
How to Style It
- Pour the distilled water, glycerin, and alcohol into an empty glass apothecary jar.
- Stir in your colored mica powder and two drops of alcohol ink.
- Wipe the inner neck of the jar dry with rubbing alcohol.
- Run a bead of hot glue along the cork stopper and press it firmly into the neck.
- Drip melted colored craft wax over the rim and press a metal seal stamp into the cooling wax.
- Line three bottles along a dark wood bookshelf alongside vintage hardcovers and brass magnifying glasses.
Products Used
- Vintage-style clear glass apothecary bottles with natural corks
- Pure vegetable glycerin
- Cosmetic-grade pearlescent mica powder in bronze, pearl white, or amethyst
- 70% isopropyl alcohol
- Sealing wax sticks and brass signet stamp
- Antique leather-bound decorative books
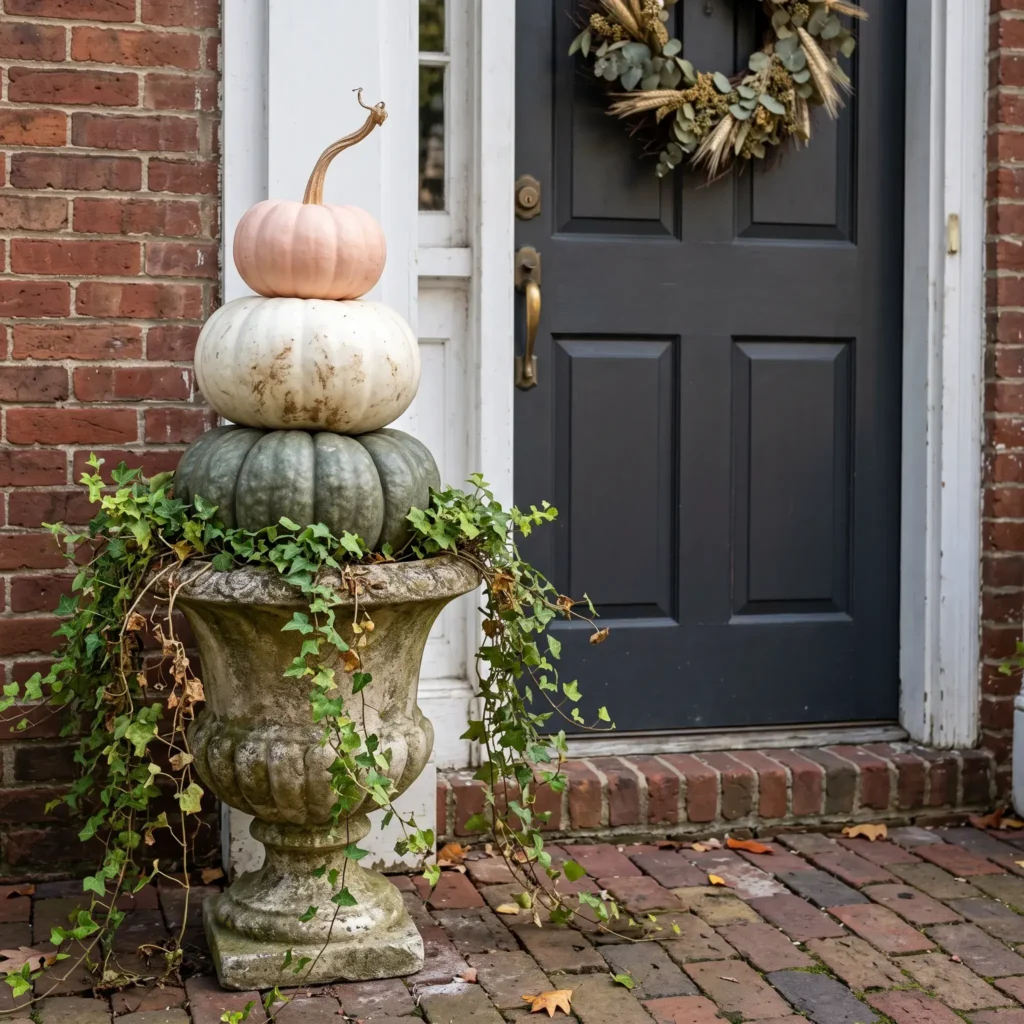
5. Stacked Heirloom Pumpkin Topiaries
A gourd topiary gives your front entry height and presence without cluttering porch walking paths. Using flat heirloom varieties provides better balance than standard orange field pumpkins.
How to Style It
- Select three pumpkins with decreasing diameters. Use a wide, ribbed green Jarrahdale or Fairytale pumpkin for your base. Choose a medium white Lumina pumpkin for the middle. Top the stack with a small pale pink gourd with a long, curved stem.
- Cut a small flat circular hollow into the top and bottom of the middle pumpkin so it rests flush on the base pumpkin.
- Drive a three-foot wooden garden dowel into a heavy stone planter filled with pea gravel.
- Slide the hollowed pumpkins down the center dowel. The internal rod locks the stack against autumn wind gusts.
- Tuck trailing English ivy and miniature white baby boo gourds around the base of the planter.
Products Used
- Heavy concrete or ceramic urn planter
- 36-inch sturdy wooden dowel rod
- Three real heirloom pumpkins in green, white, and pale pink
- Potted trailing English ivy
- Small white baby boo pumpkins
- Pea gravel for planter ballast
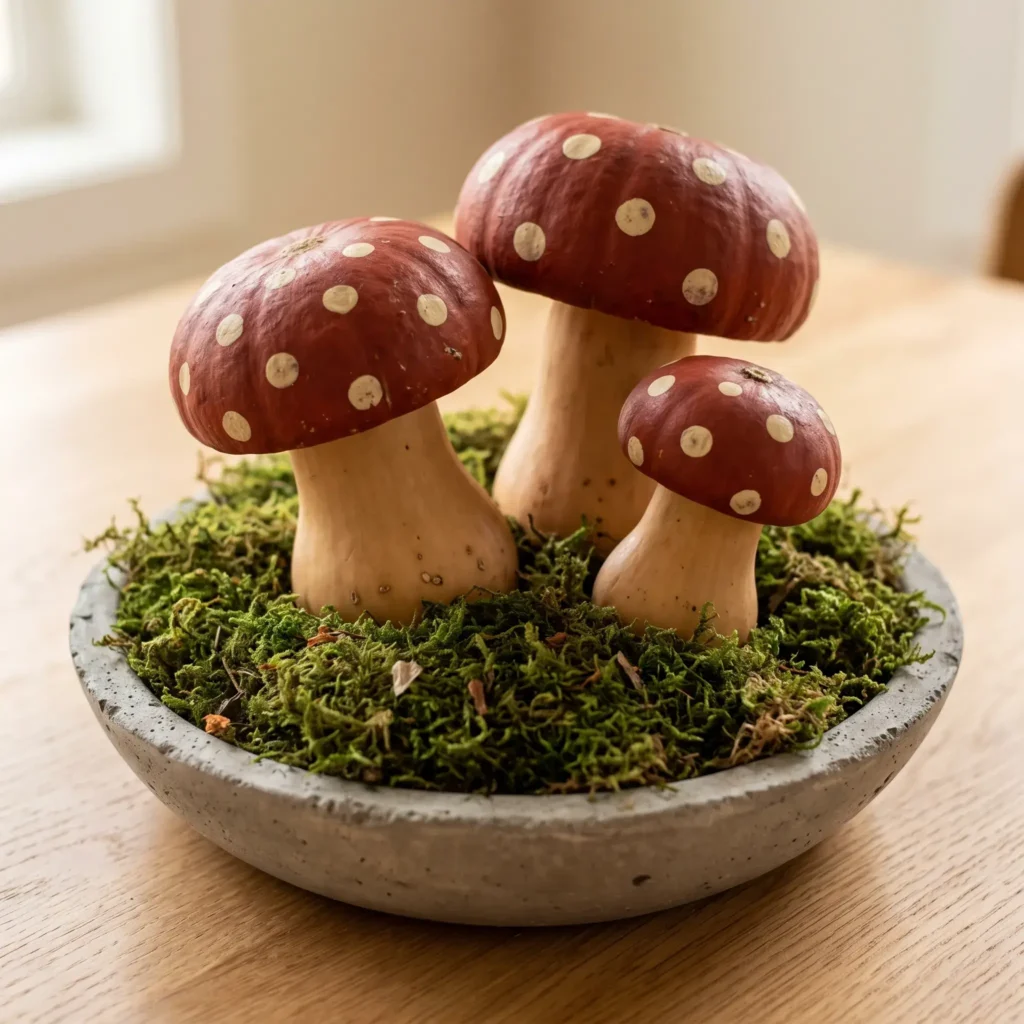
6. Fresh Gourd Amanita Toadstools
Transform standard grocery squash into storybook red-and-white mushrooms. This craft brings a forest folk mood to entry consoles, kitchen islands, or dining tables.
How to Style It
- Cut the neck off a raw butternut squash with a kitchen knife to create a flat post. This squash forms your mushroom stem.
- Slice a mini white pumpkin in half across its middle. Scoop out the seeds. This round top becomes your mushroom cap.
- Push a four-inch wooden craft dowel into the butternut neck, then push the pumpkin cap firmly down onto the exposed wood.
- Coat the pumpkin cap in rich scarlet red or warm terracotta acrylic paint. Leave the butternut stem unpainted to show its natural buff skin.
- Dip a round foam craft sponge into cream-colored paint and stamp even dots across the red cap.
- Set the finished toadstools inside a shallow concrete tray filled with preserved green forest moss and small
- pinecones.
Products Used
- Fresh butternut squash for stems
- Fresh miniature white pumpkins for caps
- Matte terracotta or scarlet red acrylic paint
- Warm cream acrylic craft paint
- Round sponge stippler pouncers
- Preserved natural sheet moss
- Shallow round cast-concrete display tray
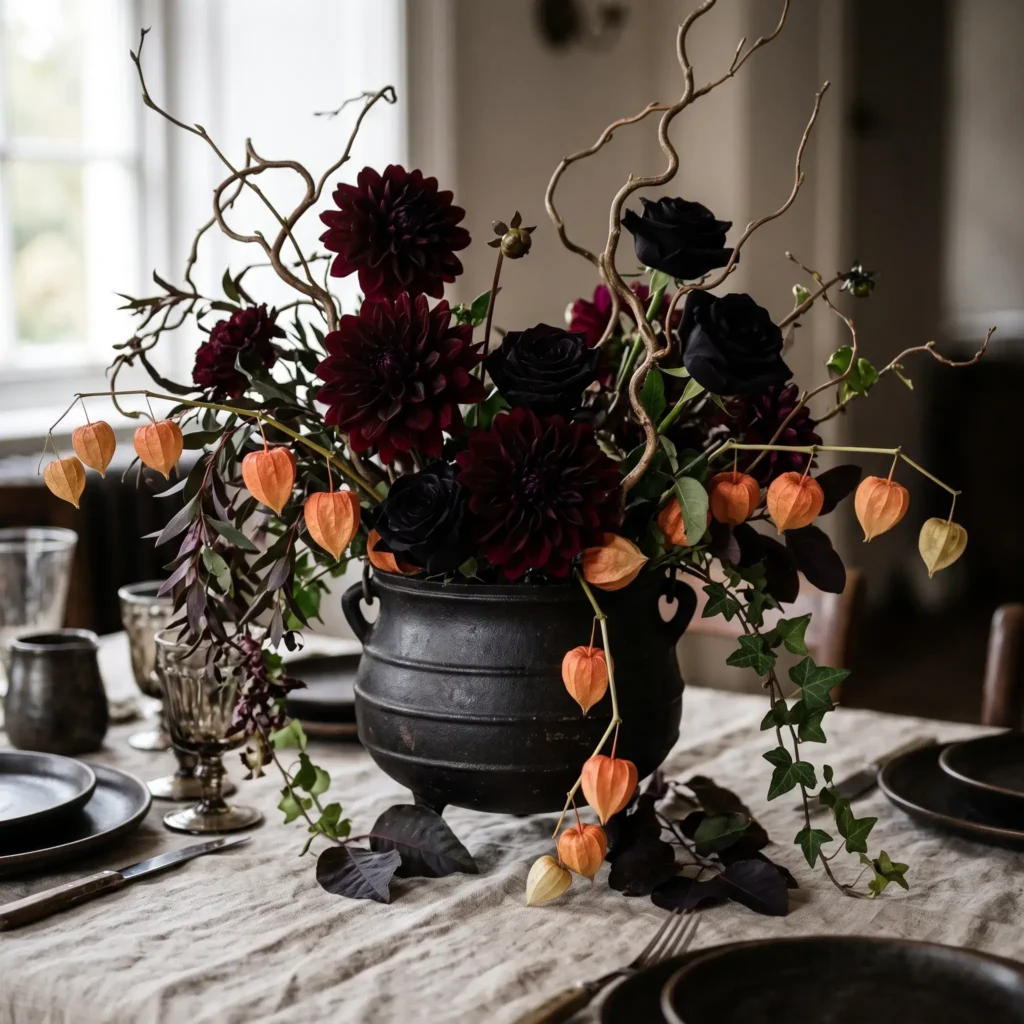
7. Spilling Botanical Cauldron Centerpiece
Replace bubbling plastic cauldrons with real botanical arrangements. Using preserved dark florals and trailing vines creates a centerpiece that feels plucked from a storybook cottage.
How to Style It
- Use a cast-iron kettle, concrete pot, or matte black ceramic cauldron. Place a watertight glass cylinder vase inside the vessel.
- Insert a block of soaked floral foam or a brass flower frog into the glass vase.
- Form your structure using twisting curly willow branches and black pampas grass plumes that reach upward.
- Insert deep focal flowers such as Black Baccara roses, burgundy dahlias, or deep plum calla lilies near the rim.
- Add playful accents using dried Chinese lantern pods. Their orange, papery bells resemble miniature glowing gourds dangling from thin branches.
- Let dark amaranthus trails spill over the edge to mimic rising steam.
Products Used
- 8-inch matte black cast iron kettle or cauldron planter
- Preserved curly willow branches
- Dried Chinese lantern pods
- Fresh Black Baccara roses or dark burgundy dahlias
- Preserved black pampas grass stems
- Hanging green or burgundy amaranthus
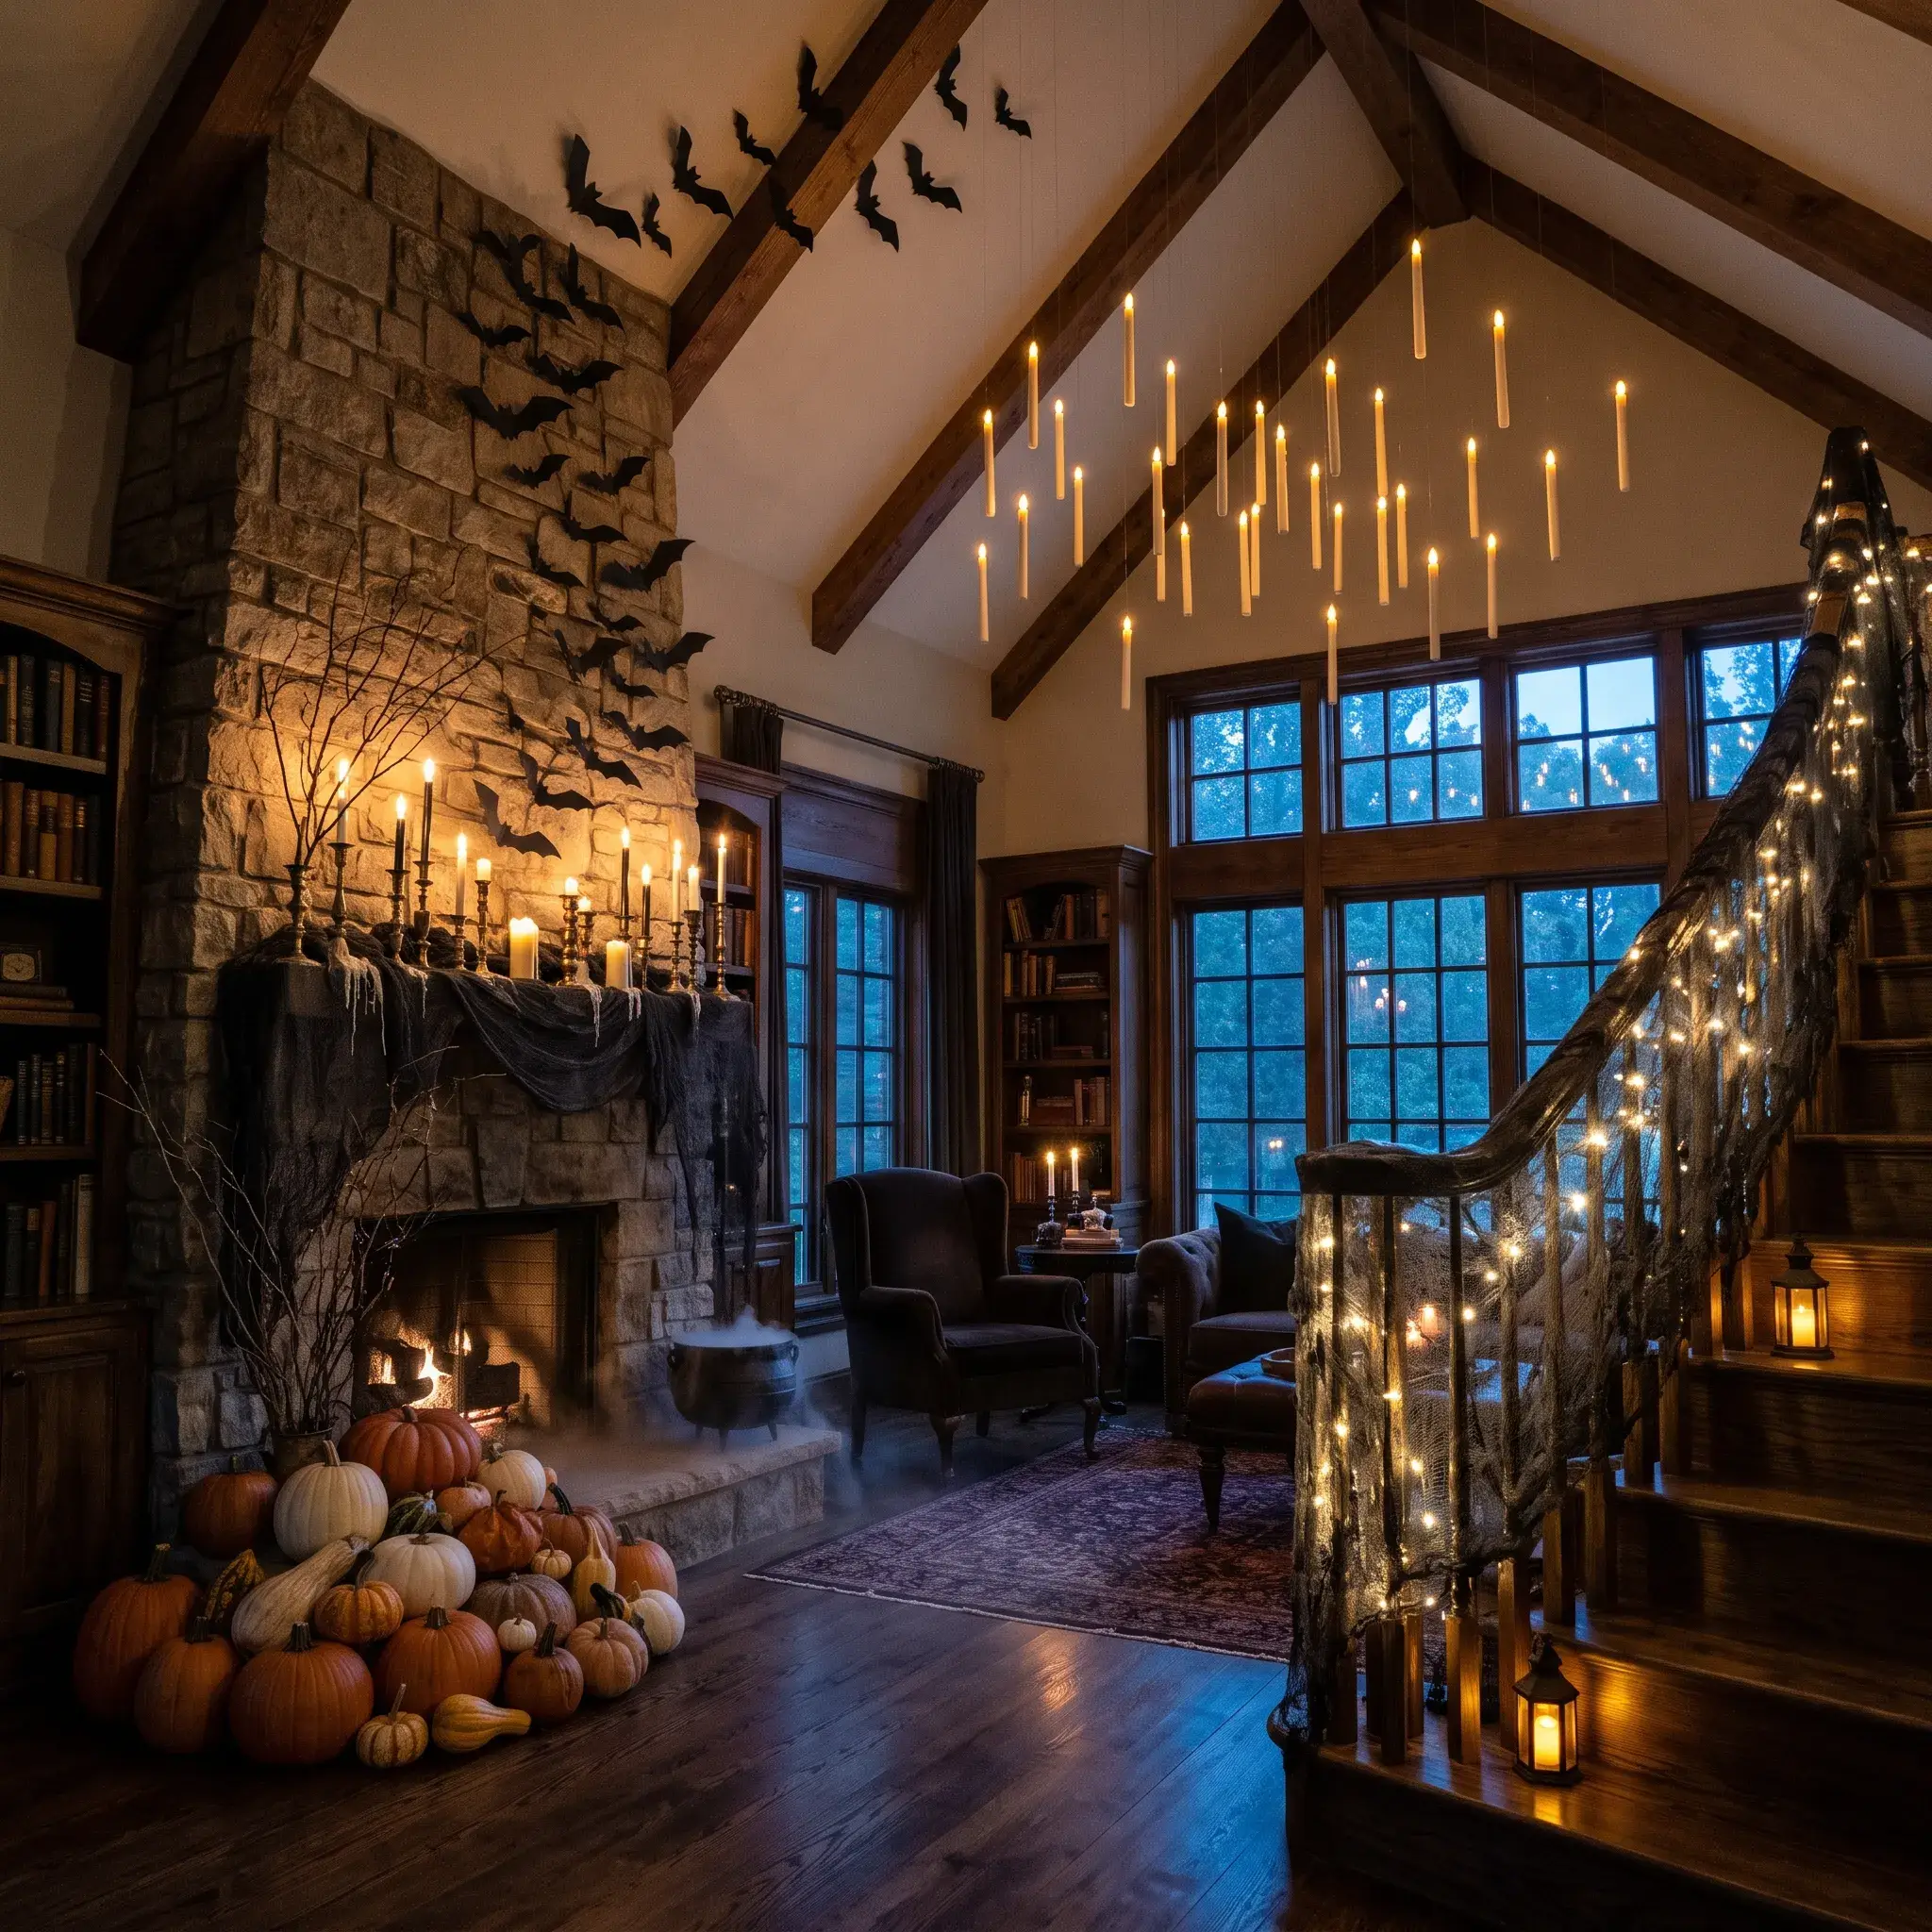
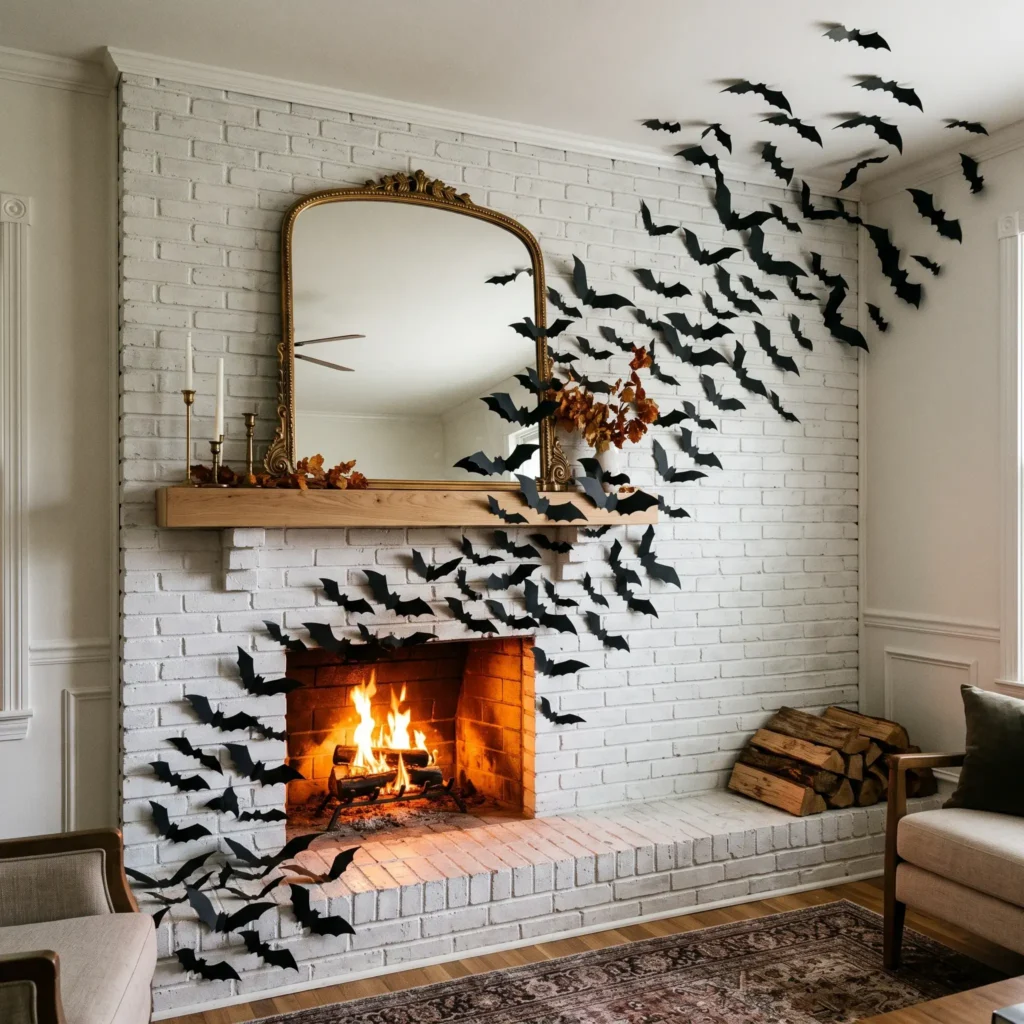
8. 3D Paper Bat Flight Across the Hearth
Paper bat cutouts remain a Halloween classic, but placing them in flat, straight lines looks artificial. Creating a curved, sweeping path mimics an authentic flock taking flight from the fireplace hearth.
How to Style It
- Cut out or purchase three dozen black cardstock bats in four different sizes. Choose cardstock with a matte finish so light does not glare off the surface.
- Fold each bat firmly down the center body line so the wings lift forward at a 45-degree angle.
- Start inside the firebox or on one lower side of the hearth. Cluster the smallest bats close together.
- Curve the path upward across your mantel shelf, crossing diagonally over the corner of a framed mirror or canvas.
- Spread the bats wider apart as they climb toward the ceiling, using your largest cutouts at the top.
- Attach each bat using removable poster putty or safe painter mounting dots that protect wall paint.
Products Used
- 3D matte black cardstock bat cutouts in a multipack with 4 varied sizes
- Removable wall mounting putty or clear adhesive tabs
- Bone folder tool for pressing crisp center wing creases
- Antique framed mantel mirror
Comparison of Whimsical Decor Projects
Use this breakdown to choose projects that fit your budget, craft comfort, and available styling time.
| Project | Ideal Room | Difficulty | Typical Cost | Reusability |
|---|---|---|---|---|
| Floating Witch Hats | Porch or Entry Hall | Easy | $20 to $35 | High (hats fold flat for storage) |
| Pastel Ghost Mantel | Living Room Fireplace | Easy | $40 to $80 | High (ceramics and textiles store safely) |
| Thrifted Ghost Painting | Living Room or Hallway | Moderate | $15 to $30 | High (hangs as permanent seasonal art) |
| Swirling Potion Bottles | Bookshelf or Sideboard | Easy | $15 to $25 | High (lasts indefinitely if sealed) |
| Stacked Pumpkin Topiary | Front Porch Entry | Moderate | $25 to $45 | Low (fresh produce lasts 3 to 5 weeks) |
| Gourd Toadstools | Kitchen Island or Table | Moderate | $12 to $20 | Low (fresh produce lasts 2 to 4 weeks) |
| Botanical Cauldron | Dining Room Table | Moderate | $30 to $65 | Moderate (vessel is permanent; blooms dry out) |
| 3D Paper Bat Flight | Fireplace or Staircase | Easy | $10 to $18 | High (reusable cardstock packs) |
The Three Rules for Elevated Whimsical Styling
When working with lighthearted seasonal themes, simple mistakes can make rooms look scattered. Keep these three core principles in mind.
1. Ground Light Palettes with Dark Accents
Blush pinks, lavenders, and milky whites create soft magic. However, too many light shades make rooms feel like spring nurseries. Anchor pastel items with charcoal linen runners, blackened bronze metals, and raw dark wood. Dark elements frame light colors and keep the space anchored in autumn.
2. Choose Tactile Organic Materials
Plastic novelty pieces reflect harsh glares and look flat. Swap smooth plastic for textured materials that invite touch. Use ribbed Cinderella pumpkins, bouclé ghost pillows, woven wicker baskets, smoked amber hurricane glass, and dried preserved moss. Natural textures add warmth even in simple layouts.
3. Respect Negative Space
You do not need to cover every table, shelf, and ledge. Leave clear room around your displays so individual pieces stand out. Group decor in tight, intentional clusters on one side of a console table, leaving the other side open with a simple lamp or bowl.
How to Transition Your Decor from October into Thanksgiving
Redecorating your entire home on November first can feel exhausting. You can plan ahead by purchasing items that transition smoothly through late autumn.
- Keep the Neutral Pumpkins: Pack away black cardstock bats, witch hats, and ghost figures on November first. Leave your white, green, and blush heirloom pumpkins in place. They fit Thanksgiving dinner tablescapes.
- Retain Warm Amber Glass: Amber glass bottles, bronze candleholders, and brass lanterns work throughout the entire fall season. Swap out black taper candles for beeswax or ivory tapers.
- Preserve Botanical Elements: Curly willow branches, pampas grass, dried eucalyptus, and Chinese lantern pods suit Thanksgiving sideboards. Simply remove dark plastic spiders or cauldrons from the arrangements.
- Switch Linens: Replace charcoal cheesecloth or bat-printed fabrics with neutral oatmeal linen or warm terracotta wool throws.
Frequently Asked Questions
How do you hang floating witch hats without damaging the ceiling?
Use clear outdoor-rated removable adhesive hooks or clear removable mounting strips. Clean the ceiling surface with rubbing alcohol first to remove dust and oil. Tie your lightweight hats with nylon fishing line. When the holiday ends, pull the adhesive tabs straight down parallel to the wall or ceiling to release the bond without stripping paint.
What colors look best for a whimsical Halloween theme?
Whimsical styles rely on softer alternatives to neon orange. Try dusty blush, soft lavender, plum, sage green, and creamy alabaster. Balance these soft colors with grounding accents like soot black, weathered brass, and rich chocolate brown.
How do you keep real pumpkin displays from rotting quickly?
Wash uncarved pumpkins in a bath of water and a small amount of mild dish soap to remove soil bacteria. Dry them completely with a towel. Coat the skin with a light spray of matte clear sealant or wipe the rind with a dab of vegetable oil to lock in moisture. Keep real pumpkins off damp dirt by resting them on wooden boards, stone steps, or wire stands.
How can I make my Halloween decor look elevated on a small budget?
Focus on two high-impact areas rather than sprinkling tiny items across every room. Upcycling thrifted landscape prints with white acrylic paint costs under twenty dollars. Folding black cardstock bats and arranging them along a curved flight path on your wall creates an eye-catching focal point for under fifteen dollars.
Cozy seasonal decor is about telling a story rather than chasing shocks. Pick two or three ideas from this list that match your home layout. Focus on warm amber lighting, layered natural textures, and playful silhouettes. Your home will feel festive, welcoming, and enchanting throughout the autumn season.