DIY K-Pop Demon Hunter Costume: 7 Stage-Ready Outfit Ideas and Complete Build Guide
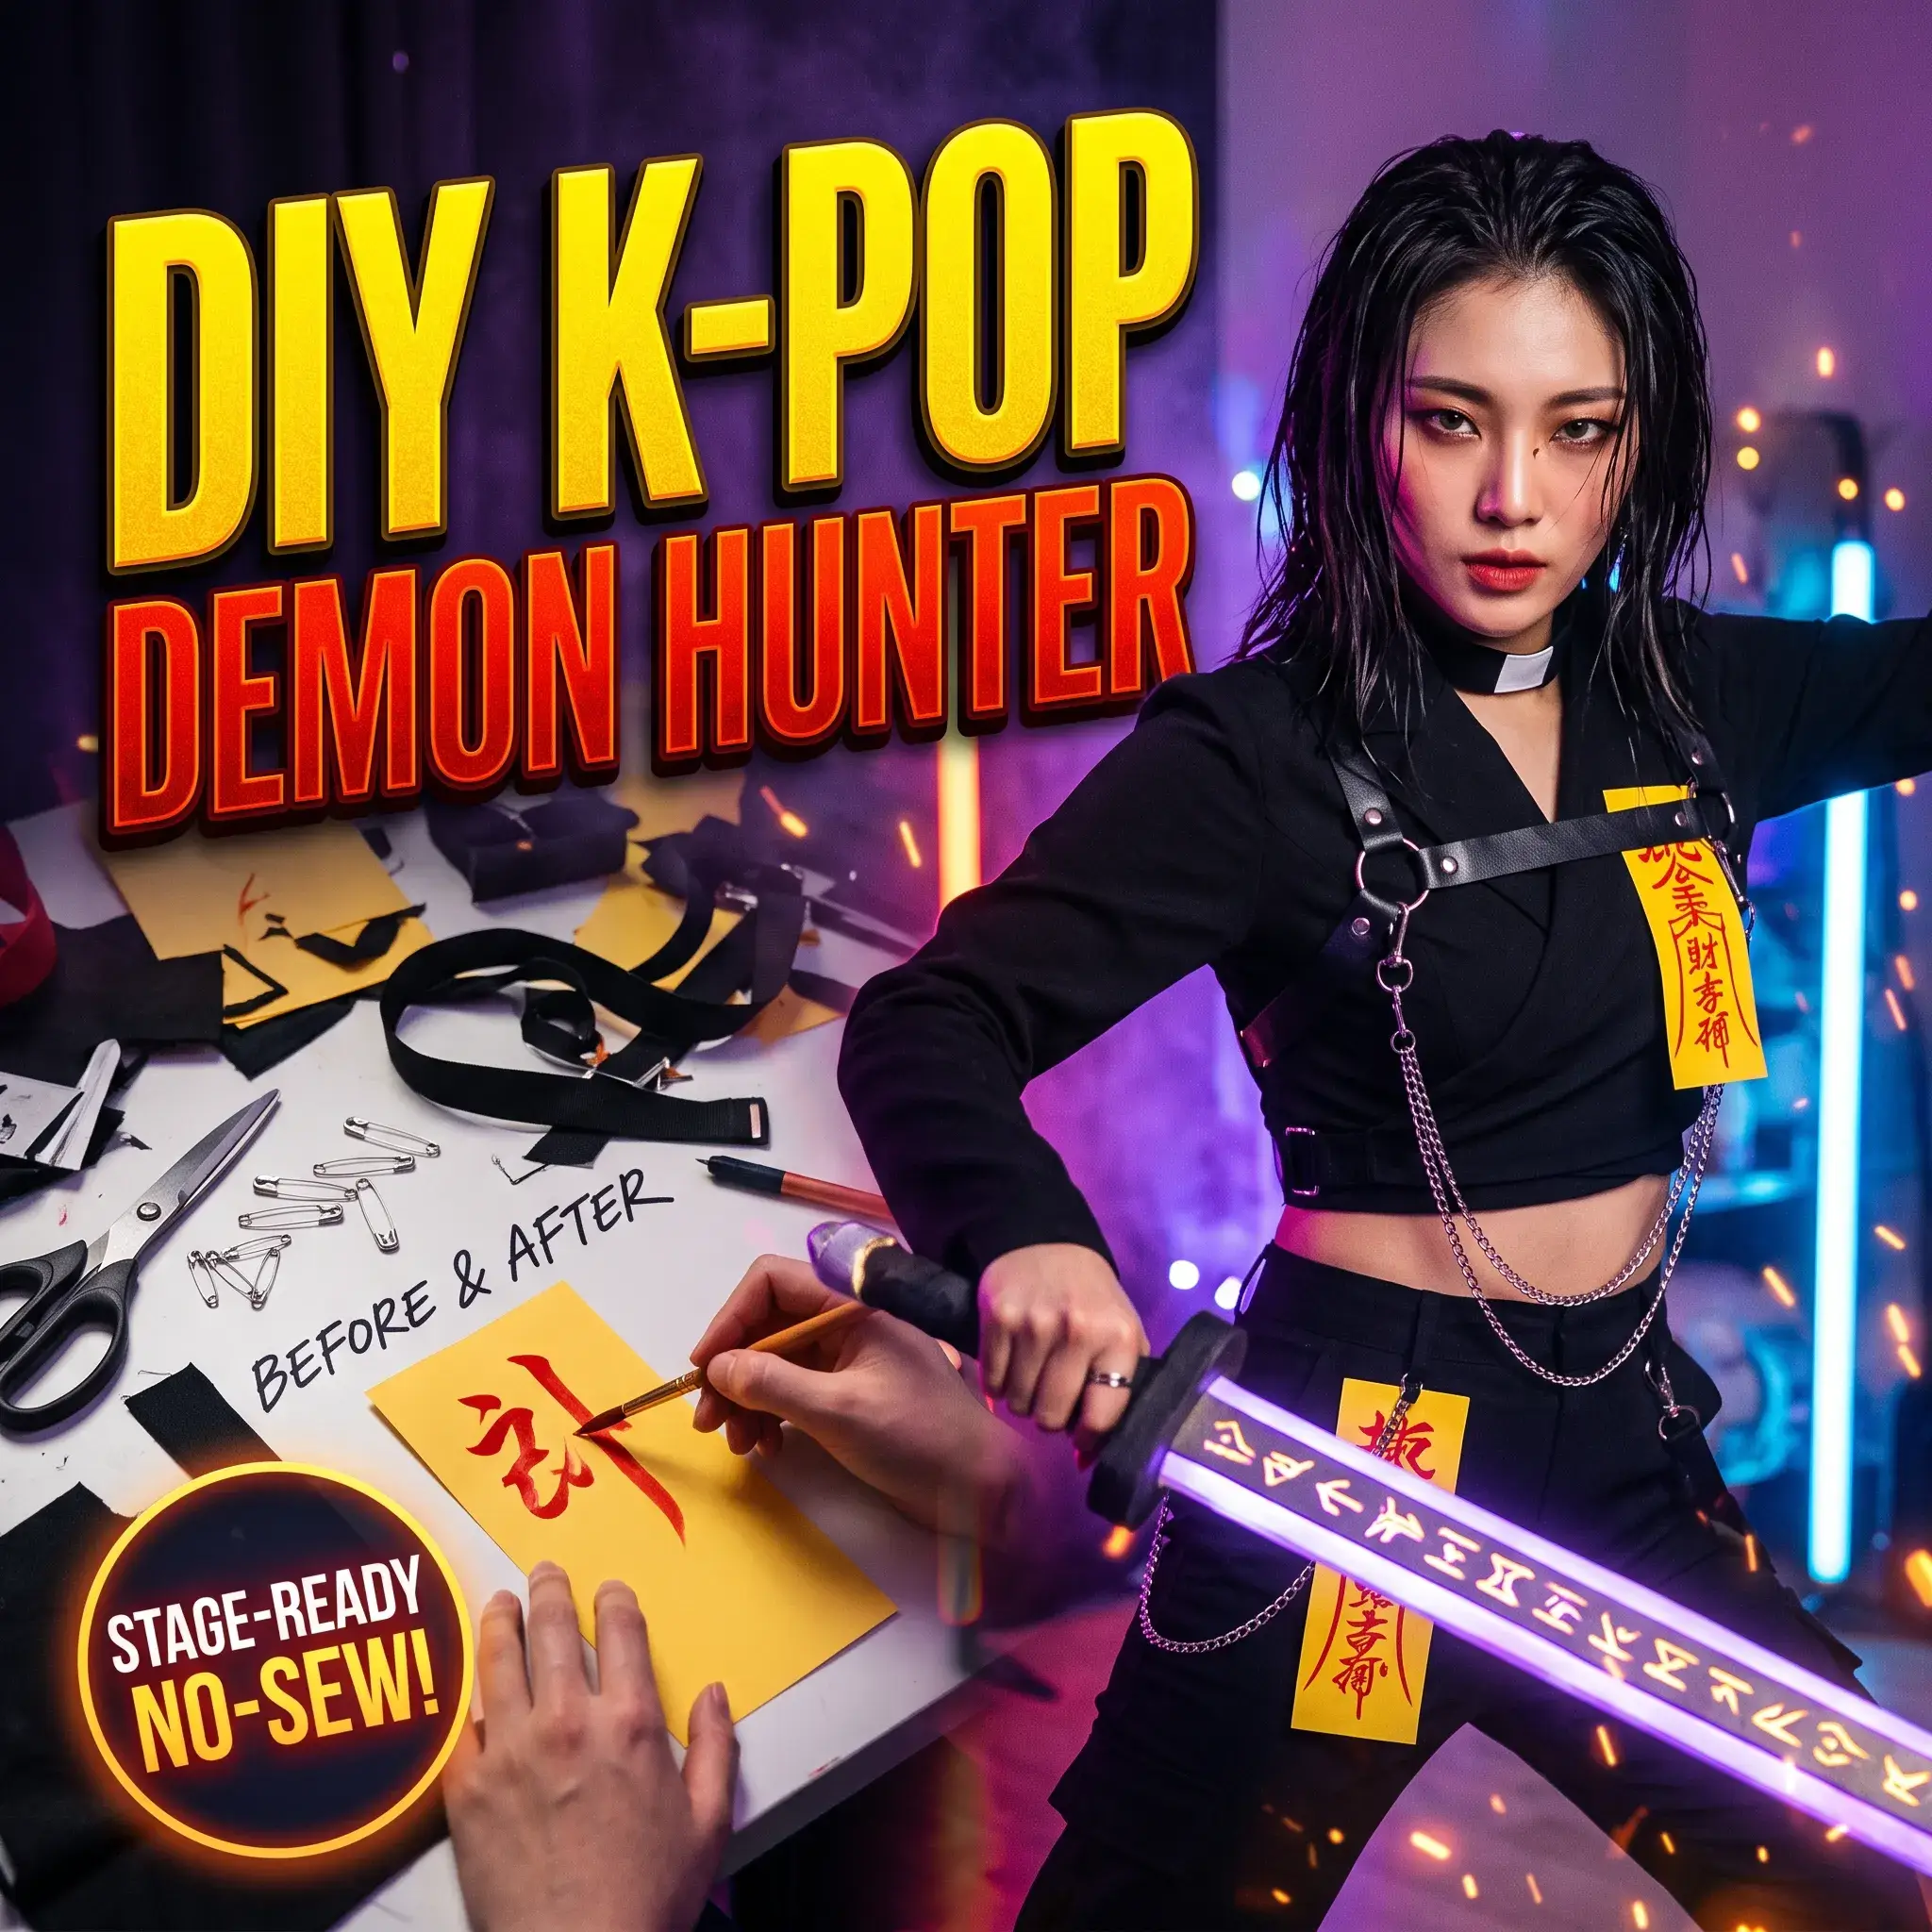
Most commercial Halloween costumes feel like cheap plastic bags. They rip along the seams, trap body heat, and look flat under stage lights or flash photography. If you want the sharp, cinematic silhouette seen in modern K-pop stages and animated series like K-Pop: Demon Hunters, you cannot buy it off a standard store rack.
A convincing exorcist idol outfit combines traditional Korean heritage garments with gritty, functional tactical streetwear. You can build an authentic, choreography-ready costume using thrifted basics, craft foam, and everyday hardware supplies.
Below are seven distinct design concepts you can assemble at home, followed by a complete technical guide to build your own gear from scratch.
7 Practical DIY K-Pop Demon Hunter Outfit Ideas
Idea 1: The Modern Hanbok Leader (Rumi-Inspired)
This style blends royal Joseon court tailoring with modern idol stage presence. It features an asymmetrical cropped jacket wrapped across the chest, paired with a pleated combat skirt and waist chains. Deep obsidian black and royal purple dominate the fabric palette, accented with clean gold details.
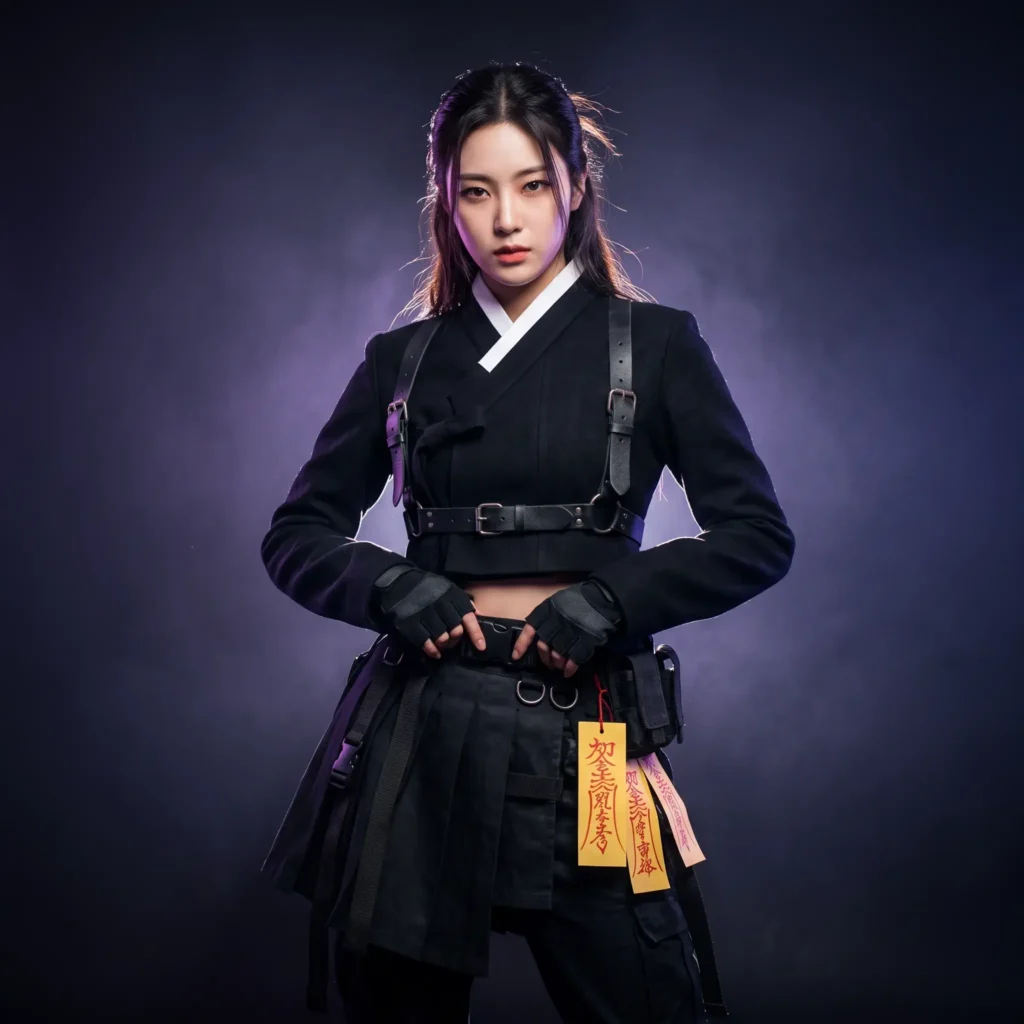
- Garments and Products Used:
- Thrifted black cropped blazer with lapels removed
- High-waisted black tennis skirt or pleated kilt with built-in athletic shorts
- 1-inch wide black faux leather chest harness
- 12 mm white vinyl strip for the inner faux collar
- Yellow cardstock paper talismans attached via mini safety pins
- Knee-high lace-up platform combat boots
Idea 2: The Tactical Exorcist Techwear Rig
This look focuses on utility, urban movement, and aggressive silhouettes. It strips away traditional silks in favor of heavy cargo fabrics, chest rigs, and quick-release buckles. It works best for active dance covers because the base layers breathe easily.
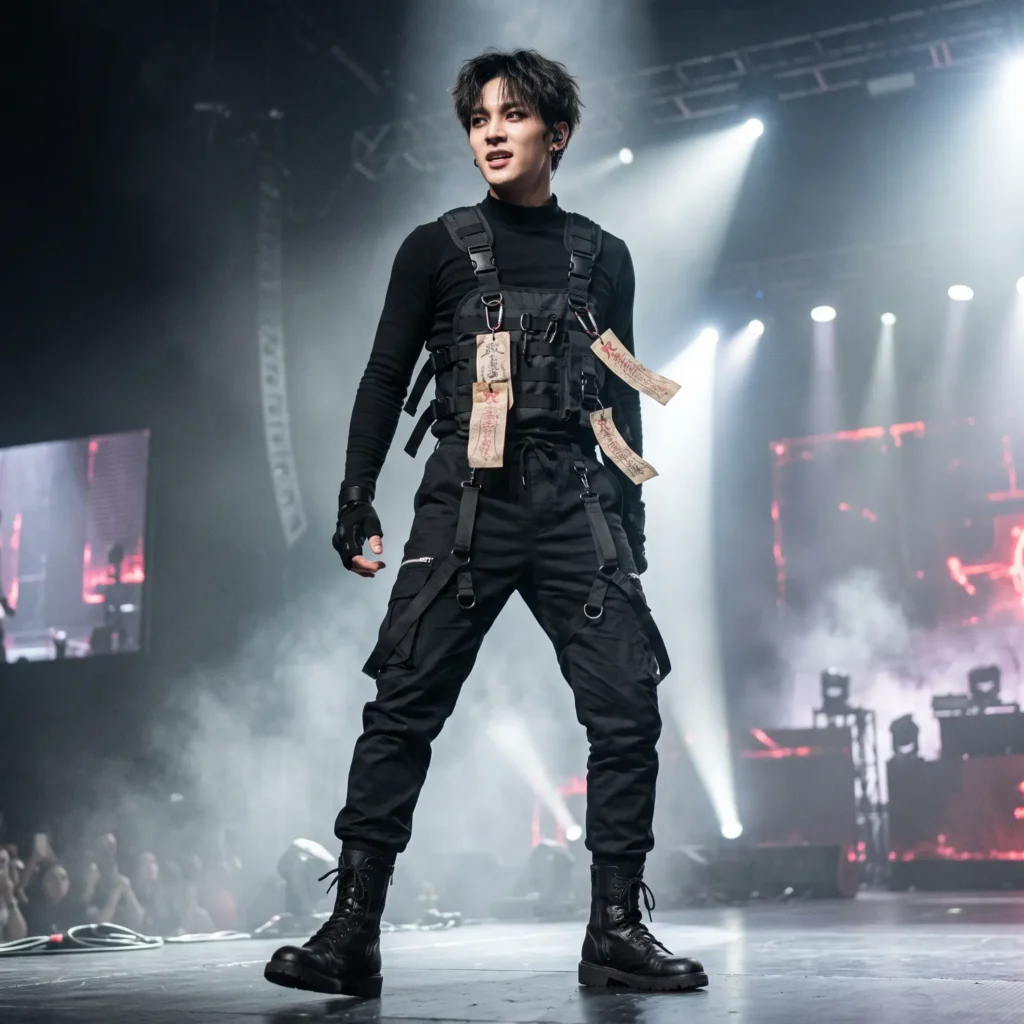
- Garments and Products Used:
- Black ribbed mock-neck compression long-sleeve shirt
- Multi-pocket black tactical cargo joggers
- Adjustable nylon chest rig pouch with MOLLE webbing loops
- Twin 1.5-inch elastic thigh holsters
- Matte black fingerless tactical gloves
- Black paracord wrapped around the forearms
Check out more DIY Ideas
Idea 3: The Midnight Cheollik Overcoat
Based on the historic Cheollik, a military coat worn by Joseon officers, this design uses an open, flowing silhouette that flares out during choreographic spins. It creates dramatic stage movement without requiring complex tailoring.
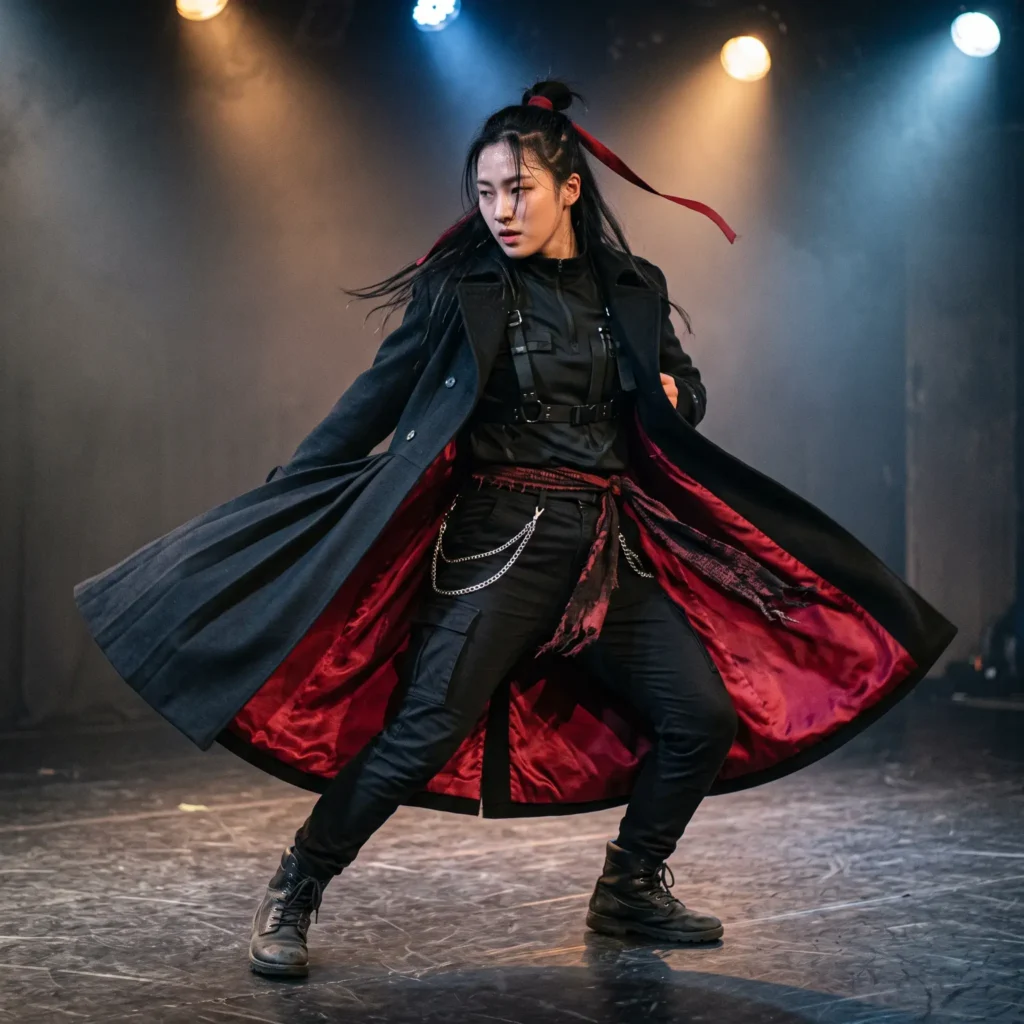
- Garments and Products Used:
- Thrifted long black trench coat or lightweight duster cardigan
- Wide red fabric sash tied in an off-center Korean knot
- Fitted black crew-neck tee
- Slim black coated denim jeans
- Silver link chains draped from belt loops to coat pockets
- Black grosgrain ribbon streamers stenciled with gold text
Idea 4: The Cyber-Shaman Rogue (Zoey-Inspired)
This concept combines youthful street style with traditional shamanic accessories. It uses an asymmetric cropped silhouette, vibrant cyan accents, and twin daggers decorated with bright silk cords.
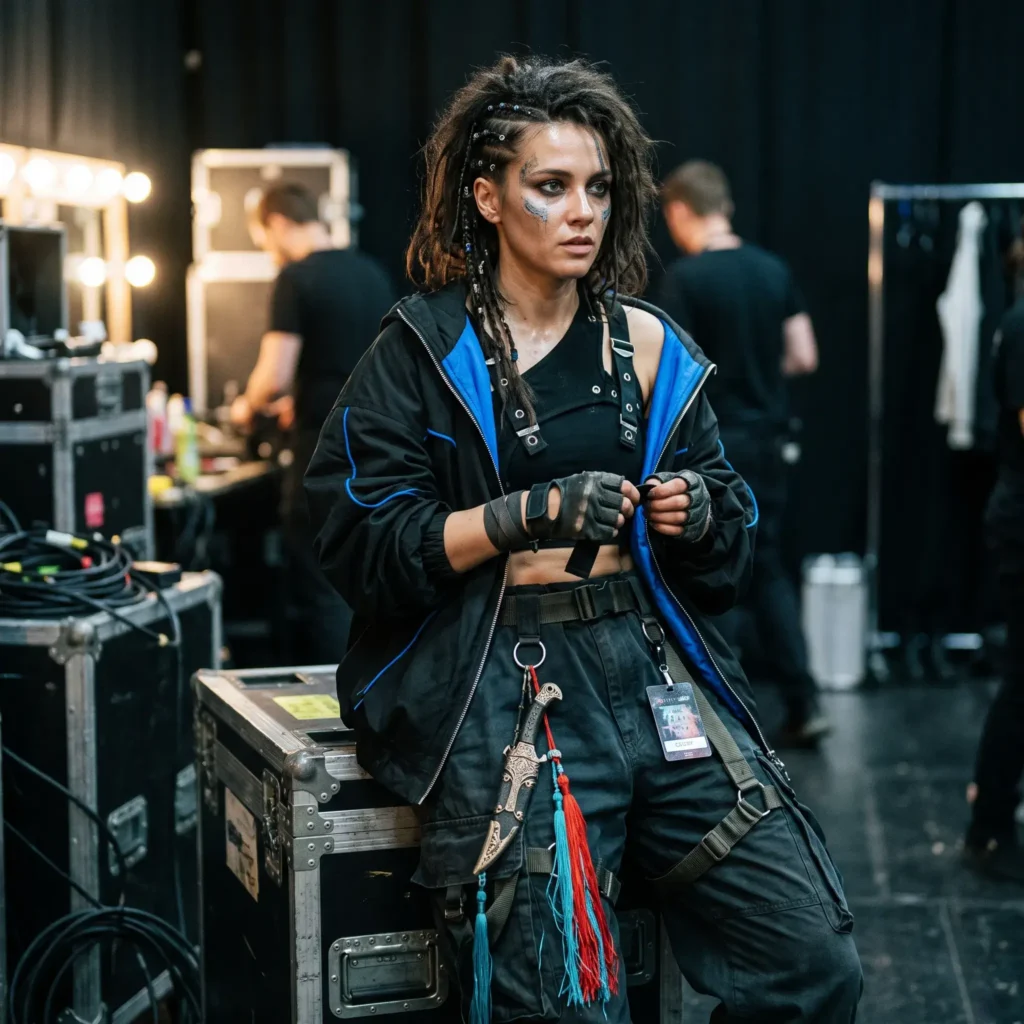
- Garments and Products Used:
- Asymmetrical black one-shoulder cropped tank top
- Oversized cropped nylon windbreaker pushed up at the elbows
- Relaxed-fit cargo pants with cinch-cord ankles
- Single molded craft-foam shoulder pauldron spray-painted matte charcoal
- Twin prop ritual daggers with long red and teal tassels
- Silver ear cuffs and layered industrial chain necklaces
Idea 5: The Crimson Ward Officer (Mira-Inspired)
This look uses a tailored paramilitary silhouette. High neck collars, structured shoulders, and deep cinnabar red accents give the outfit a disciplined, commanding presence.

- Garments and Products Used:
- Fitted double-breasted navy or black military-style jacket
- Stiffened Mandarin collar insert lined with red piping
- High-waisted tailored black shorts with opaque black tights
- Wide faux leather belt with a brass center ring
- Segmented craft foam neck gorget painted antique silver
- Chunky lug-sole knee boots
Idea 6: The Modern Urban Counter
Inspired by modern supernatural manhwa and urban exorcist dramas, this style uses everyday activewear modified with hidden tactical hardware. It is comfortable, durable, and budget-friendly.
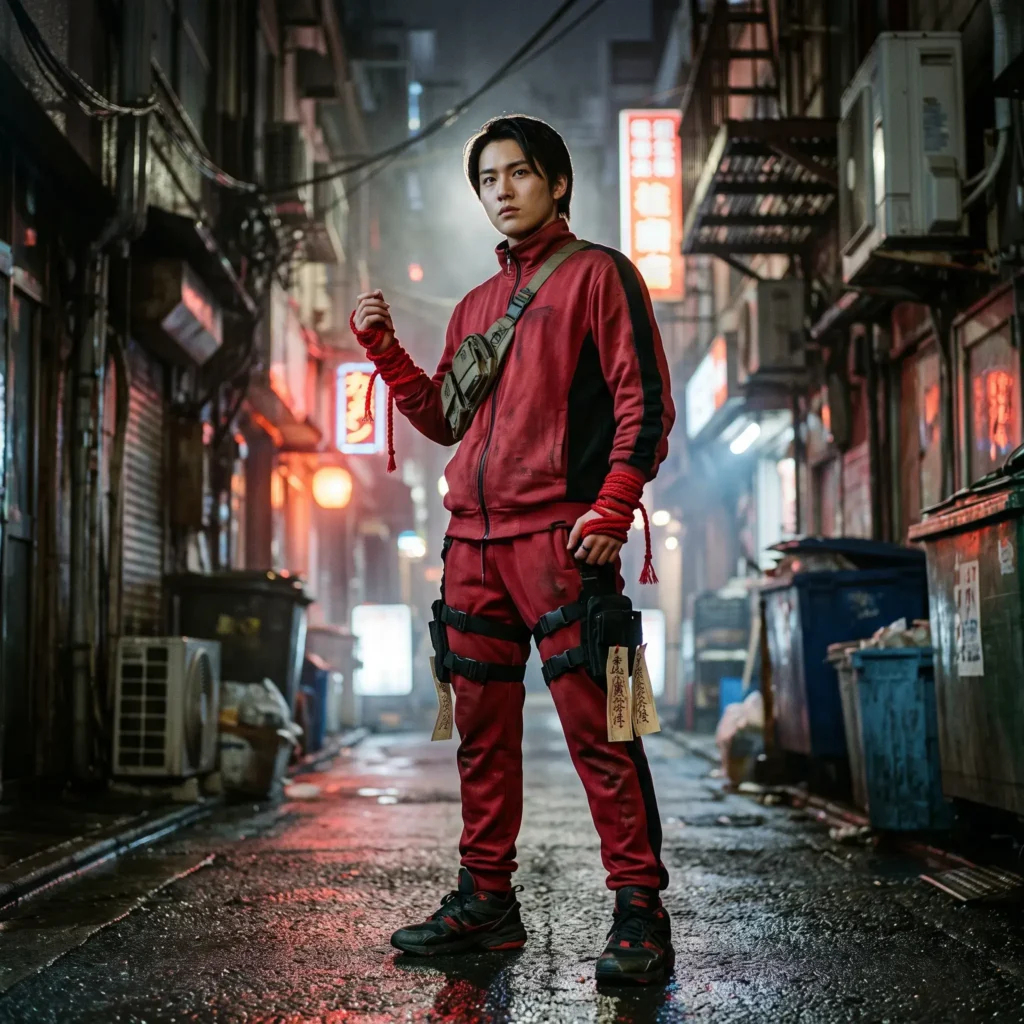
- Garments and Products Used:
- Bright red or deep crimson zip-up track jacket
- Matching red athletic track pants with black side stripes
- Concealed black webbing belt worn over the jacket waist
- Two drop-leg knife sheaths strapped around the mid-thigh
- Distressed white canvas sneakers with light weathering
- Woven red talisman bracelets on both wrists
Idea 7: The Minimalist Dance-Cover Unit
Designed specifically for K-pop dance cover groups who need identical, affordable, and flexible costumes. This build maximizes movement and avoids heavy props that could collide during group routines.
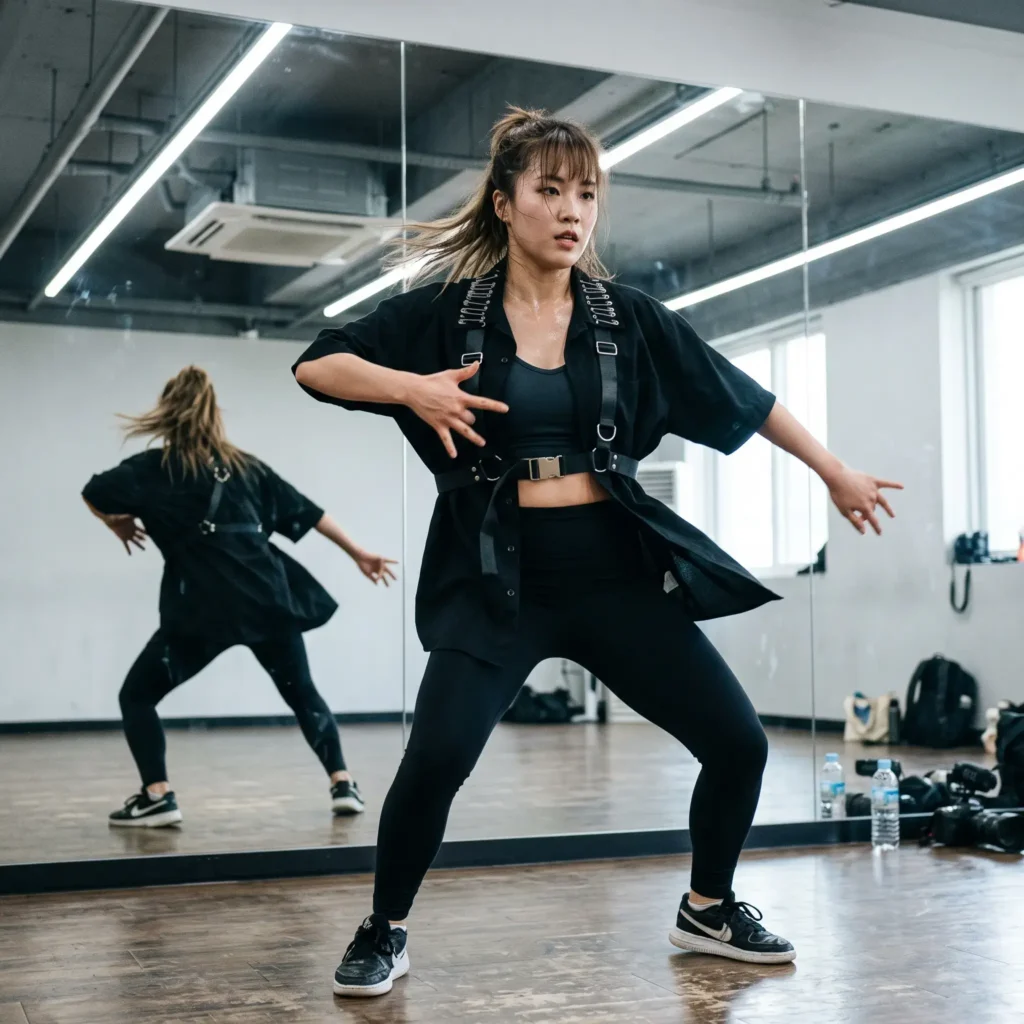
- Garments and Products Used:
- Plain black oversized short-sleeve button-down shirt
- Black athletic bicycle shorts or slim stretch trousers
- Two 1-inch black thrift store belts crisscrossed as an “X” chest harness
- Three laminated yellow paper talismans pinned along the left lapel
- Lightweight foam-padded combat ankle boots
- Silver safety pins grouped in clusters along the collar points
Base Garment Deconstruction: The No-Sew Hanbok Collar Hack
The collar is the most important focal point of this costume. A standard blazer or denim jacket looks Western. Adding the traditional Korean straight neckband, known as the jikryeong-git, transforms the silhouette immediately.
Collar Transformation Plan
- Step 1: Remove the standard notched lapels from your thrifted jacket.
- Step 2: Cut a 3-inch wide fabric strip measuring your neckline perimeter plus 4 inches.
- Step 3: Iron heavy fusible woven interfacing to the backside for rigid support.
- Step 4: Secure a 1/2-inch white vinyl strip along the inner top edge.
- Step 5: Fasten the new collar diagonally across your chest with a side buckle.
Materials Needed
- Thrifted black blazer, utility vest, or denim jacket
- 1/4 yard of matching black cotton drill or canvas fabric
- Heavy-duty fusible woven interfacing
- 1/2-inch wide strip of white faux leather or stiff cotton tape
- Fabric scissors and high-strength fabric glue or needle and thread
- One 1-inch matte black side-release plastic buckle
Step-by-Step Instructions
- Remove the Lapels: Lay the jacket flat. Cut away the existing notched collar flaps with fabric scissors. Create a clean, round neckline that sits close to the base of your neck.
- Draft the Wrap Band: Cut a fabric strip 3 inches wide. Measure the full length around the jacket neckline, then add 4 inches. This extra length creates the diagonal crossover tab across your chest.
- Reinforce the Structure: Iron the fusible interfacing directly to the wrong side of your fabric strip. Do not skip this step. Without stiff interfacing, the collar will fold over and sag under stage heat.
- Add the Dongjeong Accent: The dongjeong is the signature white trim lining traditional Korean collars. Cut your 1/2-inch strip of white vinyl or tape. Glue or stitch it along the inner top edge of the black strip. Allow 1/4 inch of white to show above the top edge.
- Attach and Secure: Pin the reinforced strip along your jacket neckline, right sides together. Sew the seam, or use high-strength fabric glue if you do not own a sewing machine. Fold the band upright and press flat.
- Install the Tactical Closure: Traditional hanbok uses delicate fabric ties called goreum. Replace them with tactical hardware. Glue or stitch a 1-inch nylon strap to the left collar tip and the right ribcage seam. Attach a black plastic side-release buckle so you can snap the front closed securely.
DIY Weatherproof Bujeok (Talisman) Guide
In Korean folklore, bujeok are yellow paper talismans inscribed with red cinnabar ink to ward off evil spirits. Standard paper charms tear easily during an event, so you need to build reinforced versions.
The Bujeok Material Setup
- Substrate Layer: 90g yellow mulberry paper (hanji) or tea-stained watercolor paper.
- Inscription Ink: Crimson acrylic paint pen with a chisel tip.
- Protective Shield: 75-micron matte thermal laminating sheet.
- Suspension Hardware: Brass eyelet with a small black carabiner or split ring.
Sourcing and Aging the Paper
Authentic talismans use yellow mulberry paper. If you cannot locate mulberry paper, use heavyweight watercolor paper. Brew two bags of black tea with a pinch of turmeric powder, then brush the liquid across both sides of the paper. Let it dry flat to create an aged, parchment-yellow finish.
Drawing the Sigils
Cut the dried paper into strips measuring 2.5 inches wide by 7 inches tall. Use a wide crimson acrylic paint pen. Draw bold, continuous calligraphic strokes down the center of each strip.
You can reference traditional exorcism characters such as the Japgwi Somyeol pattern, geometric solar symbols, or layered Hanja characters. Keep your hand steady and your lines sharp.
Weatherproofing and Mounting Steps
- Laminate the Paper: Unprotected paper absorbs sweat and tears in crowded spaces. Run your dry talismans through a thermal laminator using thin, 75-micron matte laminating pouches. Matte film stops light glare in photos while making the paper completely waterproof.
- Punch the Anchor: Trim the excess clear plastic margin to 2 mm around the edges. Punch a single hole in the center of the upper border.
- Set the Eyelet: Crimp a small brass or black eyelet into the punched hole. This prevents the plastic from tearing under movement.
- Clip to Gear: Thread a mini metal carabiner or split ring through the eyelet. Clip the finished talismans directly to your belt loops, harness rings, or weapon scabbards.
Convention-Safe Foam Weaponry: The Saingeom
Rumi’s primary weapon is inspired by the Joseon-era Saingeom (Four-Tiger Sword). Traditionally forged during astrological tiger alignments, this double-edged straight blade was believed to sever dark spirits.
Real metal blades and solid wood swords are prohibited at conventions. You can build a durable, convention-legal prop using high-density foam.
Blade Dimensions and Core Specifications
- Total Sword Length: 39 inches (100 cm).
- Internal Core: 8 mm solid carbon-fiber rod cut to 35 inches. The rod must stop 3 inches short of the tip so it never punctures through during an accidental impact.
- Center Foam Core: 10 mm high-density EVA foam (100 kg/m³ density).
- Outer Foam Skins: Two sheets of 2 mm high-density craft foam.
Step-by-Step Construction
- Cut the Core Channel: Trace your blade outline onto the 10 mm foam. Use a rotary tool with a small round carving bit to grind a straight groove down the centerline, half the depth of your carbon rod.
- Assemble the Sandwich: Apply contact cement to the groove, the carbon rod, and the mating foam surfaces. Allow the cement to become tacky, then press the rod into the groove. Glue the two 2 mm foam skins to both sides of the center core.
- Bevel the Edges: Mark a guide line 1/2 inch inward from the blade edges. Slice along the line at a 45-degree angle with a fresh utility knife to form sharp bevels. Sand the edges with 220-grit sandpaper. Major conventions require all prop edges to have a minimum 2 mm blunt radius.
- Engrave the Constellations: The historic Saingeom features 28 ancient star constellations along the blade. Use a fine-point woodburning tool on low heat to trace these star charts into the foam. The heat creates permanent, clean recessed grooves.
- Seal and Paint: Coat the foam with three layers of brush-on rubber sealant. Spray the blade with metallic gunmetal acrylic paint. Fill the recessed star lines with bright violet or UV-reactive neon acrylic paint using a fine detail brush.
The Ttidon Two-Point Suspension System
Carrying a long prop sword with a single belt loop makes it swing into your legs while walking or dancing. Solve this by adapting the historic Korean military ttidon system:
- Drop Straps: Attach two vertical nylon drop straps from your main belt down to your scabbard.
- Angle Alignment: Fasten the front strap near the throat of the scabbard. Fasten the rear strap 5 inches lower, making the rear strap 2 inches longer than the front. This locks the sword at a steady 30-degree downward angle.
- Thigh Anchor: Wrap a 1.5-inch elastic strap around your mid-thigh and secure it to the lower third of the scabbard. This holds the prop flat against your leg during high kicks and rapid walking.
Stage Cosmetics and SFX Battle Scars
Idol stage makeup demands a deliberate contrast: an immaculate, glowing facial base paired with realistic combat trauma.
Sweat-Proof Base Preparation
Conventions and performance stages generate heavy heat. Begin with a silicone-based mattifying primer pressed into your forehead, nose, and chin. Stipple a full-coverage, sweat-resistant matte foundation across your face with a damp sponge.
Bake the bridge of your nose and chin with translucent micro-fine silica powder for five minutes before dusting it off. Apply liquid pearl highlighter strictly to the highest curve of your cheekbones to achieve the glass-skin finish without looking oily under direct lights.
Graphic Eyes and Aegyo Sal
Draw a sharp, waterproof black gel liner wing extending outward past the corner of each eye, angling up toward the temple.
Define the aegyo sal (the lower eyelid fat pad common in K-pop stage looks):
- Squint lightly into a mirror to locate the natural crease under your lower lashes.
- Draw a soft, cool-toned taupe shadow line 3 mm below the lash line.
- Fill the shelf between the lash line and shadow line with a shimmering champagne liquid pigment. This highlights the eyes and keeps your expression clear under bright lights.
Applying Realistic Scars with Rigid Collodion
Do not use flat red face paint for combat injuries. Real scars have physical depth.
- Clean the Area: Wipe your cheekbone or jawline with an alcohol pad to remove skin oils.
- Lay the Color Base: Draw a thin line with a dark pink or muted plum makeup pencil where you want the scar.
- Apply the Liquid: Brush a single coat of rigid collodion directly over the colored line. As the clear liquid dries, it shrinks and puckers the skin inward to form a recessed scar.
- Deepen the Effect: Brush on three to four successive coats. Wait two full minutes between layers until the crease looks deep and physical.
- Remove the Surface Glare: Dust the finished scar with translucent setting powder to eliminate the synthetic plastic shine.
Removal Safety Warning: Never peel dried collodion off your skin with your fingernails. Ripping it off can pull the outer layer of skin and cause irritation. Dissolve the film gently using a cotton pad soaked in isopropyl myristate or dedicated prosthetic adhesive remover.
Dance Mobility and Performance Durability
If you plan to perform dance choreography, standard alterations can restrict your reach. Off-the-rack blazers pull the jacket hem upward whenever you lift your arms above your head.
The Underarm Stretch Gusset
Turn your altered jacket inside out. Use a seam ripper to open the bottom 3 inches of the armhole and the top 2 inches of the side torso seam.
Cut a diamond-shaped piece of 4-way stretch black spandex measuring 4 inches point-to-point. Pin and sew this diamond directly into the opened seam intersection. The hidden stretch panel expands when you reach upward, letting your arms move freely without shifting your collar or pulling the waist out of place.
The Emergency Utility Kit
Pack these items into one of your tactical belt pouches during any convention or dance performance:
- 0.5 oz tube of cyanoacrylate (super glue): Repairs broken foam seams instantly.
- Latex-free lash adhesive: Reattaches loose cheek rhinestones.
- Black zip-ties: Fixes snapped belt loops and secures weapon peace-bonds at convention checkpoints.
- Safety pins: Fastens shifted talismans and emergency hem tears.
Budget Breakdown: DIY Build vs. Premade Cosplay
Building your own outfit saves money and results in a more durable, authentic costume than mass-produced retail sets.
| Category | Premade Factory Cosplay | DIY Thrift and Build | Cost Difference | Key Benefit of DIY |
|---|---|---|---|---|
| Main Garments | $75.00 (Polyester blend) | $18.00 (Thrifted blazer + skirt) | Save $57.00 | Real fabric weight, breathable, custom fit |
| Tactical Hardware | $30.00 (Flimsy PU vinyl) | $12.00 (Webbing, rings, buckles) | Save $18.00 | High-tensile nylon, adjustable sizing |
| Prop Weapon | $60.00 (Inflexible resin) | $16.00 (EVA foam + carbon rod) | Save $44.00 | Convention safety legal, ultra-lightweight |
| Paper Talismans | $12.00 (Glossy printouts) | $4.00 (Tea-dyed paper + paint) | Save $8.00 | Weatherproof, authentic matte texture |
| Total Investment | $177.00 | $50.00 | Save $127.00 | Custom stage-grade durability |
Frequently Asked Questions
What are the yellow papers on Korean demon hunter costumes?
The yellow papers are called bujeok. In Korean folk shamanism, they are spiritual talismans inscribed with red cinnabar ink to repel malevolent entities and attract protection. On a costume, they act as primary visual symbols of the exorcist theme.
How do I make a cheap chest harness at home without leather tools?
Buy two 1-inch wide black nylon luggage straps or thrift store belts. Cut them to size, wrap them across your shoulders in an “X” or “Y” shape, and join the intersections using 2-inch metal key rings or binder rings. Use heavy fabric glue or staple and wrap the joints with black electrical tape for a clean, industrial finish.
Are EVA foam swords allowed inside comic conventions?
Yes, high-density EVA foam swords are permitted at almost all major conventions because they are soft and blunt. However, the prop must contain a lightweight core such as fiberglass or carbon fiber rather than solid metal or thick wood. Blade tips must stay flexible, and edges must remain rounded.
How do I keep my stage makeup from melting while dancing?
Use a silicone-based primer on your T-zone, apply high-coverage matte foundation with a damp sponge, and set it with translucent silica powder. Lock the finished look with a performance-grade setting spray designed for theatrical productions.
Can I make this costume without a sewing machine?
Yes. You can complete the collar modification and strap assembly using high-strength fabric glue, fusible hem tape, and hand-stitched safety pins. The layered, distressed techwear aesthetic hides non-sewn joints cleanly.
Final Takeaway
Creating a stage-ready K-pop demon hunter costume does not require expensive custom tailoring. Focus on three core anchors: a stiffened crossover hanbok collar, functional matte black tactical straps, and clean, weatherproof paper talismans. Source your base pieces from local thrift racks, build your props from lightweight craft foam, and prioritize athletic mobility. The result is a sharp, durable outfit built to handle stage lighting, dance choreography, and crowded convention floors.