How to Make Decoupage Seashell Art: Trinket Dishes, Wall Decor, and Keepsakes
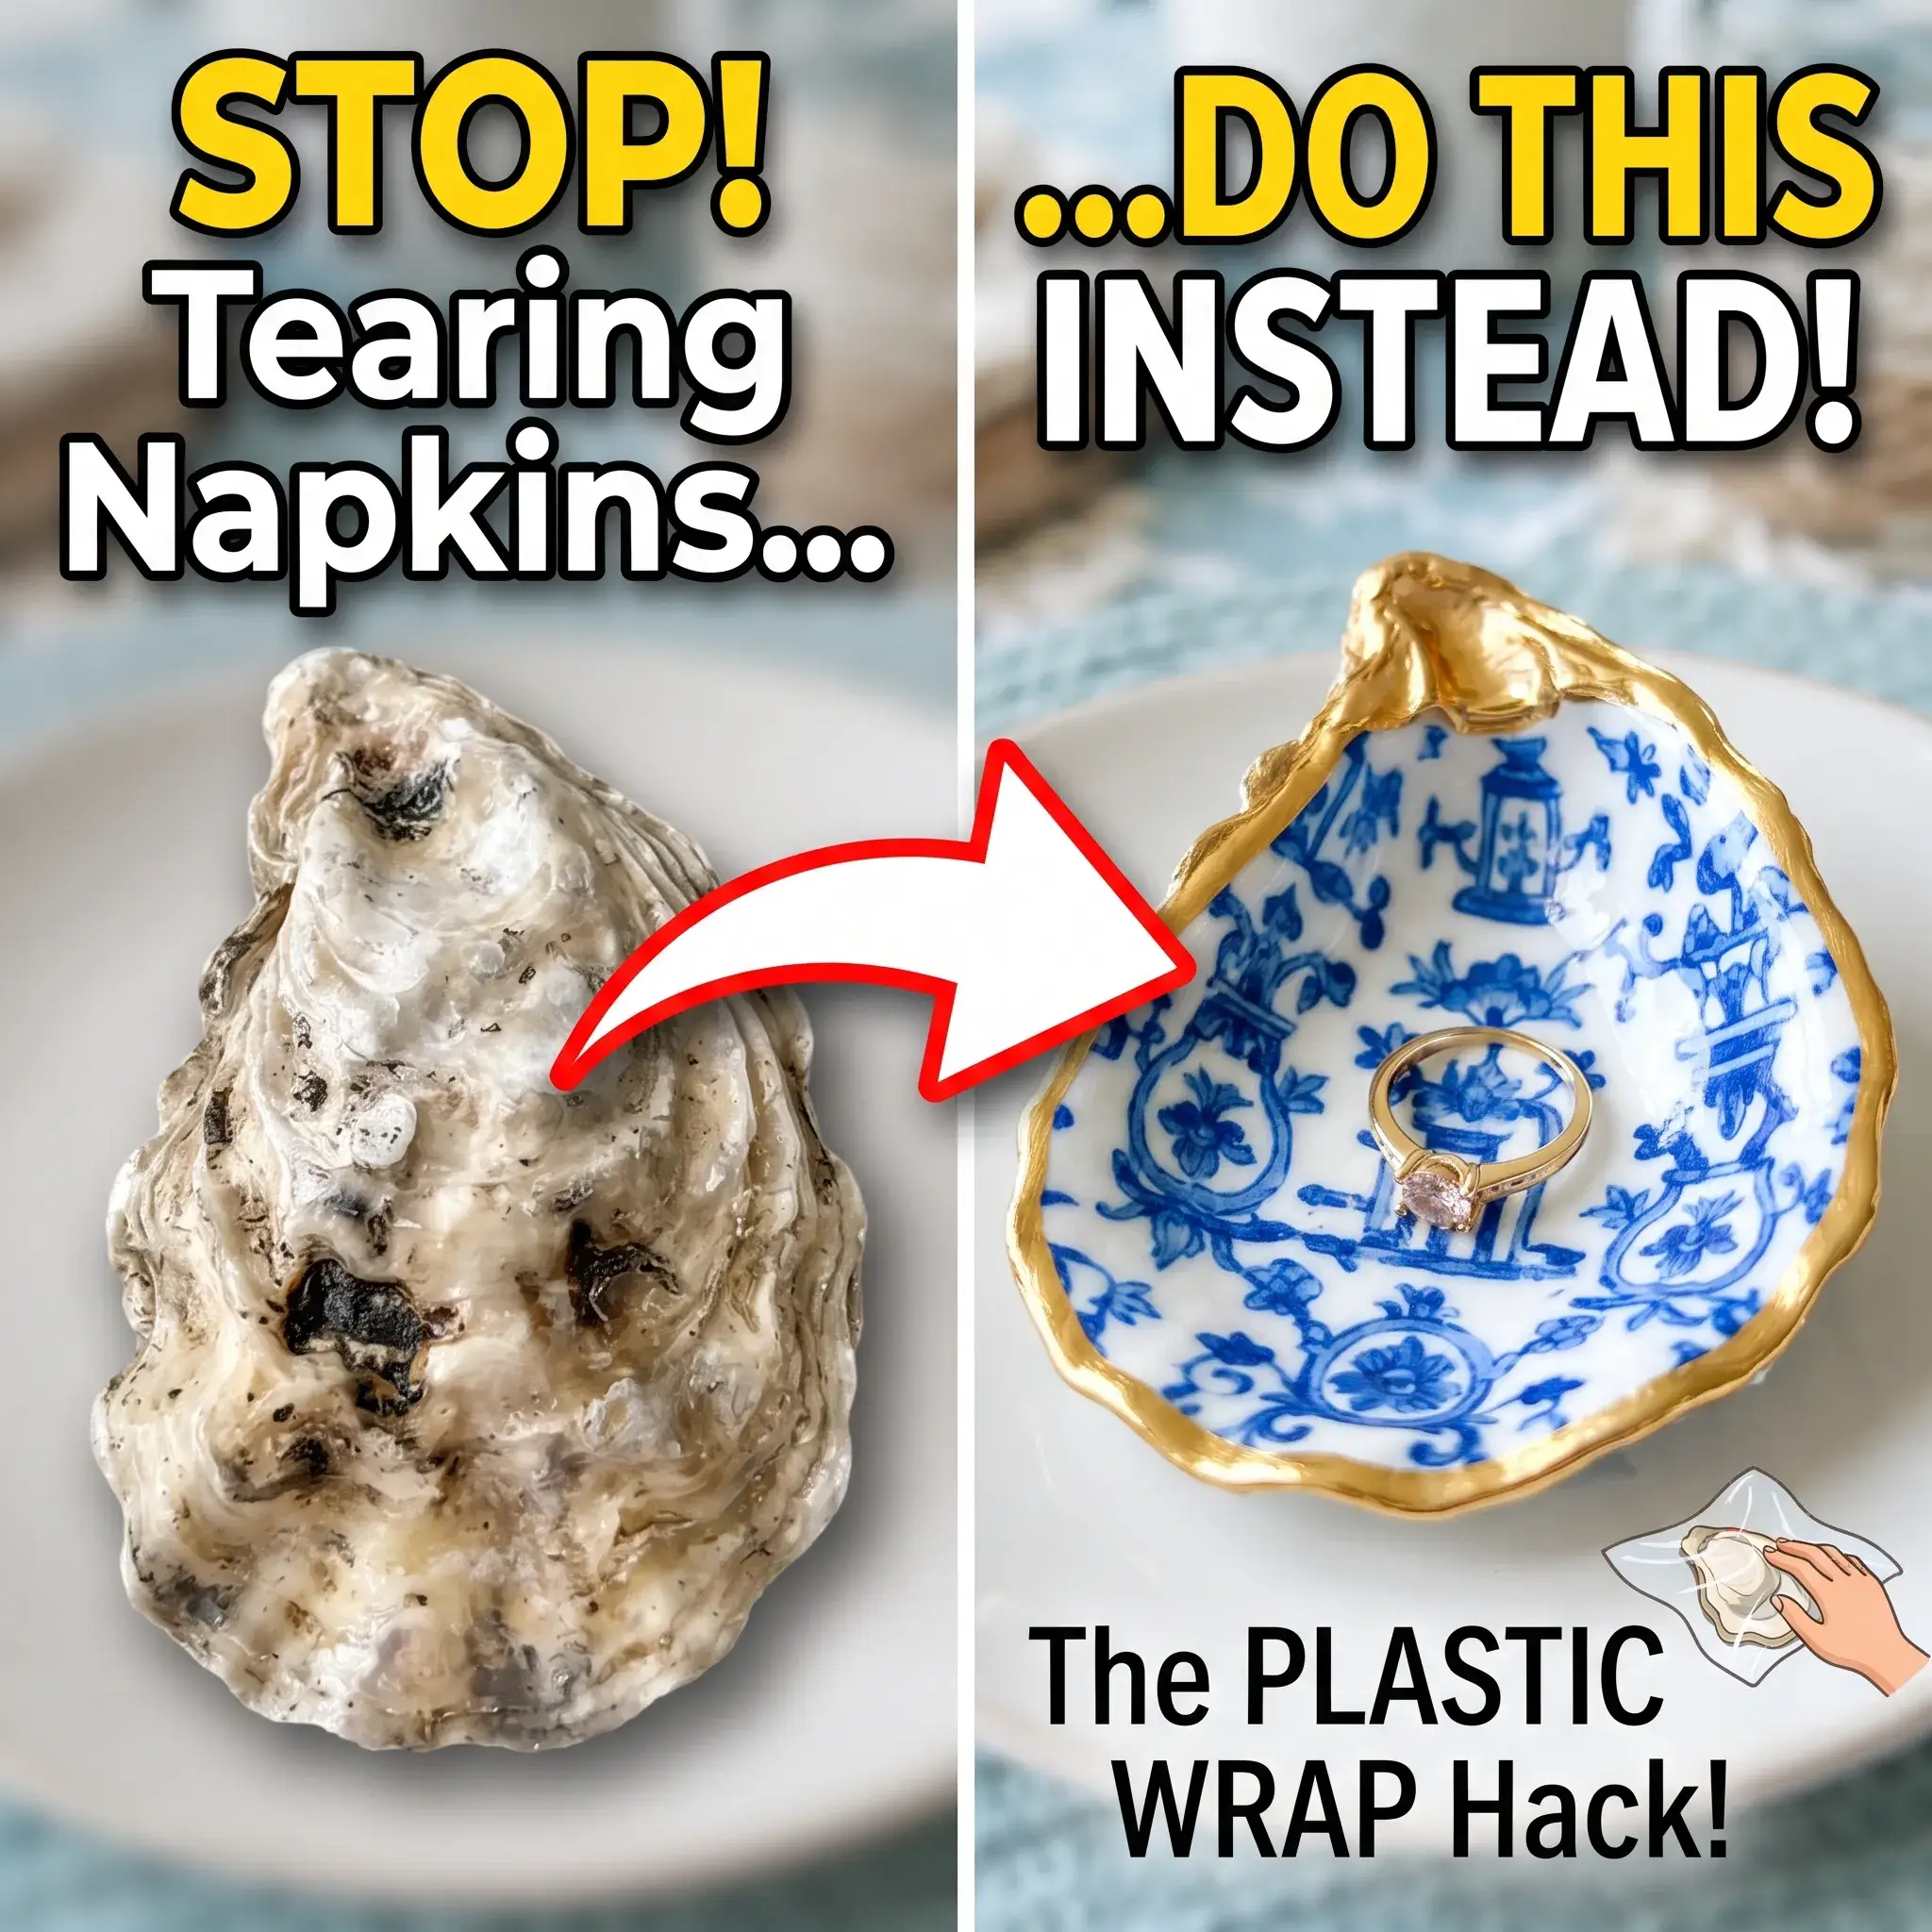
Decoupage seashells sounds simple until your paper tears, the glue turns cloudy, or the shell rocks on your table. Most craft tutorials skip the mechanical steps that prevent these exact problems.
Marine shells are made of calcium carbonate. They have steep curves, natural ridges, and mineral spots that react poorly to standard papercraft methods. Cocktail napkins use ultra-thin wood pulp that softens instantly in wet glue. If you drag a brush across that damp paper, it shreds.
This guide fixes those issues with shop-tested methods. You will learn how to prepare wild or culinary shells, apply napkins without wrinkles, level unstable shell bases, and seal surfaces for daily jewelry use.
6 Inspiring Decoupage Seashell Ideas for Your Home
Begin with design inspiration. These six concepts show how different shell shapes, patterns, and hardware create high-end home accents.
1. The Classic Blue and White Chinoiserie Oyster Ring Dish
This design uses deep Atlantic oyster shells paired with classic blue and white floral or pagoda patterns. The deep basin holds small rings, while the heavy gold rim adds a polished metallic border.
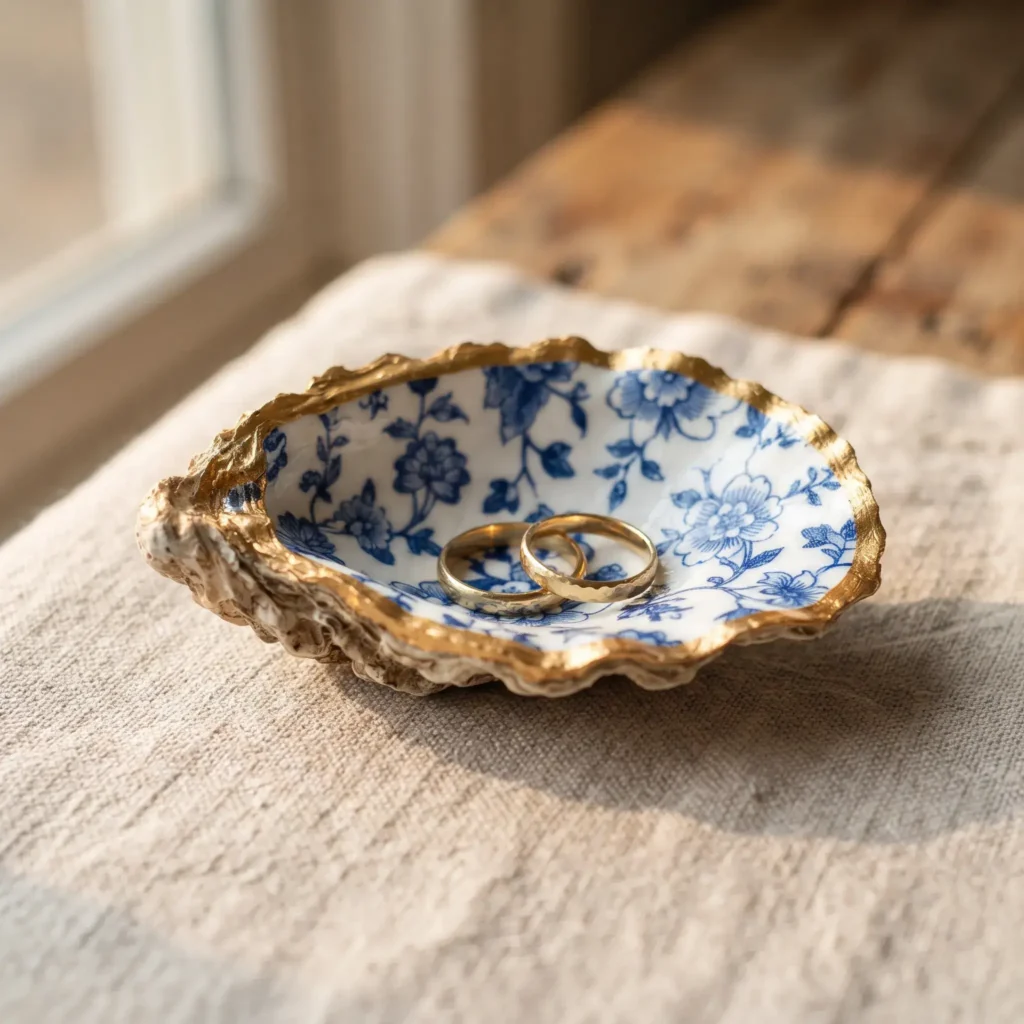
- Products Used:
- 4-inch eastern oyster shell (Crassostrea virginica)
- 3-ply blue Chinoiserie floral paper luncheon napkin
- Mod Podge Gloss
- Plaid Liquid Leaf in Classic Gold
- DecoArt Triple Thick Gloss Glaze
- 6 mm flat-backed brass spacer beads (for tripod base)
2. The French Botanical Scallop Shell Catchall
Scallop shells provide a broad, symmetrical canvas. Vintage botanical prints, such as olive branches, wildflowers, or garden herbs, follow the natural fluting of the shell ridges.
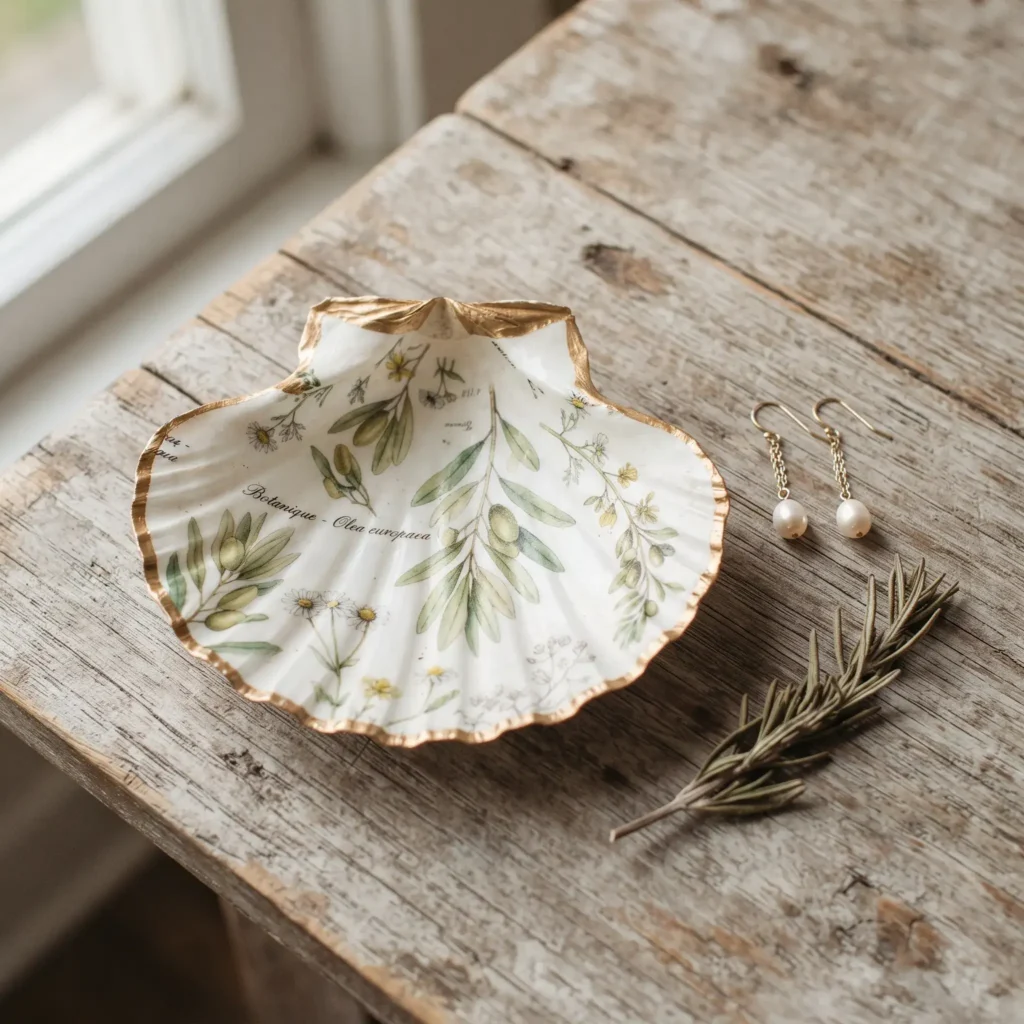
- Products Used:
- 5-inch white Pecten scallop shell
- Vintage botanical wildflower paper napkin
- White acrylic gesso primer
- Mod Podge Matte
- 18K metallic gold leaf paint pen
- Clear acrylic matte spray sealer
Check out more DIY Ideas
3. Framed Coastal Shadowbox Wall Gallery
Mounting a grid of decoupaged oyster shells turns individual crafts into structured architectural wall art. A 3×3 layout on natural textured linen creates a clean coastal gallery look.
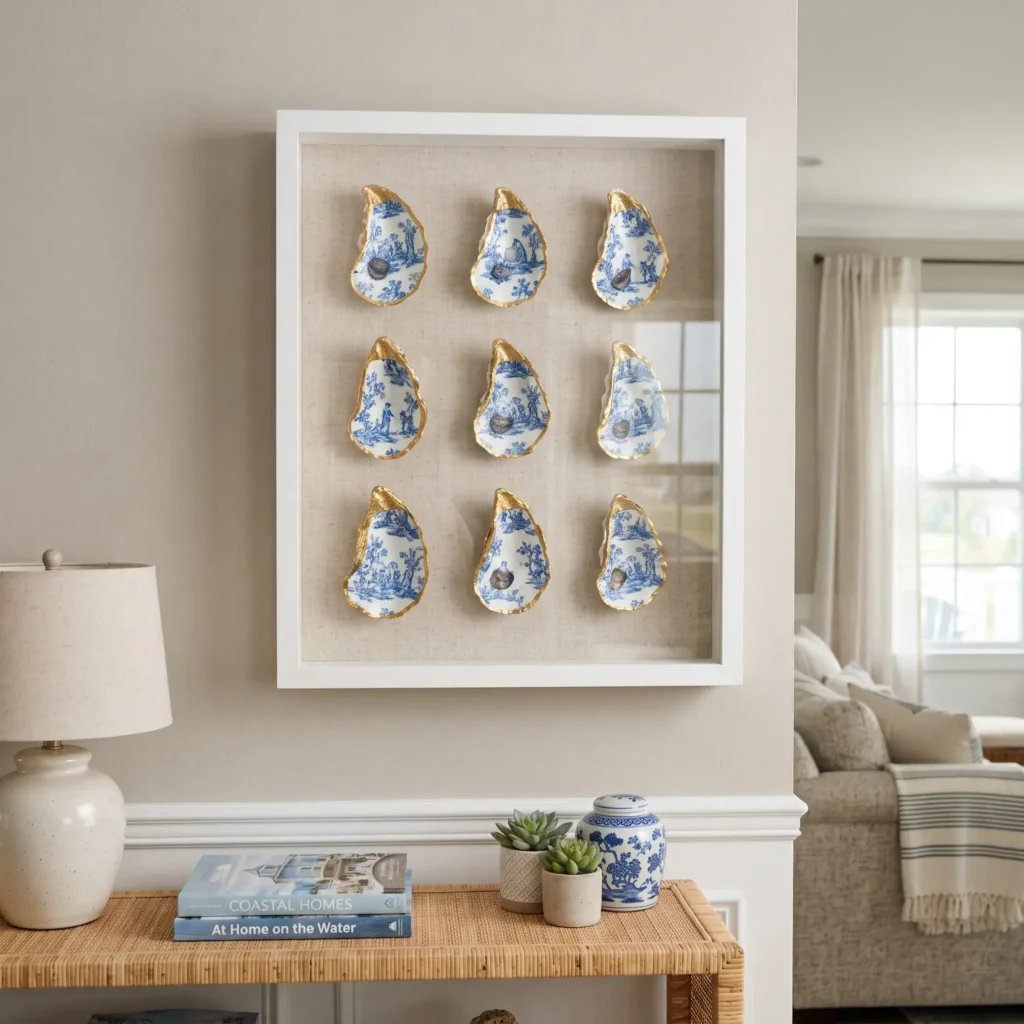
- Products Used:
- Nine matched 4-inch oyster shells
- Assorted blue and cream toile paper napkins
- 16×20-inch white wood shadowbox frame with glass front
- Natural open-weave beige linen fabric backer board
- E6000 industrial craft adhesive
- Plaid Liquid Leaf in Classic Gold
4. Gilded Velvet-Ribbon Holiday Tree Ornament
Drilling the hinge turns small shells into hanging ornaments. Deep green, berry, or winter floral prints paired with hand-tied velvet ribbons create keepsake gifts.
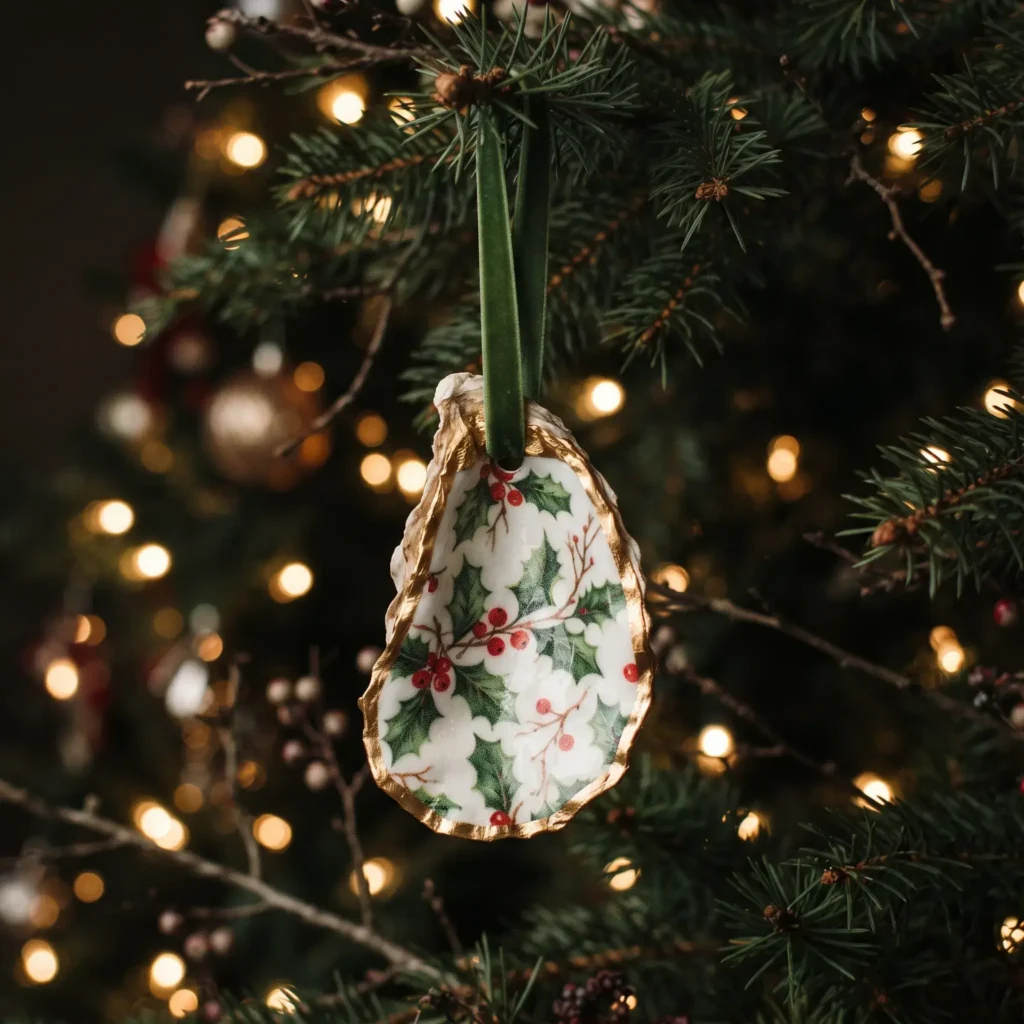
- Products Used:
- 3.5-inch oyster shell with drilled hinge hole
- Winter botanical or holly-printed paper cocktail napkin
- Mod Podge Gloss
- 3/8-inch moss green silk velvet ribbon
- Liquid gold leaf
- Rotary tool with 1.5 mm diamond core drill bit
5. Monogrammed Bridal Shower Place Card Dishes
Small oyster or clam shells double as personalized seat markers and guest favors. A single central monogram or guest name sits over a muted floral background.
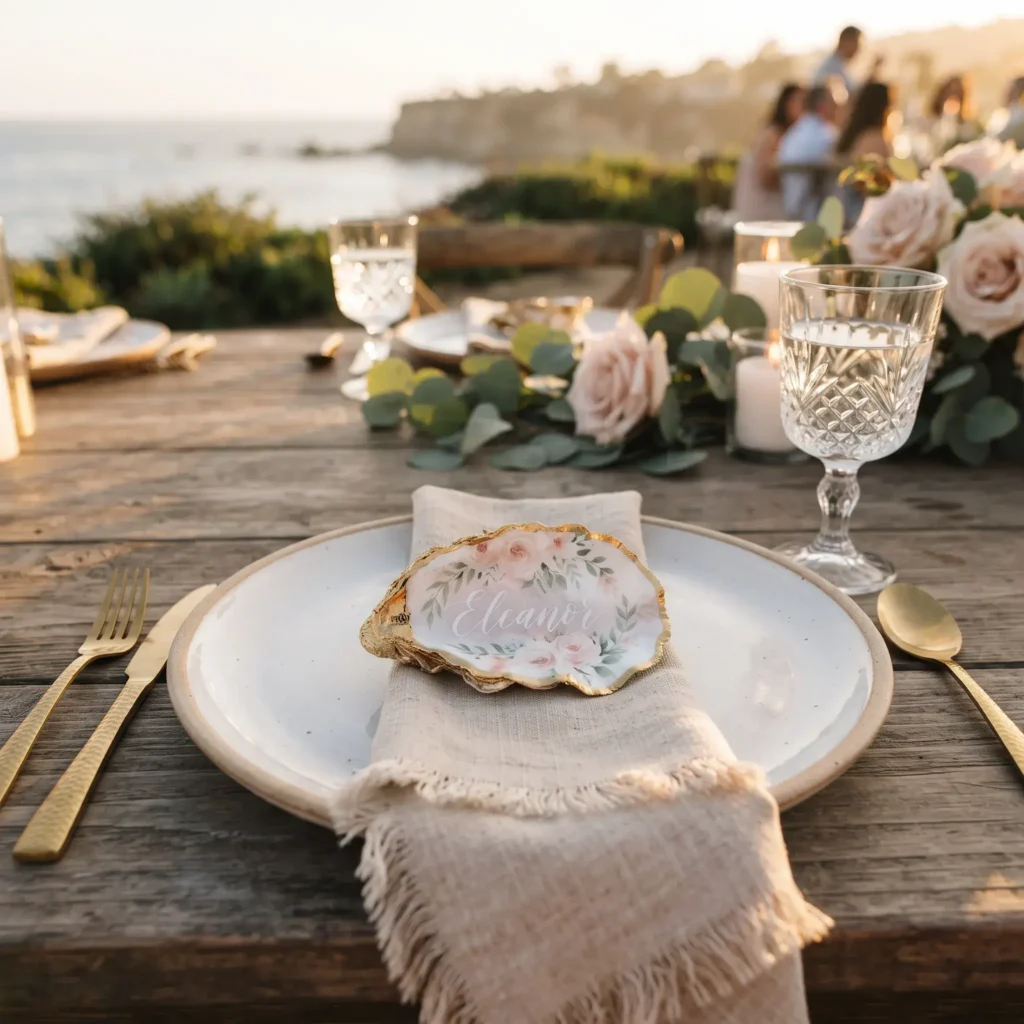
- Products Used:
- 3-inch Atlantic clam or oyster shells
- Soft blush or pastel watercolor paper napkins
- Dr. Ph. Martin’s Pen-White calligraphy ink
- Fine tip dip pen
- DecoArt Triple Thick Brilliant Gloss Glaze
- Acrylic craft pearls (for stabilizing feet)
6. Vintage Citrus and Greenery Kitchen Catchall
Bright citrus motifs, such as Meyer lemons and Mediterranean tile patterns, bring warmth to kitchen sinks or coffee bars. These shallow scallop shells hold jewelry, change, or spare keys.
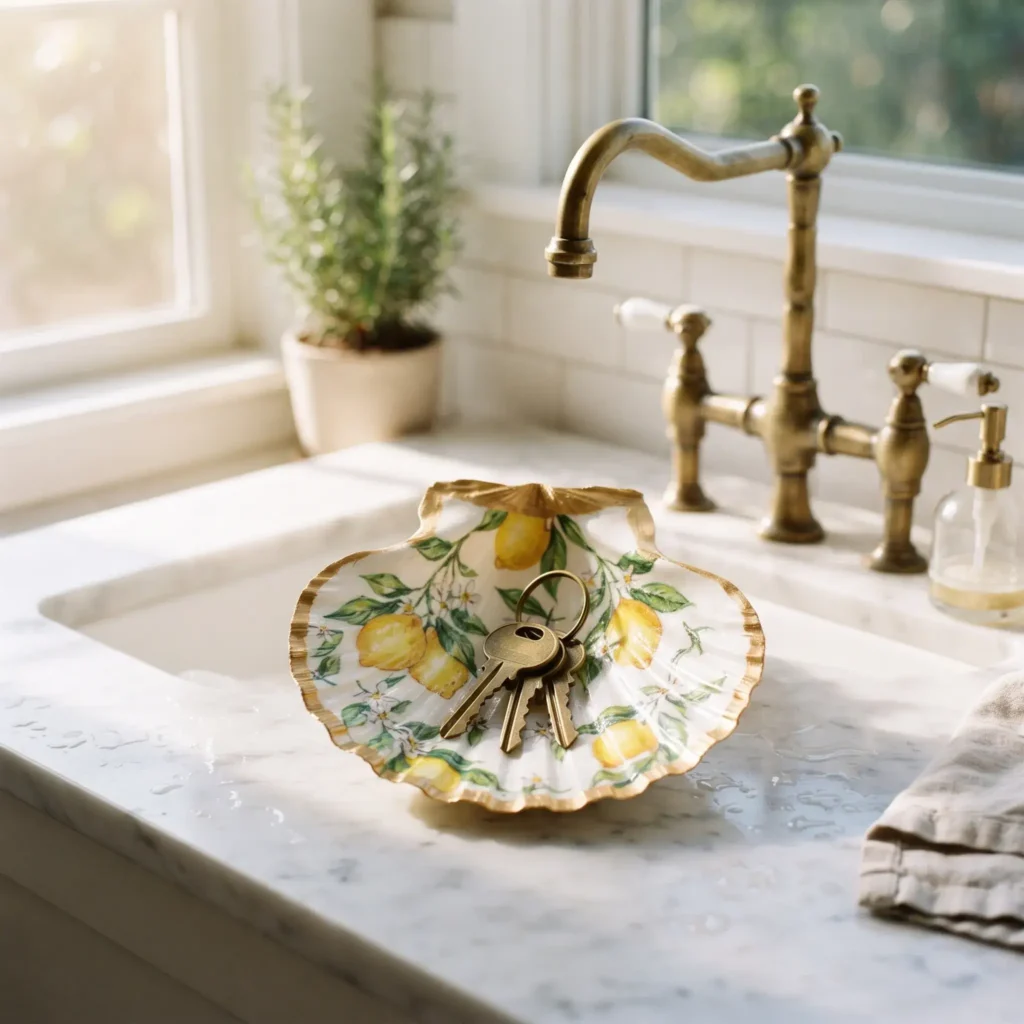
- Products Used:
- 4.5-inch flat scallop shell
- Italian citrus and lemon motif paper napkin
- White acrylic gesso
- Mod Podge Gloss
- UV resin and 36W UV curing lamp
- Carnauba-based gold gilding wax
Essential Supplies and Material Selection
Using the right materials prevents peeling paper and cloudy surfaces. Standard office supplies will not yield professional results.
| Material | Recommended Type | Why It Matters |
|---|---|---|
| Shell Substrate | Eastern Oyster or Atlantic Scallop | Oysters give a deep bowl for rings. Scallops offer wide surfaces for flat patterns. |
| Paper Source | 2-ply or 3-ply decorative paper napkins | Thin wood-pulp conforms to curves without wrinkling. |
| Surface Primer | Titanium dioxide white acrylic gesso | Napkins turn clear when wet. White primer blocks dark shell stains. |
| Decoupage Glue | Mod Podge Gloss or Matte | Polyvinyl acetate formula bonds cellulose to mineral surfaces. |
| Edge Finish | Solvent-based liquid gold leaf | Mineral flakes yield a mirror-like shine that cheap craft paint cannot match. |
| Protective Coat | UV-curable clear resin or Triple Thick glaze | Protects dishes from scratches caused by metal rings and keys. |
| Smoothing Tool | Standard plastic kitchen cling wrap | Lets you press down paper without tearing damp fibers. |
| Sanding Block | 220-grit rigid emery board | Cuts dry paper edges flush with the hard shell rim. |
Step 1: Substrate Cleaning and Decontamination
Raw shells collected from beaches or seafood dinners contain organic debris, dried algae, and bacteria. Trapped oils cause decoupage glue to peel over time.
The Bleach Bath Protocol
Mix one part standard household bleach with four parts warm water in a plastic bucket. Submerge the shells completely. Let them soak for 12 to 24 hours.
The bleach oxidizes leftover proteins and removes dark algae without harming the shell structure. After the soak, scrub both sides with a stiff nylon brush under warm water.
Why You Must Avoid Vinegar
Never clean craft shells in vinegar. Vinegar contains acetic acid. When acetic acid touches calcium carbonate, a rapid chemical reaction begins.
The acetic acid chemically dissolves the solid calcium carbonate matrix: Calcium Carbonate + Acetic Acid produces Calcium Acetate + Water + Carbon Dioxide gas.
This reaction dissolves the solid mineral structure of your shell. It pits the smooth interior surface and weakens the hinge. Weak hinges break easily when you drill or handle them. Stick strictly to an alkaline bleach soak.
The Drying Phase
Place cleaned shells on an open wire baking rack. Let them dry in an airy room for 24 to 48 hours.
Do not rush this step. If you trap moisture inside shell pores beneath acrylic sealers or UV resin, the clear coat will cure with a milky, permanent haze.
Step 2: Interior Surface Priming
The printed layer of a paper napkin is translucent. If you paste it directly onto raw shell bone, dark gray muscle scars and brown mineral bands will show through the print.
- Smooth the rim of your dry shell with a 220-grit emery board to remove sharp calcium flakes.
- Paint the entire interior bowl with a coat of opaque white acrylic gesso or matte white acrylic craft paint.
- Keep your brush strokes smooth and avoid pooling paint in the deep hinge pocket.
- Let the first coat dry for 20 minutes, then apply a second thin coat.
- Allow the base coat to cure for 30 minutes until completely dry and chalky to the touch.
Keep the rough outer back of the shell raw to showcase its natural texture. You can also paint the underside solid gold later for a luxury gift finish.
Step 3: Napkin Separation and Application
Decorative napkins use two or three layers of paper crimped together at the borders. You must use only the printed top layer. Adhering multiple layers causes the unprinted backing to bubble and lift later.
The Tape Trick for Delamination
Place a piece of clear scotch tape on the back corner of your napkin. Pull the tape up gently. The blank white backing layers will separate cleanly from the printed face sheet. Discard the white backing sheets.
Cut around your desired printed design, leaving a half-inch margin of excess paper around the perimeter of the shell.
The Layer Structure (From Bottom to Top)
- Solid Calcium Carbonate Shell Substrate
- Opaque White Acrylic Gesso Primer
- Thin Wet Film of Mod Podge Gloss
- Single-Ply Printed Paper Napkin
- Protective Acrylic Topcoat or Vitrified UV Resin
Technique A: The Plastic Wrap Barrier Method (Best for Deep Oysters)
Deep oyster shells have sharp compound curves that rip wet paper under normal brush pressure.
- Brush an even layer of Mod Podge Gloss across the white primed shell bowl.
- Center your dry single-ply napkin over the shell. Lower it into place from the center outward.
- Lay a sheet of plastic kitchen food wrap loosely over the napkin.
- Using the pad of your thumb, press down through the plastic wrap. Work outward from the deepest point of the shell toward the outer edge.
- The plastic wrap acts as a low-friction shield. Your thumb pushes out trapped air pockets without dragging on the wet cellulose.
- Peel the plastic wrap away slowly at a flat 180-degree angle. Let the shell dry for 45 minutes.
Technique B: The Osmotic Penetration Method (Best for Fluted Scallops)
Scallop shells feature parallel ridges that create air pockets under wet paper.
- Lay your single-ply napkin dry over the dry, primed shell. Center your design accurately.
- Dip a soft synthetic filbert brush into low-viscosity Mod Podge.
- Touch the brush directly to the front face of the dry napkin, starting at the center.
- Work outward along each radial groove toward the fan rim.
- The liquid adhesive wicks through the porous paper fibers instantly. The paper softens and settles neatly into the grooves without stretching.
- Let the shell dry for 45 minutes.
Step 4: The 45-Degree Sanding Rule for Clean Edges
Never cut wet napkin edges with scissors or craft blades. Wet paper stretches and tears, leaving fuzzy, lifted margins.
Wait until the Mod Podge dries completely and the paper turns stiff. Hold a 220-grit emery board or fine sanding block at a downward 45-degree angle against the outer rim.
Draw the sanding board downward in single, downward strokes. Never saw back and forth. The hard calcified edge of the shell functions as a shear blade, slicing the paper clean and flush against the rim. Brush away loose paper dust with a dry brush.
Step 5: Rim Gilding and Protective Sealing
Adding a metallic edge conceals the cut paper border and frames your artwork.
Painting the Gilded Border
Shake a bottle of liquid gold leaf thoroughly. Dip a fine round detail brush into the paint and hold it at a 30-degree angle along the shell lip.
Draw a continuous 2 mm border around the entire rim. Overlap the gold slightly onto the front edge of the decoupage paper. This encapsulates the paper seam and prevents future peeling. Let the gold dry for 30 minutes.
Choosing Your Topcoat
- For Wall Art and Ornaments: Brush two thin coats of Mod Podge Gloss over the entire inside surface. Wait 30 minutes between coats. This provides basic protection against household dust and light handling.
- For Jewelry Dishes and Ring Trays: Water-based craft glues scratch easily under metal rings. Use clear UV-curable resin instead. Pour 3 to 5 mL of clear resin into the center of the shell basin. Guide the liquid to the gilded border using a silicone tool or toothpick. Pass a lighter flame quickly over the liquid to pop surface bubbles. Place under a 36-watt UV lamp for 180 to 240 seconds until rock-hard and glass-smooth.
Structural Solutions: Making Shells Stable and Functional
Shells naturally wobble on flat surfaces. They can also crack when drilled for hanging decor. These workshop methods solve those structural challenges.
Building a Tripod Base for Vanity Trays
The curved back of an oyster shell causes it to rock on a bedside table. You can stabilize it without grinding the shell.
- Flip the cured shell upside down on a flat table.
- Locate the three primary balance points where the shell touches the surface.
- Place a drop of ethyl cyanoacrylate gel (super glue gel) on each balance point.
- Press a 6 mm to 8 mm flat-backed wood bead, acrylic pearl, or brass ball spacer into each glue drop.
- Let the glue set for 15 minutes. The shell will sit level on any surface and protect your furniture from scratches.
Submerged Wet-Drilling for Hanging Ornaments
Drilling dry shells creates high friction that cracks brittle calcium. Dry drilling also throws harmful mineral dust into your workspace air.
- Place a scrap wood block inside a shallow plastic tray.
- Rest the raw shell on the wood and add 1/4 inch of water to submerge the hinge area.
- Fit a rotary tool with a 1.5 mm to 2.5 mm diamond core drill bit. Run the tool at 5,000 to 10,000 RPM.
- Hold the bit at a 45-degree angle to start a small groove, then raise the tool upright to 90 degrees.
- Apply gentle pulsing pressure. Water cools the cutting zone and clears away shell paste.
- Rinse and dry the shell before stringing with velvet ribbon or jute cord.
Troubleshooting Common Decoupage Shell Mistakes
| Problem | Root Cause | Prevention & Quick Fix |
|---|---|---|
| Paper tears during smoothing | Direct finger or brush friction on wet napkin paper. | Always smooth through plastic cling wrap. If a small tear happens, paste a tiny matching paper scrap over the hole before sealing. |
| Cloudy white spots under resin | Residual moisture trapped inside the shell pores. | Let washed shells dry for a full 48 hours before priming. Once resin cures over moisture, you cannot fix it. |
| Sticky or tacky UV resin surface | Oxygen inhibition or weak UV light intensity. | Use a 36W UV/LED lamp for a full 4 minutes. If still slightly tacky, set the shell in direct outdoor sunlight for 20 minutes. |
| Paper lifts along the outer rim | Cutting wet paper with scissors instead of sanding dry edges. | Let glue dry fully, then file downward at 45 degrees. Re-seal lifted spots with a detail brush and glue. |
| Dark spots show through the print | Skipping the opaque white base coat. | Always apply two coats of titanium dioxide acrylic gesso before placing the napkin down. |
Care and Safety Guidelines
- Food Safety Notice: Decoupaged shells are decorative items. Never use them for unwrapped food, appetizers, or as table salt cellars. Metallic leaf paints contain copper and zinc alloys, and craft resins are not certified food-safe.
- Cleaning Instructions: Wipe the interior clean with a dry microfiber cloth or soft duster. Never submerge finished shells in water, run them through a dishwasher, or clean them with ammonia-based window sprays. Solvents break down acrylic seals over time.
Frequently Asked Questions
What glue works best for decoupaging shells with napkins?
Mod Podge Gloss is the most reliable adhesive for bonding single-ply napkins to primed shells. It provides enough open working time to position the paper and dries completely clear. For daily jewelry use, seal over the dried Mod Podge with UV resin for added scratch resistance.
Do I have to paint the shell white before decoupaging?
Yes. Paper napkins become semi-transparent when wet with glue. Without an opaque white acrylic or gesso base coat, natural gray shell marks and dark muscle scars will show through, making your pattern look dull and muddy.
Why did my shell crack while drilling?
Dry drilling generates concentrated heat and vibration that shatters brittle calcium layers. Always drill shells submerged under a shallow layer of water using a diamond core bit at medium speed. Avoid heavy downward hand pressure.
Can I use regular paper instead of paper napkins?
Standard printer paper and heavy cardstock do not bend easily across compound curves. They crease, buckle, and trap large air pockets in deep shells. Stick to 1-ply cocktail napkins or lightweight rice paper for smooth coverage.
Transforming raw coastal shells into polished home accents is an exercise in basic material control. Once you account for shell porosity, use plastic wrap to protect damp paper fibers, and level the base with a clean three-point stand, you get smooth, durable pieces that look like boutique porcelain rather than a weekend craft experiment. Pick a design, prep your shells properly, and build your collection.