How to Make Napkin Decoupage Seashell Art: Trinket Dishes, Wall Decor, and Keepsakes
Most people ruin their first decoupage seashell within minutes. Crafters brush wet glue onto a raw oyster shell, place a thin napkin on top, and watch the paper dissolve into a torn mess. Other times, the finished piece turns cloudy, stays sticky, or smells like old seawater.
You can avoid every single one of these problems. You only need simple supplies and the right order of steps.
Transforming shoreline oyster and scallop shells into polished keepsakes costs just a few dollars per piece. Review these seven project ideas first, then follow the complete tutorial below.
7 Decoupage Seashell Art Ideas
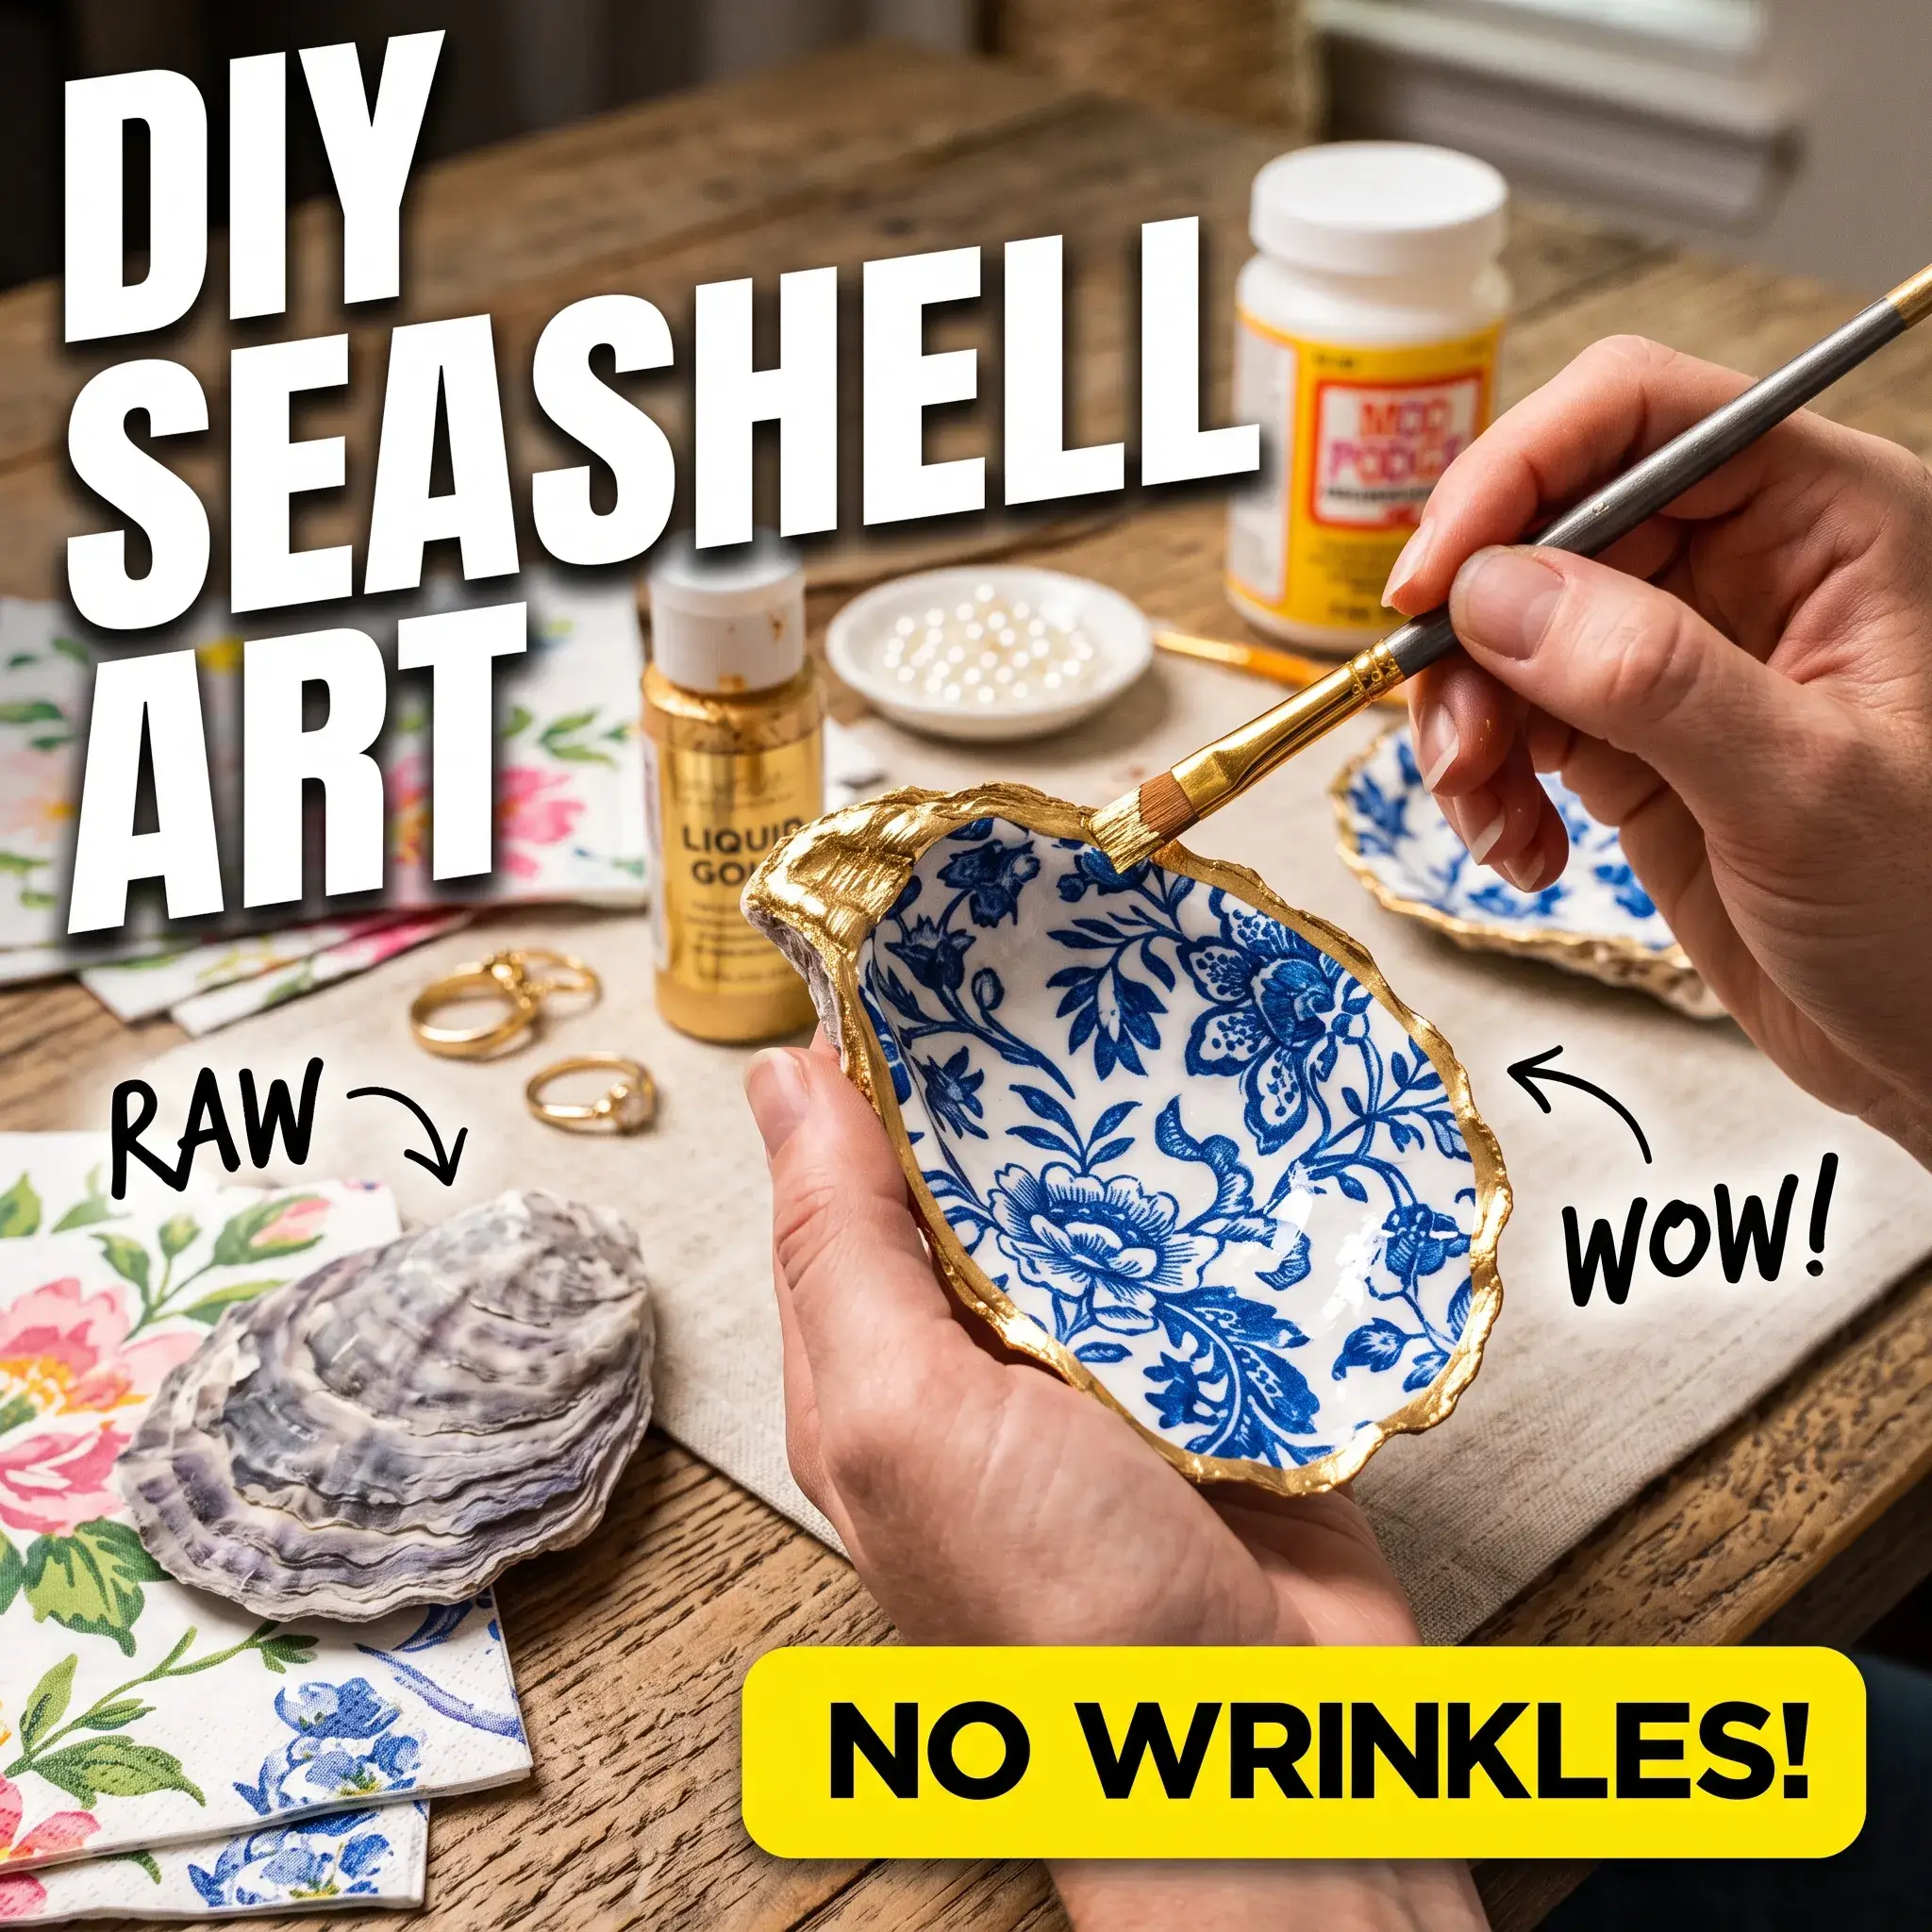
Idea 1: Chinoiserie Blue and White Ring Dish with Pearl Feet
This design places classic blue floral patterns inside a deep Atlantic oyster shell. The rough outer rim has a solid gold border. Three small faux pearls sit on the underside to keep the dish level on flat tables.
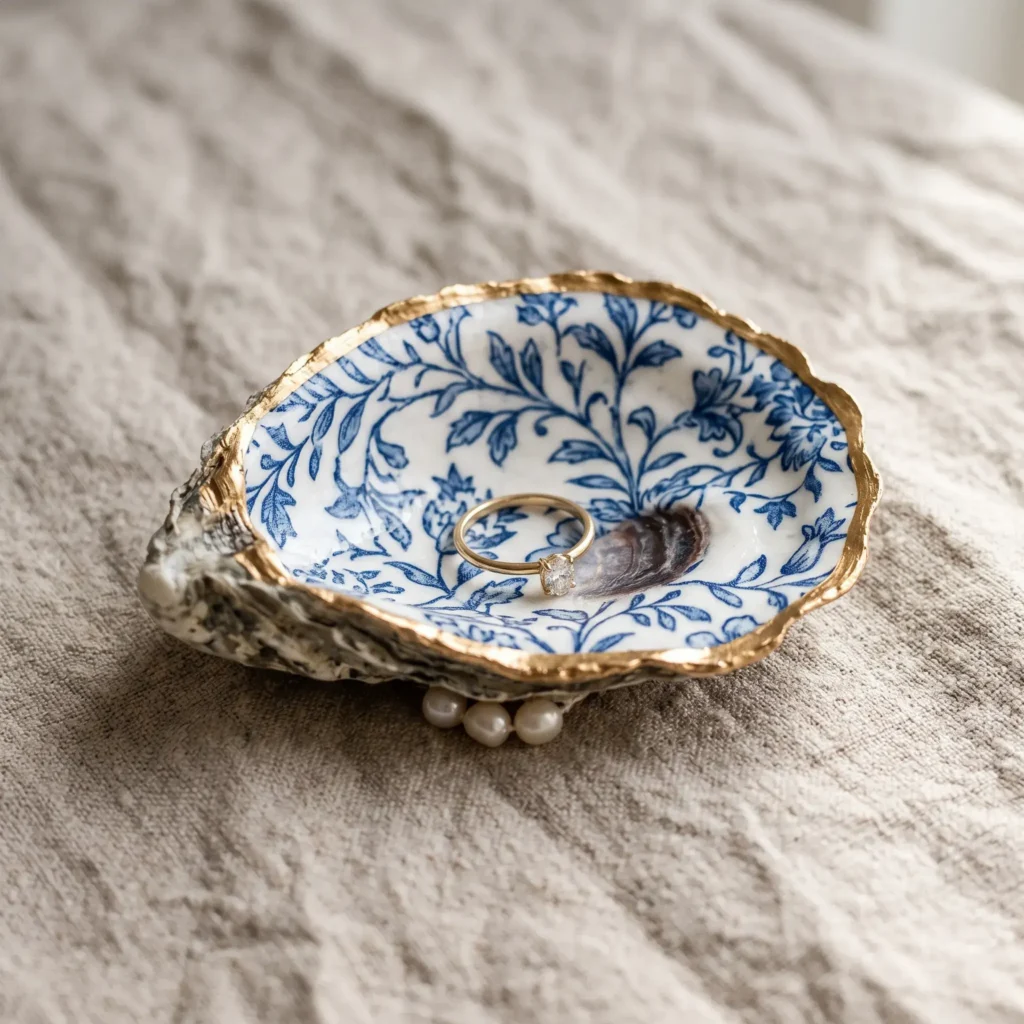
- Products Used:
- Cleaned 4-inch Eastern oyster shell
- Caspari blue and white Chinoiserie paper cocktail napkin
- Mod Podge Gloss
- Plaid Liquid Leaf in Classic Gold
- 6 mm flat-back cream pearl beads
- Gorilla Super Glue gel
Idea 2: Framed Botanical Scallop Shadow Box
Four flat scallop shells sit in a balanced square grid inside an oak shadow box frame. Each shell displays a different pressed wildflower print, mounted on raw oatmeal linen fabric.
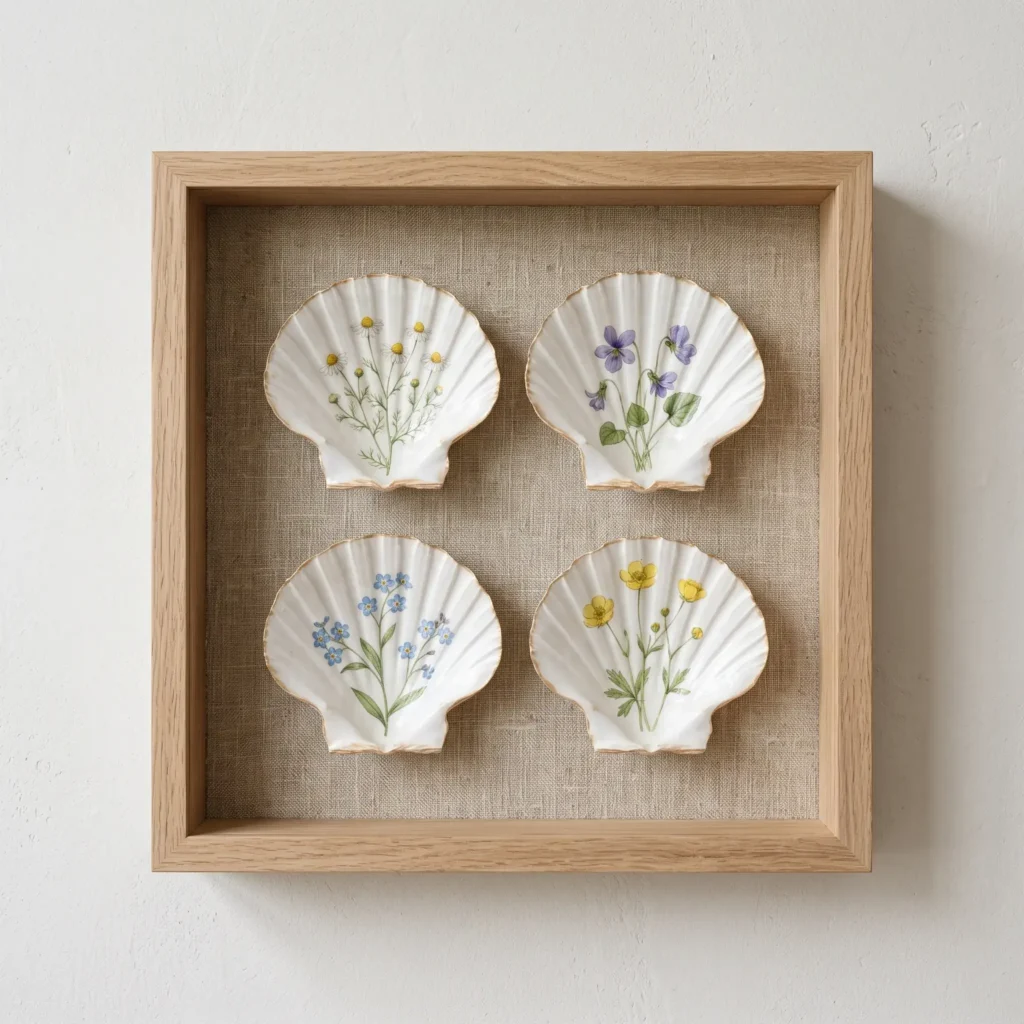
- Products Used:
- 3.5-inch white Pecten scallop shells
- Pressed botanical wildflower paper napkins
- White acrylic chalk paint
- Mod Podge Matte
- 12×12 inch deep wood shadow box frame
- E6000 craft adhesive
- Natural textured linen fabric
Check out more Styling Ideas
Idea 3: Hanging Coastal Driftwood and Shell Mobile
Five drilled oyster shells hang from a weathered beach driftwood stick using raw jute twine. Each shell features soft navy blue toile ocean sketches, separated by round wooden beads.
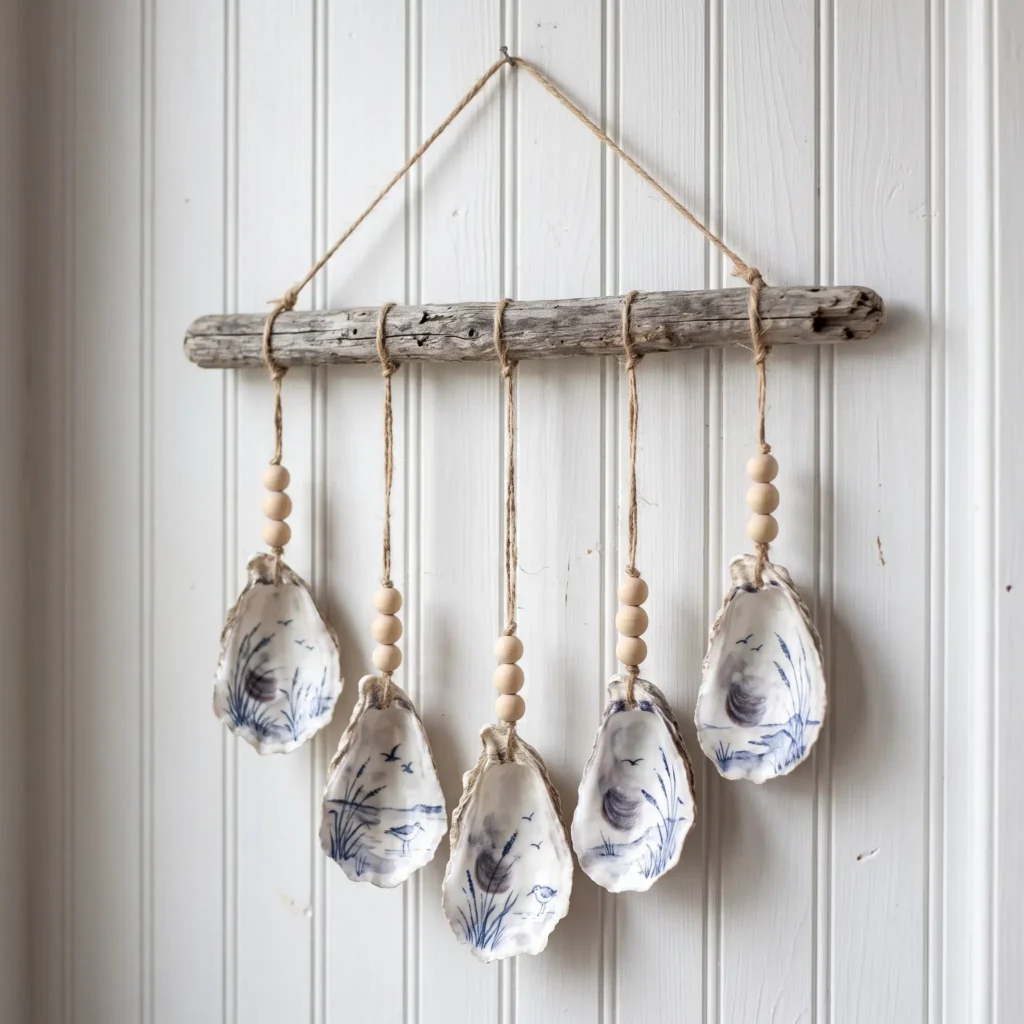
- Products Used:
- Narrow Atlantic oyster shells with pre-drilled holes
- Navy coastal toile paper napkins
- 12-inch weathered driftwood branch
- 1.5 mm natural jute twine
- 8 mm round wooden spacer beads
- Clear matte spray sealer
Idea 4: French Country Scallop Soap Dish
A broad white lion paw scallop shell decorated with an olive branch pattern. A thick coat of clear resin creates a waterproof finish that looks like glazed porcelain beside a bathroom sink.
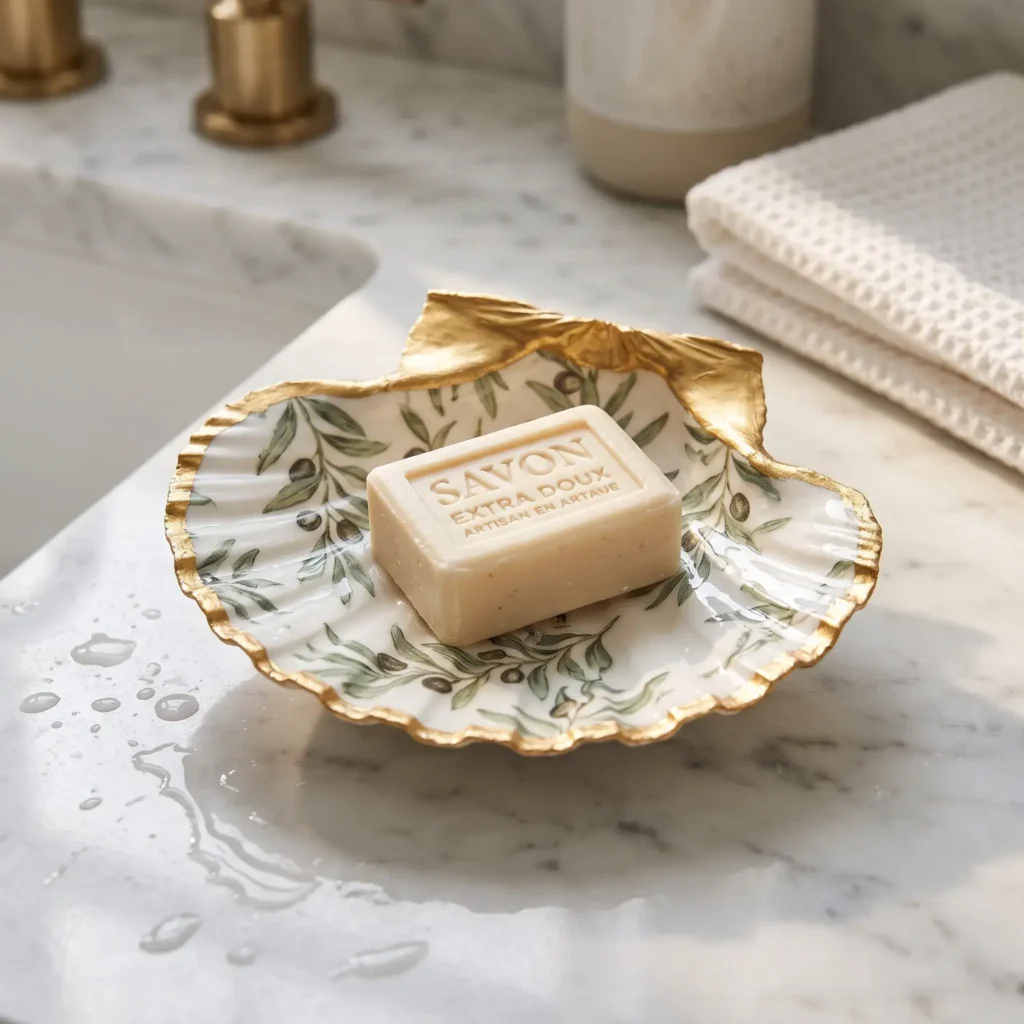
- Products Used:
- 5-inch Lion’s Paw scallop shell
- Olive branch printed paper napkins
- Titanium white acrylic paint
- Clear UV craft resin
- 36-watt UV lamp
- Gold metallic paint pen
Idea 5: Coastal Wedding Place Card Keepsake
Small oyster shells serve as individual guest place cards on reception tables. Each piece features a soft lemon blossom print, a gold leaf rim, and the guest name written in black calligraphy.
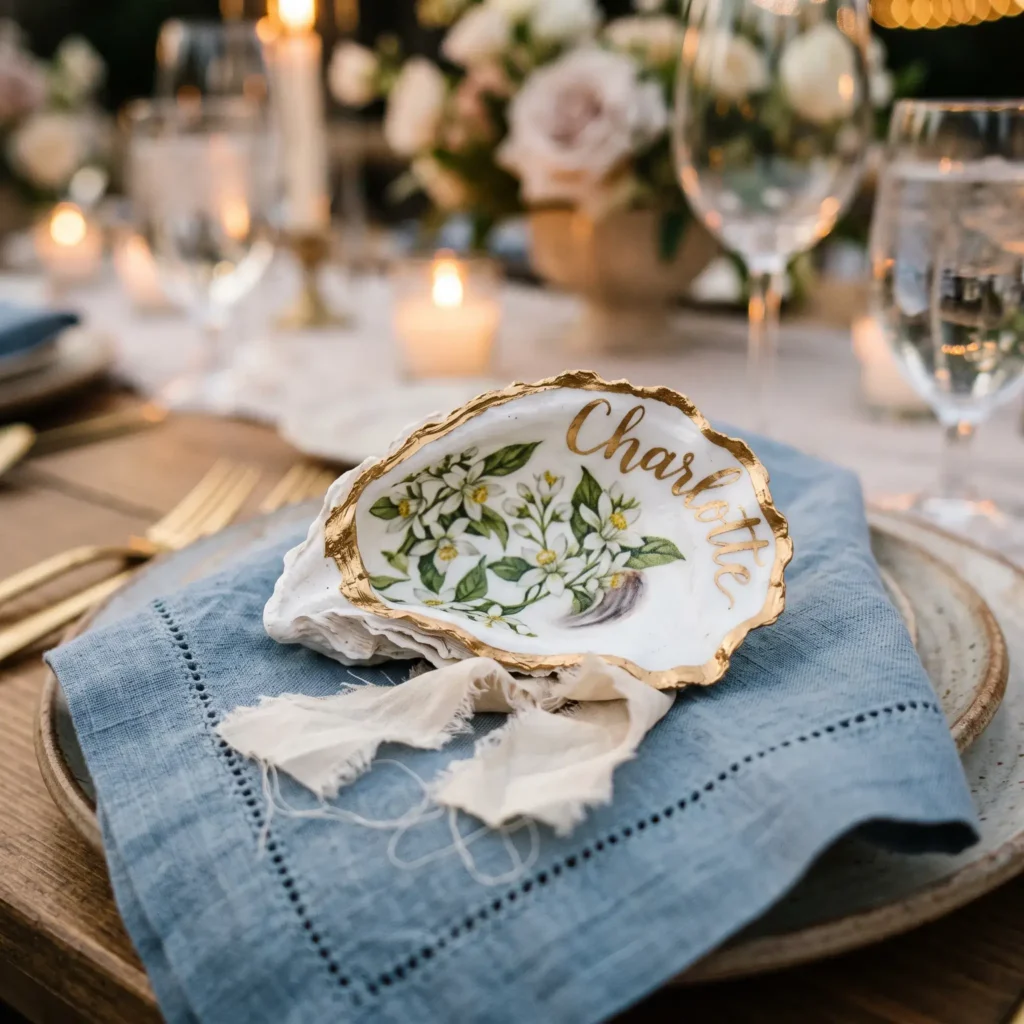
- Products Used:
- Clean 3.5-inch oyster shells
- Lemon and citrus blossom paper napkins
- Mod Podge Satin
- Liquid gold leaf
- Black fine-line archival pen
- Dusty blue chiffon ribbon
Idea 6: Gilded Christmas Tree Shell Ornament
A festive oyster shell ornament made for holiday trees. The inside displays a vintage red berry and holly print, bordered by gold paint. A dark green velvet ribbon loop hangs from the shell hinge.
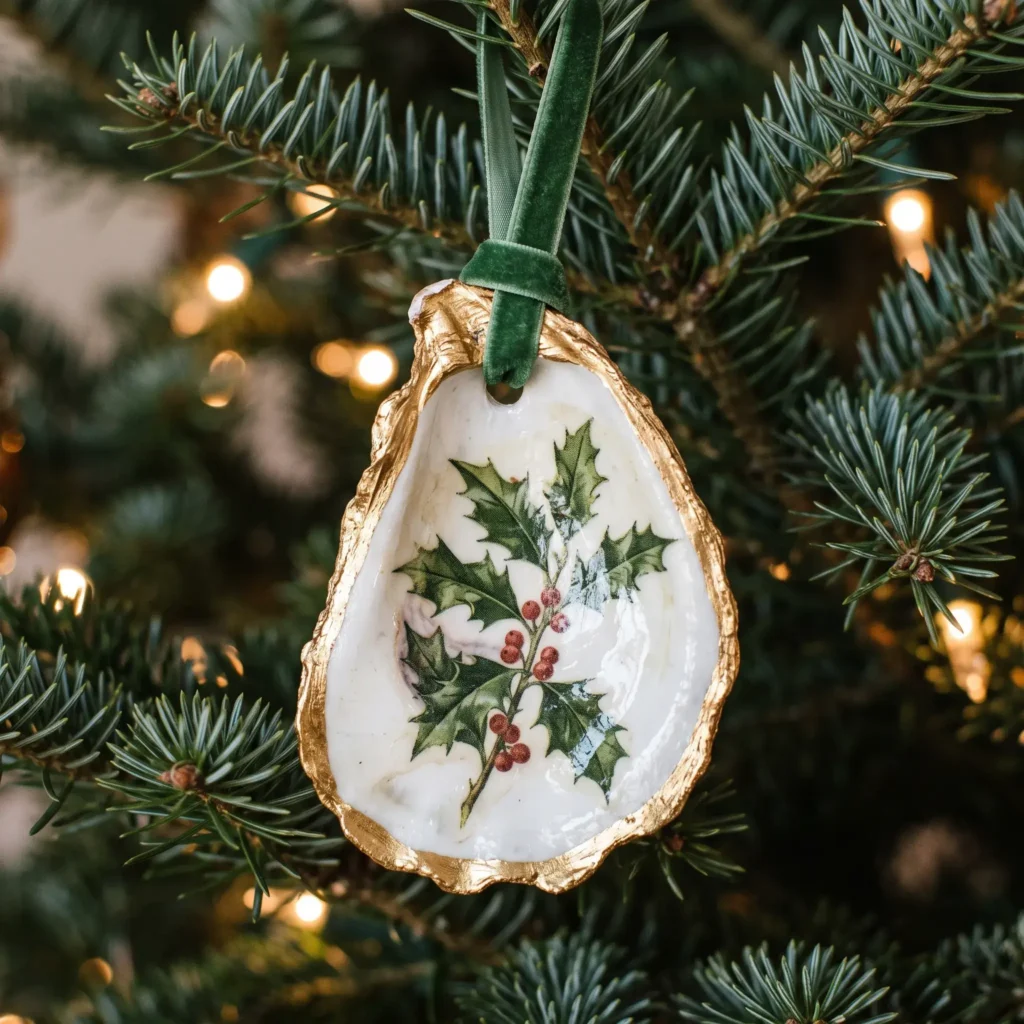
- Products Used:
- Thick oyster shell with wet-drilled hinge hole
- Vintage holly branch paper napkin
- Mod Podge Gloss
- Classic gold liquid leaf
- 3/8-inch forest green velvet ribbon
- Small brass spacer bead
Idea 7: High-Gloss Abstract Clam Catchall Tray
A heavy, smooth clam shell lined with a contemporary marble swirl pattern in cream, sage, and rust. A smooth resin coating protects the surface against keys, loose change, and pocket items.
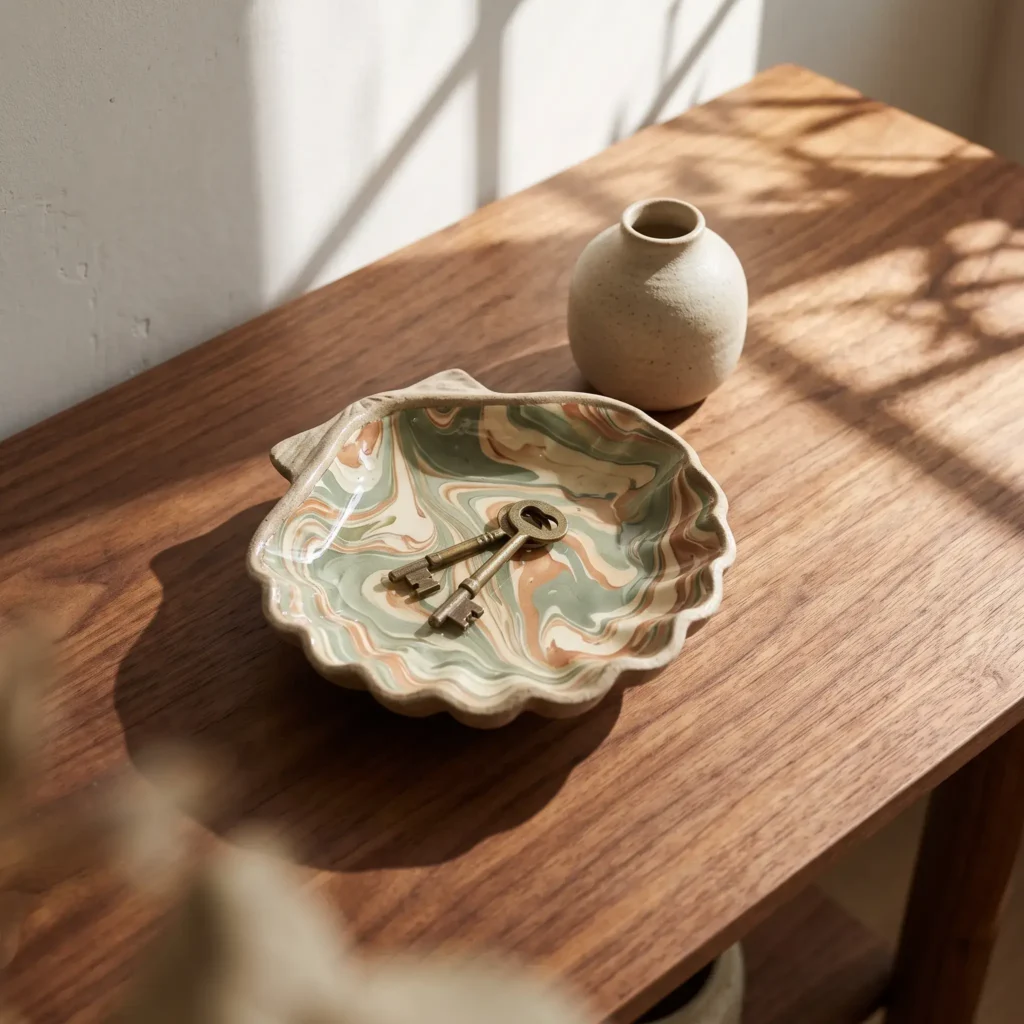
- Products Used:
- 4.5-inch Quahog clam shell
- Modern marbled decorative napkin
- White gesso primer
- Two-part clear epoxy resin
- Metallic brass acrylic paint
Preparing Raw Seashells
Proper cleaning makes or breaks this craft. Shoreline shells hold trapped algae, bacteria, and grit inside their calcified layers. Uncleaned shells will release bad odors over time, and your glue will lift off the surface.
The Chemistry: Why Bleach Works and Vinegar Ruins Shells
Many craft tutorials tell you to soak shells in vinegar. Do not do this.
Seashells are made of calcium carbonate. Vinegar contains acetic acid. When acid touches calcium carbonate, a chemical reaction takes place:
CaCO₃ + 2CH₃COOH → Ca(CH₃COO)₂ + H₂O + CO₂ ↑
The acid dissolves the solid calcium carbonate into water-soluble calcium acetate and carbon dioxide gas. You will see bubbles form as the shell weakens. Soaking shells in vinegar pits the surface, weakens the hinge, and destroys the shell wall.
Household bleach works differently. Sodium hypochlorite dissolves organic matter, algae, and proteins without harming the calcium mineral base.
The 5-Step Cleaning Protocol
- Soak in Bleach Water: Mix one part household bleach with four parts warm tap water. Submerge your shells completely for 12 to 24 hours. This step removes organic film and eliminates odors.
- Scrub Hinges and Crevices: Remove the shells from the water. Scrub the backs, edges, and hinges firmly with a stiff nylon brush.
- Dry Completely: Place shells on an open wire cooling rack. Let them dry for 24 to 48 hours. Trapped moisture inside shell pores causes glue to bubble and resin to turn cloudy.
- Sand Sharp Margins: Run a 220-grit emery board along the outer rim to smooth away sharp points.
- Prime with White Paint: Brush two thin coats of white acrylic paint or gesso across the entire interior bowl. Let it dry for 30 minutes.
Why the White Base Coat Is Mandatory
Oyster shells have dark purple or gray scars where the muscle attached to the shell.
When you wet a single-ply paper napkin with glue, it becomes semi-transparent. If you glue a napkin directly onto bare shell calcium, the dark purple scar shows through the paper. Your printed flowers or patterns will look gray and dull.
A clean white acrylic base reflects light through the thin paper. It keeps your napkin colors vibrant and true.
Step-by-Step Decoupage Tutorial
Follow these steps to apply thin paper napkins to curved shells without wrinkles or tears.
Step 1: Strip Away the Extra Plies
Decorative napkins have two or three layers of paper. Only the top layer has printed ink.
You must separate and discard all plain white backing layers. Leaving a backing ply attached ruins your project. The bottom paper absorbs the glue, while the printed top layer remains unattached. The pattern will bubble and peel away within weeks.
The Tape Trick: Press a piece of scotch tape onto a back corner of the napkin. Pull the tape up gently. It will separate the plain white ply from the printed layer without ripping the thin face.
Step 2: Apply the Napkin Without Wrinkles
Flat paper naturally bunches when pressed into a curved shell basin. Pick the application method that fits your shell shape.
| Method | Best Shell Type | Difficulty | Main Advantage |
| Plastic Wrap Method | Deep, irregular oyster shells | Beginner | Prevents finger friction and tears |
| Dry Penetration Method | Flatter scallop or clam shells | Intermediate | Gives unlimited time to position patterns |
Method A: The Plastic Wrap Technique
- Brush a thin, even coat of Mod Podge Gloss onto the white-painted shell basin.
- Center your single-ply paper napkin over the wet glue.
- Lay a square of plastic food wrap loosely over the paper.
- Press and smooth with your thumb or a soft makeup sponge, working from the center outward to the rim. The plastic sheet protects the fragile wet paper so your fingers will not tear it.
- Peel the plastic wrap away slowly at a flat angle.
Method B: The Dry Penetration Technique
- Lay your dry, single-ply paper directly onto the dry, white-painted shell.
- Adjust the pattern until the print sits exactly where you want it.
- Dip a soft flat brush into your decoupage glue.
- Brush the liquid directly over the top of the dry napkin, working from the center toward the edges. The glue soaks through the thin paper, softening the fibers so they settle into shell grooves while bonding to the base below.
Step 3: The Downward 45-Degree Sanding Rule
Never cut wet paper overhang with scissors. Scissors snag wet cellulose and pull the paper away from the rim.
Let the shell dry completely for 45 minutes until the paper feels crisp. Take a 220-grit emery board or nail file. Hold it at a 45-degree angle against the outer shell rim. File downward in single strokes.
The hard mineral edge of the shell will cut the paper cleanly. Dust off the rim with a soft, dry brush.
Step 4: Paint the Gilded Rim
Covering the cut paper edge with metallic paint creates a clean, professional border.
- Liquid Gold Leaf: Shake the bottle well. Use a fine detail brush to trace a 2 mm line along the rim. Liquid leaf contains metal particles and covers the rough shell edge in a single coat.
- Paint Pens: Oil-based metallic paint pens work well on ridged scallop shells where you need steady control without drips.
- Gilding Wax: Rub ‘n Buff paste applied with a soft cloth gives an aged, soft sheen along natural shell hinges.
Step 5: Seal the Surface
Choose your sealer based on how you plan to use the piece.
- For Wall Art and Ornaments: Brush two coats of Mod Podge Gloss or water-based acrylic varnish over the napkin. Wait one hour between coats. This protects against dust and light handling.
- For Jewelry Dishes and Soap Trays: Acrylic sealers scratch easily when metal rings touch them. For functional dishes, pour clear UV resin into the shell center. Spread it to the gold edges with a silicone stick. Pass a heat lighter six inches above the surface for two seconds to pop micro-bubbles. Place the shell under a 36-watt UV light for three minutes until hard.
Structural Mounting and Hardware
Natural shells have uneven backs and fragile hinges. Adding the right hardware turns raw shells into durable home decor.
The 3-Point Pearl Base for Tabletop Dishes
Oyster shells have uneven, rounded backs. When placed on a nightstand, they rock back and forth.
Flip the dry shell upside down on a flat desk. Locate the three points that touch the surface. Place a drop of gel super glue on each contact point and press down a 6 mm to 8 mm flat-back acrylic pearl or wooden bead. This creates a stable tripod base that prevents rocking.
Shadow Box Wall Mounting
Standard craft hot glue pops off slick shell backs when room temperatures change.
Use E6000 industrial craft adhesive instead. Put a generous dab on the thickest part of the shell back. Press the shell firmly against a linen-covered backing board inside a deep shadow box frame. Lay the frame flat for 24 hours while the adhesive cures before hanging it on a wall.
Wet-Drilling Shells for Ornaments
Standard drill bits will crack brittle calcium hinges and release fine mineral dust into the air.
Put a 1/8-inch diamond-core ball bit into a rotary tool. Place your shell in a shallow plastic bowl with 1/4 inch of water, keeping the hinge area just below the water line. Drill slowly at medium speed with light downward pressure. The water bath cools the diamond bit and stops harmful dust from floating into the air. Thread a ribbon or jute cord through the hole to hang your piece.
Troubleshooting Common Defects
- The Paper Tore During Placement: Do not scrape away wet paper. That damages your white base paint. Let the paper dry completely. Cut an exact matching scrap piece from leftover napkin plies. Brush a tiny drop of glue over the tear, place the patch, and let it dry. The paper fibers will blend invisibly under the final topcoat.
- The UV Resin Remains Tacky: Sticky resin happens under low-power lights or from surface air contact. Set the shell outside in direct midday sunlight for 20 minutes to complete the cure. You can also spray a light mist of clear acrylic gloss sealer over the tacky surface to seal it instantly.
- The Topcoat Looks Cloudy: Cloudy patches mean moisture was trapped beneath the sealer. Always let shells dry for 48 hours after bleaching, and let base paints dry for 24 hours before adding thick resin coats.
Frequently Asked Questions
Are decoupage seashell trinket dishes food safe?
No. Mod Podge, liquid gold leaf, and craft UV resins are not approved for food contact. Do not use these dishes for unwrapped snacks, mints, or table salt. Use them only for jewelry, keys, soaps, or wall display.
Can you clean raw seashells using vinegar?
No. Vinegar is an acid that reacts chemically with calcium carbonate. It dissolves shell walls, pits the natural nacre, and weakens the hinge. Clean your shells with a 1:4 dilution of household bleach and water instead.
Why does my napkin print look dull after applying glue?
Napkin paper turns semi-sheer when wet. If you apply paper directly over bare shell material or dark muscle marks, the dark spots show through. Always paint two thin coats of opaque white acrylic paint or gesso over the shell basin before gluing.
What is the easiest way to prevent wrinkles on curved shells?
Place a piece of plastic food wrap over the wet napkin before smoothing. The plastic film lets you push out air bubbles with your fingers without catching or tearing the fragile wet paper.
How do you stop an oyster shell dish from tipping over?
Glue three small 6 mm pearls or wooden beads to the bottom contact points using super glue gel. This builds a stable three-point base that stops the shell from wobbling on flat dressers.
Decoupaged seashells turn natural beach finds into lasting gifts and elegant home decor. Start by sanitizing your shells in a mild bleach bath, paint an opaque white primer, and smooth single-ply napkins using the plastic wrap trick. Finished with gold edges and a durable topcoat, your handmade shell art will stay bright and beautiful for years.