Room Decoration Ideas: 8 Practical Layouts, Real Setups, and Exact Measurements
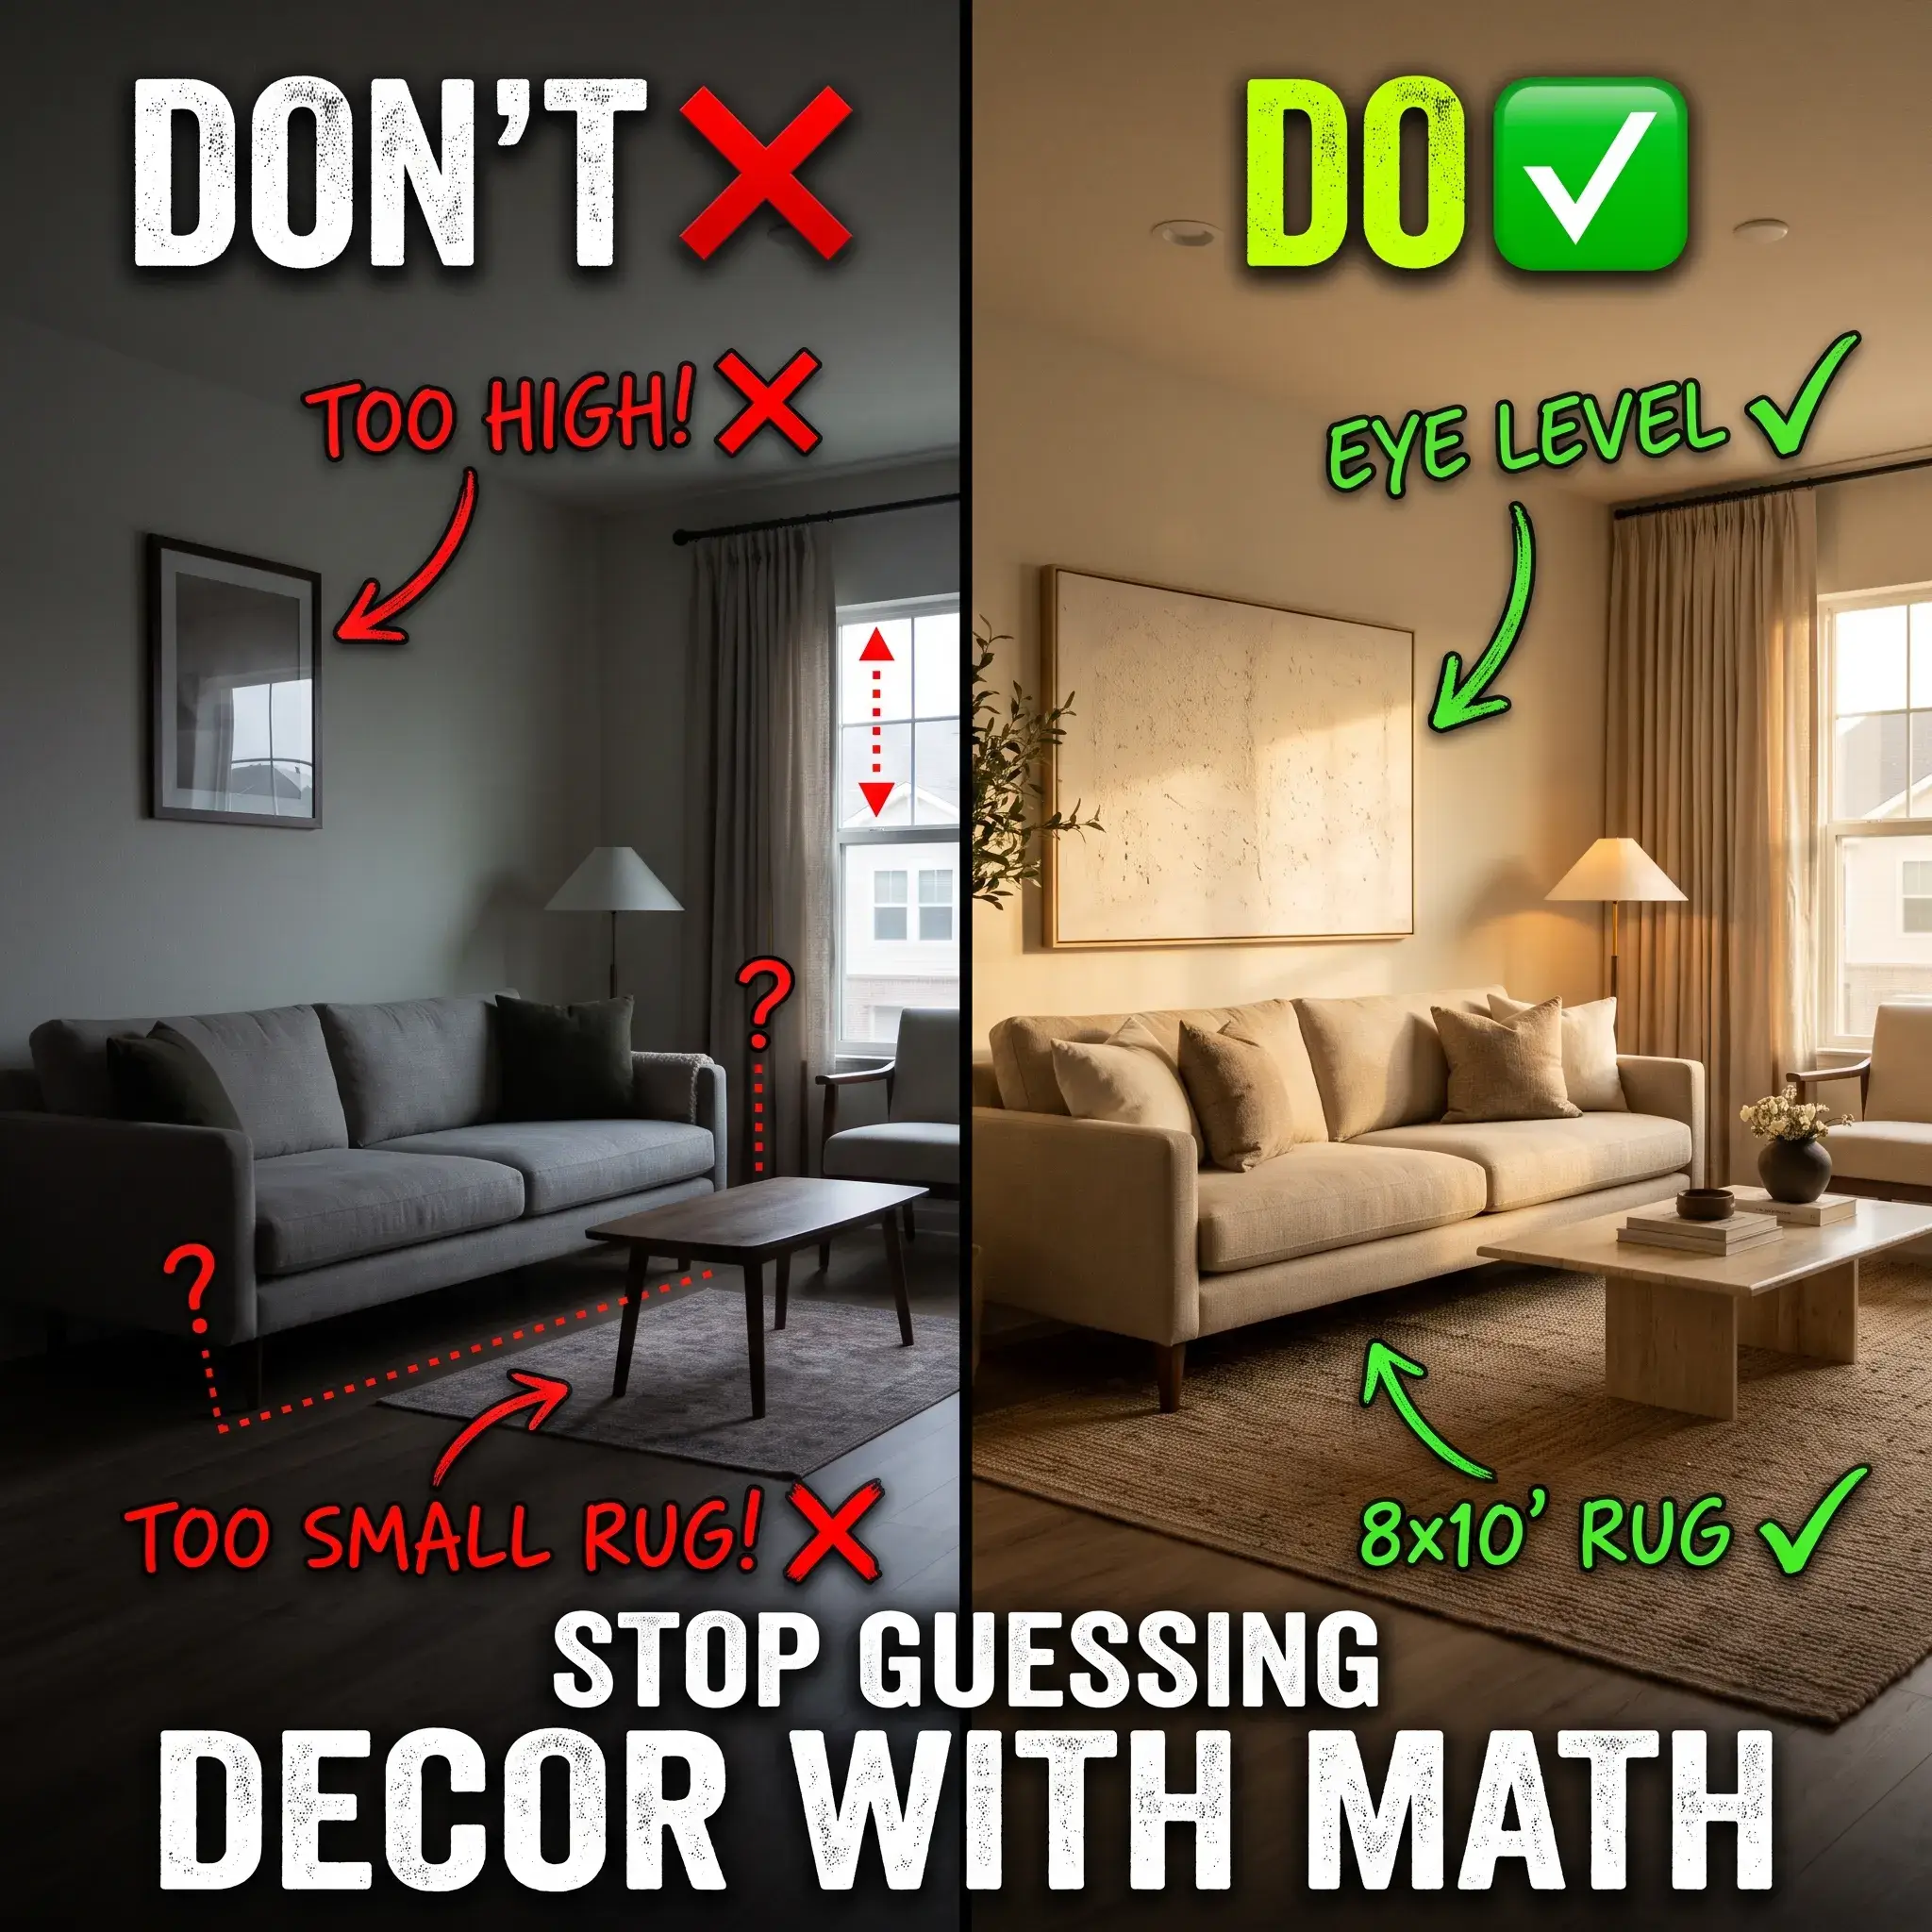
Most rooms feel disconnected because people buy decorative items before solving layout and scale. A small rug leaves furniture floating without purpose. A light fixture hung too high glares into your eyes. Artwork placed above eye level shrinks your ceiling height.
Decorating works best when you treat it as spatial planning rather than shopping for knick-knacks. The following eight room designs show you exactly how to balance floor space, lighting, and wall treatments. Each setup includes exact measurements, complete product breakdowns, and realistic design plans you can adapt immediately.
8 Practical Room Decoration Ideas for Real Homes
1. The Grounded Living Room: Low-Profile Seating with Natural Textures
Layout Plan:
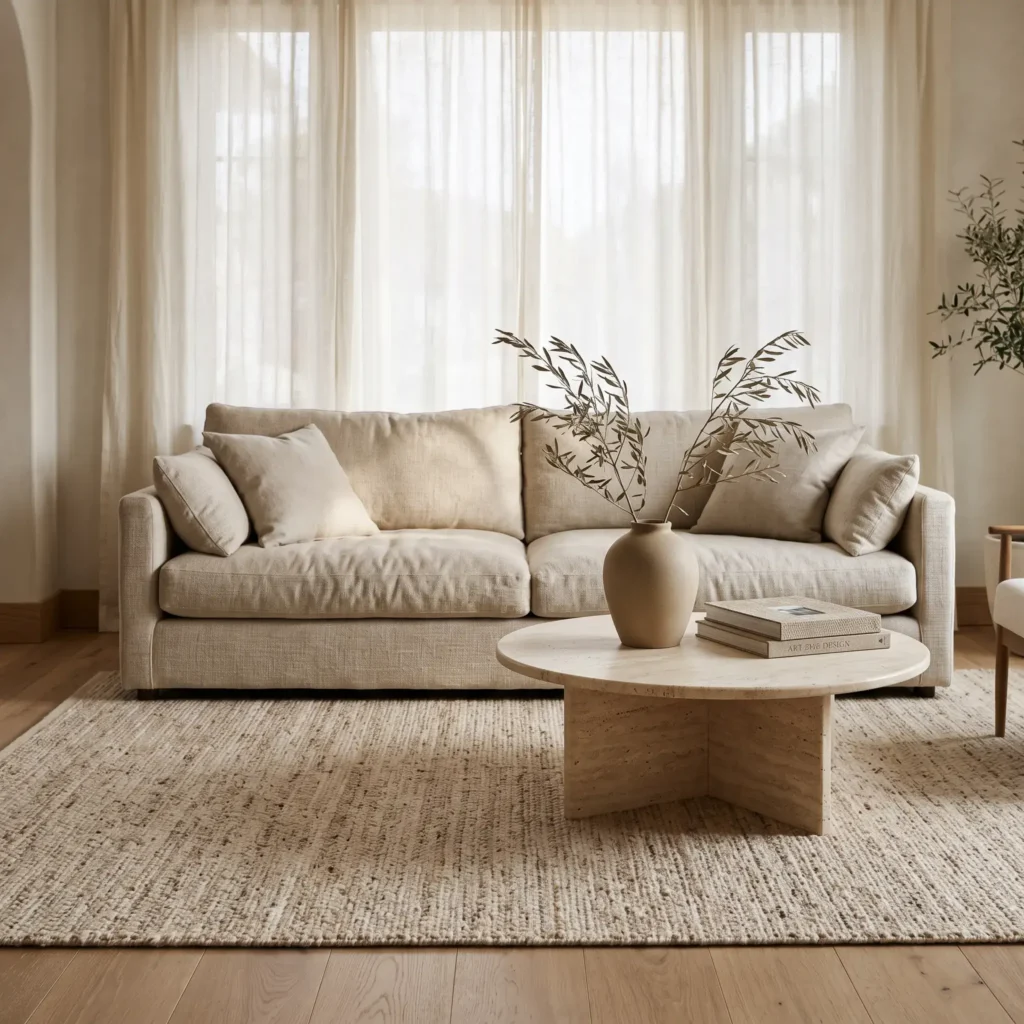
- Place an 84-inch low-profile sofa along the main wall to keep visual sightlines open.
- Center an 8-by-10-foot flatweave rug beneath the seating, keeping the front legs of all chairs planted on the pile.
- Leave 14 inches of bare wood flooring between the rug edge and the baseboards.
- Position a 36-inch round travertine coffee table 16 inches from the sofa edge for comfortable legroom.
- Hang a single 60-inch textured canvas on the wall behind the sofa, centered at 58 inches from the floor to the midpoint.
This layout anchors open living spaces that suffer from visual clutter. Low-profile seating keeps sightlines open across the room, which makes standard eight-foot ceilings feel significantly taller.
To style the coffee table without crowding the surface, follow the Rule of Threes:
- Position one tall anchor, such as an 8-inch ceramic vase holding dried olive branches, on one side.
- Place one flat foundation, like two stacked architectural books, next to it.
- Rest one tactile object, such as a carved soapstone bowl for remotes, on top of the books.
Keep primary walkways at 36 inches of clear floor space. This prevents guests from squeezing between side tables and walls.
Products Used in This Setup
- Main Sofa: 84-inch three-seat sofa in textured oatmeal linen with a 17-inch seat height.
- Coffee Table: 36-inch circular coffee table made from honed, unfilled beige travertine.
- Floor Covering: 8×10 foot hand-loomed rug composed of 60% undyed wool and 40% natural jute.
- Accent Vessel: 8-inch hand-thrown matte ceramic vase finished in raw bone white.
- Window Dressing: 96-inch pinch-pleat drapery panels made from unlined 100% Belgian flax linen.
2. The Restorative Bedroom: Layered Textures and Symmetrical Balance
Layout Plan:
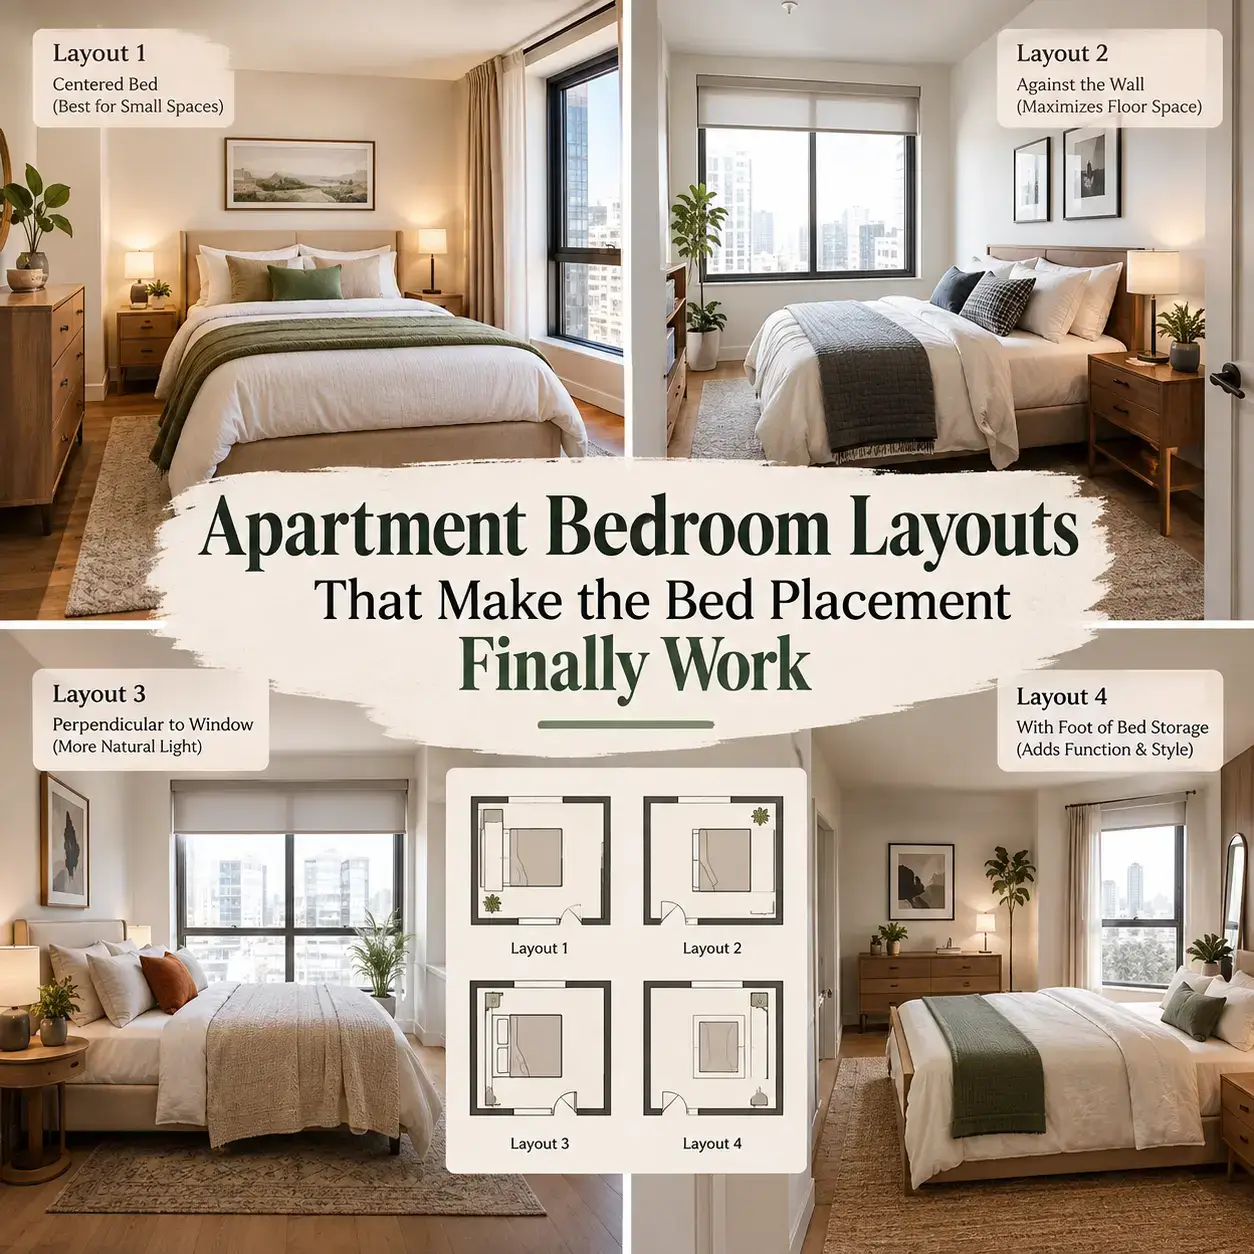
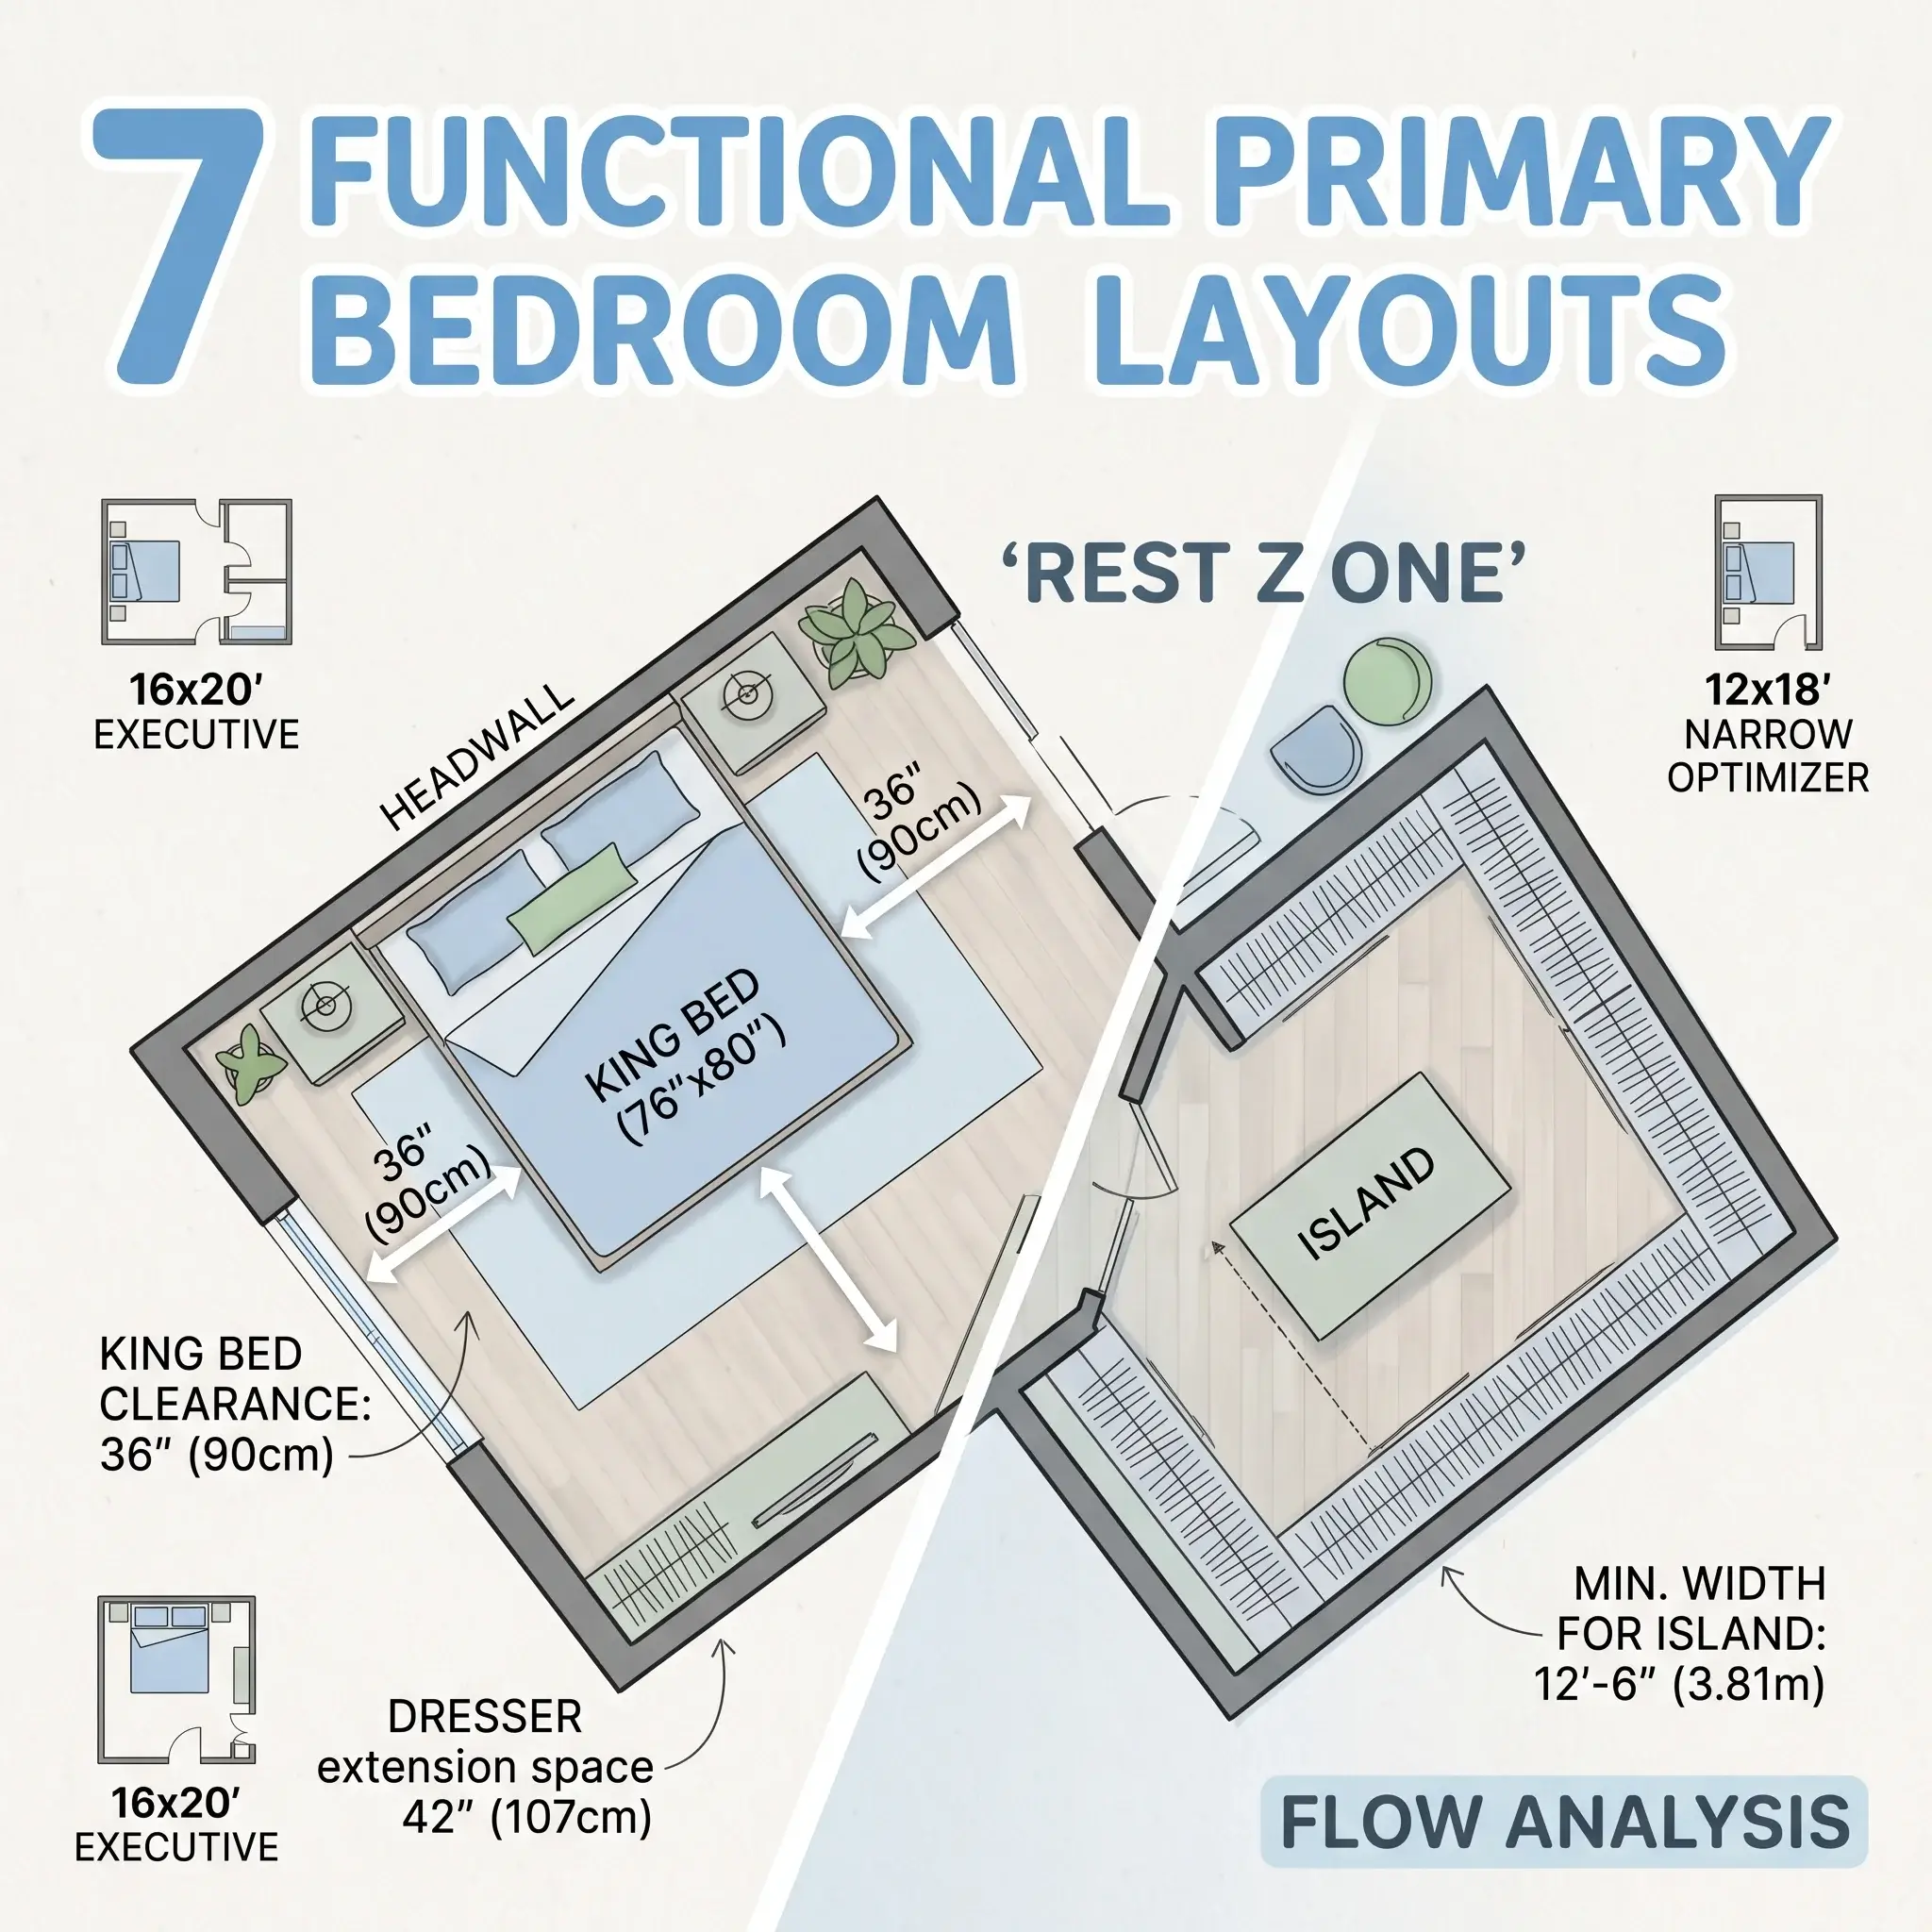
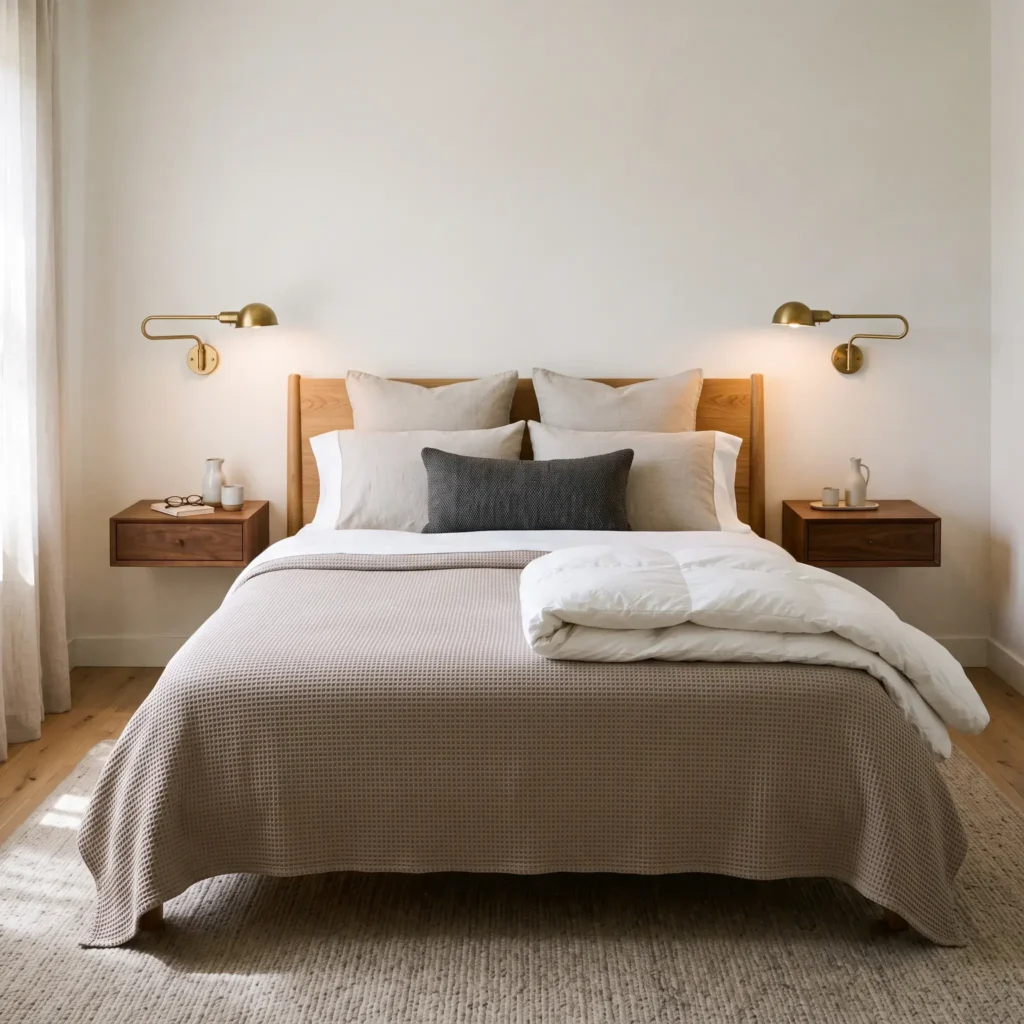
- Center an upholstered Queen bed along the primary accent wall.
- Slide an 8-by-10-foot wool rug under the bed frame, extending it 24 inches past the sides and foot of the mattress.
- Flank the bed with two floating nightstands set level with the mattress top at 24 inches high.
- Hardwire two aged brass swing-arm sconces directly into the wall at 62 inches from the finished floor.
A bedroom needs soft surfaces and quiet visual symmetry to encourage rest. Instead of using a matching furniture set, build contrast with distinct materials like woven cane, washed linen, and dark walnut.
Layer the bedding in a strict five-step order:
- Lay down an elastic fitted sheet made from washed percale.
- Lay the flat sheet patterned side down, leaving 12 inches of fabric at the head to fold back over the quilt.
- Smooth a tight waffle-weave coverlet over the mattress and tuck it firmly around the sides and foot.
- Fold a high-fill down duvet into horizontal thirds across the bottom third of the bed.
- Prop two 26-by-26-inch Euro shams upright against the headboard, place standard pillows in front, and finish with a single 14-by-36-inch lumbar pillow centered on the mattress.
Mount wall sconces on both sides of the bed 62 inches from the floor to the junction box. This keeps nightstands clear for a book and a glass of water.
Products Used in This Setup
- Bed Frame: Solid white oak platform queen bed frame with an integrated 42-inch headboard.
- Bedding Base: 300 thread-count long-staple cotton percale sheet set in bright white.
- Mid-Weight Layer: 100% cotton waffle-weave coverlet in warm taupe.
- Duvet Insert: 650 fill-power European white down insert inside a washed natural linen cover.
- Lighting: Hardwired adjustable swing-arm wall sconces finished in antique hand-rubbed brass.
Check out more Beautifully Modern Layouts
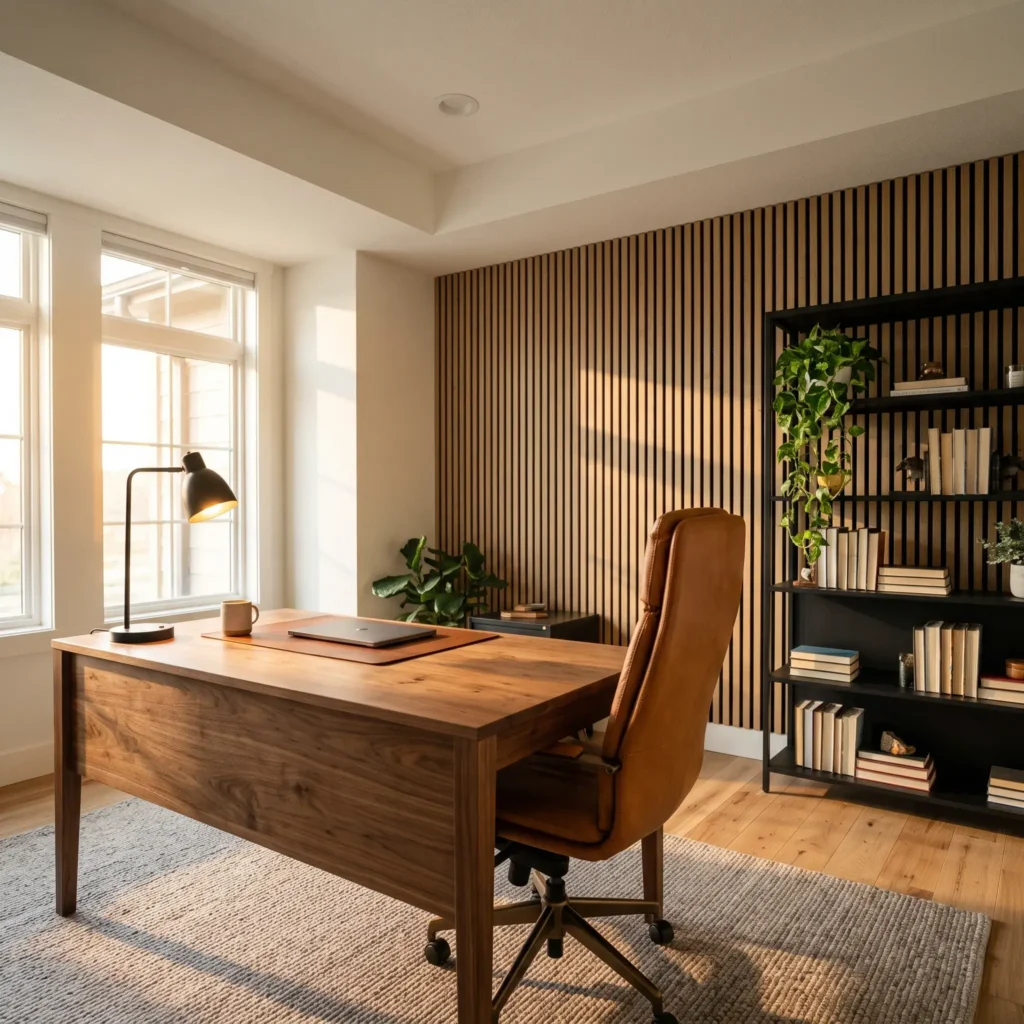
3. The Video-Ready Home Office: Intentional Depth and Acoustic Control
Layout Plan:
- Pull a 60-by-30-inch solid wood desk out into the room, leaving a 42-inch open gap behind the chair.
- Line the rear wall with vertical white oak acoustic slat panels backed by dense recycled polyester felt.
- Place an open five-shelf bookcase to the right side of the back wall for visual balance.
- Position a diffuse LED task lamp at a 45-degree angle in front of your desk at eye level.
Working from home requires an environment that sounds quiet and looks professional on video calls. Webcams compress visual depth, which makes people sitting directly against a blank wall look flat.
Pull your desk away from the wall so that at least 42 inches of space remain behind your chair. This gap creates natural depth of field, allowing cameras to keep you in focus while softly blurring background details. Install acoustic slat panels behind the desk. These panels use real oak veneer on recycled polyester felt backing to stop flutter echoes on microphones.
Style open background shelving using a strict 70/30 distribution:
- Leave 70% of the shelf volume open.
- Fill the remaining 30% with alternating stacks of books and singular matte ceramic items.
- Never place high-contrast artwork directly behind your head, which causes camera sensors to blow out exposure levels.
Products Used in This Setup
- Acoustic Panels: Wall panels featuring natural oak timber slats on a dense 9mm recycled PET acoustic felt backing.
- Desk Surface: 60-by-30-inch solid American walnut desk with bevel edge profiling and steel legs.
- Task Seating: Mid-century inspired executive chair upholstered in top-grain cognac aniline leather.
- Display Shelving: Five-tier powder-coated matte black steel bookcase with open sides.
- Task Illumination: Counterbalanced architectural LED desk lamp with a 3000K neutral warm diode.
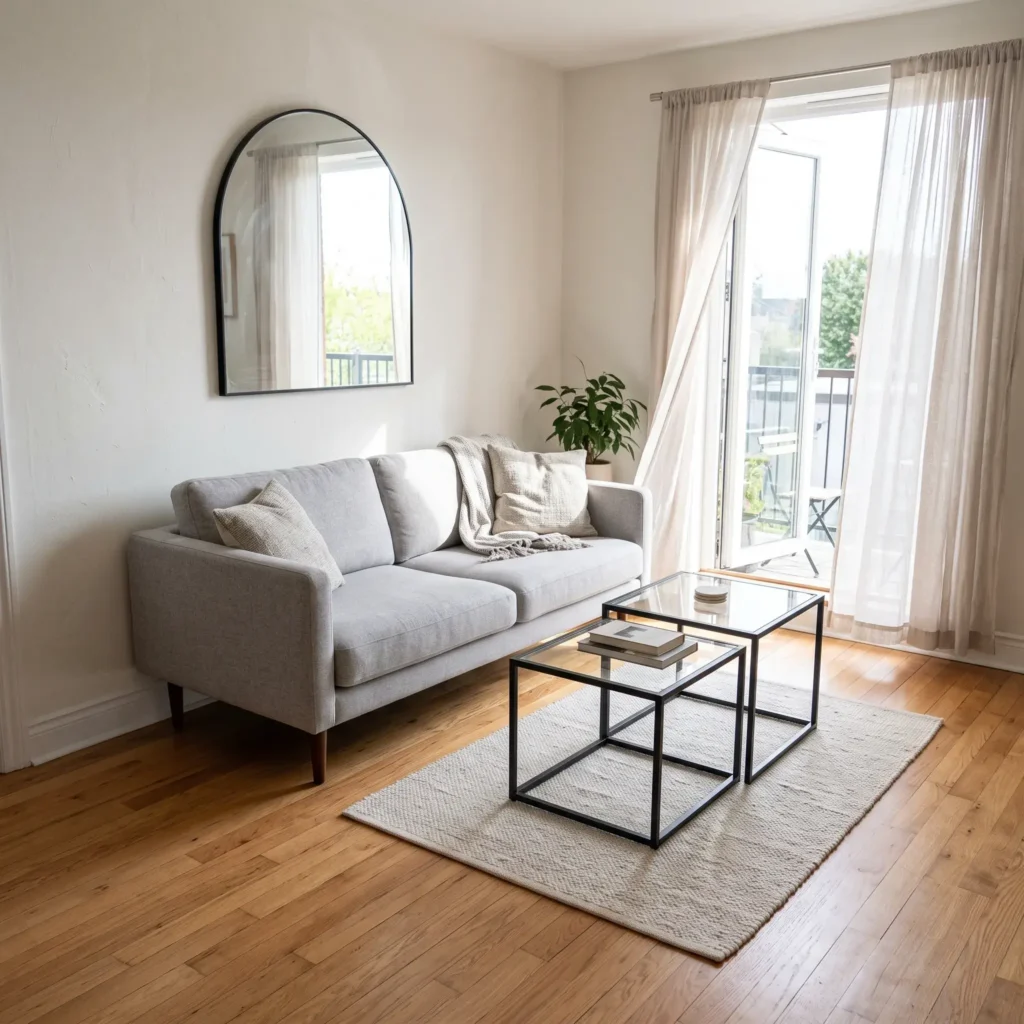
4. The Compact Living Space: Floor Clearance and Daylight Multiplication
Layout Plan:
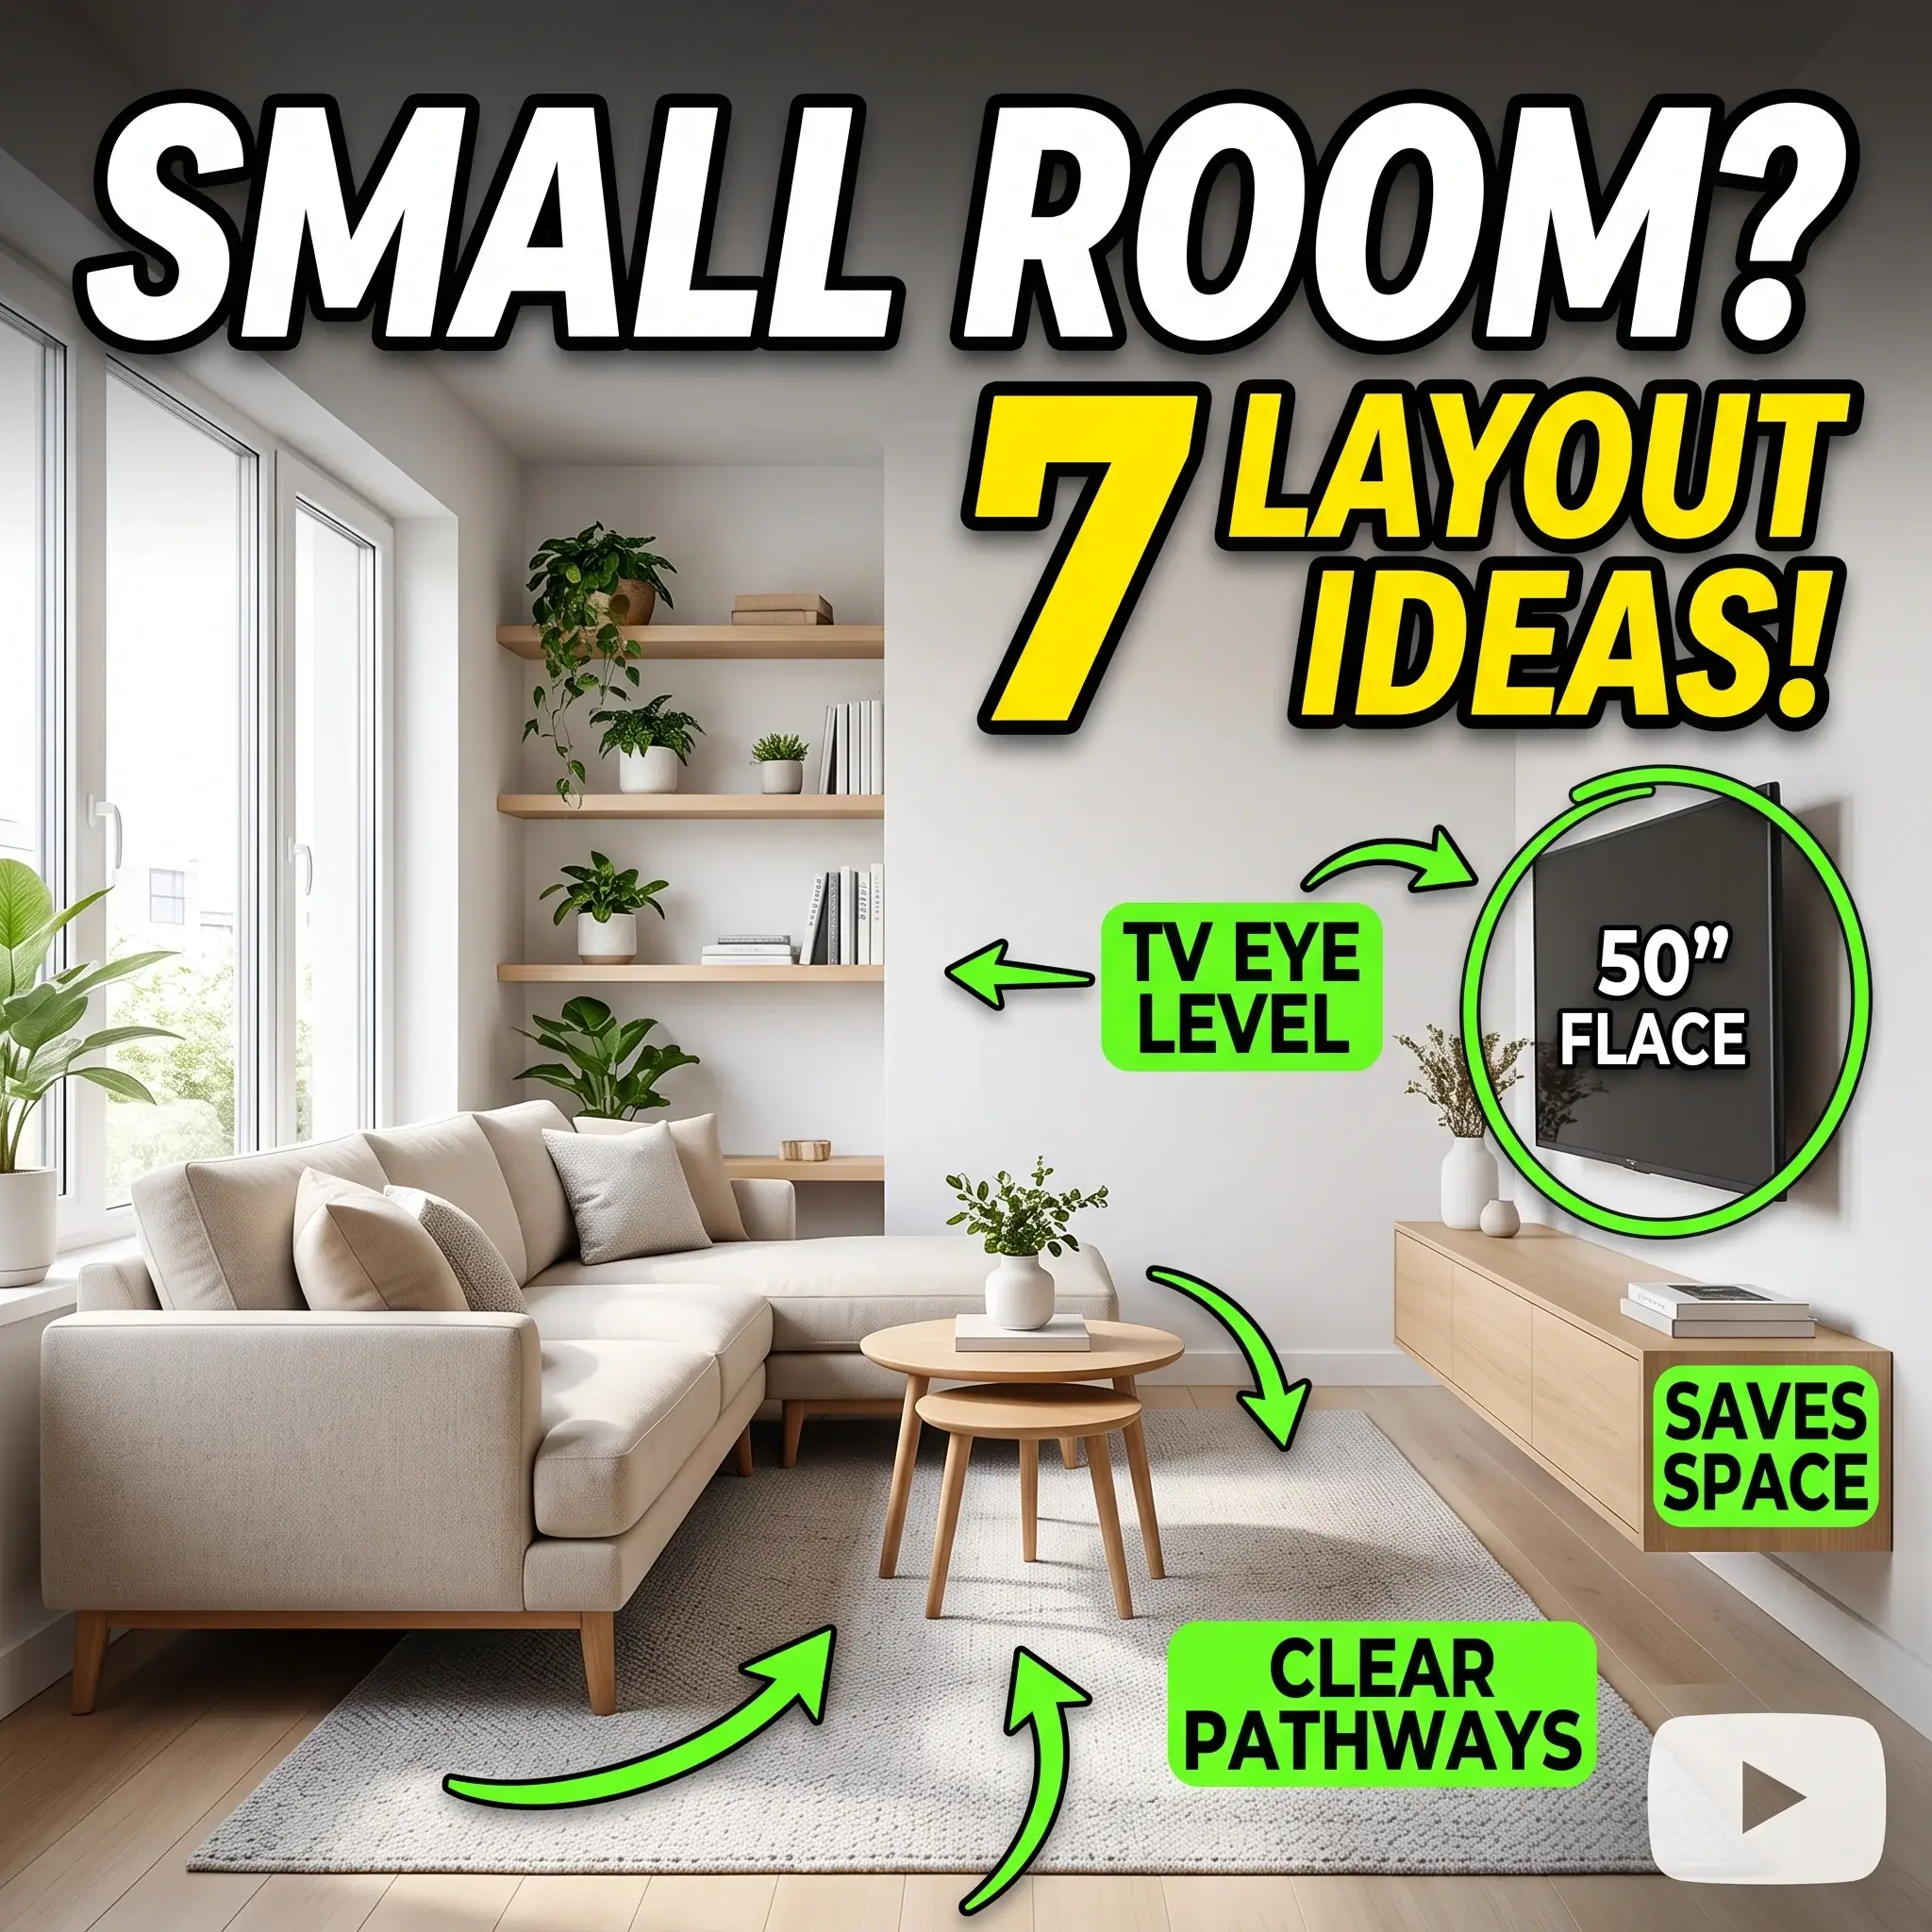
- Position a 68-inch loveseat raised on 7-inch tapered legs against the longest interior wall.
- Mount a 30-by-60-inch thin-frame mirror on the wall directly opposite your primary window.
- Float a 48-inch two-door storage credenza 10 inches above the floor on heavy-duty wall studs.
- Place a set of two transparent bent-glass nesting tables in front of the sofa over a light 5×7 rug.
Small rooms feel cramped when bulky furniture blocks floor sightlines. When the human eye can see continuous flooring extending under chairs and tables, the brain interprets the room as wider than it is.
Select furniture raised on 7-inch tapered legs instead of solid bases that sit directly on the floor. Use glass or acrylic nesting tables that allow light to pass straight through. Hang an oversized rectangular mirror on the wall directly opposite your primary window. This bounces natural daylight into dark corners and visually doubles your square footage without taking up floor space.
Keep storage off the floor entirely. Wall-mounted floating ledges and suspended credenzas free up perimeter flooring, making tight rooms easier to clean and navigate.
Products Used in This Setup
- Apartment Sofa: 68-inch tailored loveseat with 7-inch turned walnut wood legs.
- Nesting Tables: Set of two bent-glass transparent coffee tables with rounded corners.
- Wall Mirror: 30-by-60-inch minimalist arched wall mirror with an ultra-thin black iron rim.
- Floating Credenza: 48-inch two-door wall-hung storage console in bleached birch.
- Floor Accent: 5×7 foot flat-woven wool runner featuring a broken line pattern in bone and charcoal.
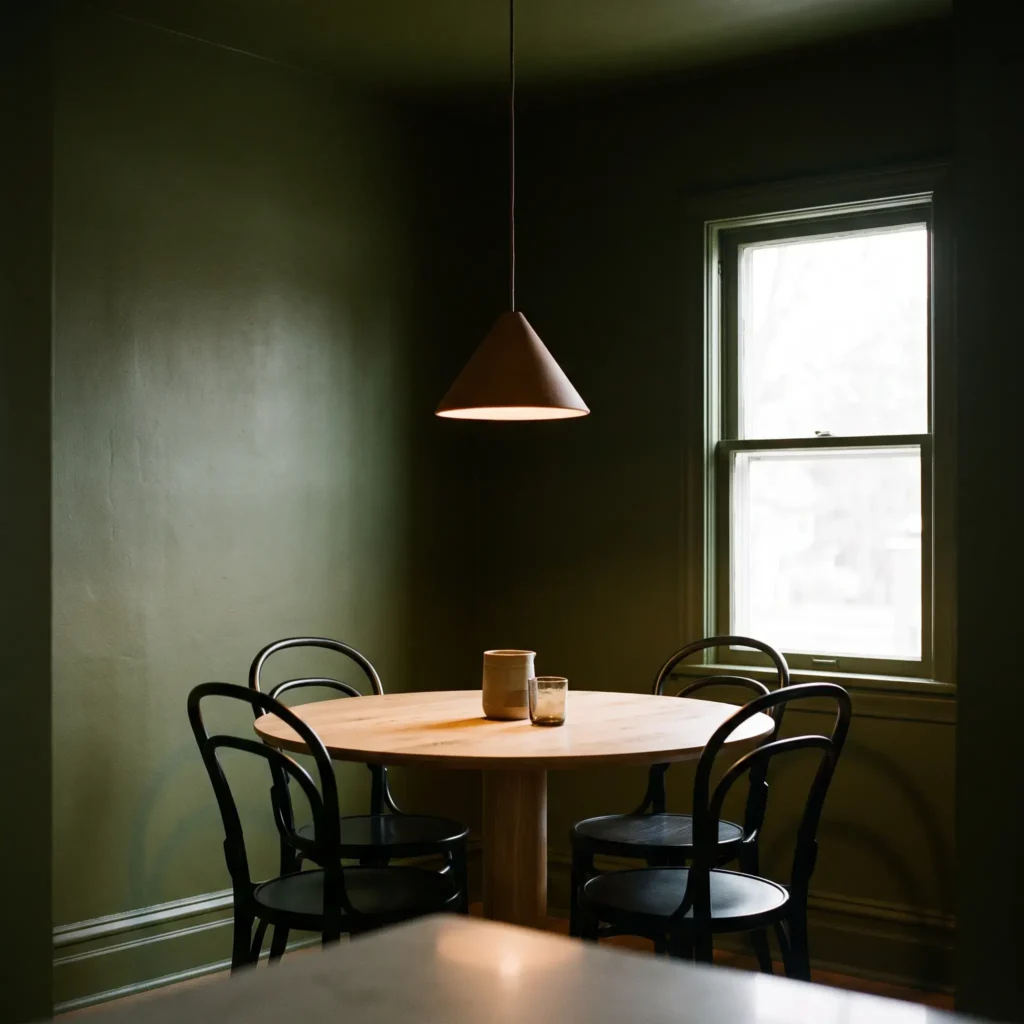
5. The Cocoon Dining Space: Monochromatic Color Drenching
Layout Plan:
- Coat all drywall surfaces, ceiling plaster, door panels, and baseboards in a single deep olive tone.
- Center a 48-inch round pedestal table made of solid white oak directly below the ceiling junction box.
- Suspend an 18-inch ceramic cone pendant light so its bottom edge sits 32 inches above the tabletop.
- Arrange four matte black bentwood chairs around the perimeter with 24 inches of clearance to the walls.
Color drenching uses a single paint hue across all surfaces: drywall, ceiling, baseboards, window trim, and interior doors. Standard white ceilings create high-contrast lines that emphasize room boundaries. Coating all surfaces in one saturated tone hides corners, which makes a small dining nook feel expansive and intentional.
To keep the room visually dynamic without changing paint colors, vary your paint sheens across surfaces:
- Coat ceilings in dead-flat paint to absorb glare from overhead fixtures.
- Apply matte or velvety eggshell paint to the walls to deepen color saturation.
- Paint window casings, trim, and baseboards in satin enamel to provide durability and create soft light reflections along the edges.
Suspend your central pendant fixture 30 to 36 inches above the dining tabletop. This height provides clear sightlines for seated guests while keeping light focused on the food.
Products Used in This Setup
- Dining Table: 48-inch round pedestal dining table crafted from solid American white oak with a matte clear coat.
- Seating: Set of four classic bentwood dining chairs in an open-grain matte black finish.
- Overhead Lighting: 18-inch diameter slip-cast terracotta ceramic cone pendant light on a black cloth cord.
- Wall Paint: Deep forest olive paint mixed in matte finish for drywall and satin finish for millwork.
- Centerpiece: 10-inch hand-carved travertine pedestal bowl holding fresh seasonal fruit.
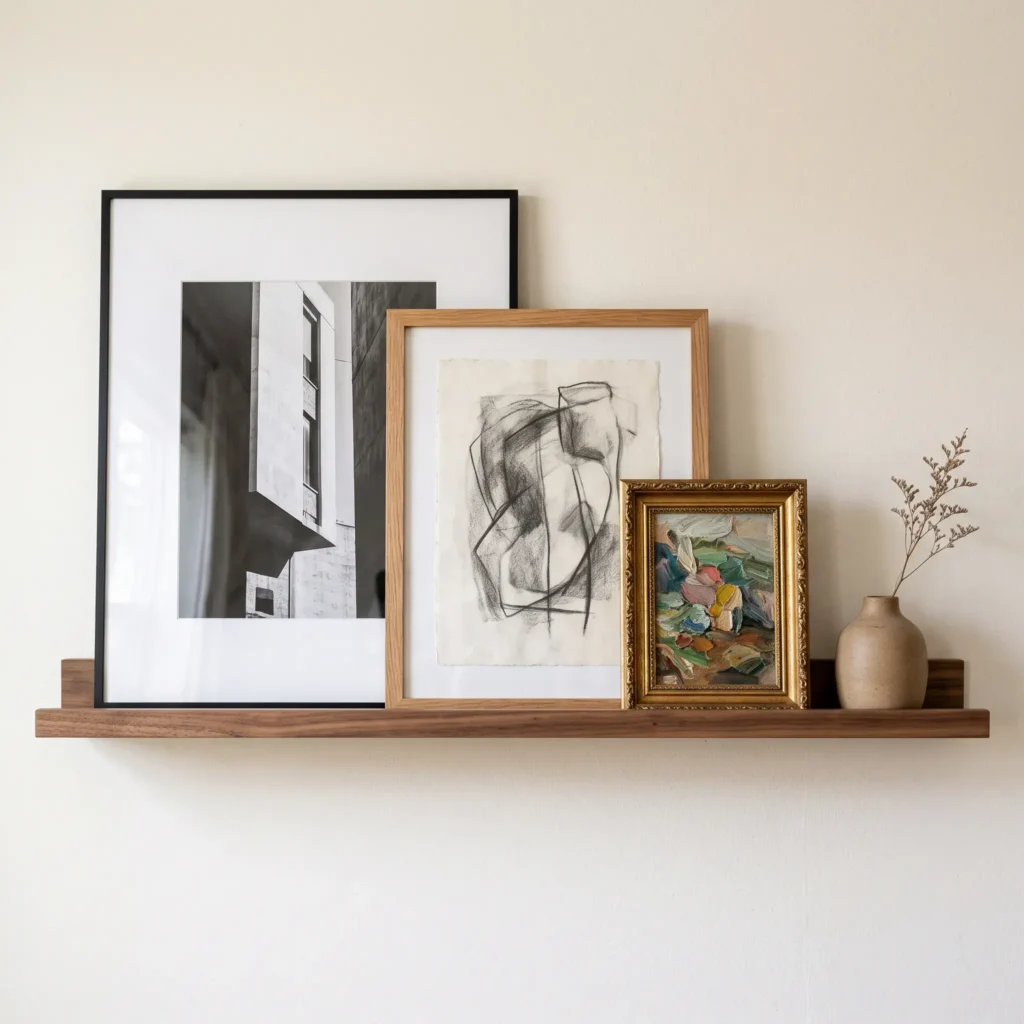
6. The Rental-Friendly Wall: Modular Rails and Non-Damaging Displays
Layout Plan:
- Mount a single 48-inch solid walnut picture ledge level across your primary hallway or living room wall.
- Position the center line of the ledge exactly 58 inches above the finished floor surface.
- Rest a low horizontal storage bench beneath the ledge, leaving a 14-inch clearance gap.
- Lean three framed prints on the ledge, overlapping the smaller frames by two inches over the larger ones.
Renters often settle for bare white walls out of fear of losing their security deposits. Drilling dozens of drywall anchors for a traditional gallery wall leaves holes that require extensive patching. Picture ledges solve this problem by providing a flexible display system that only requires two mounting holes.
Mount a 48-inch wood picture ledge with its center line 58 inches above the floor. This places your artwork right at natural eye level. Instead of hanging individual frames with wire, rest three to four frames of varying sizes directly on the ledge:
- Place your largest frame, such as a 16-by-20-inch frame, in the back.
- Overlap a smaller frame, such as an 8-by-10-inch frame, across its front corner by two inches.
- Mix thin black metal frames with warm oak frames to build visual variety.
You can swap photographs, botanical prints, and sketches anytime without driving new nails into the drywall.
Products Used in This Setup
- Display Ledge: 48-inch solid American walnut picture ledge with a two-inch front lip and concealed mounting hardware.
- Primary Frame: 16×20 inch matte black anodized aluminum picture frame with UV-filtering acrylic.
- Secondary Frame: 11×14 inch solid white oak picture frame fitted with an acid-free off-white mat board.
- Tabletop Vessel: 4-inch miniature unglazed ceramic bud vase in raw terracotta.
- Art Prints: Archival giclée reproductions of line drawings printed on 310 GSM cotton rag paper.
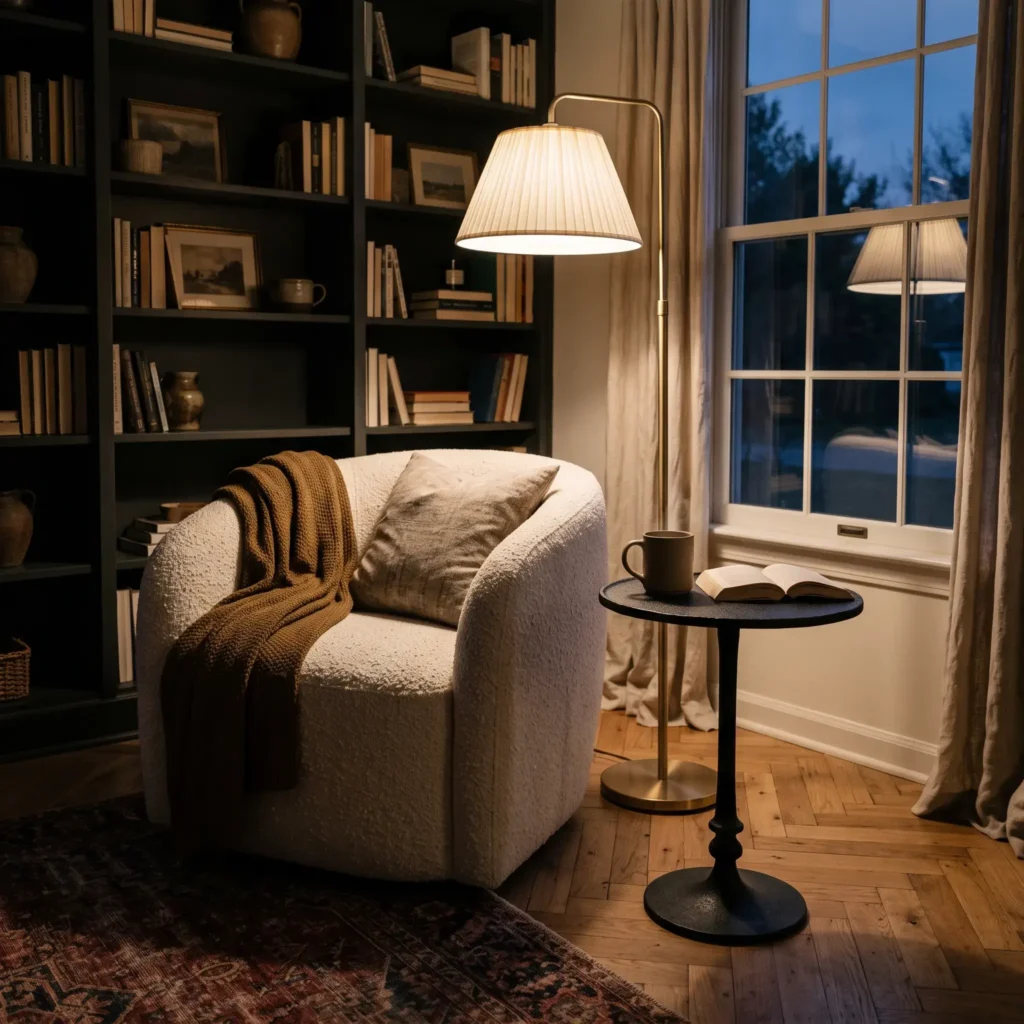
7. The Circadian Reading Corner: Low-Level Ambient Lighting
Layout Plan:
- Anchor an unused bedroom or living room corner with a curved barrel chair upholstered in bouclé.
- Set a slender brushed brass floor lamp slightly behind the chair back, positioned to the non-dominant hand side.
- Ensure the bottom rim of the fabric lamp shade sits between 42 and 48 inches above the floor.
- Place a 14-inch heavy cast-iron drink table directly beside the chair armrest.
Ceiling lights create harsh shadows that make living areas feel cold and uninviting at night. Replacing bright overhead fixtures with low-level lighting helps your eyes relax and signals your body to prepare for sleep.
Build a dedicated evening reading nook in an unused corner. Anchor the space with a comfortable accent chair upholstered in a tactile fabric like bouclé or soft chenille. Position a floor lamp slightly behind the chair so that the pleated linen shade sits at shoulder height when you are seated.
Use light bulbs rated strictly at 2700 Kelvins. This produces a soft, amber-toned glow that mimics candlelight. Add a small 16-inch side table to hold a table lamp, a book, or a warm drink.
Products Used in This Setup
- Accent Seating: Sculptural barrel chair upholstered in high-durability heavy ivory wool bouclé.
- Floor Lighting: 56-inch slender brushed brass floor lamp fitted with a traditional pleated fabric drum shade.
- Drink Table: 14-inch circular side table crafted from sand-cast iron with a rough textured black finish.
- Light Source: 6-watt dimmable LED filament bulb running at 2700K and delivering 450 lumens.
- Throw Blanket: 50×60 inch throw blanket loomed from 100% undyed baby alpaca wool with fringed hems.
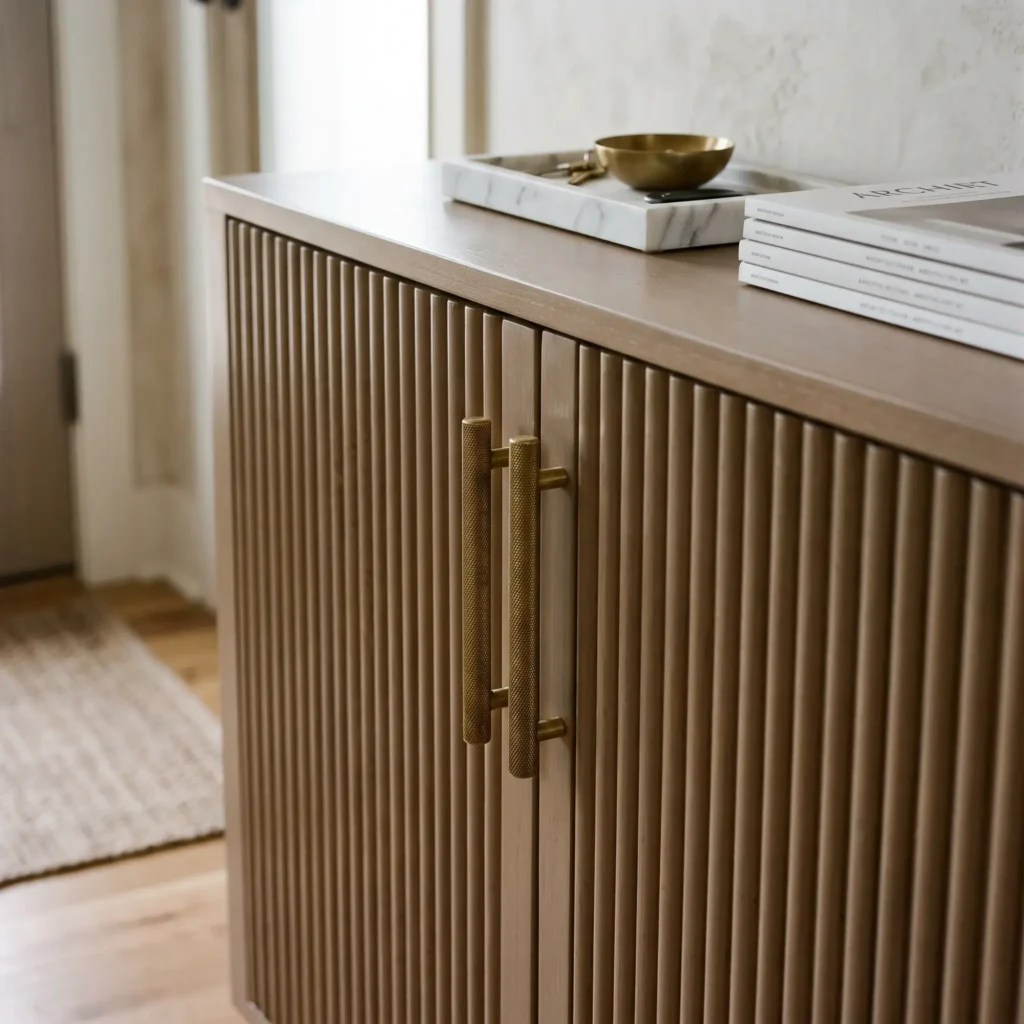
8. The Custom Console Upgrade: Fluted Wood and Brass Detailing
Layout Plan:
- Mount an upgraded flat-pack two-door cabinet six inches above the baseboard using four tapered oak furniture legs.
- Cover both front door panels with continuous vertical half-round solid pine trim strips.
- Mount two 6-inch knurled brass bar pulls vertically along the center door margins.
- Top the console with a narrow honed marble tray and two architectural journals.
Factory-made flat-pack cabinets provide affordable storage, but their smooth paper foil and melamine finishes can look cheap. You can convert basic storage cabinets into high-end architectural furniture using simple shop materials.
Standard latex paint will peel off smooth melamine veneers. Prepare the surfaces correctly using this six-step process:
- Wipe the factory finish with trisodium phosphate to remove manufacturing oils and dust.
- Sand all exterior panels lightly using 180-grit abrasive sanding sponges to create a textured mechanical key.
- Apply one full coat of pigmented shellac primer and allow it to dry for four hours.
- Cut half-round pine trim pieces to length and attach them across the door fronts using wood glue and finish pins.
- Brush on two coats of satin acrylic alkyd enamel paint, which levels out smooth without brush marks.
- Replace thin factory knobs with solid knurled brass hardware to give the doors a substantial, high-end feel.
Products Used in This Setup
- Base Cabinet: Standard two-door flat-pack storage credenza with adjustable internal shelves.
- Fluting Detail: 0.5-inch solid pine half-round architectural moulding strips cut to length.
- Cabinet Pulls: 6-inch solid unlacquered brass drawer pulls with machine-knurled diamond grip patterns.
- Primer Base: White pigmented shellac interior primer and stain blocker.
- Topcoat Finish: Water-based acrylic alkyd enamel paint tinted to a warm mushroom greige in a satin finish.
The Math of Decorating: Measurement Rules You Cannot Ignore
Guessing furniture sizes and installation heights leads to awkward rooms that feel uncomfortable to live in. Use these verified dimensional guidelines before purchasing furniture or hanging art.
| Architectural Element | Exact Measurement Specification | Installation Rule of Thumb | Why It Matters |
| Living Room Area Rug | Leaves 12 to 18 inches of bare floor border | Place the front legs of all primary seating on top | Unifies the seating group so furniture does not slide backwards |
| Dining Room Area Rug | Extends 24 to 30 inches past table edges | Keep the border symmetrical on all four sides | Keeps chair legs planted on the rug when guests slide back from dining |
| Wall Artwork (Single) | Centerline sits 57 to 60 inches from finished floor | Measure to the vertical center of the frame | Matches universal human eye-level sightlines across rooms |
| Furniture-Anchored Art | Total frame width spans 60% to 75% of furniture width | Suspend bottom edge 5 to 8 inches above furniture back | Ties the artwork and furniture into a single visual unit |
| Dining Room Chandelier | Fixture width equals 50% to 66% of table width | Hang fixture base 30 to 36 inches above tabletop | Provides tabletop light without blocking sightlines across the table |
| Open Room Chandelier | Diameter in inches equals Room Length + Width in feet | Maintain minimum 84 inches of floor clearance | Proportions fixture size to room volume while keeping walkways safe |
| Drapery Rod Placement | Mount rod 4 to 10 inches above the window casing | Extend rod 6 to 10 inches past the casing on each side | Pulls the eye up to make ceilings feel taller and lets daylight flood in |
The Three-Plane Lighting Blueprint
A room lit only by a single overhead fixture feels flat and produces harsh facial shadows. Professional spaces balance three separate planes of light across different heights:
- Plane 1: Overhead Ceiling Fixture: Delivers ambient fill light at 20 to 30 lumens per square foot.
- Plane 2: Eye-Level Sconces and Floor Lamps: Provides accent highlights at a 3-to-1 contrast ratio against wall surfaces.
- Plane 3: Tabletop and Desk Task Lamps: Focuses direct task light at 50 to 75 lumens per square foot onto work surfaces.
1. Ambient Lighting (General Illumination)
Ambient lighting provides the baseline illumination across a room. Calculate your main fixture diameter using a simple formula: add the room’s length and width in feet together, and convert that total number into inches. A room measuring 14 by 20 feet requires a fixture measuring approximately 34 inches in diameter.
For standard eight-foot ceilings, use semi-flush mount fixtures that do not hang down into walkways. If your ceilings are nine feet or higher, you can drop a hanging chandelier lower into the room.
2. Task Lighting (Focused Work Areas)
Task lighting delivers direct light to desks, kitchen countertops, and reading chairs. Use adjustable swing-arm lamps with opaque metal shades to direct light where you need it without causing screen glare.
Home offices and reading desks perform best under 3000K to 3500K neutral-warm light. This helps you focus without creating the stark, cold look of 5000K daylight bulbs.
3. Accent Lighting (Visual Depth)
Accent lighting highlights artwork, architectural alcoves, and millwork. Use plug-in picture lights, concealed under-cabinet LED strips, or small directional uplights tucked behind floor plants. Keep accent lights on separate dimmer switches so you can adjust them independently from your main ceiling lights.
| Room Type | Recommended Correlated Color Temp | Target Light Output |
| Living Room | 2700K (Warm Amber Glow) | 1,500 to 2,500 Lumens |
| Primary Bedroom | 2700K (Soft Evening Relaxation) | 1,000 to 2,000 Lumens |
| Home Workspace | 3000K to 3500K (Clear Task Focus) | 3,000 to 4,000 Lumens |
| Dining Room | 2700K (Intimate Dining Ambience) | 1,500 to 2,200 Lumens |
Wall Treatments and Paint Finishes
Paint transforms rooms faster than almost any other home update. Modern room styling has moved past standard accent walls in favor of complete color envelopes and rich, tactile finishes.
The Science of Color Drenching
In standard two-tone rooms, a white ceiling meeting a dark colored wall creates a sharp horizontal line that draws attention to the room’s perimeter. Color drenching removes that border by coating the ceiling, walls, door jambs, and baseboards in one uniform paint hue.
This technique is effective in small powder rooms, dens, and long hallways. Darker shades like navy, slate, and chocolate brown make the corners disappear, creating a cozy feel. Lighter shades like warm alabaster and bone soften shadows, helping small spaces feel open and unified.
Sheen Selection Strategy
Do not use the same paint sheen across every surface. Using different sheens protects high-traffic trim while maintaining rich color depth across your walls:
- Ceilings: Apply a dead-flat finish. Flat paint diffuses light, hides drywall joints, and eliminates reflection from floor lamps.
- Drywall Surfaces: Use a matte or eggshell finish. Matte paint absorbs direct sunlight, bringing out deeper pigment while remaining wipeable.
- Trim and Moldings: Paint baseboards and casings in a durable satin finish. Satin resists scuffs from shoes and vacuum cleaners.
- Doors and Cabinets: Use semi-gloss enamel on high-touch surfaces to resist finger oils and make cleaning easier.
Mineral Limewash for Old-World Texture
If smooth latex paint feels too flat for your space, authentic mineral limewash creates a soft, chalky finish with subtle color variations. Limewash is made by combining slaked lime (calcium hydroxide) with natural pigments and water. As the wet wash dries on the wall, it absorbs carbon dioxide from the surrounding air. This turns the slaked lime back into limestone, bonding the finish directly to your wall.
Applying limewash over modern drywall requires specific prep work:
- Modern gypsum drywall and old latex paint lack the porosity needed for slaked lime to bond. Roll on a quartz-aggregate mineral primer to create a textured surface the wash can grip.
- Apply limewash using a wide masonry block brush in sweeping, overlapping cross-hatch strokes. Never use paint rollers, which flatten out the cloudy variations that give limewash its character.
- Limewash dries up to 40% lighter than it looks in the bucket. Apply two thin coats twenty-four hours apart to build depth without peeling.
Frequently Asked Questions
How do I make a small room look larger without removing furniture?
Choose furniture with open, slender legs that expose the flooring underneath. When you can see continuous floor extending beneath seating and consoles, rooms feel wider. Hang wide floor-length mirrors across from windows to bounce daylight into dark corners. Mount drapery rods 4 to 8 inches above window frames to draw the eye upward toward the ceiling.
How high should I hang my artwork above the living room sofa?
Hang your wall art so the bottom edge sits 5 to 8 inches above the back of your sofa cushion. The total width of the artwork or gallery cluster should take up roughly two-thirds to three-quarters of the sofa’s width. This anchors the frame to the furniture so it reads as a unified arrangement rather than floating by itself.
What is the most common rug mistake in living room decoration?
Buying an area rug that is too small for the room is the most common layout mistake. A tiny 5-by-7-foot rug floating in the center of a living room makes the space look disconnected. Primary seating should sit with at least its front two legs firmly on the rug, leaving 12 to 18 inches of bare floor exposed along the room’s perimeter.
How do I decorate a rental apartment without losing my security deposit?
Rely on temporary, non-damaging installation methods. Mount picture ledges with clean, small anchor holes instead of hammering dozens of individual nails for gallery walls. Use tension rods to suspend curtains inside deep window casings without drilling into trim. Use peel-and-stick vinyl tiles over dated bathroom flooring, and replace plain cabinet hardware with modern brass handles, saving the original knobs to put back when you move out.
What light bulb temperature should I use in my living spaces?
Use 2700K warm white bulbs in living rooms, dining rooms, and bedrooms. This color temperature produces a relaxing, golden tone that softens fabric textures. Avoid 4000K to 5000K cool white bulbs in relaxing areas, as their blue-heavy light looks harsh and can disrupt your body’s natural sleep cycle.
A balanced room comes down to clear proportions, disciplined lighting choices, and comfortable walkways. Start by measuring your floor plan and positioning your primary area rug before purchasing smaller accents. Once you anchor your largest pieces at proper clearances, use the Rule of Threes and layered lighting to bring warmth and function into every corner of your home.