7 Headboard Designs You Can Steal Without Buying a New Bed
A quality bed frame often costs between $600 and $1,200. Most of that money pays for heavy steel rails and wooden support slats you do not actually need. If your mattress already rests on a solid platform base or box spring, replacing your entire bed just to get a decorative headboard wastes cash.
Attached headboards also suffer from a basic mechanical flaw. Every time you turn over, the bed frame acts as a lever arm. It rocks the attached board back and forth, loosens factory hardware, scuffs your paint, and causes annoying squeaks.
Decoupling your headboard solves this problem completely. When you mount the headboard directly to the wall or let it stand independently, the mattress foundation and the backrest become separate units. You eliminate frame creaks, protect your drywall, and get complete freedom over your bedroom style.
Here are 7 practical, frame-independent headboard designs you can steal today, built for real comfort and simple installation.
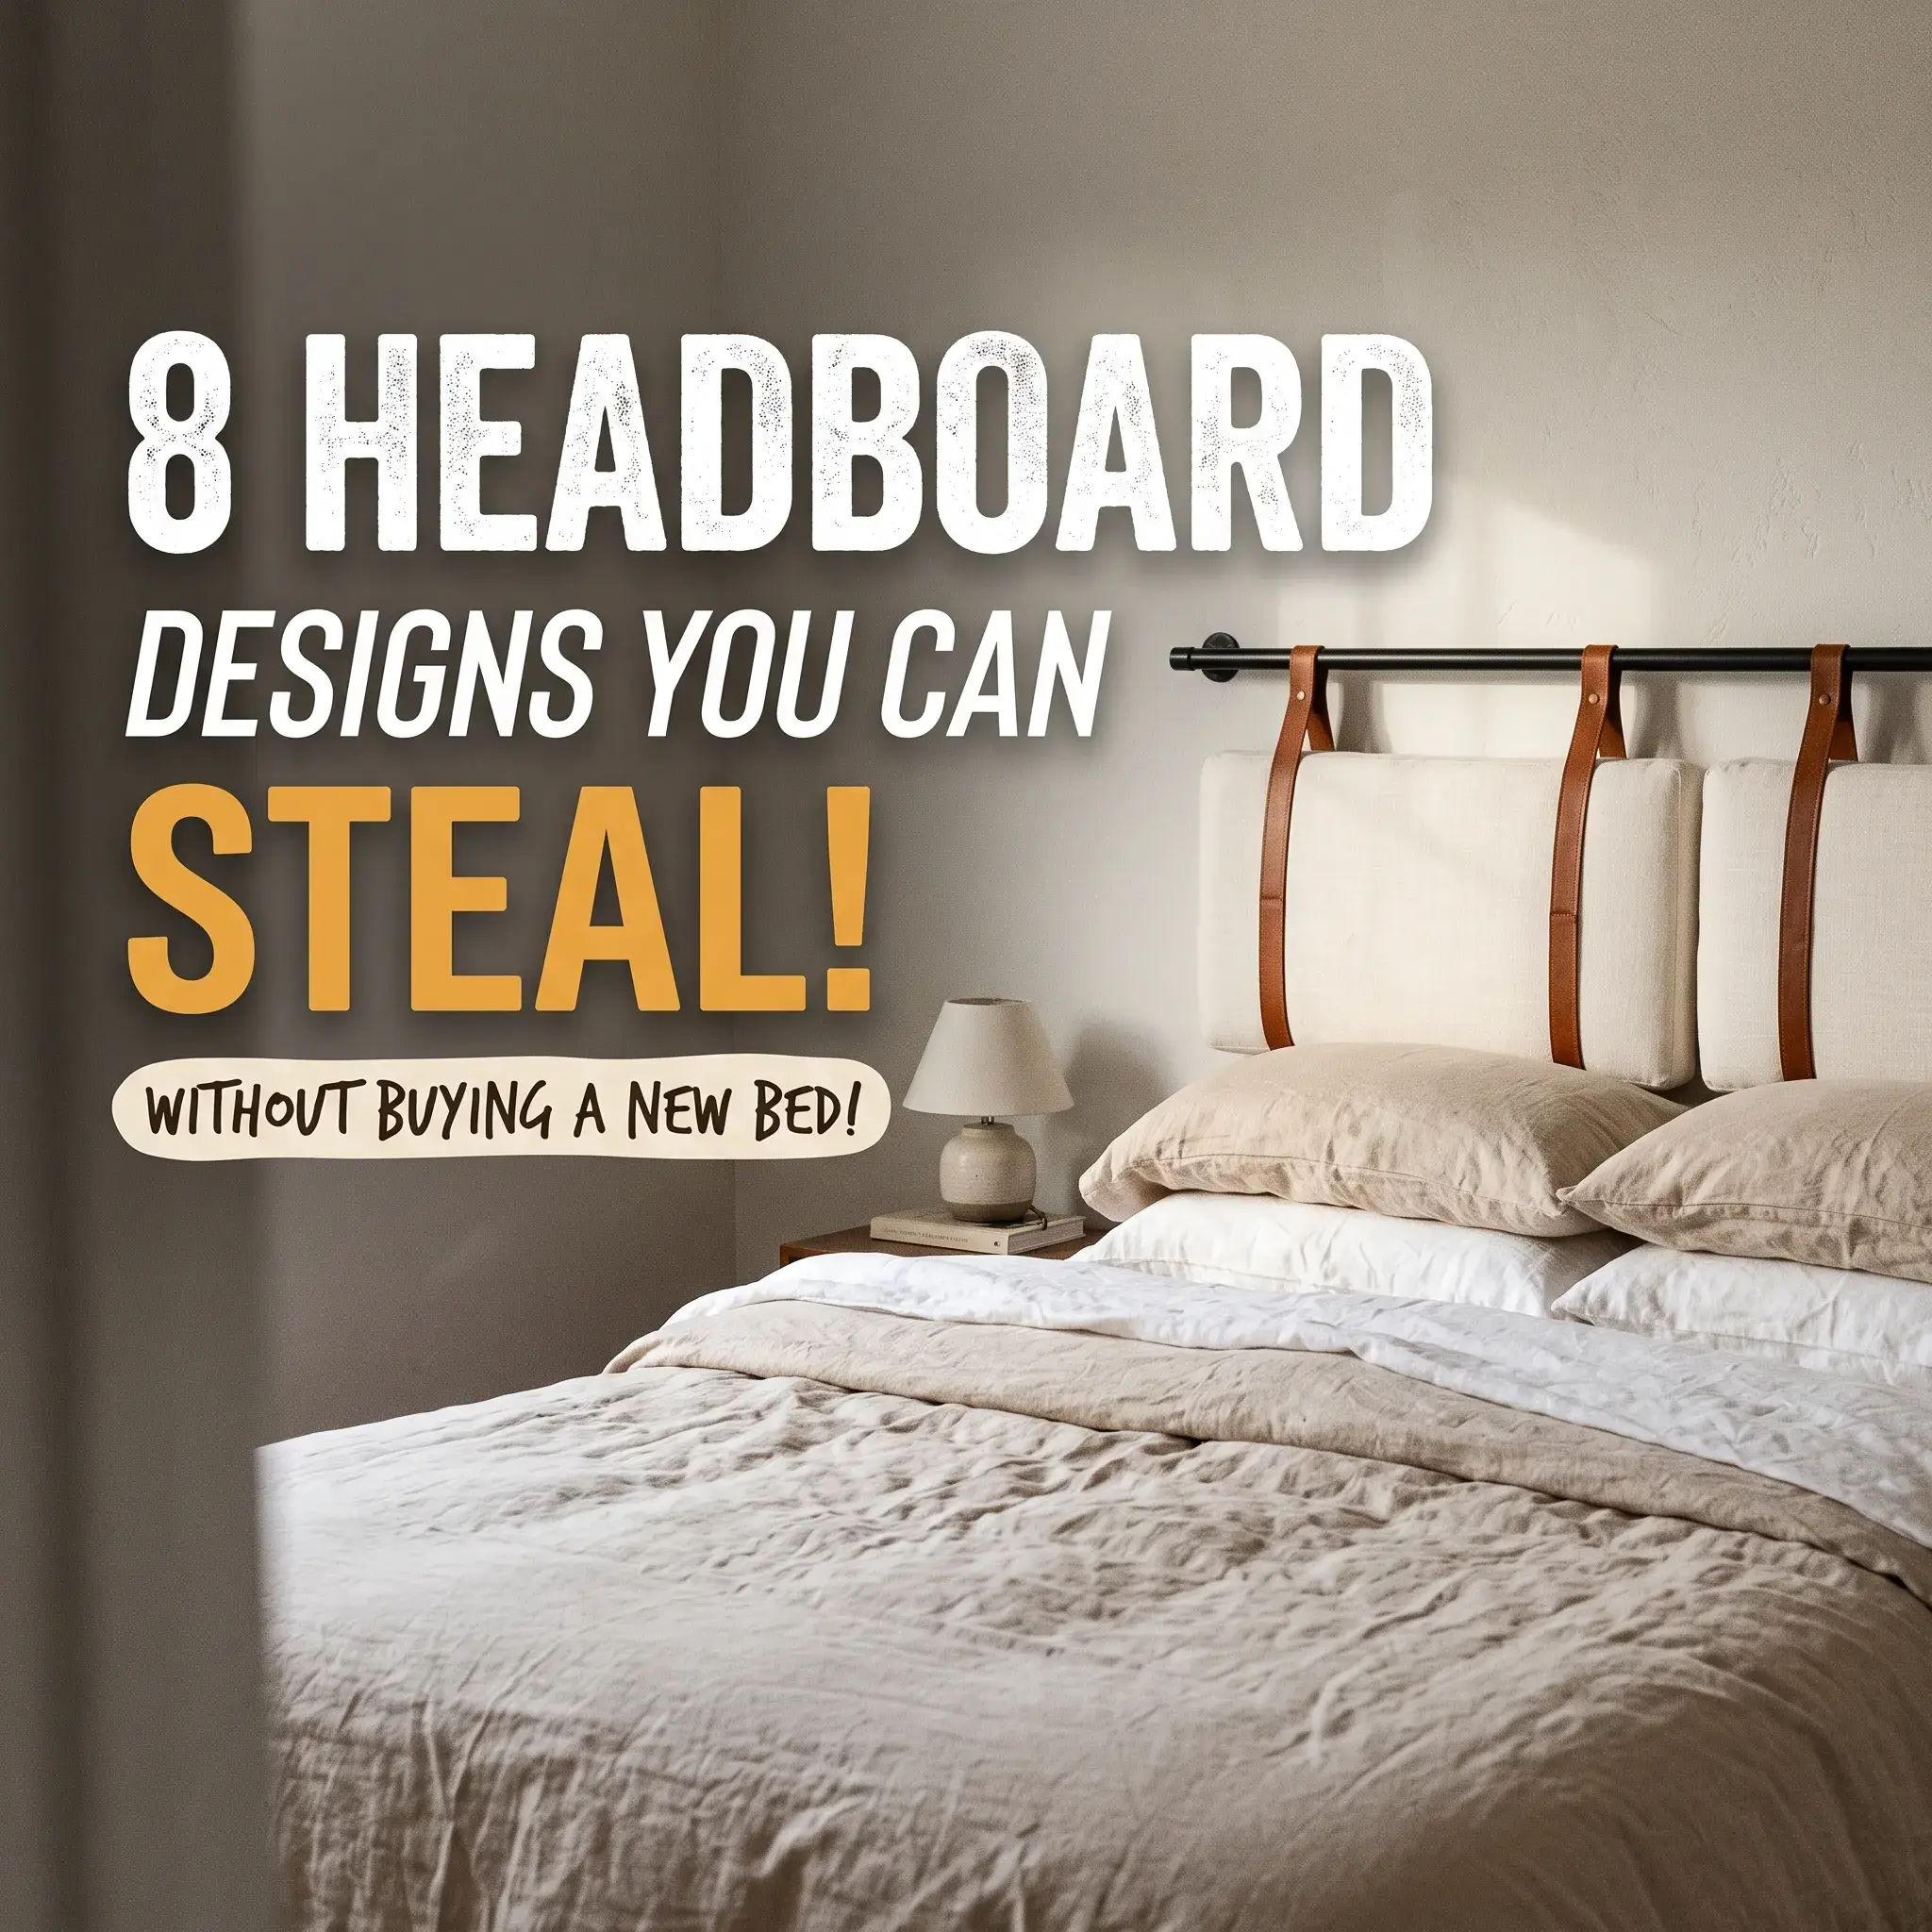
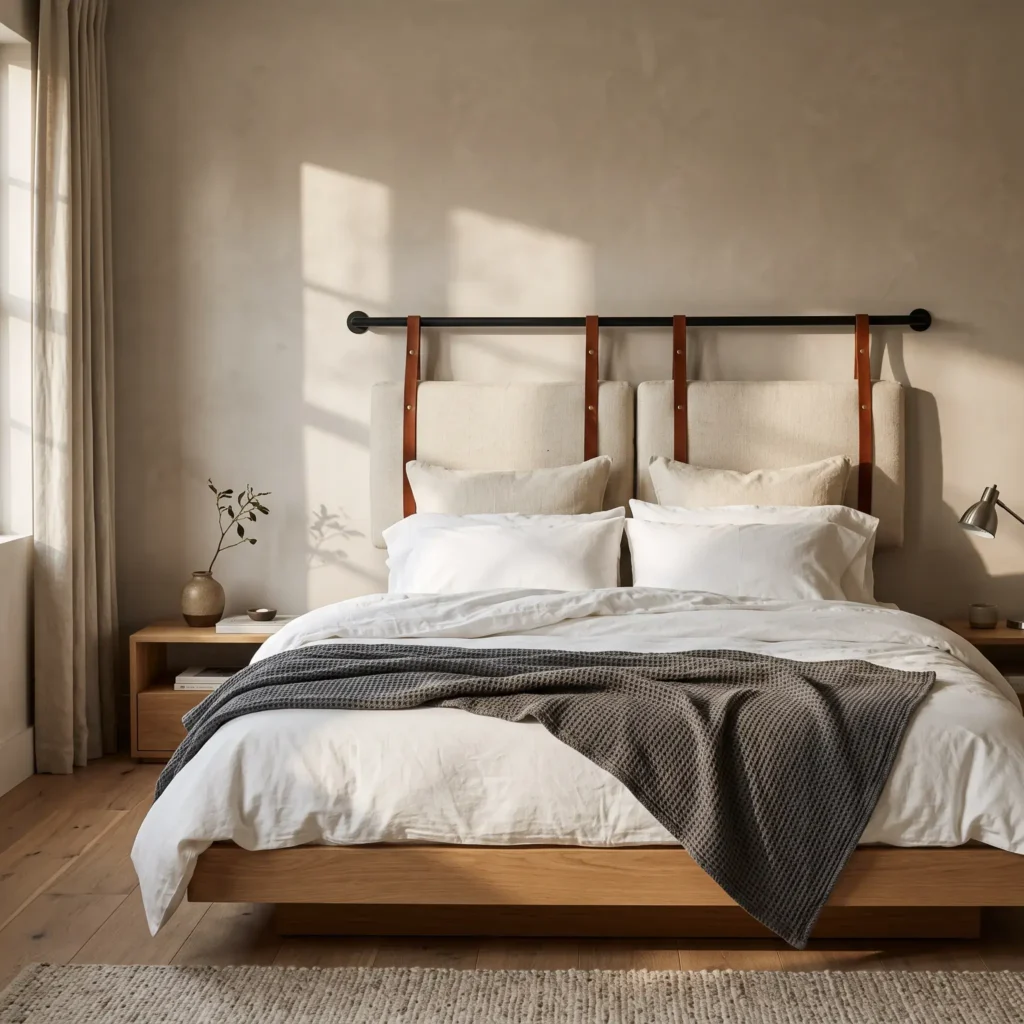
1. The Suspended Linen Cushion on Leather Straps
This design brings a relaxed European cafe look into your bedroom. A matte black drapery rod mounts to the wall above your bed, supporting high-density foam cushions hung by leather loops. It delivers soft lumbar support for reading without taking up any floor area.
How to Build It
- Mount a 1-inch metal drapery rod 32 inches above your mattress surface using wall anchors or stud screws.
- Cut two 1.5-inch wide cognac leather strips to 14 inches in length.
- Fold the straps into loops around the rod. Secure them to the top corners of your cushion using heavy stitching or threaded brass screw rivets.
- Let the bottom edge of the cushion drop 3 inches below the top line of the mattress to prevent pillows from slipping behind the bed.
Materials and Products Needed
- 1-inch matte black steel curtain rod with matching wall brackets
- 2-inch thick high-density polyurethane foam bench pad (or two 20×26 inch Euro sham inserts)
- Heavyweight textured ivory Belgian linen slipcover
- Vegetable-tanned leather utility straps (1.5 inches wide, 3 mm thick)
- Solid brass Chicago binding screws (1/4-inch post)
2. Acoustic Oak Slat Wall Panels
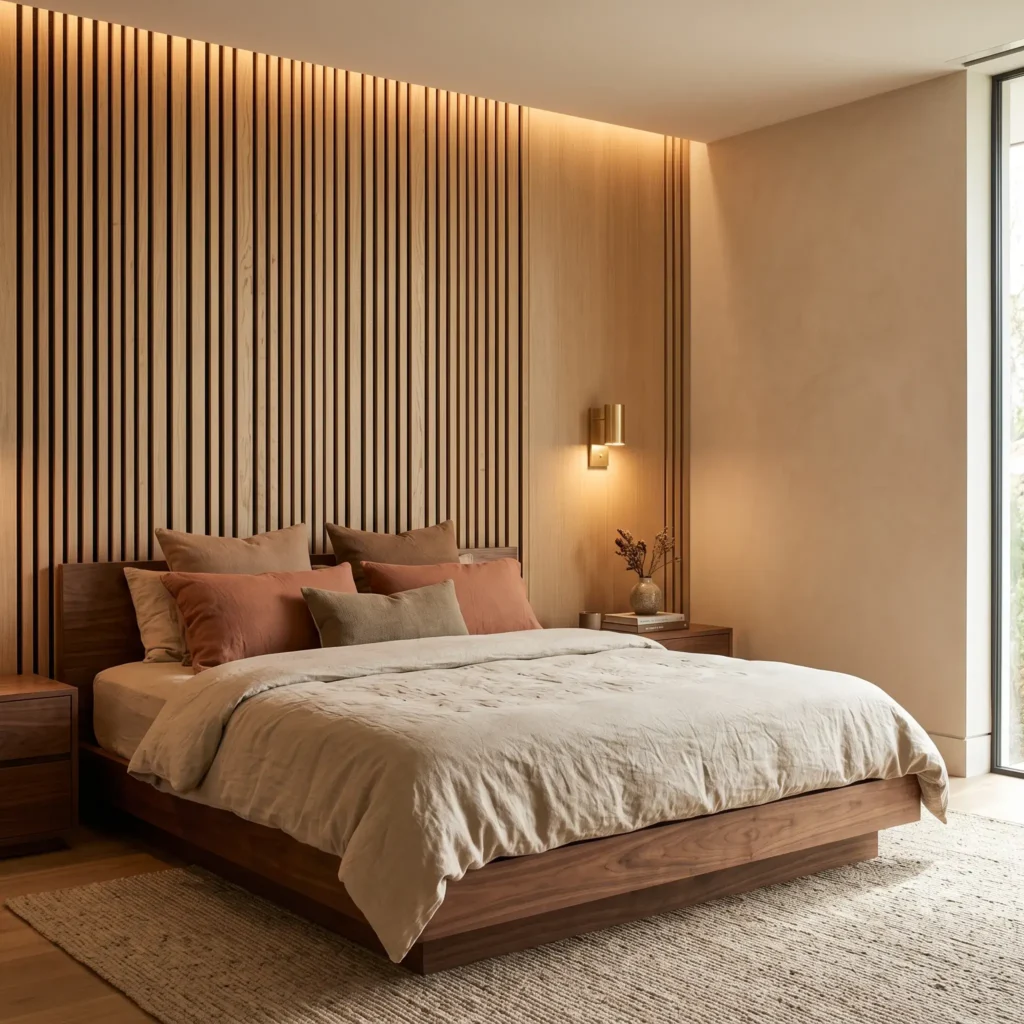
Commercial acoustic panels combine natural white oak veneer with a black recycled felt backing. When installed behind a bed, they add visual height, cover uneven drywall, and absorb sound echoes in the room.
How to Build It
- Measure your wall width to match your mattress width plus 4 inches of extra overhang on each side.
- Cut standard 24×96-inch panels to your ceiling height using a circular saw with a fine-finish blade.
- Hold each panel against the wall and drive 1.5-inch black phosphate drywall screws directly through the black felt backing into your wall studs.
- The black screw heads sink directly into the felt and disappear between the wood slats.
Materials and Products Needed
- Acoustic wood slat wall panels (white oak veneer on 9 mm black polyester felt)
- 1-5/8 inch black drywall screws
- Fine-tooth 60-tooth circular saw blade for clean veneer cuts
- Stud finder and magnetic torpedo level
Check out more Decor Styles
3. The Pool Noodle Channel-Tufted Velvet Wall
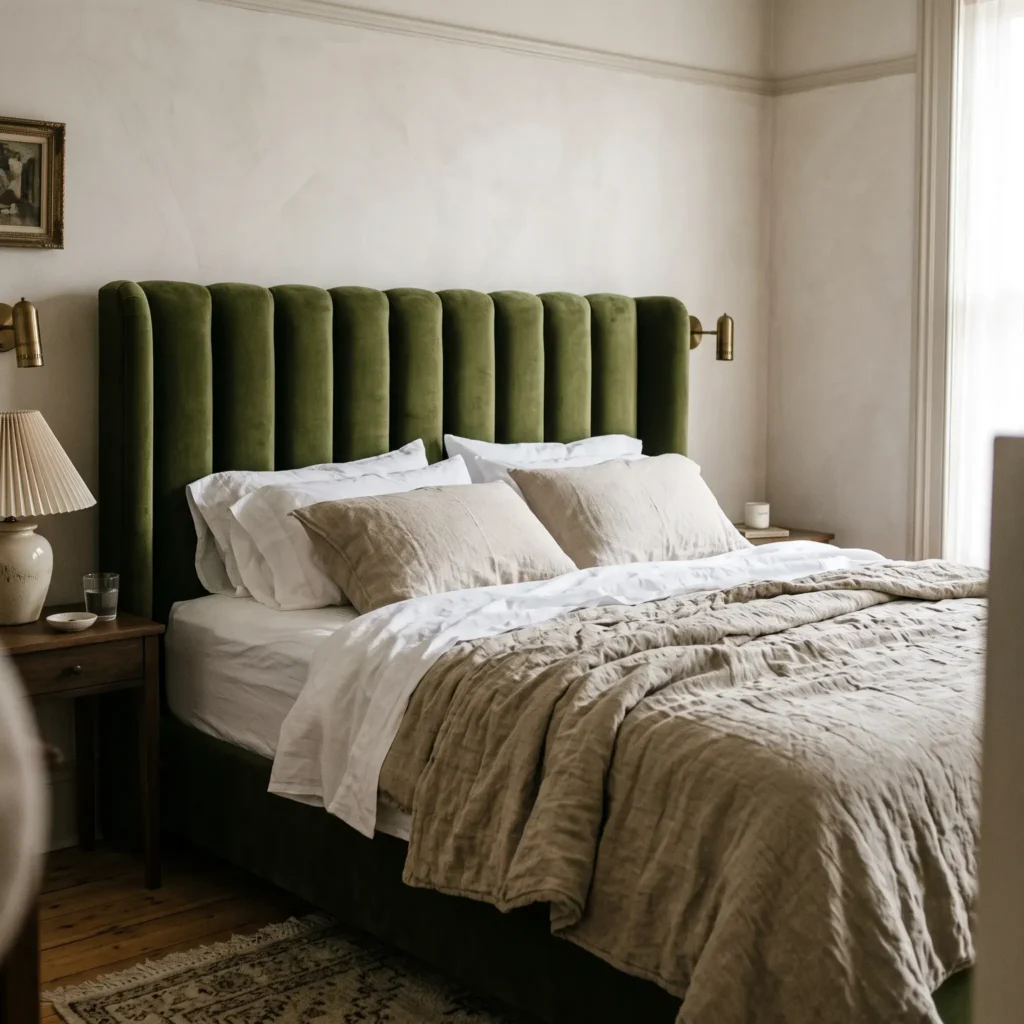
Vertical channel tufting looks upscale, but you can build it in an afternoon using round polyethylene foam rods. Slicing foam pool noodles in half gives you uniform, pre-formed vertical flutes without carving costly upholstery foam blocks.
How to Build It
- Cut a sheet of 1/2-inch plywood to match your bed width by 36 inches high.
- Slice foam pool noodles in half lengthwise with a serrated bread knife.
- Glue the flat side of each foam half vertically onto the plywood using foam-safe contact adhesive.
- Lay polyester batting across the foam, followed by your fabric, such as matte velvet or cotton bouclé.
- Push the fabric down into the valleys between noodles using a plastic putty knife. Pull it tight around the back of the plywood and secure it with heavy-duty staples.
- Mount the finished headboard to your wall using an interlocking aluminum French cleat anchored into two wall studs.
Materials and Products Needed
- 1/2-inch sanded plywood backing board
- 3-inch diameter polyethylene foam pool noodles or foam pipe insulation
- Foam-safe spray adhesive (such as 3M 77)
- Polyester upholstery batting (Dacron)
- Upholstery-weight velvet or bouclé fabric (add 1 extra yard for tucking)
- 30-inch heavy-duty aluminum French cleat mounting bracket
4. The Friction-Fit Rattan Folding Screen
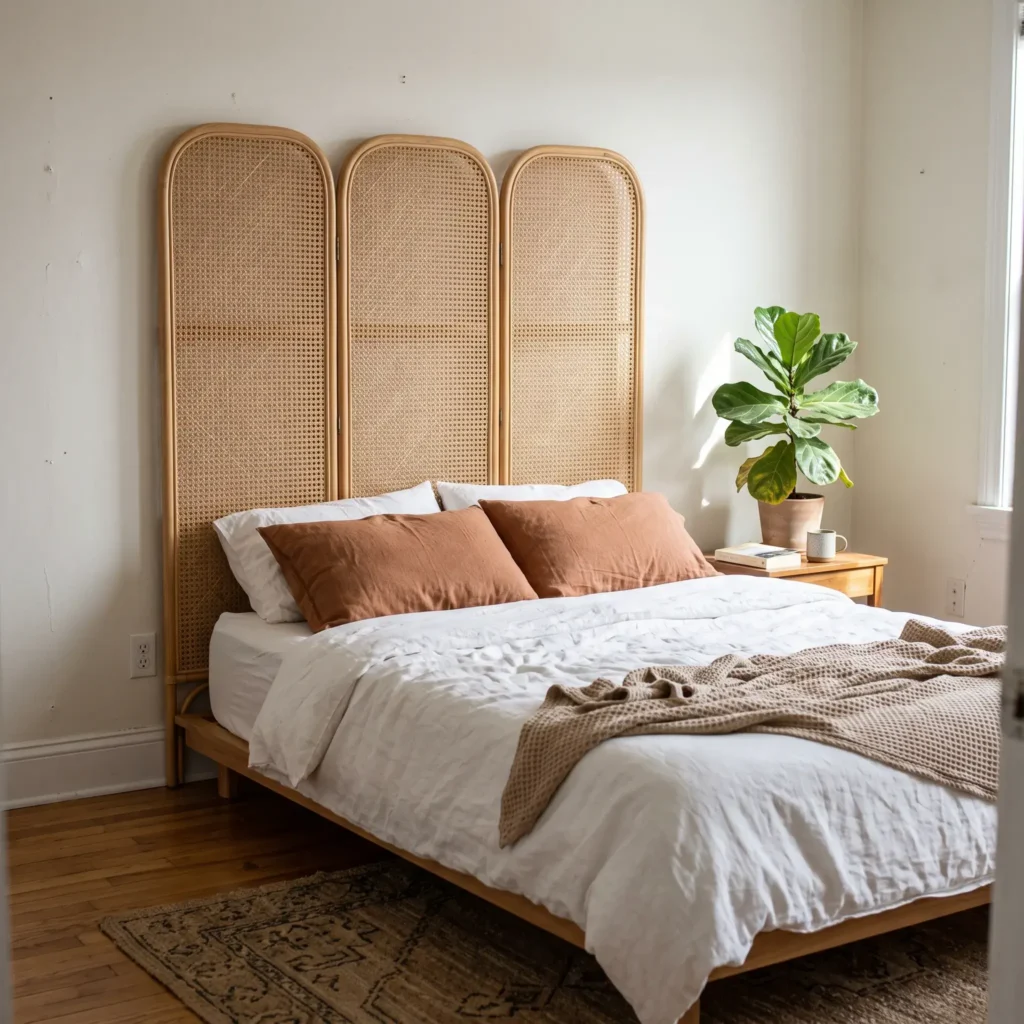
This is the simplest zero-damage headboard solution for renters. A three-panel woven cane or rattan room divider provides texture and height without putting a single hole in your drywall.
How to Build It
- Unfold a three-panel folding screen flat behind your bed.
- Push your mattress foundation and platform base firmly backward, sandwiching the lower 24 inches of the screen against the wall.
- The physical weight of the mattress locks the screen securely in place through direct friction.
- For extra stability, apply two heavy-duty interlocking adhesive strips between the top screen rail and the wall surface.
Materials and Products Needed
- 6-foot tall three-panel folding screen made of natural woven rattan or ash cane
- Heavy-duty interlocking picture hanging strips (rated for 16 pounds with damage-free removal)
- Adhesive rubber furniture grips for the screen feet
5. The Floating Picture Ledge with a Retention Lip
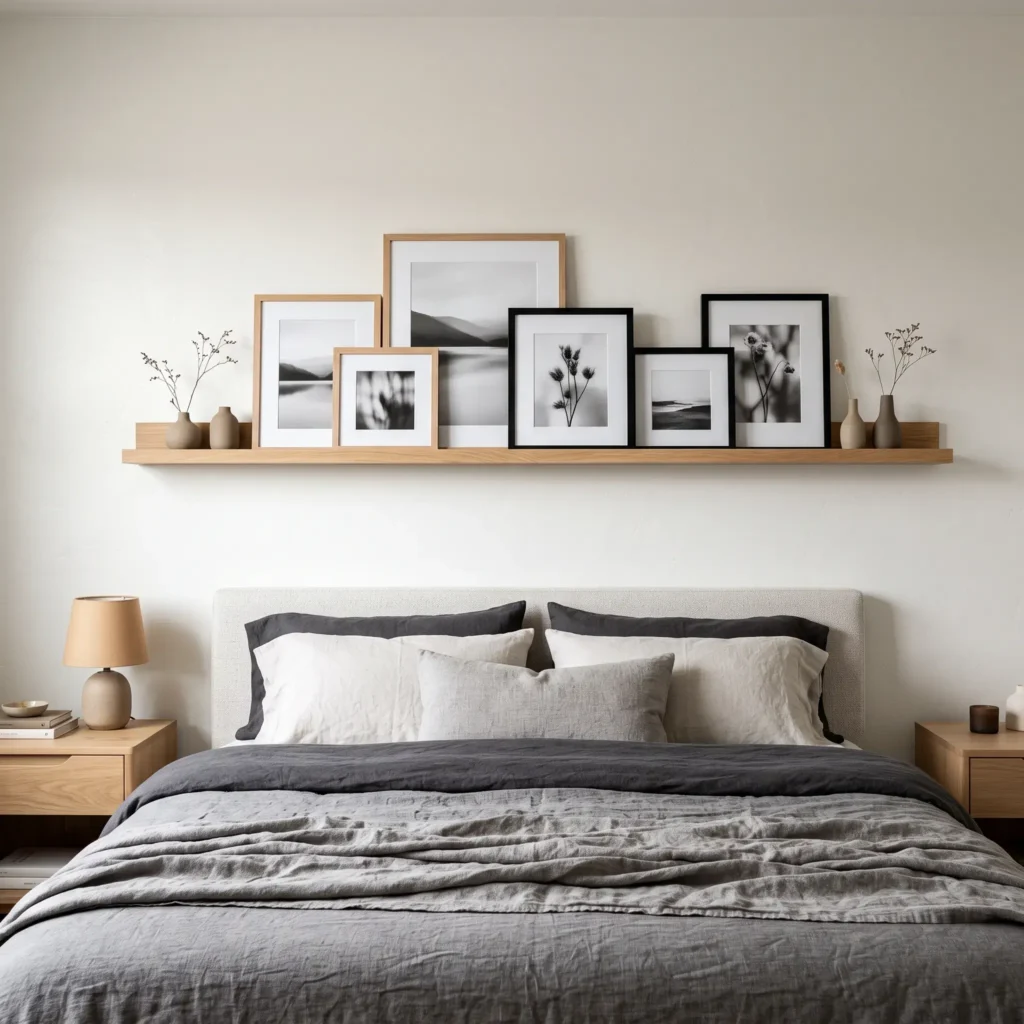
A floating display shelf provides a place to rotate artwork, stack paperback books, and rest small objects without using floor space for nightstands. Because this shelf sits right above your sleeping area, proper installation is critical.
How to Build It
- Never use a flat floating shelf over your bed. Pick a picture ledge with a 3/4-inch front retention lip to stop frames from sliding off when the wall vibrates.
- Mount the bottom of the shelf at least 32 inches above your mattress surface so you can sit up straight without hitting your head.
- Fasten the ledge directly into two structural wall studs with 3-inch timber screws. Never trust hollow drywall anchors above your head.
Materials and Products Needed
- Solid wood picture ledge (60 inches wide for a Queen bed, featuring a raised front lip)
- 3-inch star-drive hardened cabinet screws
- Assorted lightweight framed art prints (choose acrylic front panels instead of heavy glass)
- Wireless rechargeable LED puck reading light with magnetic base
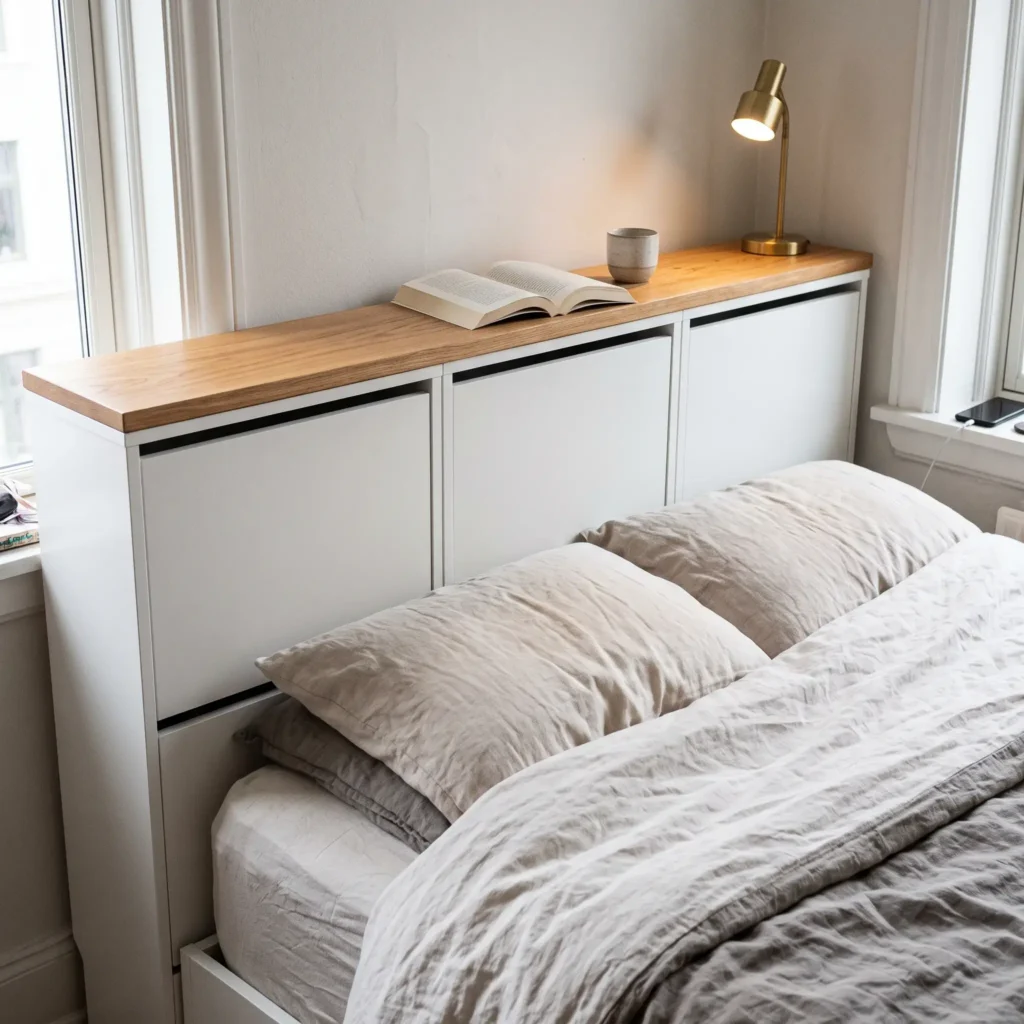
6. The Slimline Tilt-Out Storage Headboard
Small bedrooms often lack room for bedside tables. By mounting three shallow storage cabinets across the back of the bed, you create a headboard with only 7 inches of depth that conceals books, glasses, and cables.
How to Build It
- Mount three shallow polypropylene shoe storage cabinets (such as IKEA Trones) horizontally side by side on your wall using metal toggle anchors.
- Position them so the top edge sits 6 inches above your mattress line. This lets the bins tilt forward freely without catching on your pillows.
- Cut a piece of 1×8 white oak or pine board to span across the top of all three cabinets.
- Secure the wood board from underneath using 5/8-inch wood screws to conceal the plastic seams and form a solid display ledge.
Materials and Products Needed
- Three IKEA Trones storage cabinets (or similar shallow wall-mounted tilt bins)
- 1×8 clear pine or white oak lumber cut to 62 inches long
- 3/16-inch snap-toggle hollow drywall anchors
- 5/8-inch wood screws
- Peel-and-stick felt drawer liner to quiet items inside the bins
7. The Painted Architectural Arch
A painted headboard takes up zero floor space, costs under $30, and defines your sleeping area using simple color. A tall Roman arch visually draws the eye upward, making standard 8-foot ceilings feel noticeably taller.
How to Build It
- Mark your bed width plus 2 inches on each side using a pencil.
- Run vertical lines of painter’s tape from the baseboard up to your chosen arch spring line (about 48 inches high).
- Place a thumbtack dead-center between the tape lines. Tie non-stretching string to the tack, attach a pencil at the outer line, and draw a smooth semi-circular arc.
- Paint the curved boundary using a small angled sash brush, fill the central area with a mini roller, and pull the tape while the second coat remains wet.
Materials and Products Needed
- 1 quart of premium interior paint in a washable satin or eggshell finish
- Green edge-treated painter’s tape (FrogTape)
- 1.5-inch angled sash paintbrush
- 4-inch mini microfiber paint roller with tray
- Heavy cotton twine and a standard thumb tack
- Image File Name: painted-arch-diy-headboard-accent-wall.webp
- Alt Text: Terracotta painted arch on an off-white wall framing a bed with white and rust-colored bedding.
Architectural Sizing and Clearance Guide
The most common mistake with DIY headboards is incorrect sizing. A headboard that is too narrow makes your bed look awkward, while hanging a headboard too high leaves an unfinished gap behind your pillows.
Use these standard US mattress dimensions to plan your project width and height:
| Mattress Size | Mattress Dimensions | Flush Headboard Width | Extended Overhang Width | Recommended Height Above Mattress |
|---|---|---|---|---|
| Twin | 38 in × 75 in | 38 to 40 in | 42 to 44 in | 20 to 24 in |
| Full / Double | 54 in × 75 in | 54 to 56 in | 58 to 60 in | 24 to 28 in |
| Queen | 60 in × 80 in | 60 to 62 in | 64 to 66 in | 28 to 32 in |
| King | 76 in × 80 in | 76 to 78 in | 80 to 84 in | 30 to 36 in |
| California King | 72 in × 84 in | 72 to 74 in | 76 to 80 in | 30 to 36 in |
The 3-Inch Overlap Rule
Never mount a headboard flush with the resting top edge of your mattress. When you sit or lie down, your mattress foam and internal coils compress by 1 to 3 inches.
If your headboard stops right at the uncompressed mattress surface, that dip creates an open void. Your pillows will slide into the crack, and your lower back will press against bare drywall. Always extend the bottom edge of any wall panel or hanging cushion 2 to 4 inches below the top surface of the uncompressed mattress.
Wall Mounting Hardware: Choosing the Right Anchors
Your headboard must hold two distinct types of weight: the downward pull of gravity, and the outward pulling force when you recline back to read.
Common plastic expansion plugs fail under repeated leaning force. Over time, that outward tension loosens the plastic sleeve and rips out a section of drywall. Match your mounting hardware to your wall type:
- Mounting directly into a wood wall stud: Use 2.5-inch to 3-inch hardened steel cabinet screws. Each screw provides over 100 pounds of reliable holding capacity.
- Mounting into hollow drywall (under 10 pounds): Use expanding metal molly sleeve anchors.
- Mounting into hollow drywall (over 10 pounds): Use 3/16-inch solid steel snap-toggle bolts. Toggle bolts spread the load across the back face of the gypsum core.
- Rental apartments with strict drill limits: Use heavy-duty interlocking adhesive strips for flat graphics, or let the mattress base hold the weight using friction.
Preventing Annoying Wall Knocks
If your headboard hangs close to the wall, daily tossing and turning can cause it to tap against the paint.
Stick 1/4-inch thick adhesive wool felt pads or small rubber bumper dots to the lower back corners of the headboard. The felt cushions dynamic impact, accommodates uneven wall surfaces, and keeps your bed completely silent.
Frequently Asked Questions
Can you use a headboard without attaching it to the bed frame?
Yes. Wall-hung panels, suspended cushion rails, and freestanding folding screens work independently of your bed frame. Mounting your headboard to wall studs stops kinetic vibration, eliminates bed squeaks, and protects your drywall from scuffs.
How do I stop my bed from sliding away from a detached headboard?
If your mattress base sits on smooth wood, vinyl plank, or tile, place non-slip rubber caster cups beneath each bed leg. High-grip rubber floor pads keep your platform base firmly in position when you lean back against the wall.
What is the best headboard alternative for renters?
The easiest damage-free options are a freestanding three-panel rattan folding screen or an oversized triangular wedge bolster cushion. The folding screen stands upright through mattress friction, while a bolster cushion rests directly on top of the mattress, requiring zero screws or wall tape.
How high should a floating headboard hang above the floor?
The bottom edge of the headboard should drop 2 to 4 inches below the top line of your mattress. For a typical 25-inch high mattress and foundation, set the bottom edge around 21 to 23 inches from the floor, extending upward 28 to 34 inches.
Making Your Decision
You do not have to spend hundreds of dollars on a bulky bed frame to give your room a clean, finished look.
If you read in bed and want cushioned comfort, choose the hanging linen rail or the channel-tufted velvet wall. If you live in a tight studio apartment and need extra storage, build the tilt-out cabinet shelf. If you rent and cannot drill into your walls, pick the friction-fit folding screen.
Take accurate measurements of your mattress width, add 2 to 4 inches for clean visual balance, and use proper metal wall anchors. You will save money while creating a bedroom setup built around your everyday needs.