8 DIY Halloween Decor: Budget-Friendly Ideas for an Elevated Home
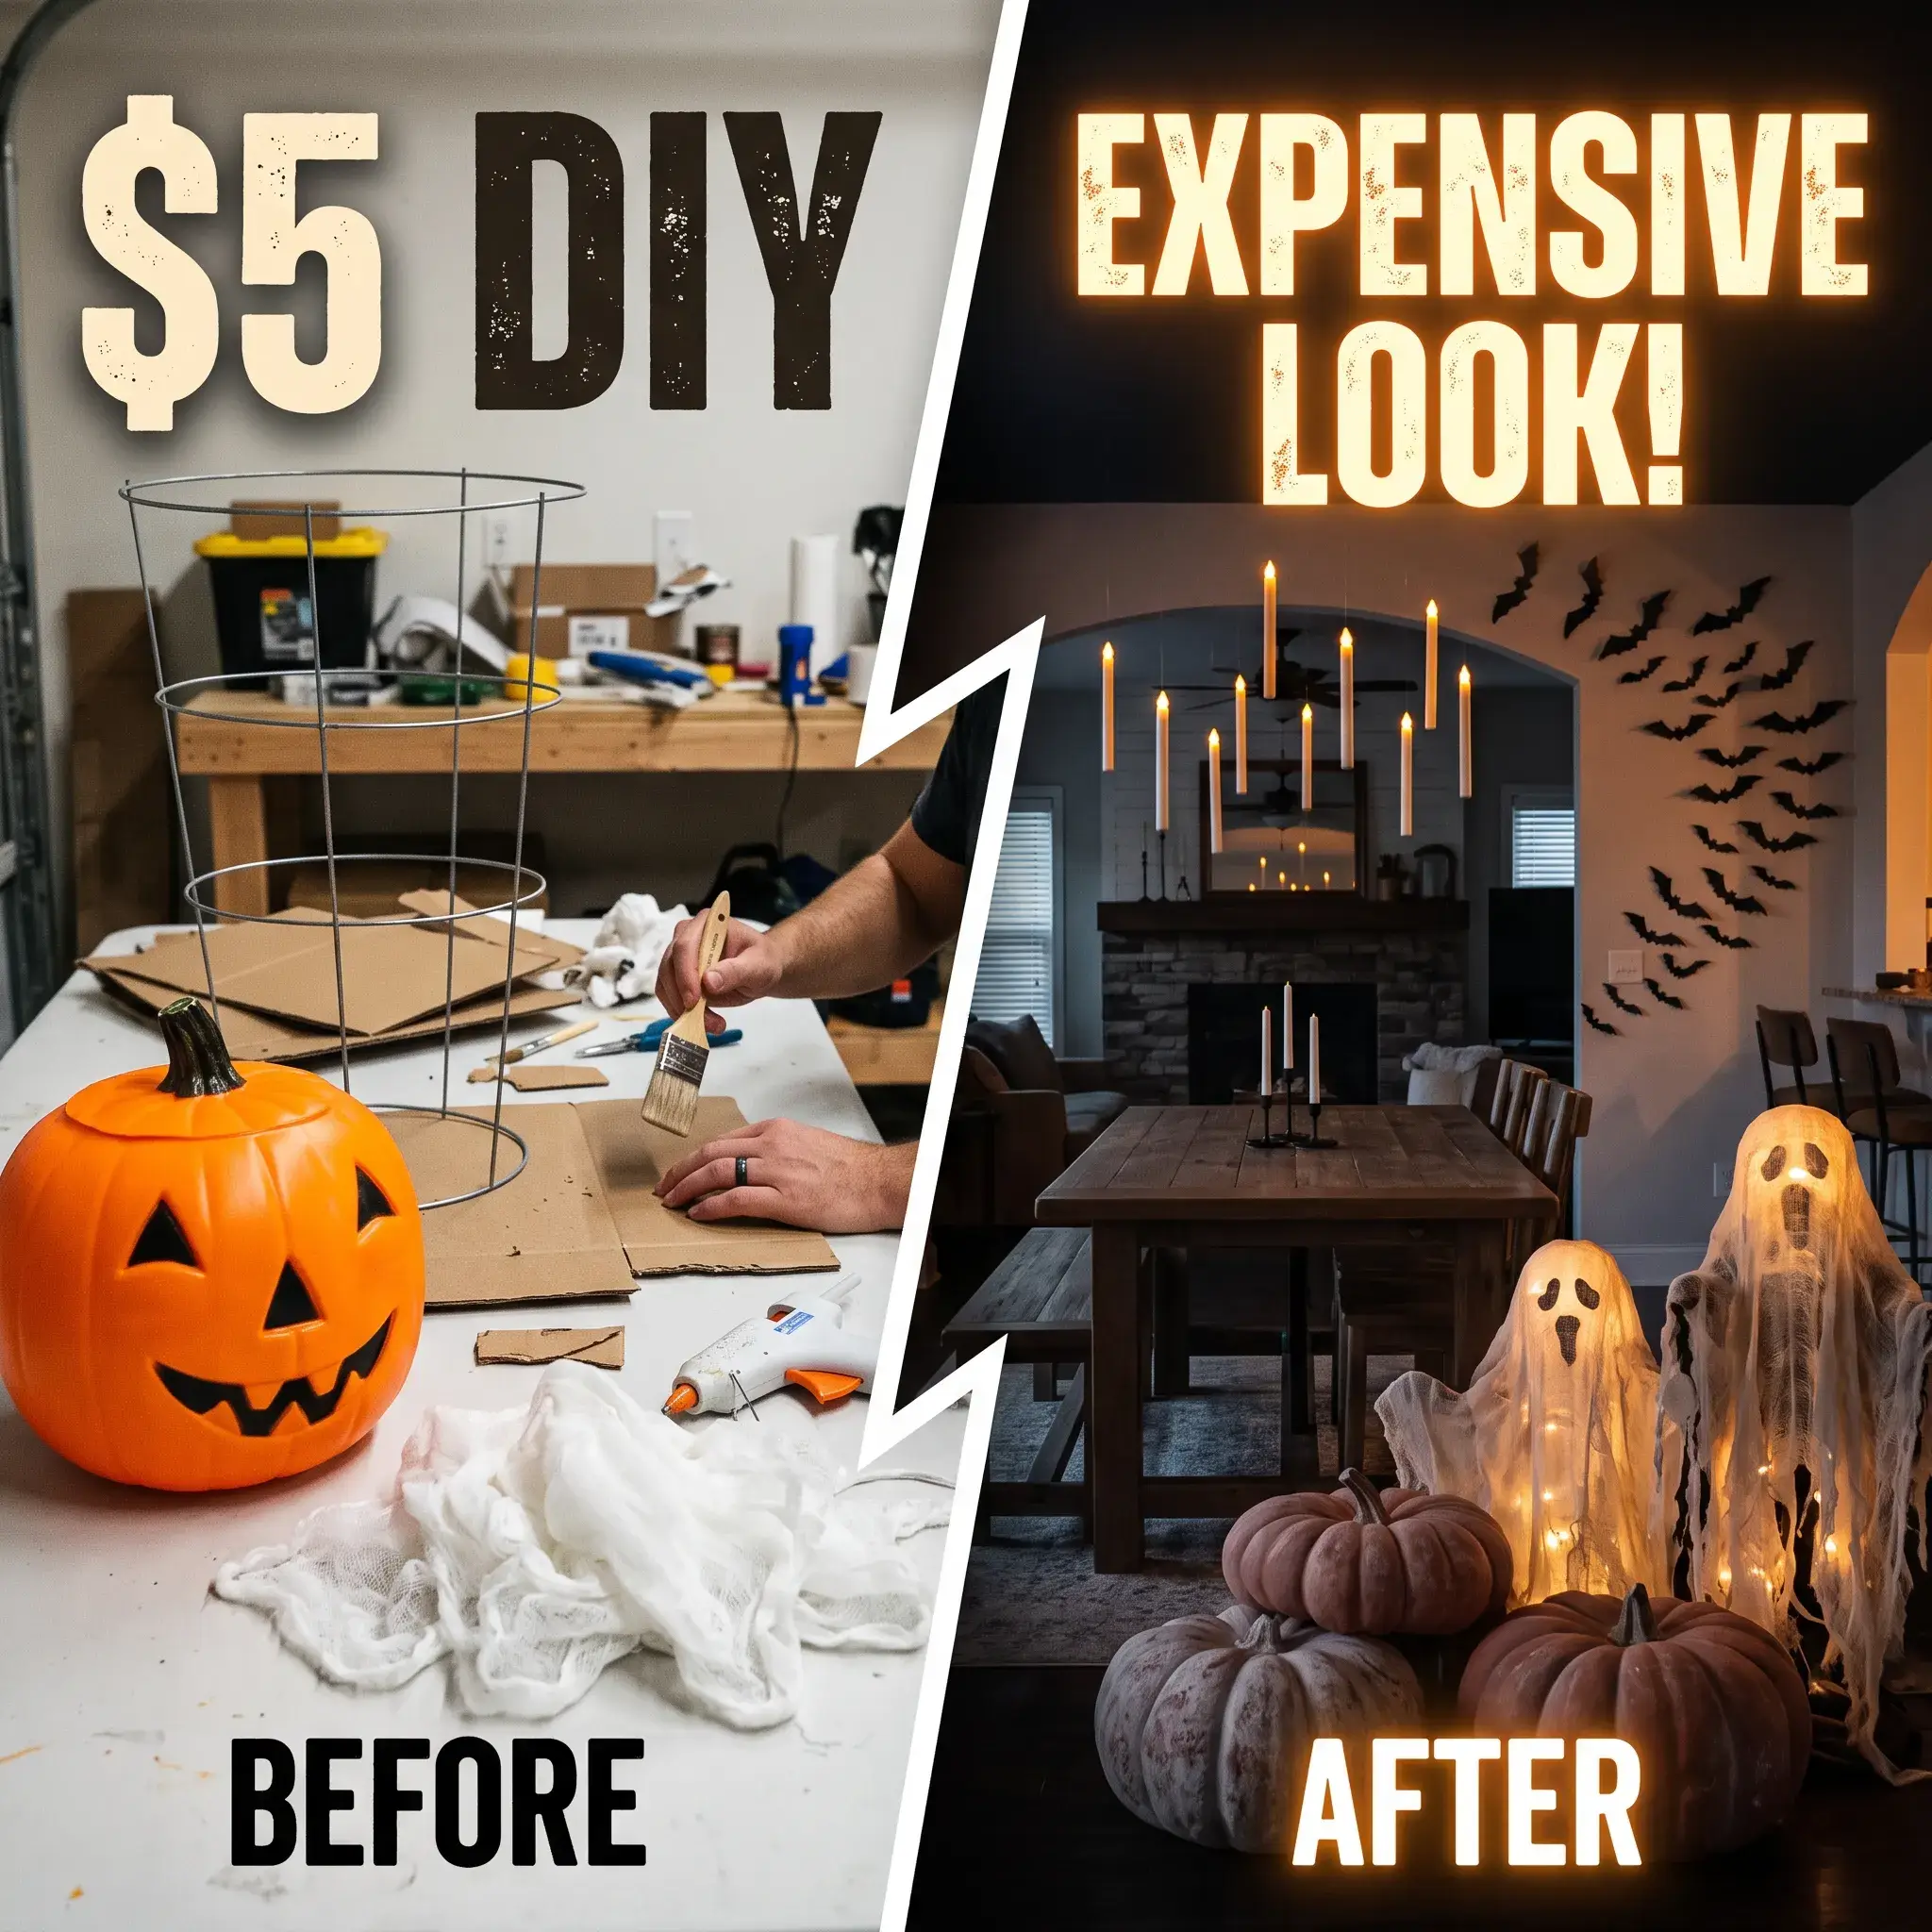
Store-bought Halloween displays often feel flimsy, look neon, and cost too much money. Most plastic items end up cracked in a garbage bin after a single season.
You can make authentic, theater-quality props at home using basic hardware supplies, pantry staples, and recycled household containers. The secret relies on classic scenic painting, warm low-voltage lighting, and realistic matte textures.
Here are eight high-impact DIY projects that bring a moody, designer look to your living space without draining your wallet.
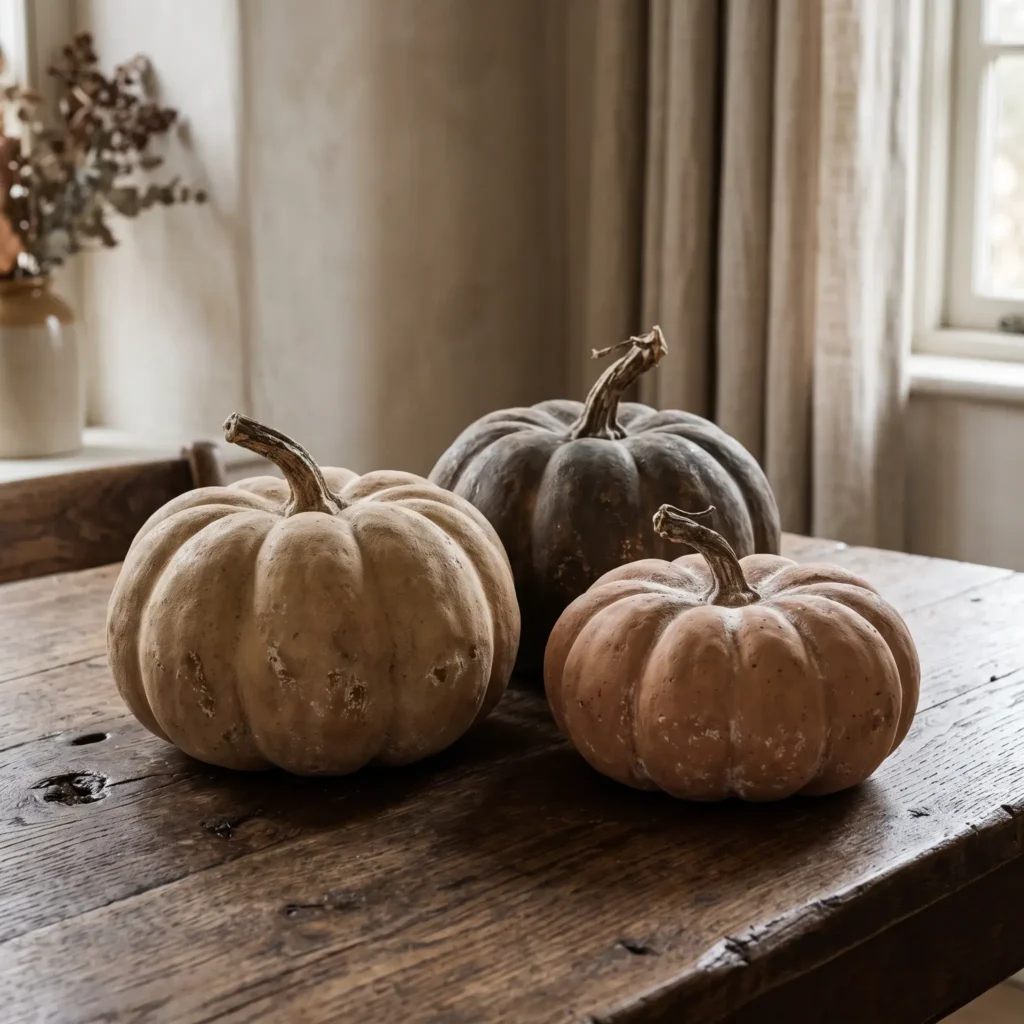
1. Faux Terracotta Pumpkins (Baking Soda Slurry Method)
Bright orange plastic pumpkins look shiny and synthetic. You can turn them into authentic ceramic stoneware using an inexpensive texturing mixture from your kitchen pantry.
How to Build It
- Scuff the shiny plastic surface with fine 120-grit sandpaper so your paint bonds firmly.
- Mix flat acrylic craft paint and baking soda in an exact 1:1 ratio inside a bowl. The mixture will foam slightly and create a thick, spreadable paste.
- Dab the mixture onto the pumpkin using a coarse chip brush. Do not stroke the brush flat. Stipple the bristles up and down to create a rough earthenware texture.
- Let the first coat dry for one hour, then apply a second coat over bare spots.
- While that second coat is still wet, dust a pinch of unbleached flour or dry baking soda across the surface. Rub the powder in gently with your fingertips to simulate aged mineral deposits.
Products and Supplies List
- Inexpensive plastic or foam craft pumpkins (dollar store or thrift shop)
- Flat matte acrylic craft paint in terracotta, warm stone, or charcoal black
- Standard baking soda (sodium bicarbonate)
- All-purpose flour (for mineral dusting)
- 1-inch coarse chip brush
- 120-grit sandpaper sheet
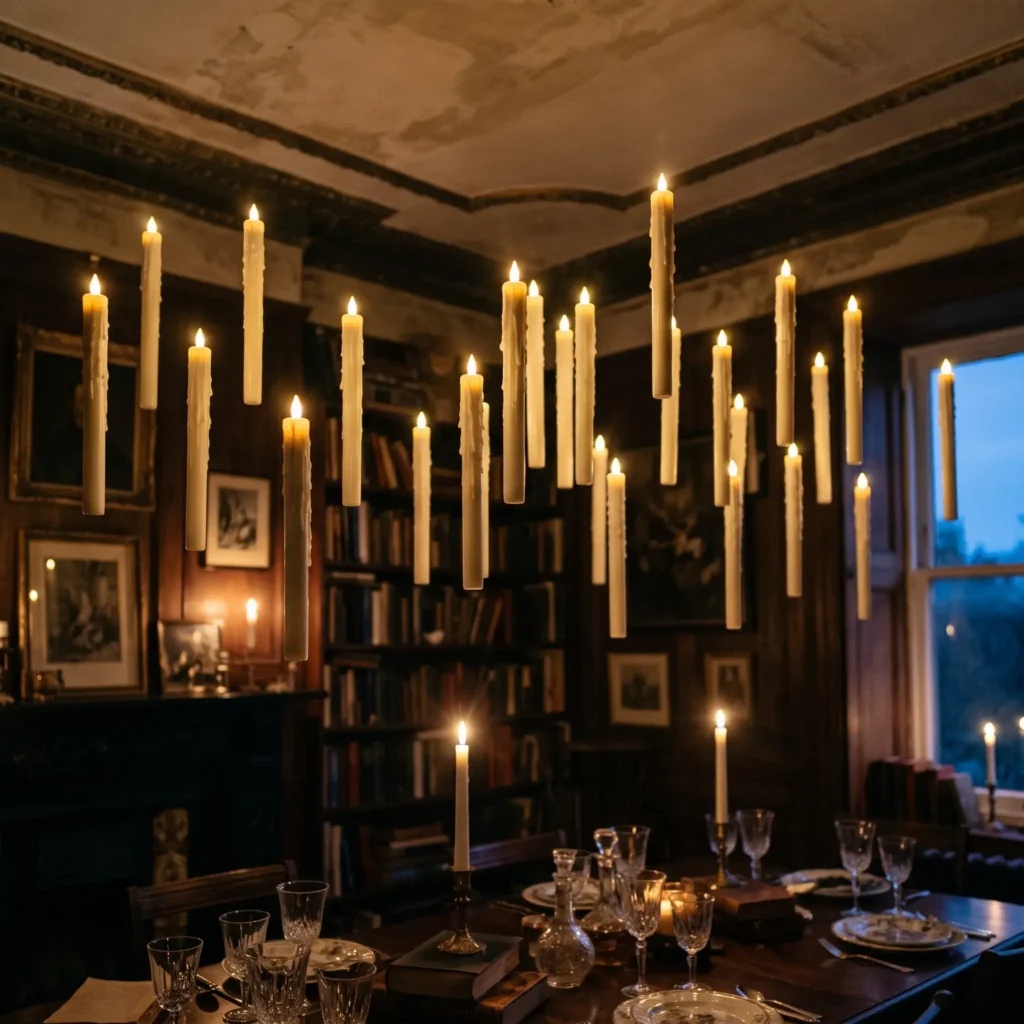
2. Suspended Great Hall Floating Taper Candles
Hanging candles create instant drama over dining tables, mantels, and entryways. You do not need to buy costly specialty kits when you have cardboard cores in your recycling bin.
How to Build It
- Cut cardboard paper towel rolls and bath tissue cores into varied lengths between 4 and 10 inches.
- Heat a hot glue gun. Run thick lines of hot glue along the top rim, letting the glue drip naturally down the sides to mimic melted wax.
- Apply a heavy bead of hot glue inside the tube, roughly 3/4 inch below the top opening. This forms a built-in shelf to hold your light.
- Glue a small cardboard circle inside the bottom opening to conceal the hollow interior when viewed from below.
- Coat the entire tube with flat ivory or bone-white spray paint.
- Thread clear 4-pound monofilament fishing line through two small pinholes near the top rim.
- Set a battery-operated LED tea light onto the inner glue shelf. Hang the candle from your ceiling using clear pushpins.
Products and Supplies List
- Empty cardboard paper towel and toilet paper tubes
- High-temperature hot glue gun and clear glue sticks
- Battery-operated flickering LED tea lights (1.5-inch diameter)
- 4-pound to 8-pound clear monofilament fishing line
- Matte bone-white or charcoal spray paint
- Clear thumbtacks or ceiling hooks
Check out more Interior Ideas
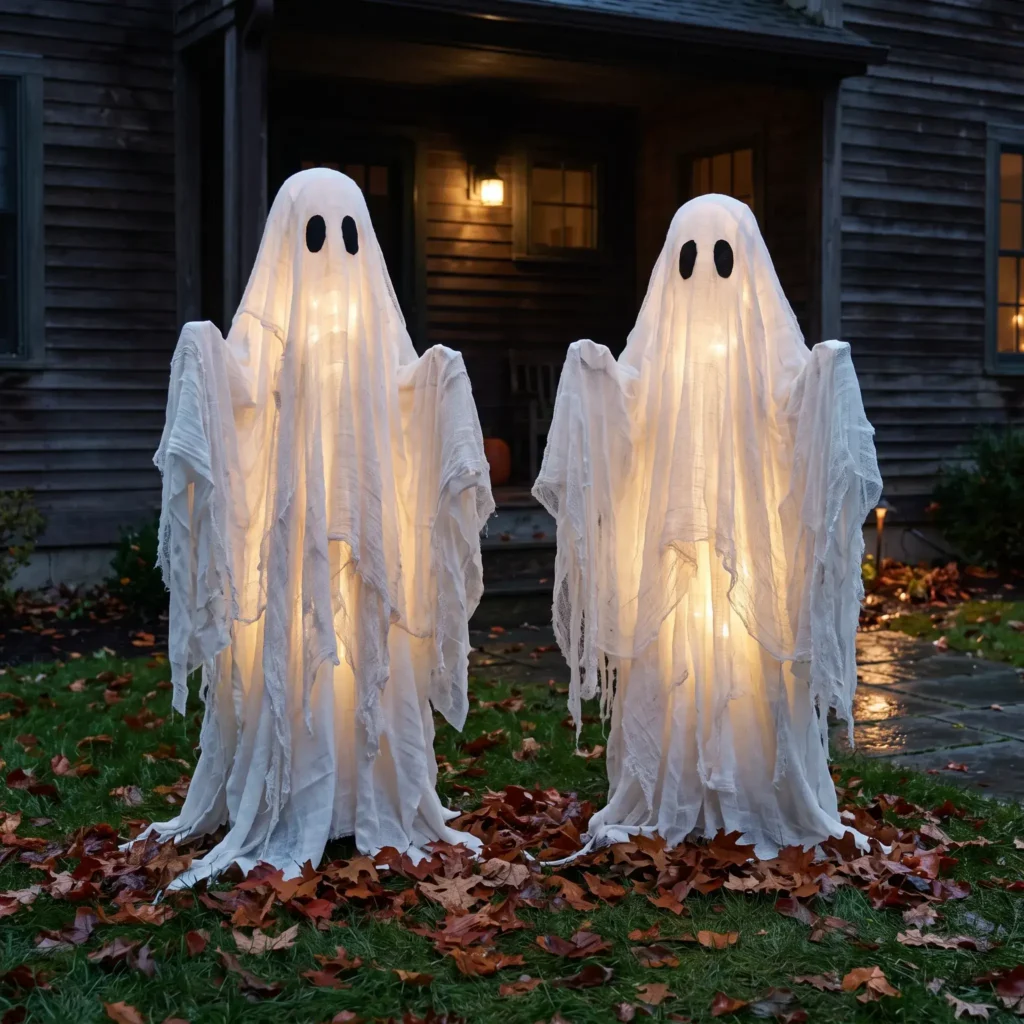
3. Weatherproof Tomato Cage Porch Specters
Inverted wire tomato cages provide an exceptionally stable steel frame for life-sized outdoor figures. This build withstands heavy autumn wind and costs a fraction of retail yard props.
How to Build It
- Turn a 42-inch galvanized wire tomato cage upside down. The widest circular wire ring now rests flat on the ground.
- Gather the pointed metal prongs at the top. Fasten them together tightly with two heavy-duty zip ties.
- Push an 8-inch foam craft ball or an empty plastic milk jug onto the top prongs to form the head.
- Wrap a strand of battery-operated warm-white micro LED wire lights down the frame ribs.
- Drape an inexpensive white polyester bedsheet or white vinyl tablecloth over the frame. Avoid untreated cotton sheets because cotton absorbs rain and sags heavily.
- Add a layer of loose, shredded cheesecloth over the sheet to create windblown movement.
- Cut two oval eye shapes from black outdoor vinyl and stick them directly to the face area.
- Drive two 6-inch steel landscape U-stakes over the bottom wire ring into the turf to hold the figure down.
Products and Supplies List
- 42-inch galvanized steel tomato cage
- 8-inch styrofoam craft sphere or hollow plastic jug
- 50-count battery-operated outdoor LED fairy lights
- Twin-size white polyester bedsheet or outdoor polyester fabric
- Grade 10 loose cotton cheesecloth
- Matte black adhesive vinyl sheet or waterproof craft felt
- Heavy-duty nylon zip ties (8-inch)
- 6-inch steel landscape U-stakes
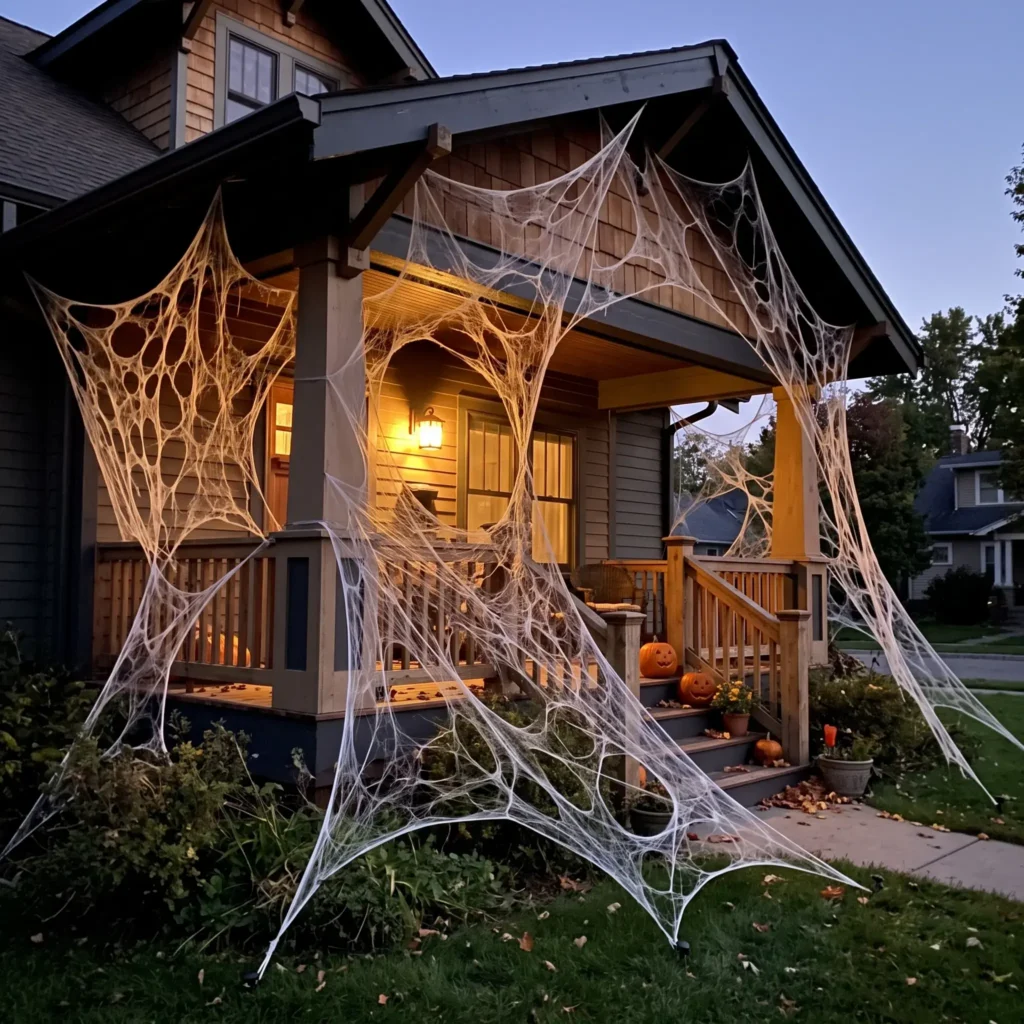
4. Industrial Beef Netting Spiderwebs
Bagged polyester cobweb batting shreds easily in mild wind and traps backyard songbirds. Industrial tubular beef netting creates realistic funnel webs that survive heavy storms and pack away cleanly for next year.
How to Build It
- Order a roll of polyester-cotton tubular beef netting (stockinette) from a butcher supply shop or hardware store.
- Use sharp fabric shears to cut the continuous tube open down one side, unfolding it into a flat sheet twice its original width.
- Lay the netting out flat across your driveway or porch floor.
- Cut small, staggered horizontal slits every few inches using fabric scissors. Do not cut completely through the edges of the sheet.
- Anchor the top edges of the netting to your porch trim or gutters using exterior hooks.
- Pull the lower corners down toward your porch railing or yard, securing them with ground stakes. As the fabric pulls tight, the small slits expand into realistic geometric webs.
Products and Supplies List
- 10-foot to 20-foot roll of industrial polyester-cotton beef netting (stockinette)
- Heavy-duty fabric shears or utility knife
- Outdoor gutter hooks or siding clips
- 6-inch steel landscape ground stakes
- Large faux plastic spiders (optional accent)
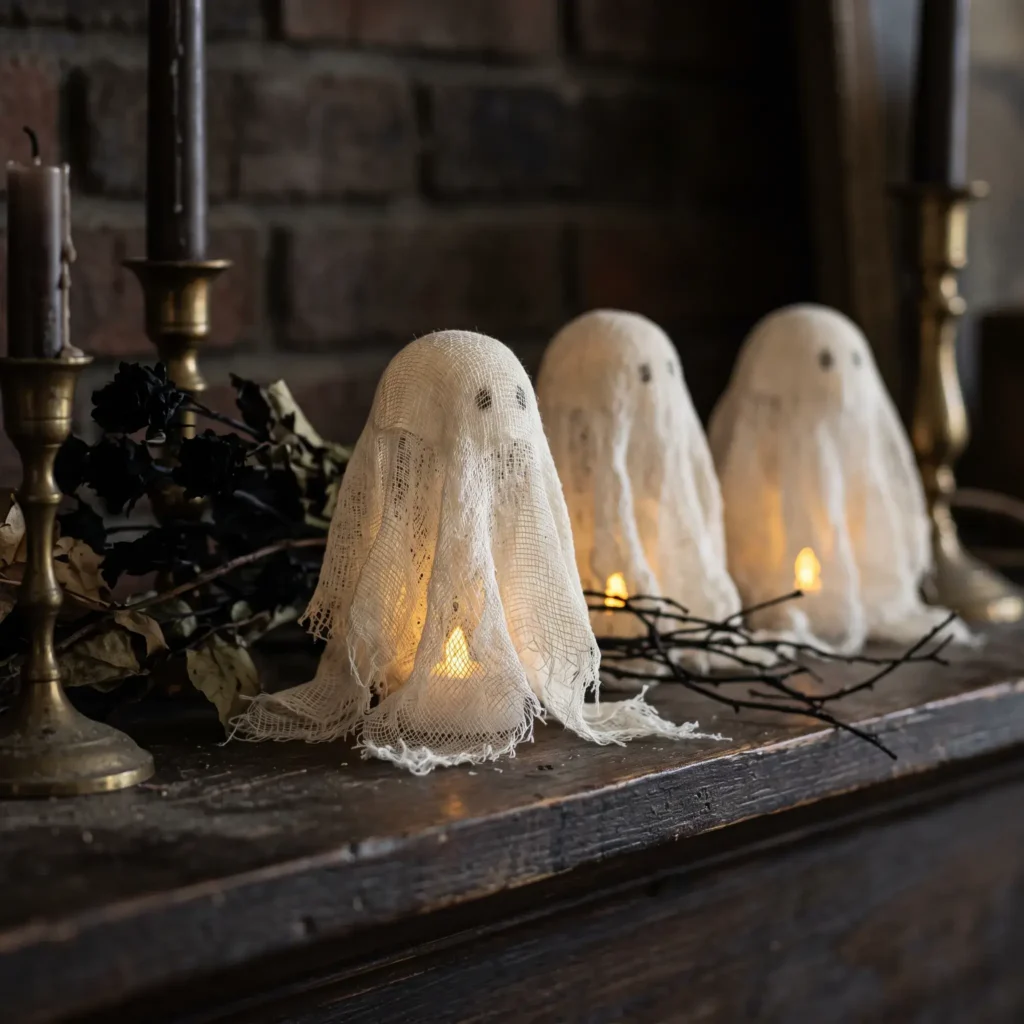
5. Freestanding Stiffened Gauze Specters
These tabletop figures stand completely on their own without permanent wire armatures inside. They fit neatly onto fireplace mantels, floating shelves, and dining consoles.
How to Build It
- Build a temporary support mold on your work table using a glass bottle topped with a small balloon. Wrap the mold in plastic food wrap so the wet cloth will not stick to it.
- Mix two parts white PVA craft glue with one part warm water in a wide container until smooth. You can also use undiluted liquid laundry starch.
- Cut Grade 10 to Grade 50 unbleached cotton cheesecloth into rectangular strips.
- Soak the cheesecloth strips in the glue liquid. Squeeze out the excess moisture until the cloth stops dripping.
- Drape the wet strips over your temporary mold in crisscrossing layers. Arrange the bottom edges to pool flat on your table, which forms a broad base to hold the ghost upright once dried.
- Allow the fabric to cure undisturbed for 24 hours.
- Slip the glass bottle and balloon out from underneath the rigid shell. Set a small flameless LED tealight underneath to light the piece from within.
Products and Supplies List
- Grade 10 to Grade 50 unbleached cotton cheesecloth
- Standard white PVA craft glue or liquid laundry starch
- Empty glass bottles and small balloons (temporary forms)
- Plastic food cling wrap
- Flameless battery-operated LED tealights
6. Swirling Apothecary Specimen Bottles
Turn discarded condiment jars and beverage containers into shimmering potion bottles using basic kitchen liquids and mineral powders.
How to Build It
- Soak old glass jars in hot soapy water to remove paper labels. Dry the glass thoroughly.
- Fill each jar 90% full with distilled water.
- Pour in 10% clear vegetable glycerin or clear liquid hand soap. The thick glycerin slows down liquid flow, keeping the shimmer suspended longer.
- Add two drops of liquid food dye or green alcohol ink for color.
- Add a small pinch of cosmetic-grade powdered mica.
- Seal the cap or cork with a bead of hot glue to prevent spills.
- Tie natural jute twine around the bottle neck. Swirling the bottle gently creates flowing, cloud-like currents inside the glass.

Products and Supplies List
- Recycled clear and amber glass jars with lids or corks
- Distilled water
- Clear vegetable glycerin or clear liquid soap
- Cosmetic mica powder (pearl, emerald green, or bronze)
- Alcohol ink or liquid food coloring
- Natural jute twine
- Hot glue gun
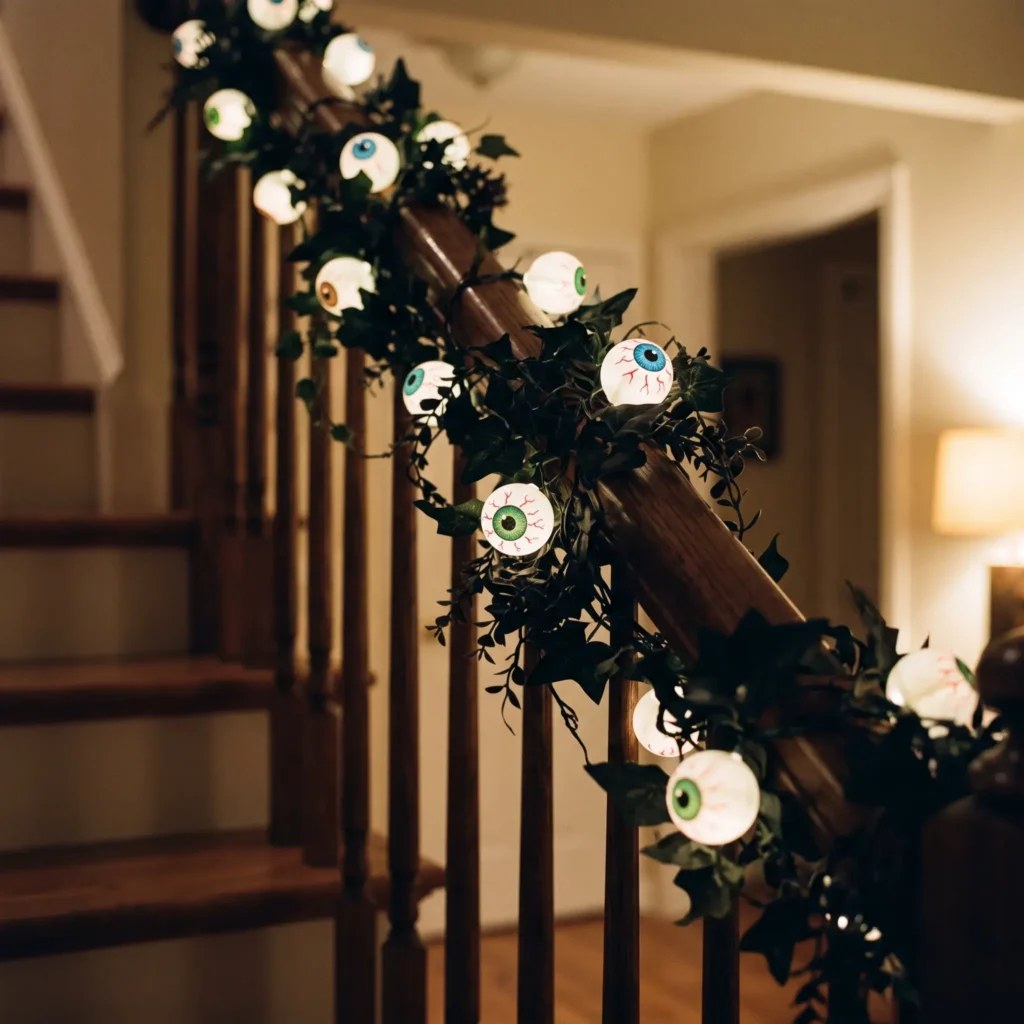
7. Diffused Ping Pong Ball Eyeball Garland
Standard string lights often look harsh and show bare wire points. Plastic table tennis balls act as effective optical diffusers, transforming bright bulb points into soft, glowing spheres.
How to Build It
- Pick up a bulk pack of plain white table tennis balls.
- Use a craft knife to cut a small 1/8-inch “X” into the side of each ball. Keep the cut away from the molded seam.
- Draw irises and red capillary veins around the cut using fine-tip permanent markers.
- Push one micro-LED bulb from a holiday string through each cut. The flexible plastic grips the base of the light securely without tape or glue.
- Drape the finished strand along stair railings, entry tables, or front windows.
Products and Supplies List
- 24-pack of matte white plastic table tennis balls
- 100-bulb warm-white or green LED micro string light strand
- Precision craft knife with a fresh blade
- Fine-tip permanent markers (black, red, blue, green)
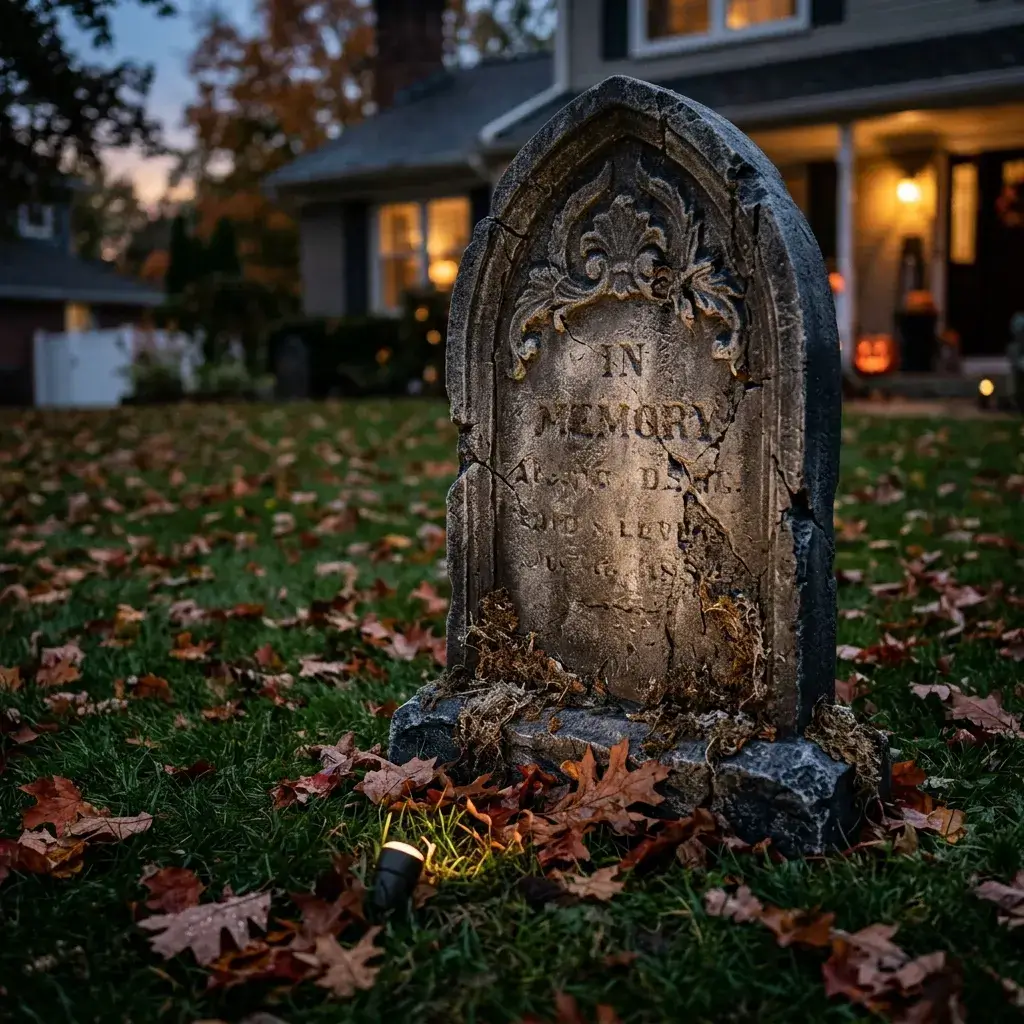
8. Faux Granite Cemetery Headstones (Monster Mud Coating)
Cardboard shipping boxes provide plenty of free building material, but raw cardboard warps when exposed to damp autumn air. Scenic prop makers coat cardboard frames in “Monster Mud” to form a durable, rock-like shell.
How to Build It
- Cut matching headstone shapes from thick corrugated shipping boxes. Cut two identical faces for each stone.
- Glue 2-inch cardboard scraps between the faces to give the piece realistic physical depth.
- Mix your Monster Mud in a sturdy pail: combine 4 parts premixed drywall joint compound with 1 part exterior latex paint.
- Brush a thin layer of the mixture over the cardboard using an old paintbrush. Let it dry for 24 hours. Thin coats stop the surface from cracking.
- Add a second coat to seal any exposed cardboard edges.
- Once fully dry, dry-brush light gray and bone-white acrylic paint across the high edges. Dab dark green paint or craft moss into the corners to simulate damp age.
Products and Supplies List
- Large corrugated cardboard shipping boxes
- 1 gallon premixed drywall joint compound
- 1 quart flat gray exterior latex house paint
- Utility knife and replacement blades
- Stiff 2-inch paintbrushes
- Craft moss and dark green acrylic paint (for aging accents)
Damage-Free Mounting Guide for Renters and Homeowners
Aggressive mounting tape tears drywall paper, while weak putty drops your displays in the middle of the night. Use these zero-damage techniques to hold props firmly in place.
The Painter’s Tape and Hot Glue Interface
Do not put hot glue directly onto painted interior drywall. First, clean your wall spot with an isopropyl alcohol wipe to remove household dust. Apply a strip of blue painter’s tape to the wall and press it down firmly.
Place a pea-sized drop of hot glue directly onto the paper backing of the tape, then press your lightweight prop into the glue for ten seconds. When taking down your decor, peel the painter’s tape away from the wall at a 45-degree angle. The tape and glue pull away cleanly without ripping your paint.
Exterior Brick Fasteners
Porous masonry resists tape and suction cups. Spring-steel brick clips clamp around standard bricks without drilling or screws. These tempered metal fasteners grip recessed mortar joints firmly, supporting up to 25 pounds of wreaths, framed signs, or heavy garlands.
Vinyl Lap Siding Hooks
Never drive nails or screws through vinyl siding panels. Puncturing the siding damages exterior moisture barriers and invites water intrusion. Stainless steel siding hooks slide directly into the horizontal gaps between your siding panels. They lock into the track to support up to 12 pounds of lighting strings, netting, or signs.
Webbing Face-Off: Industrial Beef Netting vs. Store-Bought Polyfiber
Selecting the right webbing material determines whether your outdoor display survives the first rainstorm.
| Feature | Conventional Bagged Polyfiber | Industrial Beef Netting (Stockinette) |
|---|---|---|
| Material Base | Loose polyester spun batting | Knitted continuous cotton-polyester tube |
| Wind Resistance | Poor; separates and tears in mild wind | High; stretches and flexes under tension |
| Rain Performance | Matts into solid, clumpy white patches | Drains water quickly and keeps its shape |
| Wildlife Safety | Dangerous; traps small birds and bats | Safe; tight knit prevents claw snagging |
| Reusability | Single-use; thrown away after Halloween | Multi-year; wash, dry, and store flat |
| Average Cost | $4 to $7 per bag | $12 to $18 for a 15-foot roll |
Illumination Safety: Managing Heat in DIY Props
Decorative lighting placed inside tight cardboard tubes, hollow plastic gourds, or draped gauze requires low-voltage, cold-operating diodes.
Traditional incandescent mini-lights run hot, often reaching surface temperatures above 150 degrees Fahrenheit. That heat dries out paper, melts craft glue, and creates a real fire risk near dry fabric.
- Stick with Battery-Operated LED Tea Lights: Surface temperatures stay below 85 degrees Fahrenheit. They remain cool to the touch and sit safely inside paper tubes or draped gauze.
- Select Automatic Timers: Pick LED tea lights and fairy light strands equipped with built-in six-hour timers. The lights turn off automatically each night, saving your battery supply without requiring you to disturb delicate props.
- Submersible Micro-LEDs for Liquids: When lighting potion jars or glass vessels, pick IP68-rated submersible puck lights. They operate on low voltage and generate zero surface heat inside fluid suspensions.
Project Cost and Build Time Matrix
Use this breakdown to plan your weekend builds based on available time and budget.
| Project Name | Primary Sourcing | Average Build Time | Total Project Cost | Difficulty Level |
|---|---|---|---|---|
| Faux Terracotta Pumpkins | Dollar store, pantry | 30 minutes | Under $5.00 | Beginner |
| Floating Taper Candles | Recycling bin, craft stash | 45 minutes | Under $4.00 | Beginner |
| Tomato Cage Specters | Hardware store, linen closet | 20 minutes | Under $10.00 | Beginner |
| Industrial Beef Netting Web | Meat supply or hardware shop | 35 minutes | $12.00 to $15.00 | Intermediate |
| Stiffened Gauze Specters | Supermarket, craft store | 25 minutes + drying | Under $6.00 | Beginner |
| Swirling Apothecary Bottles | Recycling bin, cosmetic stash | 15 minutes | Under $3.00 | Beginner |
| Diffused Eyeball Garland | Dollar store, holiday bins | 20 minutes | Under $5.00 | Beginner |
| Monster Mud Gravestones | Recycling bin, hardware store | 60 minutes + drying | Under $8.00 | Intermediate |
Frequently Asked Questions
How do you make cheap plastic Halloween decorations look expensive?
Remove the high-gloss shine. Inexpensive decorations look cheap because shiny plastic reflects harsh glare and highlights manufacturing seams. Sand the surface lightly with fine sandpaper, then apply flat spray paint, textured stone finishes, or a 1:1 baking soda paint slurry. Replacing cool-white neon bulbs with warm 2700K amber lighting also gives props a weathered, high-end appearance.
How can you hang outdoor Halloween decor without drilling into brick or siding?
Use mechanical fasteners designed for specific exterior materials. Slide curved stainless steel hooks into the seams of vinyl siding to secure lighting and props without puncturing the panels. For brick walls, snap tempered spring-steel brick clips over the brick face to support displays up to 25 pounds without adhesives or masonry screws.
What is the best way to waterproof homemade cardboard props?
Coat the cardboard in Monster Mud, which combines drywall joint compound with exterior latex house paint. Once the base layers cure, apply two coats of clear, water-based exterior polyurethane or brush-on masonry sealer. This forms a hard, moisture-resistant barrier that keeps autumn rain from softening the cardboard underneath.
How do you store delicate DIY Halloween decorations without crushing them?
Store hollow and stiffened pieces, like cheesecloth ghosts and floating candles, inside rigid plastic storage totes rather than flexible garbage bags. Place lightweight crumpled kraft paper between layers to prevent crushed shapes. For paper bat swarms, peel them off the wall and stack them flat inside a zip-top plastic freezer bag so the scored wing folds stay crisp for next year.
Building a memorable Halloween home display comes down to smart scenic techniques rather than large retail budgets. Focus on one or two prominent focal points, like your front porch or living room mantel, and build out complete vignettes using textured coatings and warm LED lighting. By transforming everyday household recyclables and simple hardware items, you can create durable, theater-quality seasonal decor that lasts for years.