8 Living Room Gallery Wall Ideas: Layouts That Will Not Look Messy
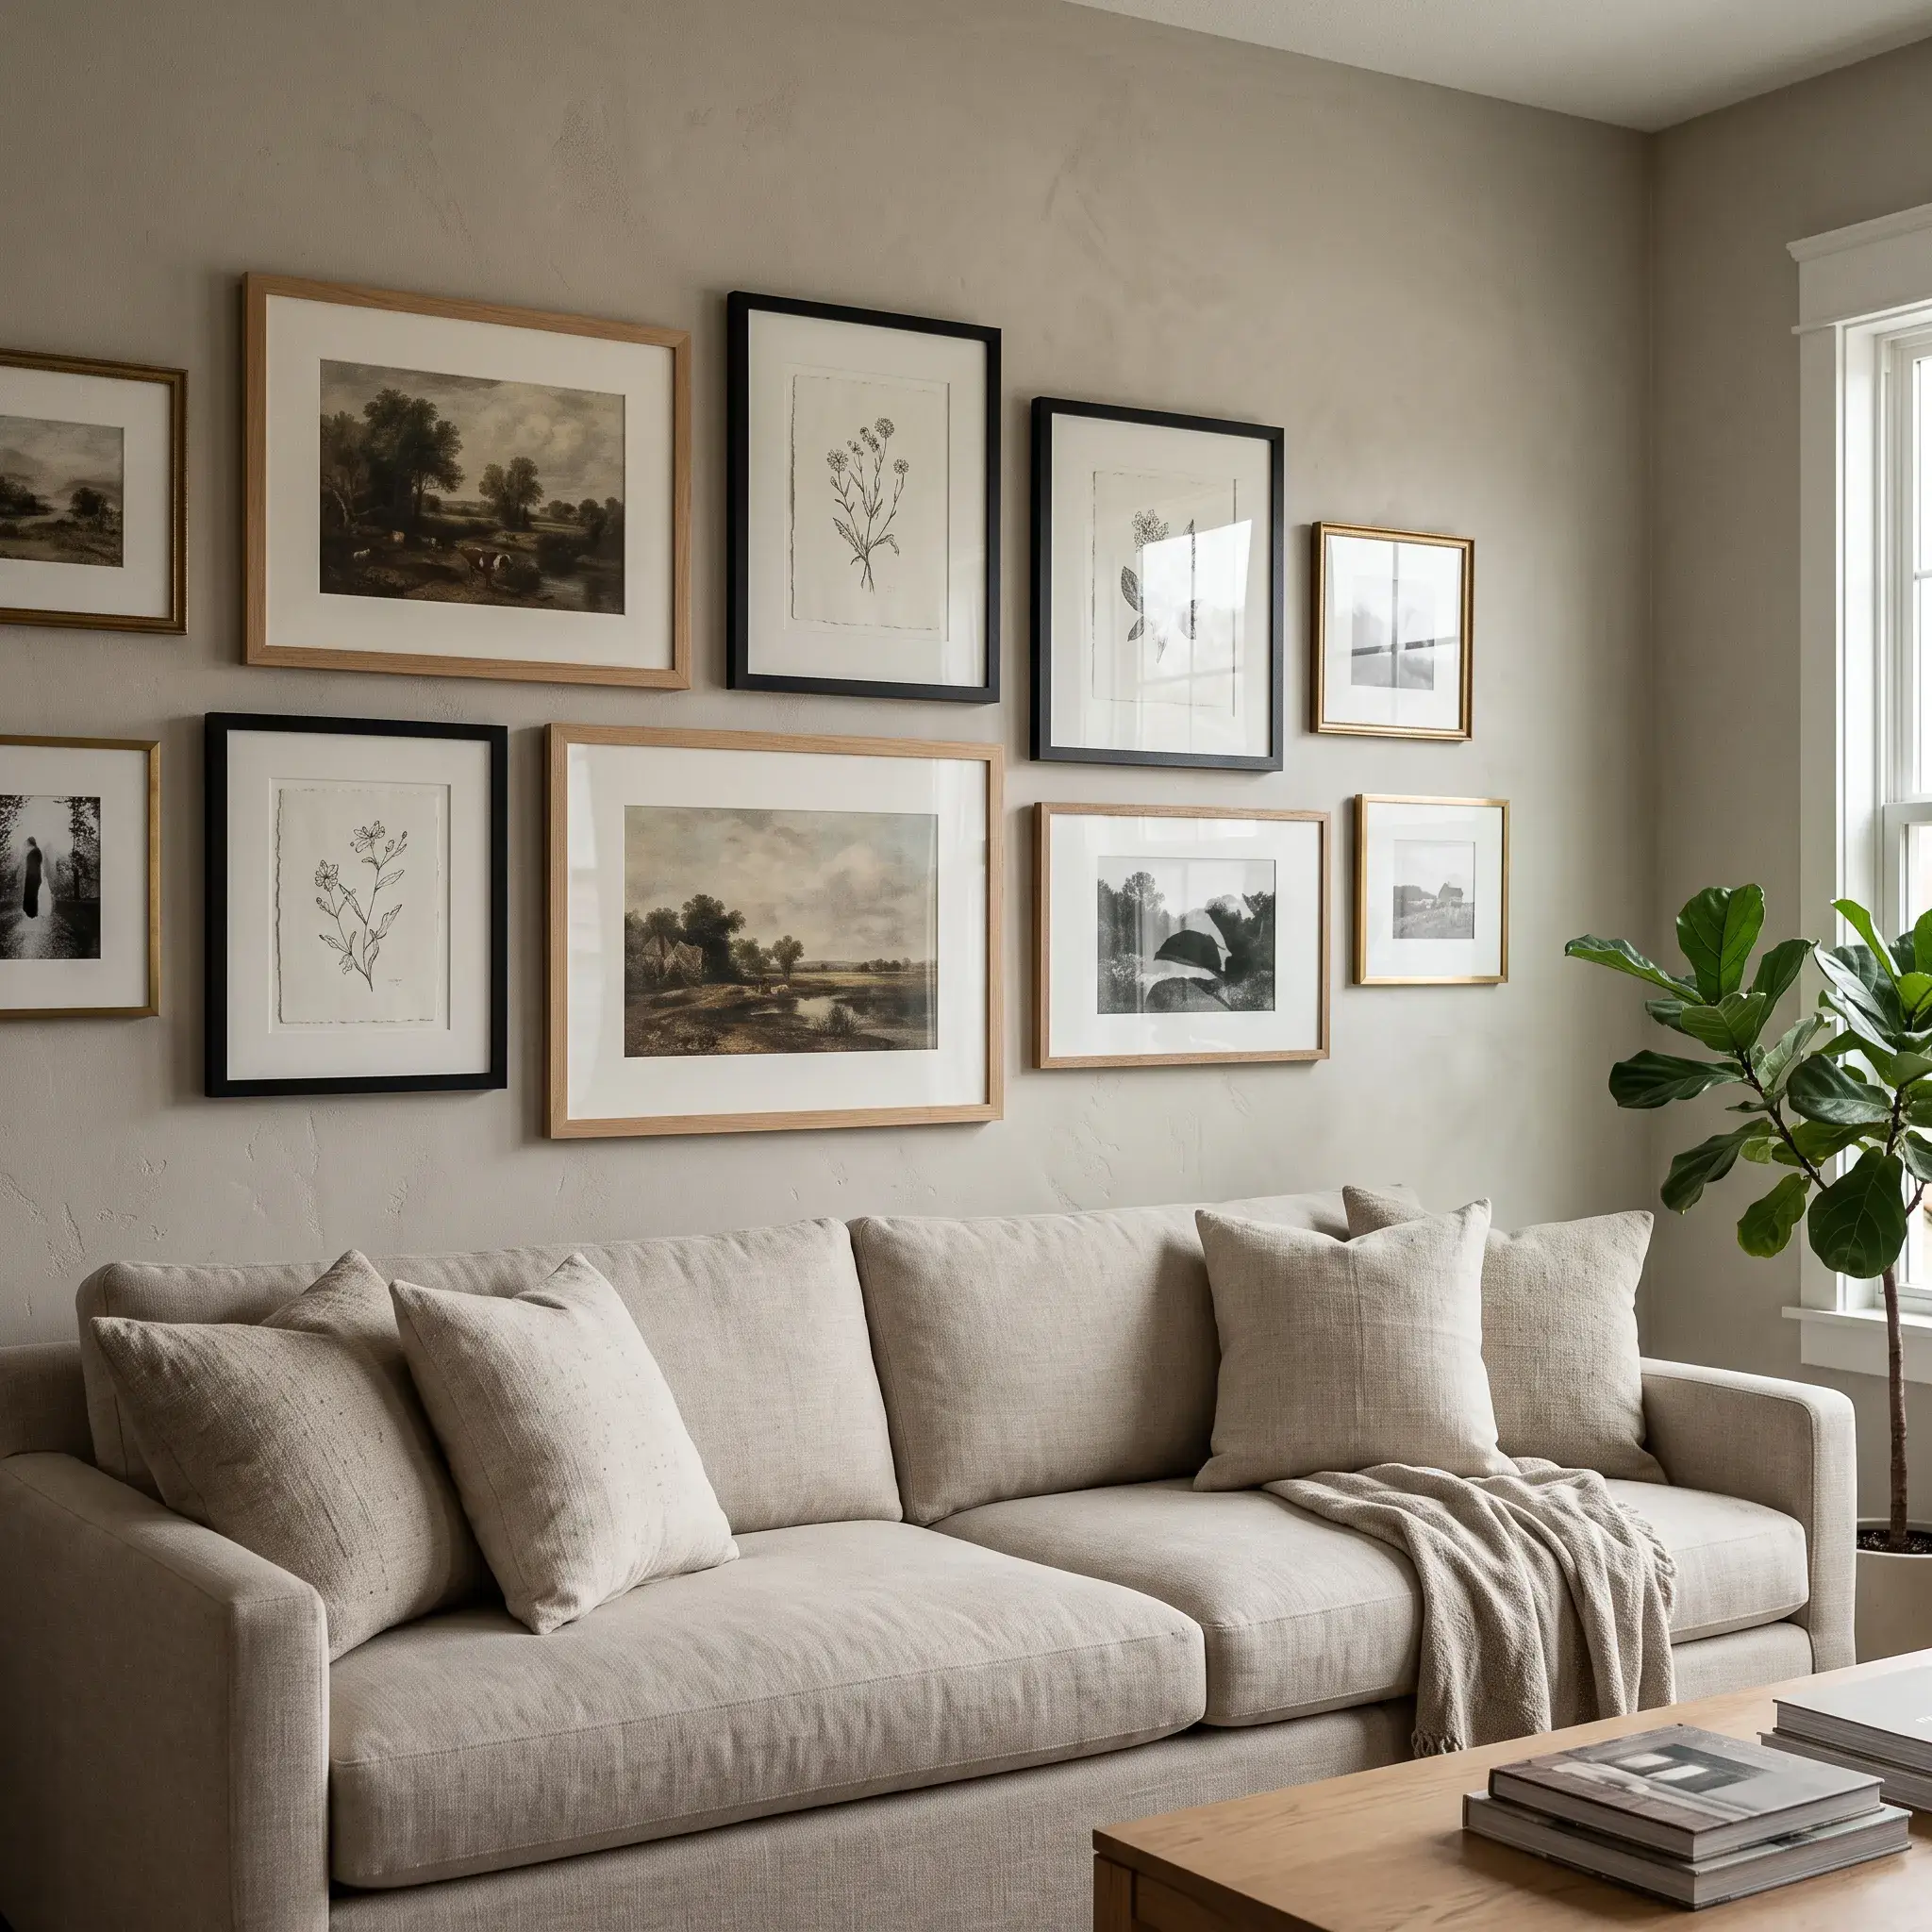
A bare wall behind your sofa can make your entire living room feel unfinished. Most people try to fix this by picking up random matching frames at target. They end up with crooked lines, uneven gaps, or an arrangement that looks tiny compared to their couch.
A well-planned gallery wall anchors the room. It balances the size of your seating, directs sightlines, and brings personal character into your home.
Here are 8 tested gallery wall layouts designed for real living rooms. Each idea includes styling advice, shopping items, and an ultra-realistic photo prompt so you can generate or commission the exact concept.
8 Practical Living Room Gallery Wall Ideas
1. The Symmetrical Nine-Frame Grid
This layout uses nine identical square frames set in three rows of three. It creates clean architectural lines and suits open living rooms with high ceilings. It looks best centered directly above a structured three-seater sofa. Because the frames form an exact square or rectangle, the layout keeps visual clutter low while filling wide vertical spaces.
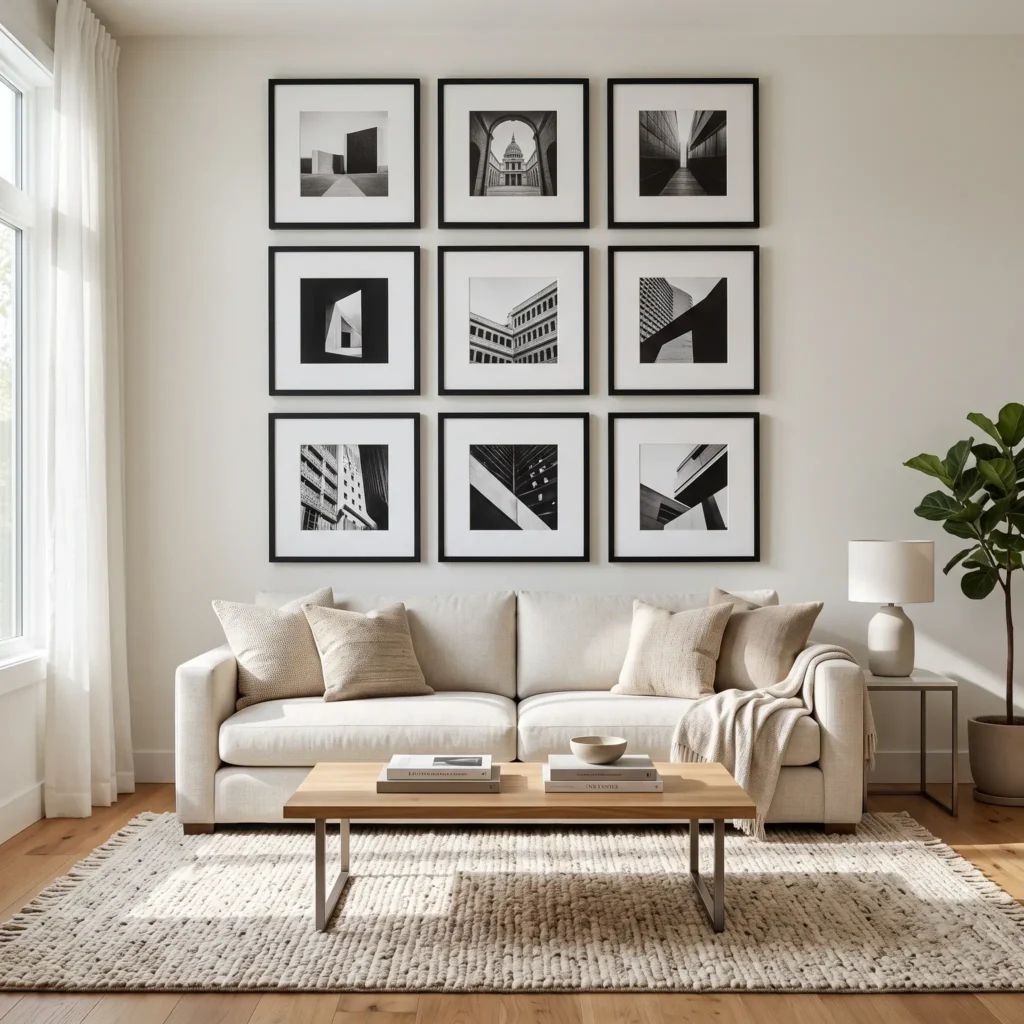
- Products Used:
- Nine 16×16 inch matte black solid wood gallery frames
- Custom 16×16 inch white mat boards with 8×8 inch square openings
- 8×8 inch black-and-white architectural photo prints
- Heavy-duty picture hanging level with dual bubble vials
2. The Asymmetrical Salon Above a Sectional
Salon layouts combine different frame sizes, finishes, and art styles without looking messy. This design sets a large anchor piece slightly off-center. Smaller sketches, oil studies, and a round brass accent then surround it. It works particularly well over long L-shaped sectionals where a rigid grid feels too stiff.
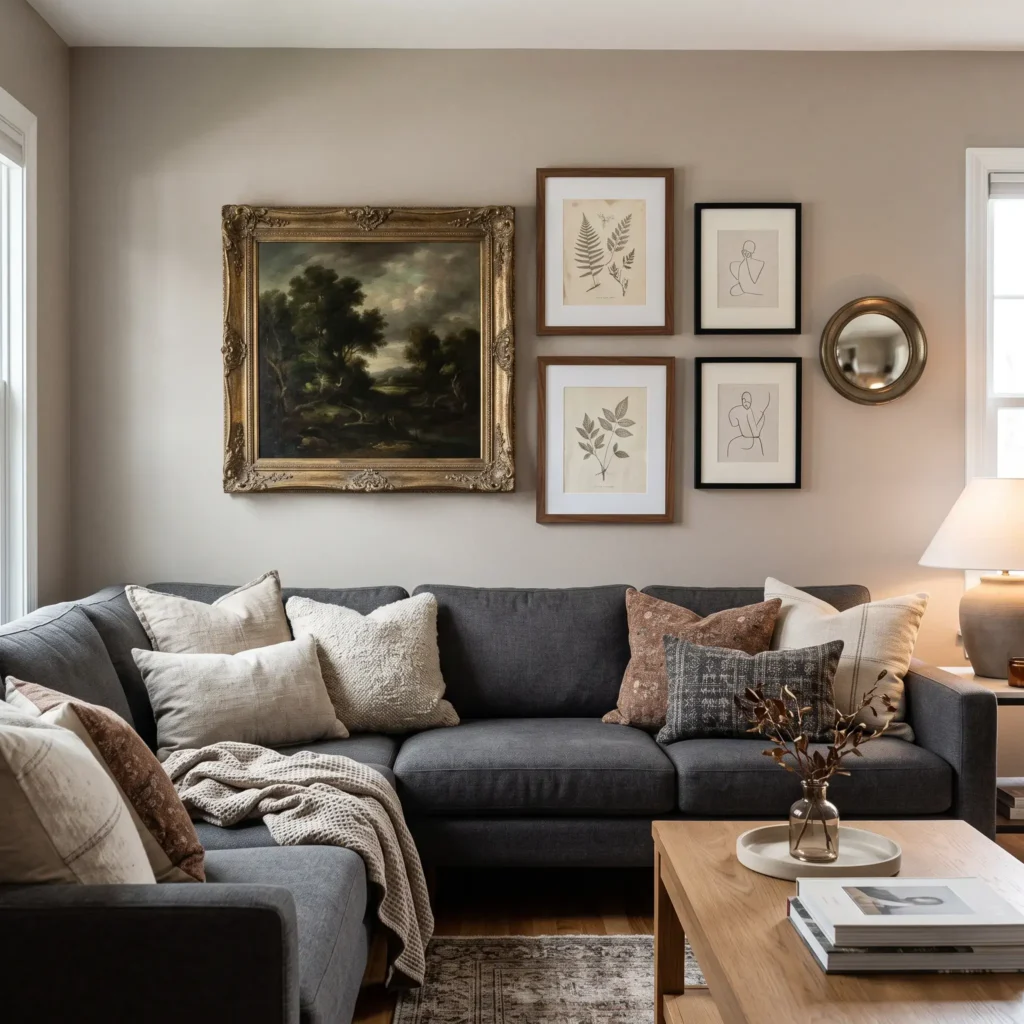
- Products Used:
- One 20×24 inch antique gold leaf wood frame
- Two 11×14 inch natural walnut frames
- Two 8×10 inch slim aluminum black frames
- One 10-inch round brass convex wall mirror
- Assorted vintage landscape and botanical art prints
Check out more Living Room Ideas
3. The Minimalist Linear Triptych
A triptych uses three oversized matching frames hung in a clean horizontal row. This layout widens the perceived width of your room and complements low-profile modern furniture. By limiting the display to three large pieces, you get high visual impact without small frame clutter.
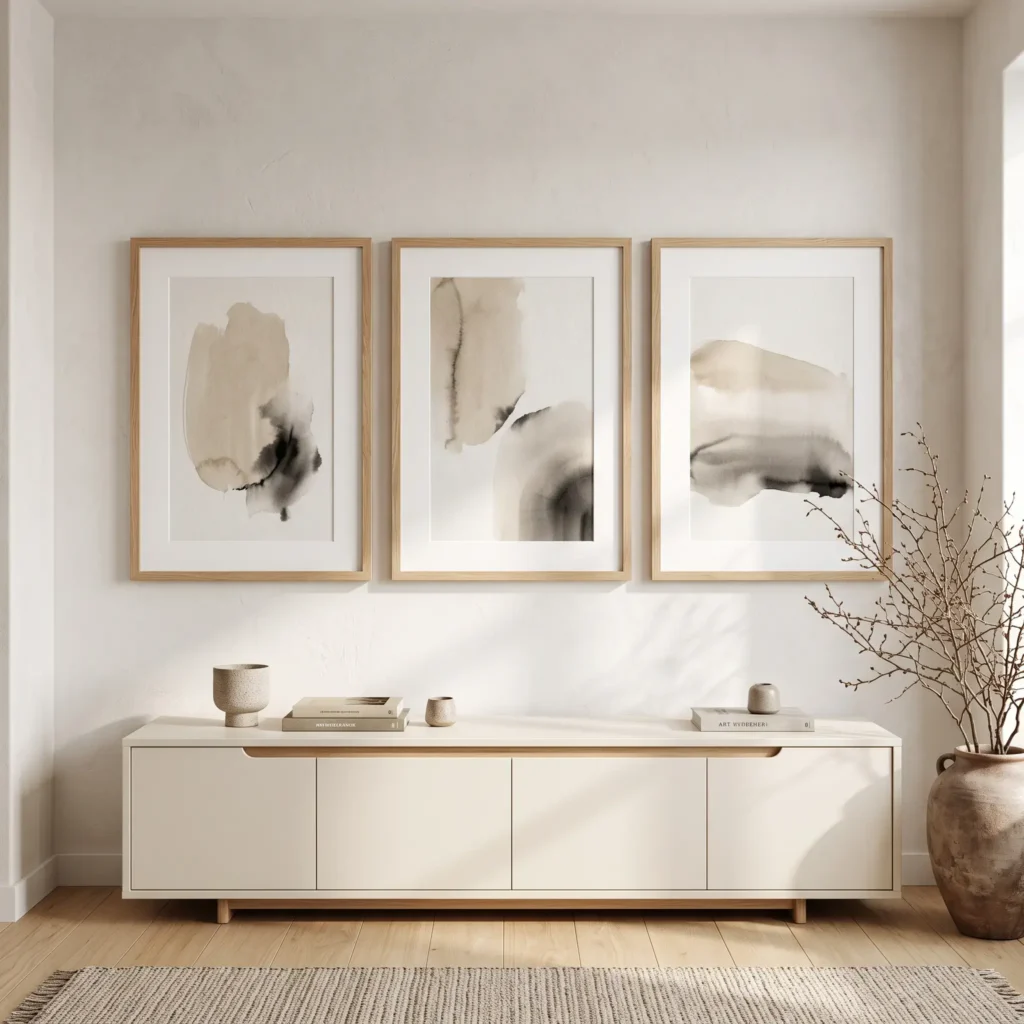
- Products Used:
- Three 24×36 inch solid white oak poster frames
- Custom acid-free 3-inch wide white mat boards
- Large-scale neutral ink wash prints
- Interlocking aluminum French cleat hangers
4. The Layered Picture Ledge Wall
Picture ledges let you lean, layer, and rotate framed prints without driving new nails into the drywall. Two shallow wood ledges mounted one above the other create physical depth. You can overlap small frames over larger ones and mix in small ceramics or art books.
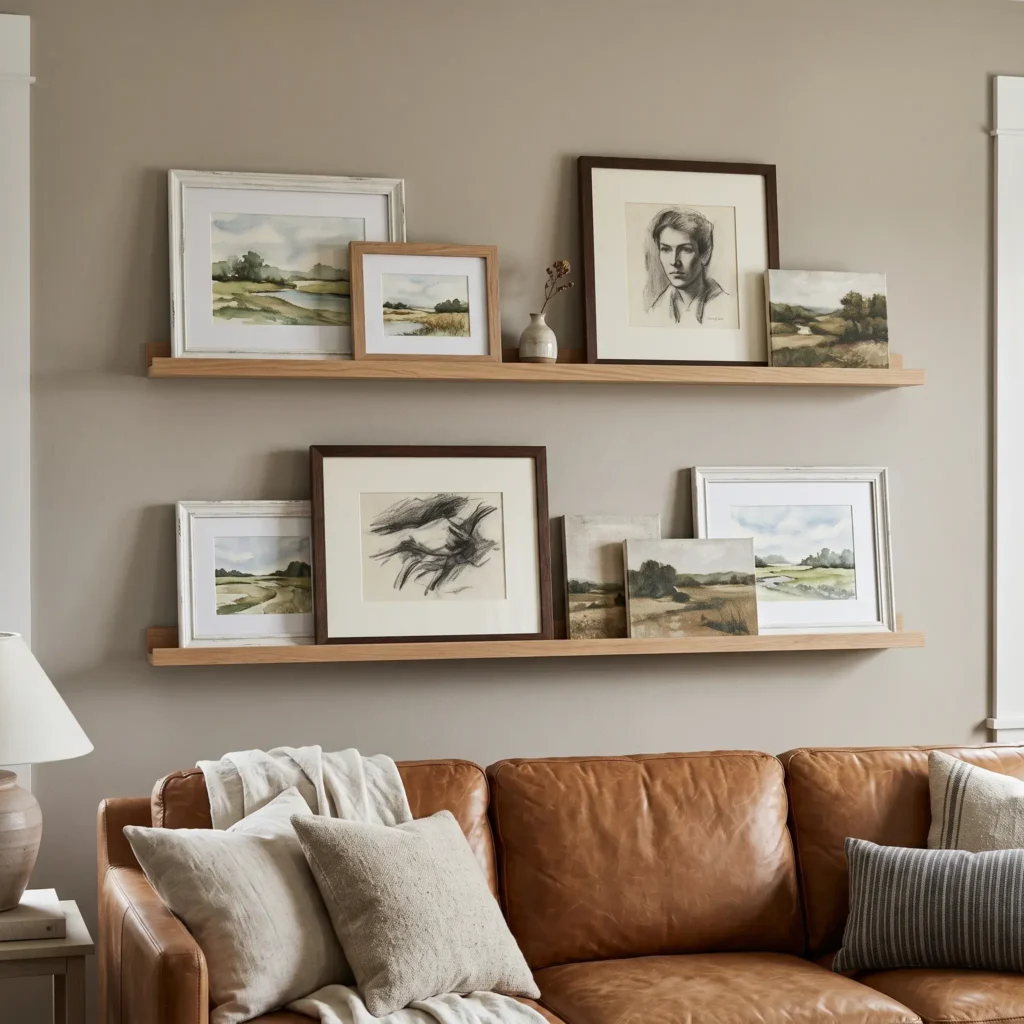
- Products Used:
- Two 48-inch floating picture ledges with front lip in white oak
- Assorted frames in 8×10, 11×14, and 5×7 inches
- Cotton-paper watercolor landscape prints
- Heavy-duty wood screws and wall anchors for stud mounting
5. The Television Disguise Layout
A wall-mounted TV can look like an empty black void when turned off. Surrounding the screen with real framed art blends the monitor into your broader living room design. Using TVs with matte art modes, such as the Samsung Frame, helps the screen read like another piece of art.
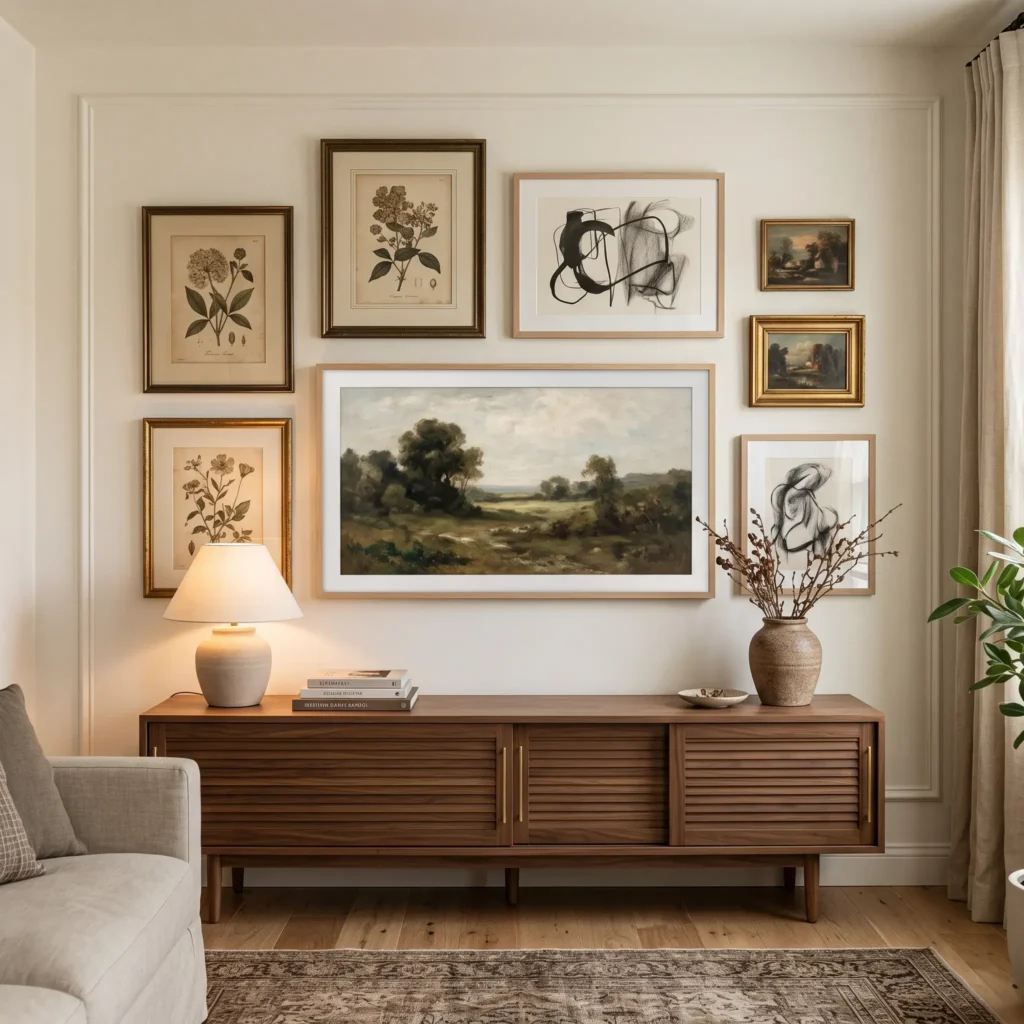
- Products Used:
- Samsung The Frame TV with custom blonde wood bezel
- Seven mixed frames ranging from 5×7 to 16×20 inches
- Digital art files formatted for 4K TV displays
- Assorted brass and wood wall frames
6. The Over-Mantel Vertical Column
Fireplace mantels demand strong vertical proportion. Hanging two or three large, matching frames stacked directly on top of each other draws the eye upward to highlight ceiling height. This approach frames the chimney breast cleanly without crowding the shelf below.
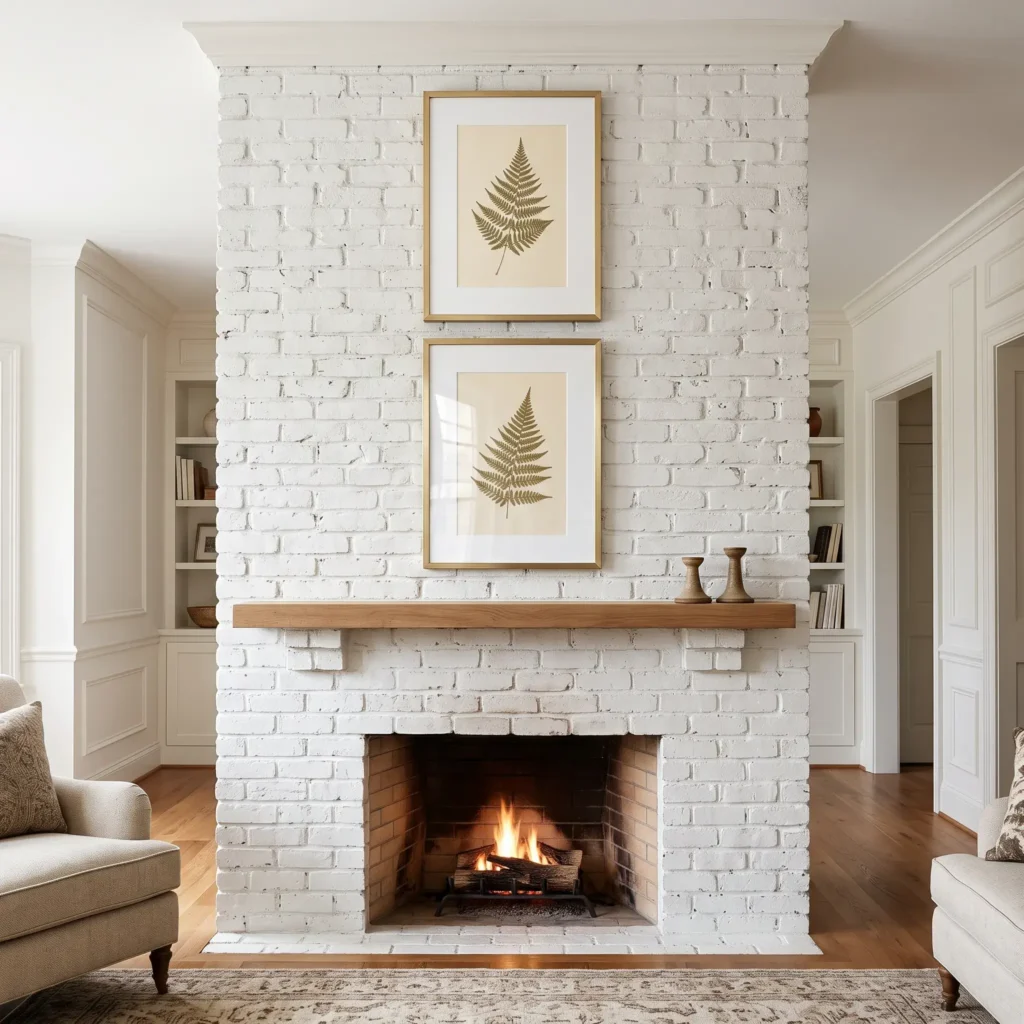
- Products Used:
- Two 20×28 inch brushed brass metal frames
- Archival white mat boards with 11×14 inch openings
- Pressed botanical prints on deckled cotton paper
- Masonry drill bit and ribbed plastic wall anchors
7. The Inside Corner Wrap
A corner wrap carries art across two adjacent walls where an L-shaped sectional sits. Instead of treating the walls as separate areas, this design connects them. It builds an intimate corner nook and eliminates the problem of an awkward, empty wall intersection.
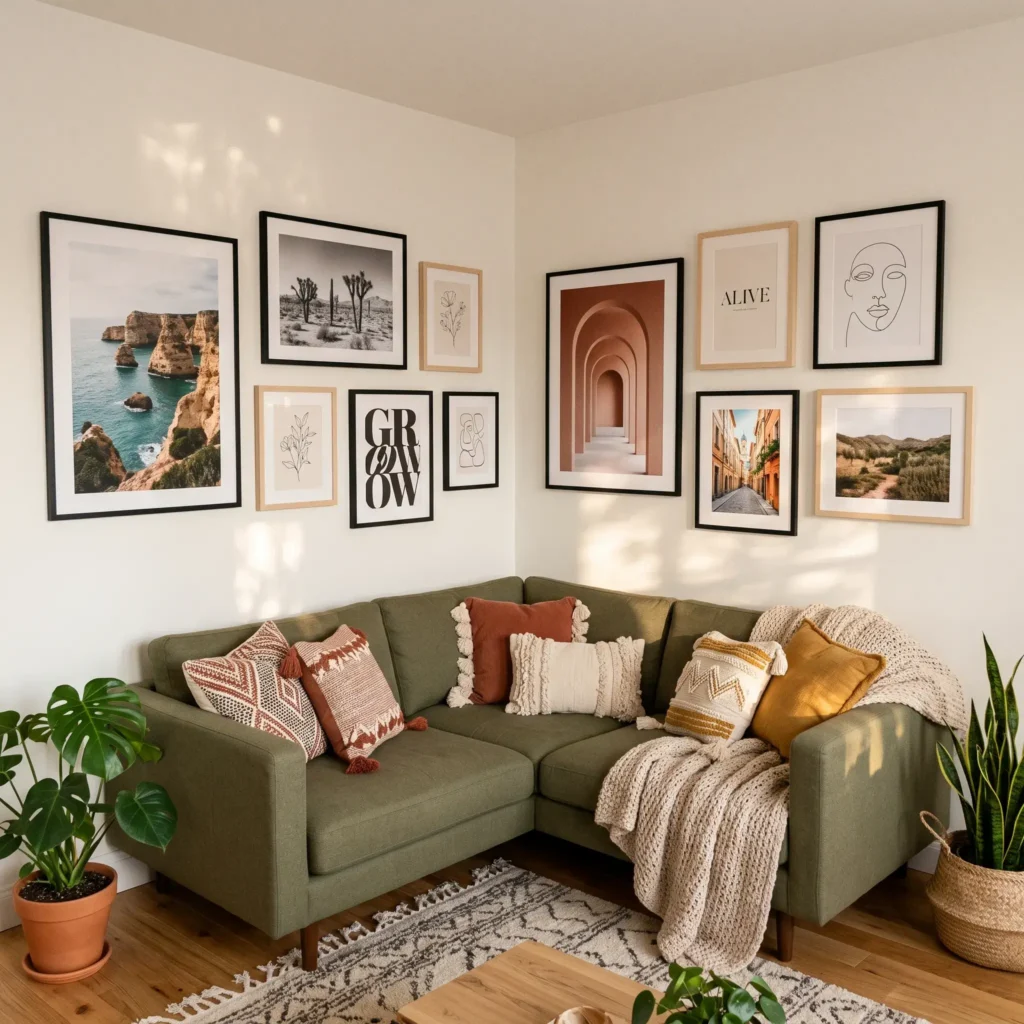
- Products Used:
- Ten coordinating frames in slim black wood and light birch
- Travel photography prints and modern typography posters
- Blue painter tape for pre-installation layout mapping
- Angled brass picture hanging pins
8. The Mixed-Media Architectural Alcove
A gallery wall does not have to rely only on flat paper prints in rectangular frames. Mixing in three-dimensional wall decor adds texture and real shadow lines to living room alcoves or reading corners. Pairing framed sketches with shallow ceramic dishes, woven trays, or small brass wall accents prevents the wall from feeling flat.
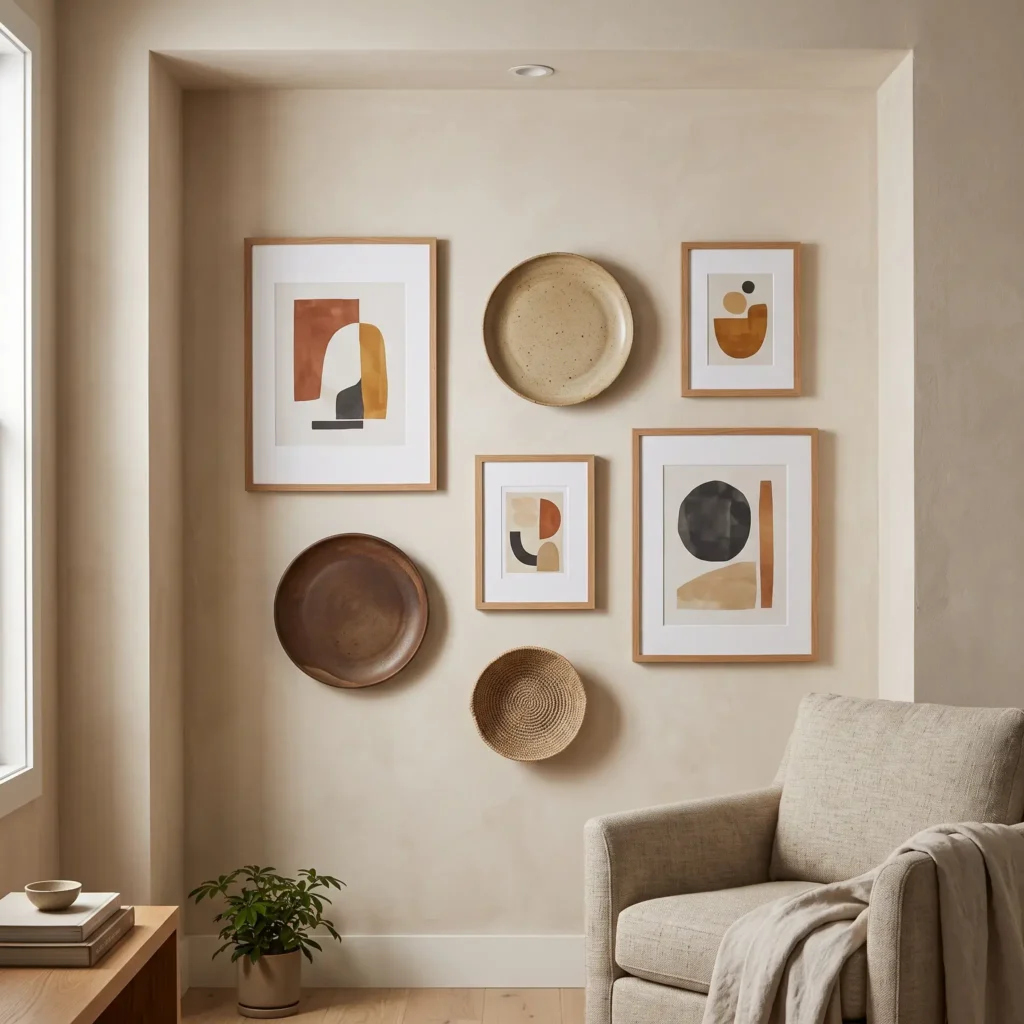
- Products Used:
- Three 12×16 inch thin solid oak frames
- Two decorative ceramic wall plates with plate wire hangers
- One small woven shallow sweetgrass wall basket
- Disc adhesive wall hangers and brass picture hooks
Sizing and Spacing Rules: The Living Room Math
Gallery walls look awkward when spacing feels like an afterthought. Following concrete measurements before you make any holes keeps the arrangement anchored to your furniture.
The Two-Thirds Furniture Rule
When hanging art over a sofa, credenza, or console table, the total width of the gallery wall must match the scale of the furniture beneath it.
The full width of your gallery grouping should cover 60% to 75% of your furniture width. Target roughly two-thirds (66%) as your baseline.
For an 84-inch sofa:
- Minimum gallery width (60%): 50.4 inches
- Ideal gallery width (66%): 55.4 inches
- Maximum gallery width (75%): 63 inches
An arrangement under 60% looks disconnected from the couch. An arrangement wider than the sofa makes the wall look top-heavy.
Seated Eye-Level vs. Museum Height
Art galleries hang work so the vertical center of a display sits 57 to 60 inches from the floor, reflecting an average standing sightline.
In a residential living room, people spend their time sitting on couches and accent chairs. Sticking strictly to a 60-inch center line forces people to look uncomfortably upward.
- For entryways and standing hallways: Center the grouping at 57 to 60 inches from the floor.
- For primary living room seating areas: Lower the visual center to 51 to 54 inches from the floor. This aligns the art with seated eye levels while preserving proper clearance above the couch back.
Clearance Above Furniture
Leave 8 to 10 inches between the bottom edge of your lowest frames and the top of the sofa backrest.
This clearance prevents guests from hitting frames when leaning back into sofa cushions. It also keeps the art close enough to the furniture to form a single visual unit. Gaps wider than 12 inches make the art feel like it is floating away.
Spacing Between Frames
Keep the gaps between individual frames consistent throughout your entire display.
- For small to medium frames (up to 16×20 inches): Keep 2 to 2.5 inches between frames.
- For large frames (24×36 inches and up): Keep 3 inches between frames.
Gaps narrower than 1.5 inches feel crowded. Gaps wider than 4 inches make the collection read as scattered individual frames instead of a unified gallery.
Furniture and Art Sizing Reference
| Furniture Type | Average Width | Target Gallery Width (66%–75%) | Clearance Above Furniture | Centerline From Floor |
|---|---|---|---|---|
| Console Table | 48 inches | 32 to 36 inches | 4 to 8 inches | 56 to 58 inches |
| Loveseat | 60 inches | 40 to 45 inches | 6 to 8 inches | 54 to 56 inches |
| Three-Seat Sofa | 72 inches | 48 to 54 inches | 8 to 10 inches | 54 to 56 inches |
| Large Sectional | 84 to 96 inches | 56 to 72 inches | 8 to 10 inches | 52 to 55 inches |
| Fireplace Mantel | 60 inches | 40 to 45 inches | 6 to 10 inches | Guided by mantel shelf |
Wall Types and Mounting Hardware
Picking the wrong hardware leads to crooked frames, pulled fasteners, or cracked walls. Choose your anchors based on what is behind your paint.
Drywall Installations (Homes Built After 1960)
Drywall consists of a soft gypsum core wrapped in paper facings. It holds weight through downward shear force, but offers weak resistance to direct pull-out force.
- For lightweight frames (under 5 lbs): Use angled brass picture hooks with hardened needlepoint steel pins. The 45-degree angle uses downward shear friction to support weight while leaving only a tiny pinhole.
- For medium frames (5 to 25 lbs): Use self-drilling zinc threaded anchors. The wide threads grip into the gypsum core without pre-drilling. Avoid cheap plastic ribbed expansion plugs, which easily pull out of hollow drywall.
- For heavy frames and mirrors (over 25 lbs): Fasten directly into wooden studs using 2.5-inch wood screws. If your studs do not line up with your layout, use spring-wing steel toggle bolts. The wings open behind the drywall to distribute the load across a wider surface area.
Plaster and Lath Installations (Pre-1950s Homes)
Plaster walls consist of a hard, brittle lime or gypsum layer spread over thin wooden lath strips. Hammering nails directly into old plaster will crack the surface and break the plaster keys behind the wood.
- Apply blue painter tape over the marked hanging spot to prevent the surface from chipping.
- Drill a pilot hole through the plaster using a carbide-tipped masonry bit at slow drill speeds.
- Once through the plaster, switch to a standard wood drill bit to penetrate the lath strip.
- Drive a screw into the lath or insert a toggle bolt.
- If your home has original picture rail molding near the ceiling, use brass rail hooks with clear monofilament wire to hang art without drilling into the plaster.
Why D-Rings Beat Picture Wire
Hanging wire attached to the back of a frame stretches over time. Every time someone closes an adjacent door or walks past the couch, wired frames shift and tilt out of alignment.
To keep your gallery wall straight:
- Use dual D-rings on the back of each frame at matching heights on the left and right stiles. Hang each D-ring on its own wall hook. This two-point connection stops frames from swinging or tilting.
- Use interlocking aluminum French cleats for heavy statement pieces, framed mirrors, or floating ledges. One cleat mounts level to the wall and the other attaches to the frame. The beveled edges lock together to hold weight flush against the wall.
How to Hang a Gallery Wall Without Extra Holes
Do not guess your layout with a hammer in hand. Use the kraft paper template method to test your arrangement and mark drill points accurately.
- Trace your frames: Lay your framed art on a roll of brown kraft paper or butcher paper. Trace around the outer edge of each frame with a pencil. Cut out each individual paper template.
- Mark hanging points: Flip each frame over. Measure the distance from the top outer edge of the frame down to the hanging bracket or D-rings. Mark that exact measurement with an X on the front of your paper template.
- Establish your lines: Measure your sofa width and mark the center point on your wall with low-tack painter tape. Use a tape measure and pencil to mark your 54-inch eye-level line and your 8-inch cushion clearance line.
- Position templates on the wall: Tape your paper templates to the wall using painter tape. Step back 10 feet to check balance, visual weight, and spacing. Move templates around until all gaps measure between 2 and 3 inches.
- Drive fasteners through the paper: Place your nail or drill your pilot hole directly through the marked X on each paper template.
- Remove paper and hang: Pull the painter tape and paper templates off the wall. Mount your frames onto the hardware and verify levelness using a small torpedo level.
Matting and Framing Guidelines
High-quality framing protects your artwork and provides visual breathing room so your gallery wall does not look crowded.
Optical Bottom-Weighting
The human eye perceives the visual center of an image as slightly lower than its true geometric center. When a mat board has identical 3-inch borders on all four sides, the artwork can look like it is sinking toward the bottom of the frame.
To correct this illusion, use optical bottom-weighting:
- Cut the top, left, and right mat borders to matching widths (for example, 3 inches).
- Cut the bottom mat border roughly 0.5 inches wider (for example, 3.5 inches).
This small adjustment corrects the optical illusion and gives your pieces a custom, professional look.
Archival Mats and Preservation
Standard paper mats contain wood pulp and lignin that release acid over time, causing yellow or brown burn lines on art paper.
- Use 100% cotton rag, acid-free mat board for family photos, original art, and vintage prints.
- For works on deckled-edge watercolor paper, float-mount the art on top of an uncut mat board using acid-free linen hinge tape. Use frame spacers to keep the glazing glass from touching the art surface.
Lighting Your Gallery Wall
Proper lighting brings out pigment colors and eliminates dark shadows cast by deep picture frames.
The 30-Degree Angle Rule
When installing ceiling-mounted track lights or recessed directional spots, aim the light beam at a 30-degree angle from the vertical wall plane.
- A steeper angle (under 20 degrees) causes the top molding of thick frames to cast a heavy downward shadow across your art.
- A shallower angle (over 45 degrees) creates direct glare on the glass, making the art difficult to see from your sofa.
Color Temperature and CRI
- Color Temperature: Use 2700K to 3000K warm white LED bulbs. This range brings out warm wood tones, oil paints, and living room fabrics without feeling cold or clinical.
- Color Rendering Index (CRI): Pick bulbs with a CRI rating of 90 or higher. Low-CRI bulbs wash out color pigments and skin tones in photography.
- UV Protection: Sunlight and halogen bulbs emit ultraviolet rays that fade delicate paper and watercolours. Use solid-state LEDs and frame valuable original works behind 99% UV-filtering acrylic or museum glass.
Frequently Asked Questions
How far apart should gallery wall frames be?
Keep frames 2 to 3 inches apart in most living rooms. Spacing tighter than 1.5 inches feels cluttered, while gaps wider than 4 inches make the collection look like disconnected, random pieces.
How high should a gallery wall be above a sofa?
Hang the bottom row of frames 8 to 10 inches above the top of your sofa backrest. This leaves safe head clearance for seated guests while keeping the artwork visually anchored to the furniture.
How do you mix different frame styles without looking messy?
Limit your layout to two or three frame finishes across the whole display, such as matte black, natural oak, and brushed brass. Distribute those finishes evenly across the wall rather than clustering all matching frames in one spot. Using matching white mat boards also helps tie mixed frames together.
How can I hang a gallery wall in an apartment without damaging walls?
For frames under 4 pounds, use interlocking picture hanging strips. Clean the wall surface with isopropyl alcohol before applying the adhesive to ensure a strong grip. For heavier pieces, use brass needlepoint picture hooks. They leave only a pinhole mark that is easy to fill with a dab of spackle when you move out.
Building a living room gallery wall does not require guesswork. Anchor the total width to roughly two-thirds of your sofa, set your seated eye line between 51 and 54 inches, and keep frame gaps consistent at 2 to 3 inches. Test your arrangement on paper before driving fasteners into your wall, and you will create a balanced, lasting focal point that completes your room.