9 Low Ceiling Bedroom Makeover Ideas for the Weekend
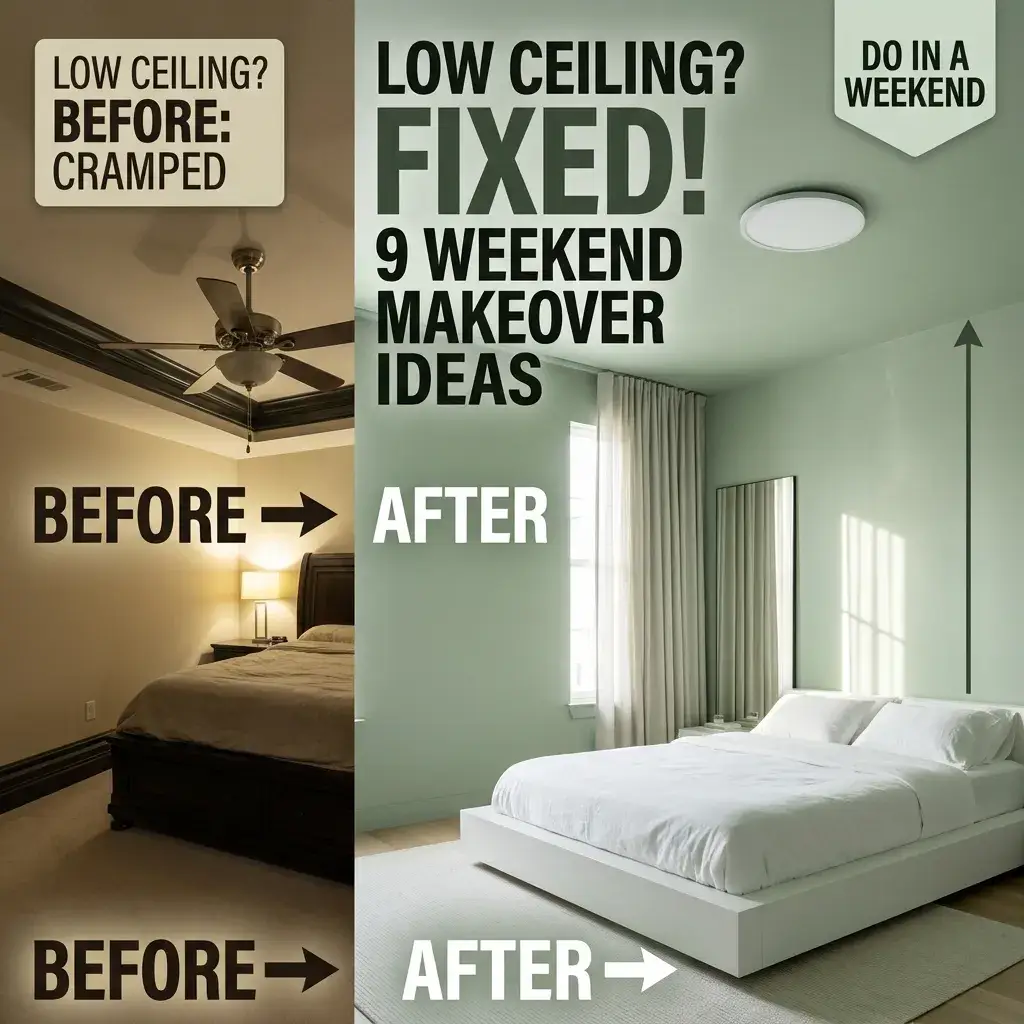
A bedroom with an eight-foot or seven-foot ceiling often feels boxed in. Standard builder choices make the problem worse. Thick ceiling fans steal headroom, tall headboards crowd the walls, and dark baseboards chop the room into small horizontal slices.
You do not need to tear out drywall or rebuild roof framing to fix this. Human spatial perception relies on visual tracking. Your eyes scan vertical edges, contrast lines, and shadows to judge room volume. When you soften hard boundaries and pull visual lines straight upward, the ceiling appears to lift.
Here are nine practical makeover ideas tailored for low-clearance rooms, followed by an exact 48-hour schedule to complete the work over a single weekend.
9 Weekend Makeover Ideas for Low Ceiling Bedrooms
1. Monochromatic Color Drenching
- Key Products Needed:
- Ultra-flat dead matte paint (under 2 percent sheen)
- 3/8-inch nap microfiber paint roller
- 2.5-inch angled sash trim brush
Standard rooms feature colored walls with an off-white ceiling. That sharp color contrast creates an unmistakable border line where the two surfaces meet. The eye hits that line, stops moving upward, and registers the low vertical limit.
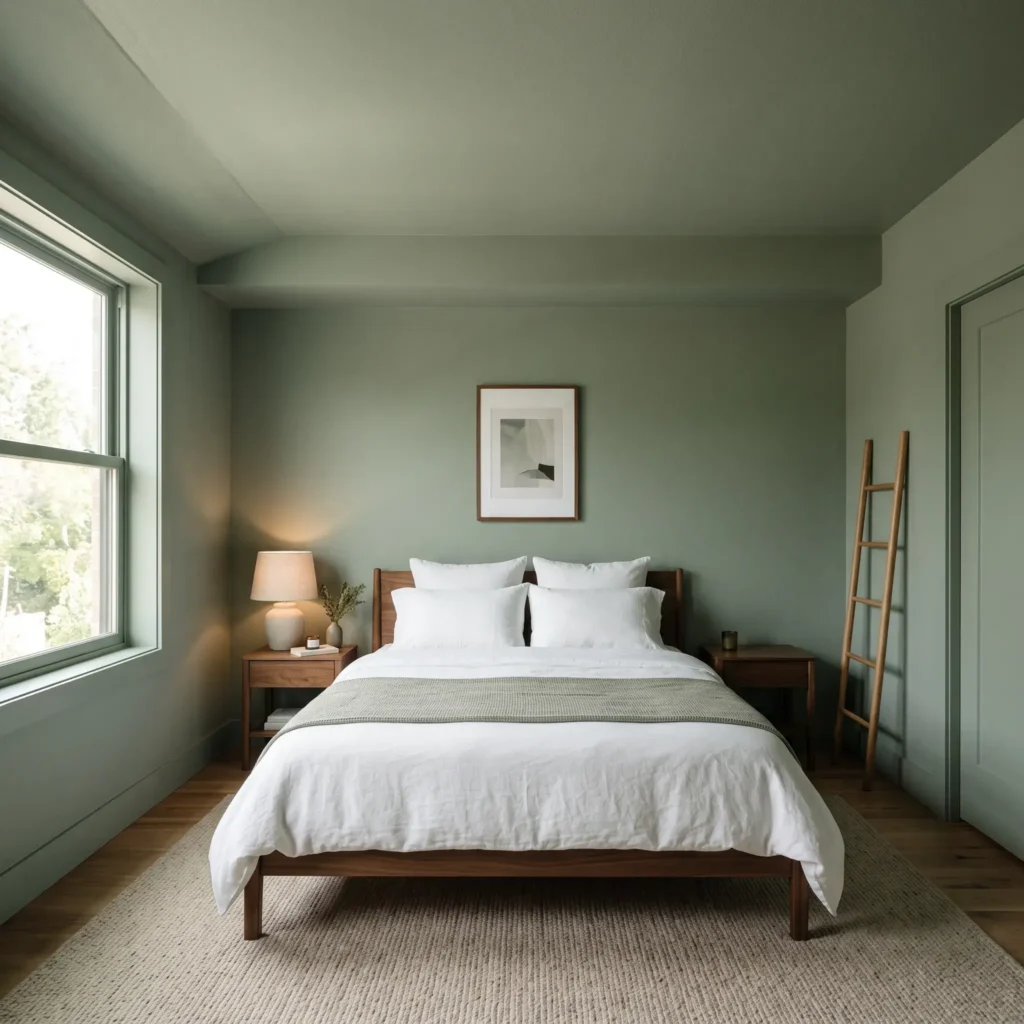
Color drenching removes that dividing line entirely. Coat the drywall ceiling, walls, baseboards, and window trim in the exact same paint shade. Without contrasting trim, the boundary dissolves. The human eye cannot easily locate where the wall stops and the ceiling starts. Soft sage, greige, warm taupe, or misty slate blue provide the best balance of softness and depth.
2. The 6-to-12-Inch Perimeter Wall Drop
- Key Products Needed:
- High-LRV white ceiling paint (LRV 85 or higher)
- Self-leveling green cross-line laser
- Low-tack precision edge painter tape
If you prefer two different wall and ceiling colors, avoid stopping your ceiling color directly in the top corner. Bringing the lighter ceiling paint six to twelve inches down onto the wall creates a floating perimeter band.
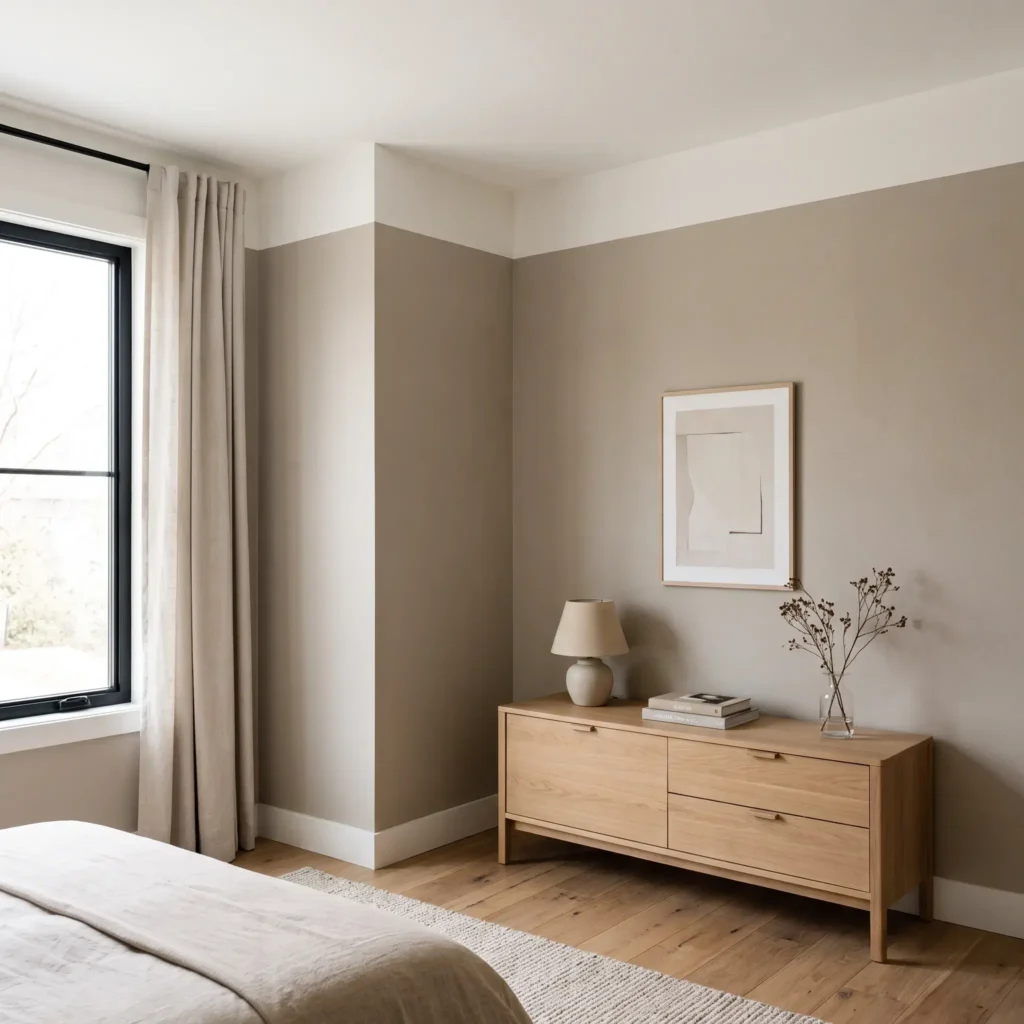
Mount a self-leveling laser to mark a continuous horizontal line around the room. Tape the line and roll your ceiling paint over the upper drywall band. This pushes the visual edge outward and fools the eye into perceiving the wall as an extension of the ceiling plane.
Check out more Modern Bedroom Ideas
3. Ceiling-Mounted Drapery Tracks
- Key Products Needed:
- Low-profile aluminum ceiling curtain track
- Floor-length unlined natural linen curtain panels
- Self-drilling drywall wallboard anchors
Mounting curtain rods right above a window frame divides the wall into broken fragments. It focuses attention on the small strip of drywall above the casing, making the room look short.
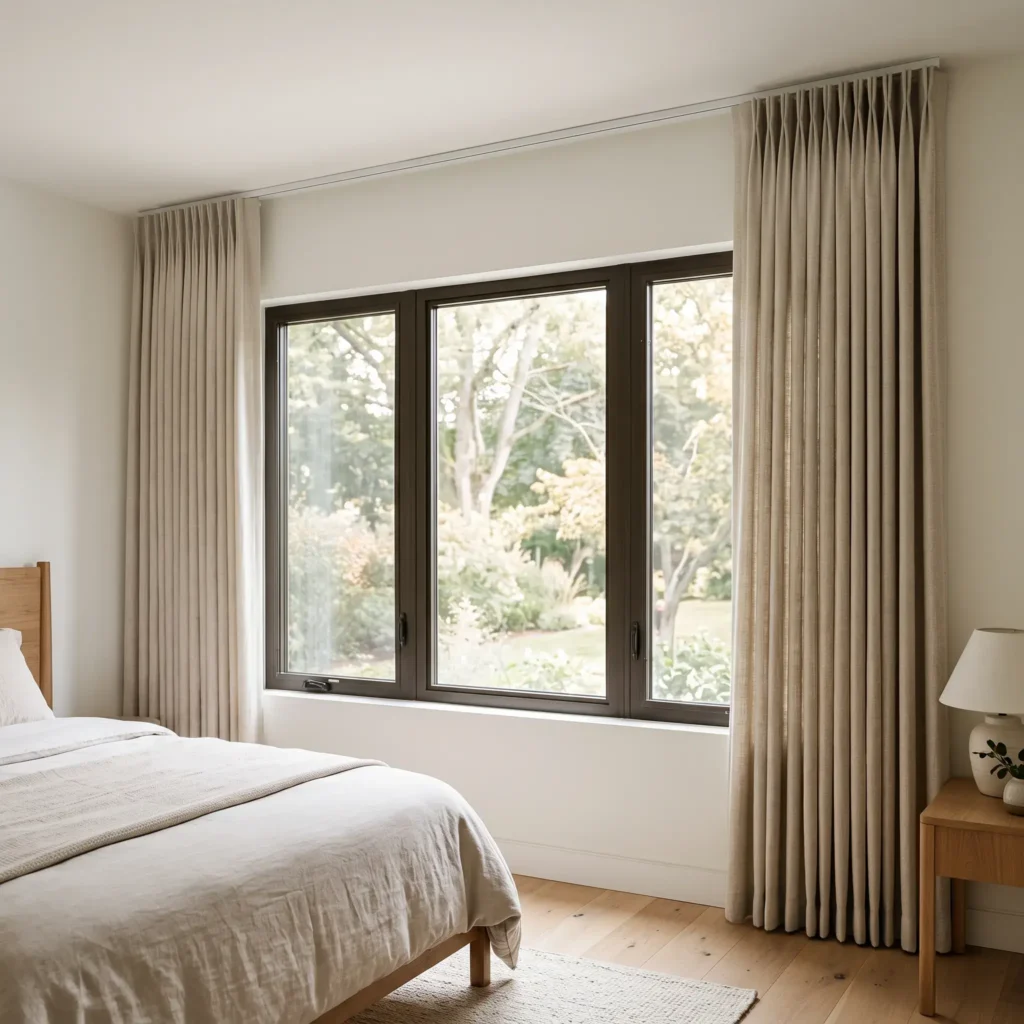
Install a slim track directly into the ceiling drywall instead. Hang panels long enough to hover roughly half an inch above the floorboards. Extend the track eight to twelve inches past each side of the window casing. When open, the stacked fabric clears the glass to let natural daylight wash the room. The long vertical pleats create unbroken visual lines that lead the gaze up to the ceiling.
4. Low-Profile Platform Bed Base
- Key Products Needed:
- Solid wood low platform bed frame (6 to 8-inch clearance)
- 10-inch low-profile mattress
- Wall-mounted slim fabric headboard bolster
Traditional box springs and tall bed frames lift mattresses 28 to 32 inches above the floor. Add a standard five-foot headboard, and the furniture consumes more than half of your vertical wall space.
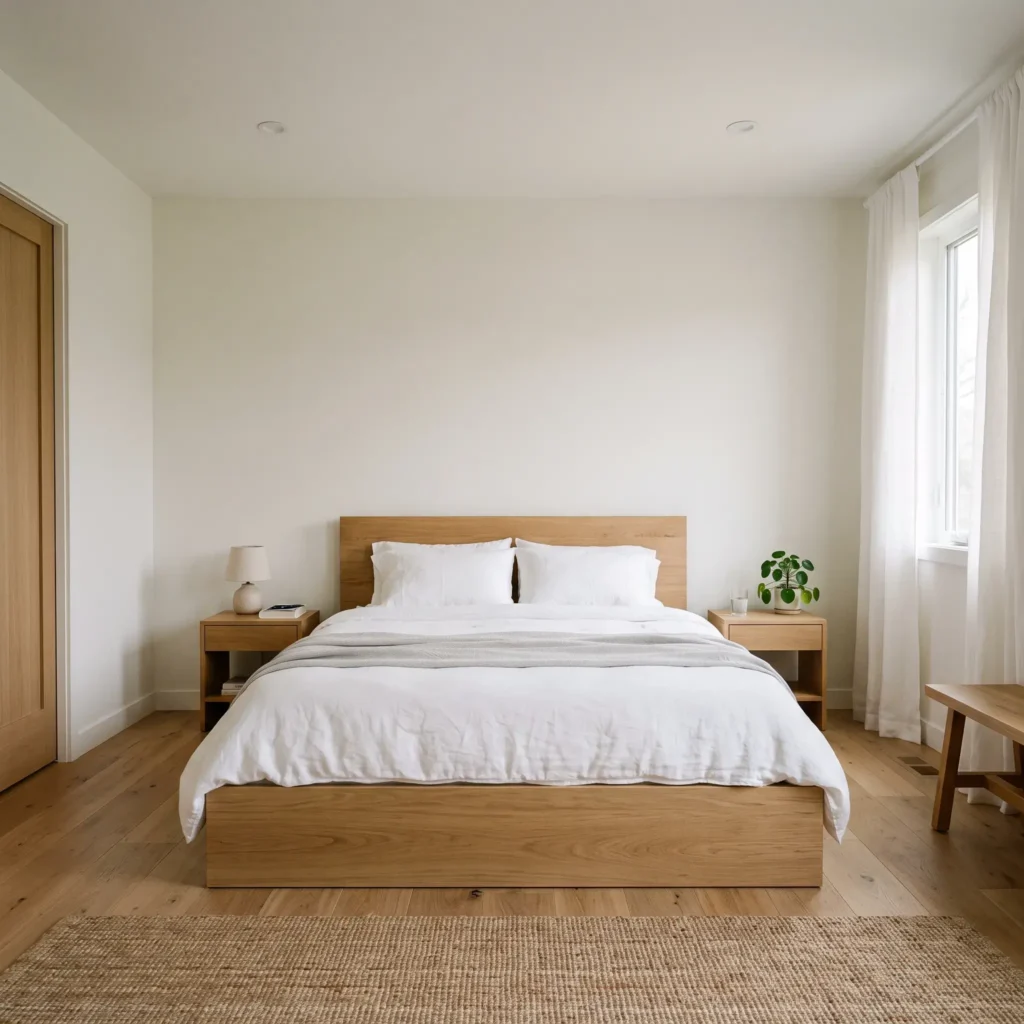
Switch to a low platform frame that sets your finished mattress height between 18 and 22 inches. Choose a headboard that stands under 36 inches tall, or use a wall-hung cushion. This simple swap frees up four to five feet of open wall space above the bed, restoring balanced proportions to a low-clearance room.
5. Wall-Mounted Floating Nightstands
- Key Products Needed:
- Wall-mounted floating nightstand with drawer (10 to 12-inch depth)
- Heavy-duty steel toggle bolts
- Magnetic torpedo bubble level
Heavy, floor-resting nightstands cover the baseboards and crowd the perimeter floor. When floor visibility drops, a bedroom instantly feels narrower and shorter.
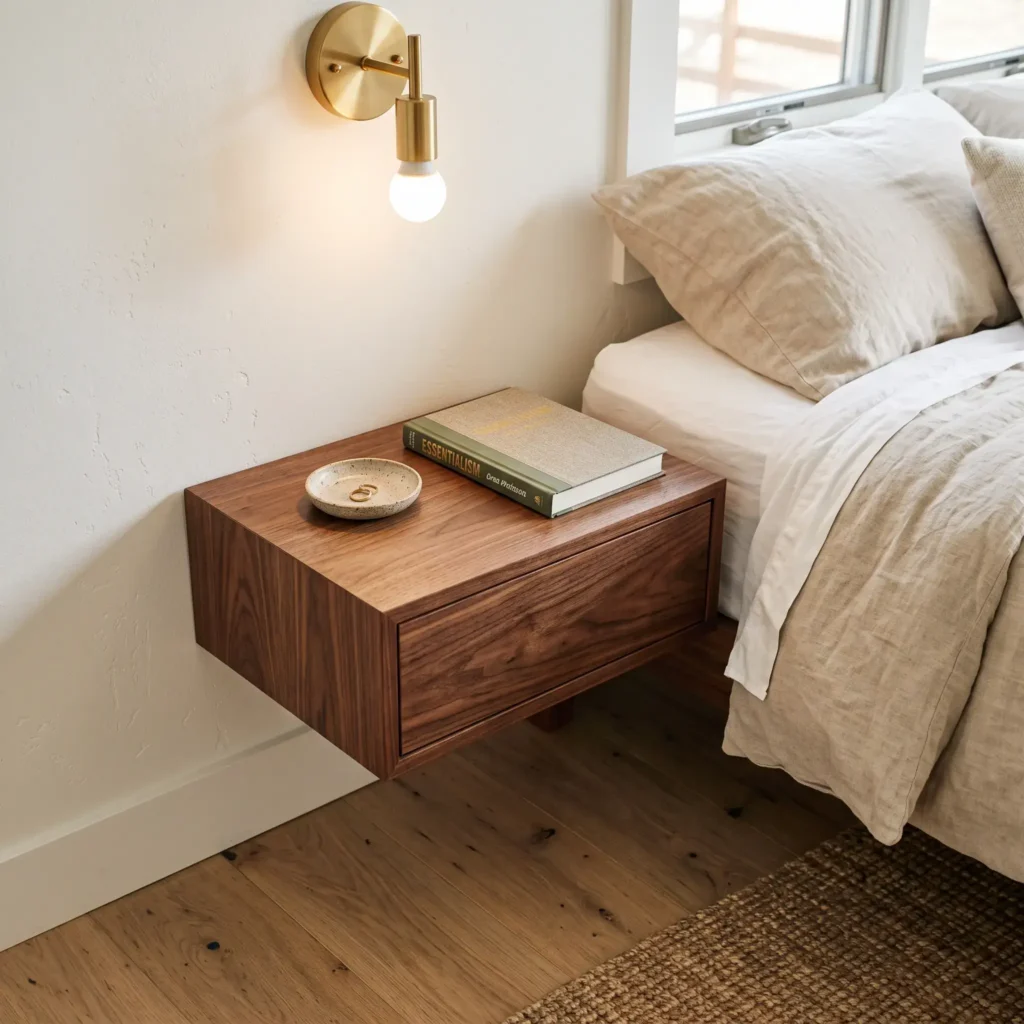
Replace floor units with wall-mounted floating shelves or cantilevered drawer boxes. Set the top surface level with your mattress, roughly 18 to 22 inches from the floor. Keep the depth between 10 and 12 inches to reduce physical strain on the drywall anchors. Unbroken floor sightlines make the entire footprint feel larger.
6. Bidirectional Bedside Sconces
- Key Products Needed:
- Plug-in bidirectional metal wall sconces
- 2700K warm white LED bulbs (E26 base)
- Paintable self-adhesive wire raceway kit
Table lamps clutter nightstands and trap light on the lower third of the room. Dropped bedside pendants hang down into walking paths and emphasize low ceiling height.
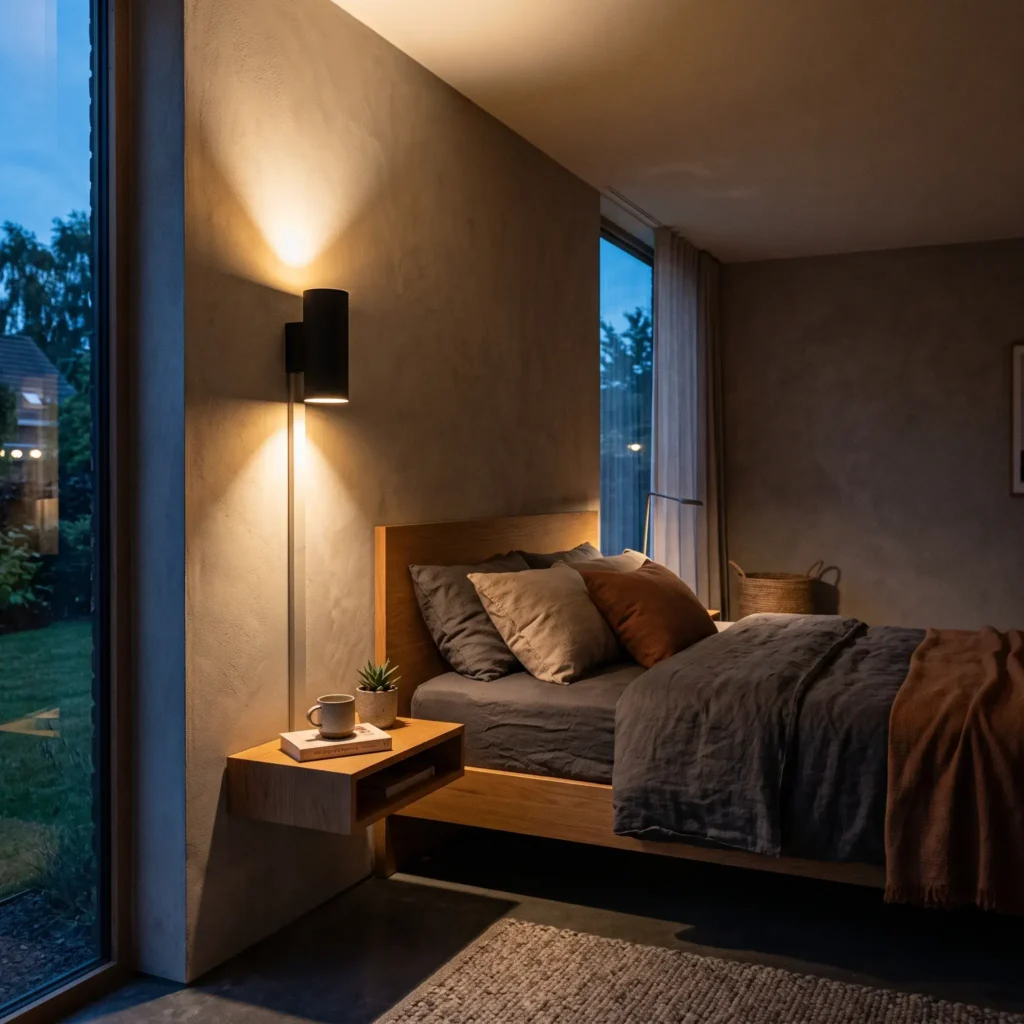
Mount plug-in sconces directly to the wall beside your headboard. Choose bidirectional designs that throw light both upward and downward. The upward beam illuminates upper drywall corners and reduces perimeter shadows, while the downward beam provides focused reading light. This vertical wash leads the eye up the wall surface.
7. Ultra-Thin Flush LED Wafer Discs
- Key Products Needed:
- Ultra-thin canless recessed LED wafer lights (0.5-inch profile)
- Non-contact voltage detector pen
- Adjustable drywall hole cutter
Traditional dome fixtures and hanging chandeliers hang six to fifteen inches down from the ceiling. In an eight-foot room, a low fixture sits directly in your primary eye line and makes the ceiling feel closer.
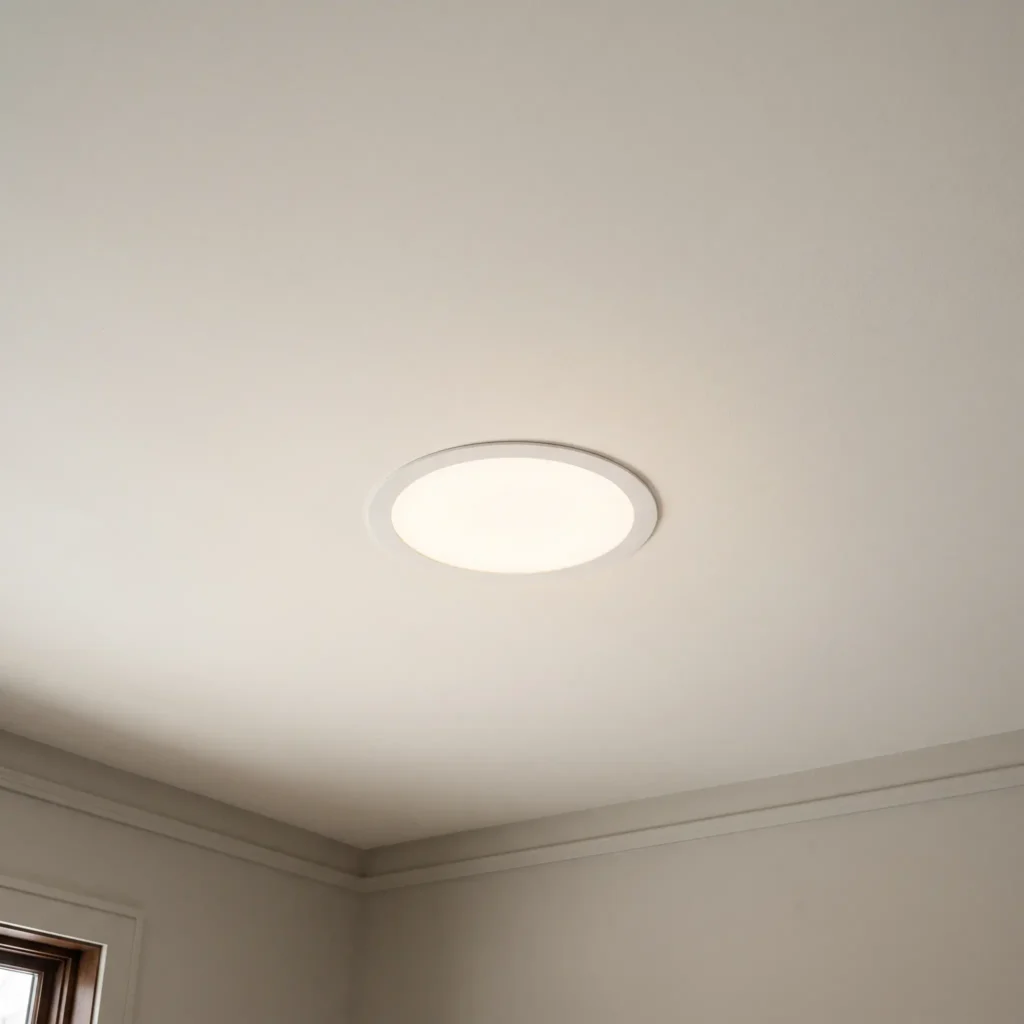
Replace bulky fixtures with ultra-slim LED wafer discs that project less than half an inch from the drywall. A flat fixture preserves functional standing clearance and leaves sightlines completely clear. Select fixtures with a selectable color temperature switch set to 2700K or 3000K to avoid harsh commercial glare.
8. Vertical Slat Wall Feature
- Key Products Needed:
- Peel-and-stick vertical acoustic wood slat panels
- Fine-tooth Japanese pull saw
- Heavy-duty panel construction adhesive
Horizontal wall elements such as picture rails, chair moldings, and wallpaper borders visually split the wall plane, cutting down vertical height. Vertical lines do the exact opposite.
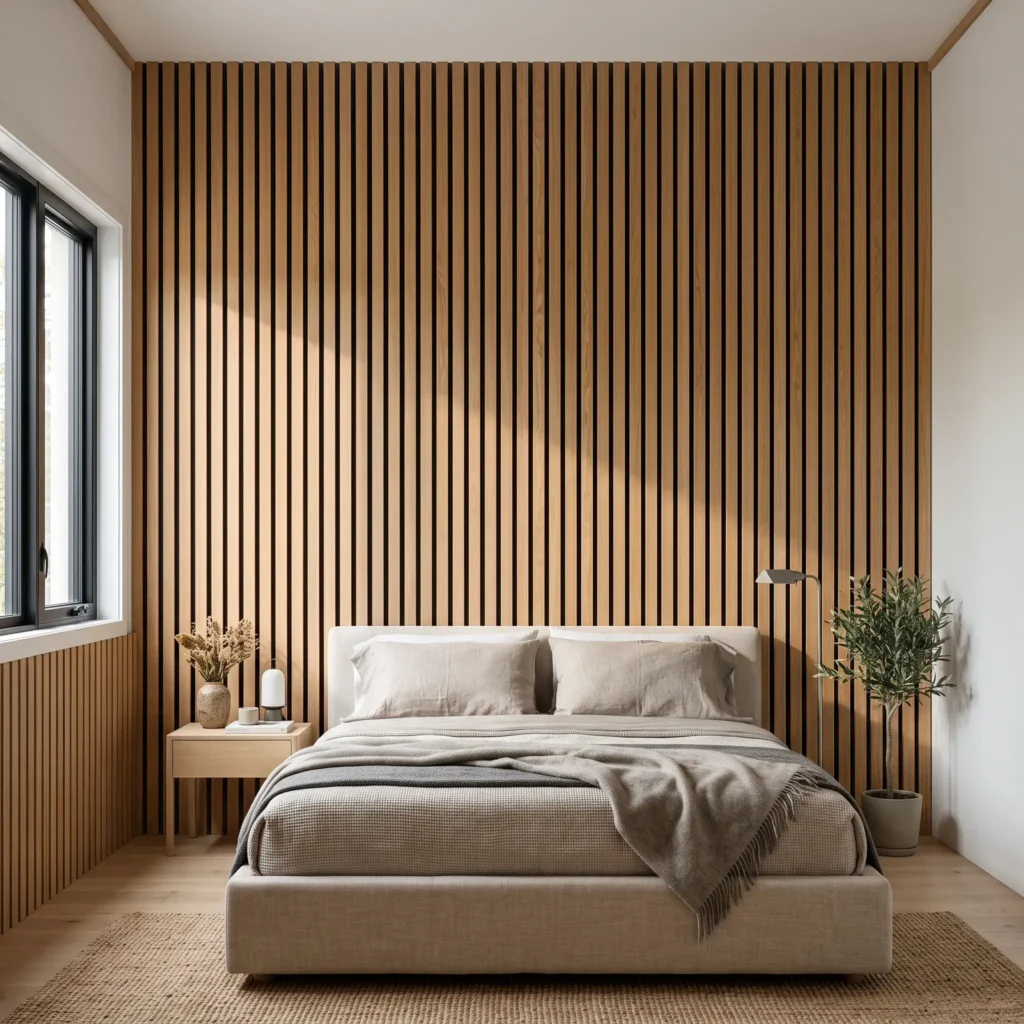
Install vertical acoustic wood slat panels or subtle striped peel-and-stick wallpaper on the wall behind your headboard. Ensure the slats run continuously from the top of the baseboard to the ceiling joint. These long linear elements guide ocular tracking directly upward, giving the illusion of added height.
9. Tall, Narrow Vertical Accent Mirror
- Key Products Needed:
- Slim-profile full-length wall mirror (minimum 72-inch height)
- Heavy-duty interlocking French cleat hanger
- Lint-free glass cleaning cloth
Wide, horizontal mirrors emphasize the lateral span of a room, which can make a low ceiling feel lower. A tall, narrow mirror introduces a crisp vertical shape while reflecting daylight upward.
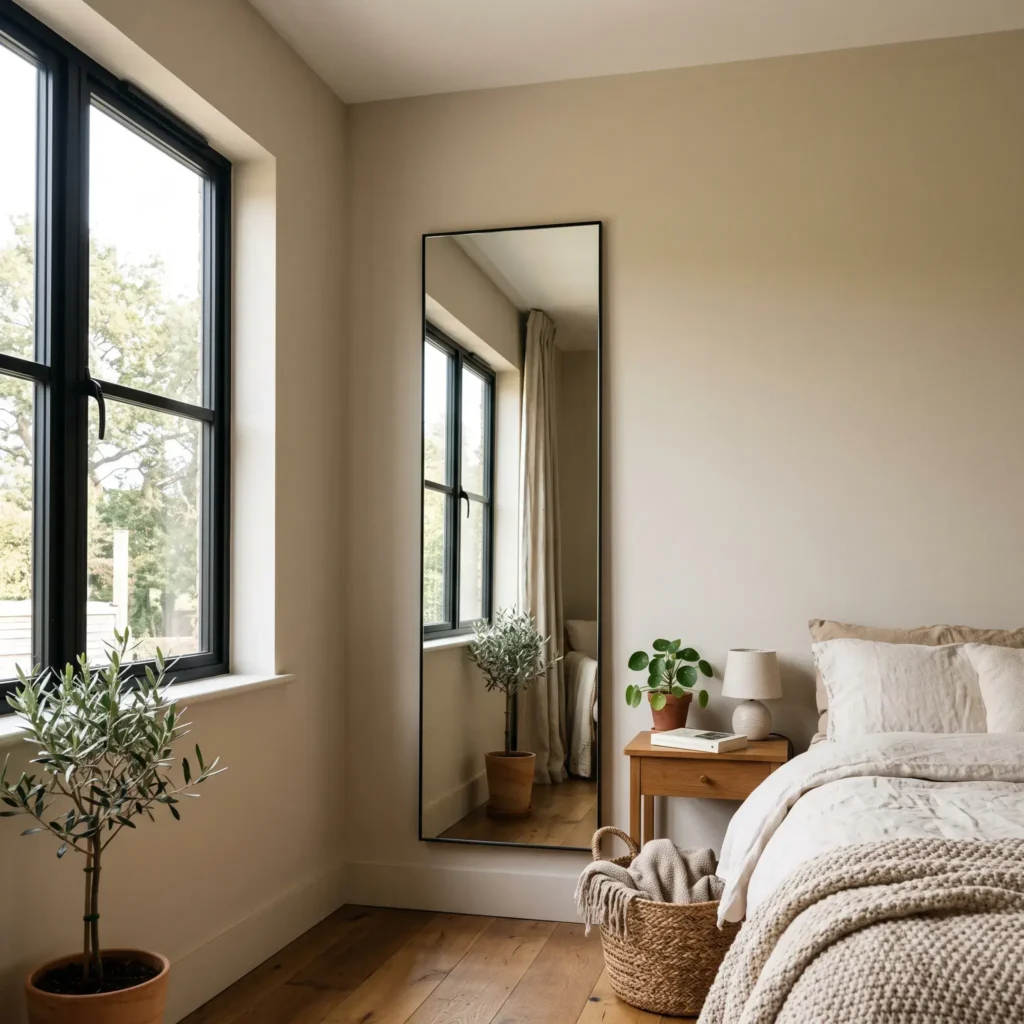
Choose a mirror measuring at least 72 to 78 inches high with a simple, thin frame. Hang it securely on a wall perpendicular to a window. The mirror reflects the vertical wall lines and bounces natural light across the upper perimeter, making dark corners feel brighter.
Makeover Method Comparison
| Makeover Technique | Height Mechanism | Skill Level | Typical Cost | Time Required |
|---|---|---|---|---|
| Color Drenching | Blurs horizontal joints between wall and ceiling | Moderate | $70 to $140 | 8 to 12 hours |
| Perimeter Drop Band | Lowers the apparent visual edge of the ceiling | Moderate | $50 to $90 | 4 to 6 hours |
| Ceiling Track Curtains | Adds continuous vertical lines from floor to ceiling | Easy | $60 to $150 | 2 to 3 hours |
| Low Platform Bed | Increases open wall space above the mattress | Easy | $180 to $450 | 3 to 4 hours |
| Floating Nightstands | Opens floor sightlines around the perimeter | Easy | $50 to $120 | 2 to 3 hours |
| Bidirectional Sconces | Washes the ceiling with soft upward illumination | Moderate | $60 to $140 | 2 to 3 hours |
| Slim LED Wafer Swap | Restores 6 to 12 inches of open headspace | Moderate | $30 to $80 | 1 to 2 hours |
| Vertical Slat Panels | Guides the gaze straight up to the ceiling plane | Moderate | $120 to $260 | 4 to 6 hours |
| Tall Narrow Mirror | Reflects vertical wall lines and natural light | Easy | $70 to $180 | 1 to 2 hours |
The 48-Hour Weekend Project Schedule
Plan your work carefully to avoid damaging fresh coatings or running out of time on Sunday night.
Phase 1: Friday Evening (Surface Preparation and Clearing)
- Time: 6:00 PM to 9:30 PM
- Clear the Room: Remove small furniture, old window treatments, and wall decor.
- Drywall Repairs: Scrape loose drywall paper and fill old anchor holes with quick-setting spackle. Let it cure, then sand it flush with a 220-grit sanding block.
- Perimeter Masking: Wipe down baseboards and trims to remove dust. Apply painter tape along baseboard edges, door frames, and casings. Spread drop cloths across the floor.
Phase 2: Saturday Morning (Ceiling and Upper Perimeter Coatings)
- Time: 8:00 AM to 1:00 PM
- Ceiling First: Cut in the corners with an angled sash brush. Roll the ceiling using an ultra-flat matte finish. If you plan to color-drench the bedroom, roll this same paint across the top of the walls.
- Drop Band Method: If using two shades, carry the ceiling color down six to twelve inches onto the vertical drywall.
- First Wall Coat: Once the ceiling dries, cut in the wall perimeters and roll the first coat of your primary wall paint.
Phase 3: Saturday Afternoon (Second Coat and Vertical Slat Installation)
- Time: 2:00 PM to 7:00 PM
- Final Paint Layer: Apply the second coat of paint across all walls. Set up a portable floor fan to maintain airflow and speed up dry times.
- Install Slats: Once the walls are dry to the touch, locate studs using a stud finder. Use your laser level to set a plumb line, then cut and adhere your vertical slat panels behind the bed.
Phase 4: Sunday Morning (Lighting Swaps and Window Treatments)
- Time: 8:30 AM to 1:00 PM
- Cut Electrical Power: Switch off the breaker supplying power to the bedroom lighting circuit. Test the wires with a non-contact voltage pen before touching any connections.
- Install Slim Wafer Light: Disconnect the old fixture and wire your ultra-slim LED disc directly into the junction box. Snap the fixture flush to the ceiling.
- Mount Ceiling Curtain Track: Screw the track directly into the ceiling drywall one to two inches out from the wall. Slide on your floor-length linen panels.
- Install Bedside Sconces: Mount your plug-in wall sconces beside the bed, securing cord covers straight down to the baseboard.
Phase 5: Sunday Afternoon (Low-Profile Furniture and Final Assembly)
- Time: 2:00 PM to 6:00 PM
- Build Bed Frame: Assemble your low platform frame and lay the mattress on the base.
- Anchor Nightstands: Mount floating bedside shelves level with the mattress top using heavy toggle bolts.
- Mount Vertical Mirror: Secure your tall mirror to the adjacent wall with a French cleat.
- Finish Up: Pull up the painter tape, vacuum the floors, make the bed with clean linens, and review your newly opened room.
Mistakes That Make Low Ceilings Look Worse
- Wide Crown Molding: Thick molding adds a heavy horizontal band where the wall meets the ceiling, which shortens your vertical wall space.
- Hanging Art Too High: Placing picture frames high on the wall draws attention to the small gap between the frame and the ceiling. Center artwork at standard eye level, about 57 to 60 inches from the floor.
- Glossy Paint on Uneven Ceilings: High-sheen paint reflects light, but it also highlights drywall seams, dips, and patch jobs. Stick to dead-flat matte finishes unless your ceiling is completely smooth.
- Curtains That Drag on the Floor: Allowing heavy drapes to puddle on the floor creates a messy pile of fabric that interrupts vertical lines. Keep bottom hems hovering half an inch above the floor.
Final Takeaway
A low ceiling does not have to make your bedroom feel cramped. By switching to slim ceiling-mounted fixtures, dropping your furniture height, and drawing clean vertical lines from the floor to the ceiling, you can fundamentally change how the space feels. Pick two or three of these ideas, grab your tools, and use your weekend to transform your room.
Frequently Asked Questions
Can you use dark paint in a room with low ceilings?
Yes. Dark paint works well when applied as a full monochromatic color drench. Painting the walls, trim, and ceiling in deep charcoal, navy, or dark olive hides the room corners. Because the eye cannot locate the boundary lines, the ceiling does not feel low.
What is the best bed frame height for an eight-foot ceiling?
Choose a platform frame that places the top of your made mattress 18 to 22 inches above the floor. Pair this base with a low headboard under 36 inches tall. This setup leaves over four feet of open wall below the ceiling, which preserves balanced room proportions.
How high should I hang floating nightstands next to a platform bed?
Mount floating nightstands level with the top of the mattress, or within two inches above it. For low platform beds, this sets your mounting height at roughly 18 to 22 inches from the floor. This provides comfortable reach from the bed while keeping the floor beneath open and visible.
What light bulb temperature works best for low-clearance rooms?
Select warm white bulbs between 2700K and 3000K. Cool white light above 4000K creates harsh, sterile shadows along upper wall corners that emphasize low ceilings. Warm white light diffuses gently across flat matte surfaces.